MEMORIES of PASTEIS

Dad left us 15 years ago today. But he did not really leave. This is a post from 9 years ago, which I re-blog today.
(comments are shutdown)

sallybr's avatarBewitching Kitchen

When traveling to a country for the first time, it’s a good idea to pay special attention to their “street food.”   In Paris, for example, the tiny shops selling crepes (sometimes slathered with Nutella!) are a delight as one strolls along the avenues.   Many big cities are filled with  such delicacies, and in fact, one of my favorite cookbooks revolves around this topic.

On the streets of Brazil, you might stop to buy a “pastel,” and after sampling it, immediately return to the vendor for a couple more (plural = pasteis).    These fried savory pastries are sold at the entrance of street markets: every week on the same day a few blocks of a neighborhood street close to traffic, while farmers sell their produce from early morning until slightly past noon, with prices dropping as the hours pass.  You’ll smell the pasteis from a distance…

View original post 1,102 more words

SUNDRIED TOMATO TWIST BREAD

Since they say confession is good for the soul, here is mine: I’ve been cheating. Big time. Not only I’ve been baking bread with commercial yeast, but I went one step further down the path of debauchery and grabbed a bottle of “rapid rise” to play with. Just for the fun of it. This bread was ready in less than 3 hours. It had a wonderful texture and tasted amazing too. Sourdough will never leave my world, but I see some other “quickies” in my future.

SUNDRIED TOMATO TWIST BREAD
(adapted from several sources)

3 + 1/2  (420 g)  cups all purpose flour, divided
2 1/4 teaspoons (1 package) fast acting yeast (about 7g)
2 teaspoons sugar
1  teaspoons salt
1 + 1/4 cup (280 g) water
1/4 cup (53 g) canola oil
1/2 tablespoon white vinegar
1/4–1/2 cup sundried tomato pesto (store-bought or homemade)
1/3 cup shredded Gruyere cheese (eye-balling is ok)

In the bowl of a stand mixer, combine 2 + 1/2 cups (300 g) flour, yeast, sugar, and salt with a whisk.

Heat water and canola oil until warm (100 F). Add to flour mixture. Add vinegar. Mix roughly with a wooden spoon, then switch to the dough hook and add the remaining flour in small amounts until you get a dough that is smooth and barely sticks to the sides of the bowl.  You might not need the full amount of flour, I had just a little bit left.

Knead for about 5 minutes in low-speed. Place in a bowl lightly coated with oil, and let it rise until almost doubled.  If using fast-acting yeast, it will take less than one hour.

Grease a 9-inch springform pan, and line bottom with parchment; grease paper. Place on top of a baking sheet. Set aside. Punch down the dough. On a floured surface, roll the dough into a thin rectangle, as thin as you can without tearing it. Spread a thin layer of pesto on top of the dough, leaving a small border without any pesto. Spread the Gruyere cheese all over the pesto.  Starting at the long edge, roll it tightly and gently into a log.

Use a bench scraper to cut the dough in half lengthwise. Cross the two halves (layers facing up) to create an X shape; braid top and bottom of dough by laying the left piece over the right keeping the cut side up, until pieces of dough are tightly twisted. Pinch ends together.

Start at the thinner edge and slowly and very gently, roll the braid into a giant snail shell or a very large cinnamon bun. Be careful to keep all the layers facing up.  Carefully pick up the shaped bread and place in the prepared springform. Cover; let rise in warm place until almost double.  If using fast-acting yeast, it will again be ready in about 40 minutes, or even less, depending on the temperature of your kitchen.

Heat the oven to 400 F as the bread is in its final proofing stage.  Bake at 400º for 10 minutes, lower oven temperature to 350º and bake for an additional 30 minutes. When the bread is out of the oven lightly brush olive oil on top and sides. Let cool completely on a rack before slicing.

ENJOY!

to print the recipe, click here

Comments: Amazing how fast that yeast works. Being used to working with sourdough it almost scared me when after what it felt like the blink of an eye I caught the dough almost an inch above the rim. Unreal. A really nice dough to work with thanks to the addition of oil, handles very smoothly, not threatening to tear while rolling out and shaping.

I used store-bought sundried tomato pesto, because I made this bread in a weekend of intense baking and taking a little shortcut was my only real option, but of course making the pesto from scratch would be even better. So many other fillings will be great also. Black olives, pieces of ham or crispy bacon, you can take this bread in many directions. Just try to roll tightly and thinly, so that you get as many little layers as possible.

If you are a novice at bread baking, don’t let the shaping scare you, this is the type of dough that is very forgiving and even if you mess up the shaping a bit, it will look great. You don’t even have to do the twisted shape, you could braid the two halves of the dough, join the ends and call it a day.

Leftovers are superb toasted!

ONE YEAR AGO: And now for something completely different….

TWO YEARS AGO: Parsnip, Coconut, and Lemongrass Soup

THREE YEARS AGO: In My Kitchen, October 2016

FOUR YEARS AGO: Paleo Moussaka

FIVE YEARS AGO: In My Kitchen, October 2014

SIX YEARS AGO: In My Kitchen, October 2013

SEVEN YEARS AGO: Crimson and Cream Turkey Chili

EIGHT YEARS AGO: Taking a break from the nano-kitchen

NINE YEARS AGO: Chocolate Chip Cookies

COMMON TABLE, SOMETHING NEW IN MY LIFE

It is quite obvious that I love to bake. From cakes to cookies, from bread to pies, I love it all. Last year I got a lot more serious about my hobby, as I went through the process of screening for the Great American Baking Show (you can read about it here, in case you missed it).  When that did not materialize I kept searching for an outlet for my baking, something that would keep me focused on it and help me improve. It took a bit long, but I’ve finally found it: Common Table, a meal for homeless people organized by volunteers and churches from our town.  They serve meals a few times each week, I’ve been taking my bakes on Fridays. It is the most rewarding and satisfying thing I’ve done in a while. I enjoy everything about it, planning what to take, baking, and finally delivering my bakes in the meal room, at 17:45hs, when folks are starting to arrive. I had no idea so many people rely on this type of charity to get by. Probably the only chance they have for a decent meal. I feel lucky to be able to help.

I share today the recipe I took on my first participation (April 26th) and after that a list of what I’ve made so far.  It would be pointless to blog on each of them, unless I wanted my blog to turn into a baking site at the expense of general cooking, which is not my intention.

COCONUT TRES LECHES CAKE
(adapted from this recipe)

for the cake:
1 cup all-purpose flour (130 g)
1-1/2 teaspoon baking powder
1/4 teaspoon salt
5 whole eggs, at room temperature
1 cup sugar, divided (215 g)
1 teaspoon vanilla
1/3 cup milk (82 g)

for soaking after baking:
6 oz coconut milk (1/2 can, well-shaken)
1 can sweetened, condensed milk
1/4 cup heavy cream

for the icing:
1 pint heavy cream
3 Tablespoons Sugar

Heat oven to 350 degrees. Spray a 9 x 13 inch pan liberally until coated. Combine flour, baking powder, and salt in a large bowl. Separate eggs.

Beat egg yolks with 3/4 cup sugar on high-speed until yolks are pale yellow. Stir in milk and vanilla. Pour egg yolk mixture over the flour mixture and stir very gently until combined.

Beat egg whites on high-speed until soft peaks form. With the mixer on, pour in remaining 1/4 cup sugar and beat until egg whites are stiff but not dry. Fold egg white mixture into the batter very gently until just combined. Pour into prepared pan and spread to even out the surface.

Bake for 35 to 40 minutes or until a toothpick comes out clean. Turn cake out onto a rimmed platter and allow to cool.

Combine condensed milk, coconut milk, and heavy cream in a small pitcher. When cake is cool, pierce the surface with a fork several times. Slowly drizzle all but about 1/3 cup of the milk mixture—try to get as much around the edges of the cake as you can.

Allow the cake to absorb the milk mixture for 30 minutes. I actually allowed it to sit in the fridge overnight, lightly covered with aluminum foil. To ice the cake, whip the heavy cream with the sugar until thick and spreadable.

Spread over the surface of the cake, you might not need all the amount made, but a thick layer of icing should be your goal. Decorate cake if you like, with toppings of your choice. Cut into squares and serve.

ENJOY!

to print the recipe, click here

Comments: I chose this cake for my first contribution to Common Table because it was by far the most popular cake I’ve ever made to our department. I was curious about adding a hint of coconut to it, and when I tried a bit of the cake trimmings, I knew it was going to be another winner.  It was very well-received in that meal. If you like Tres Leches, try this version, you won’t be disappointed.

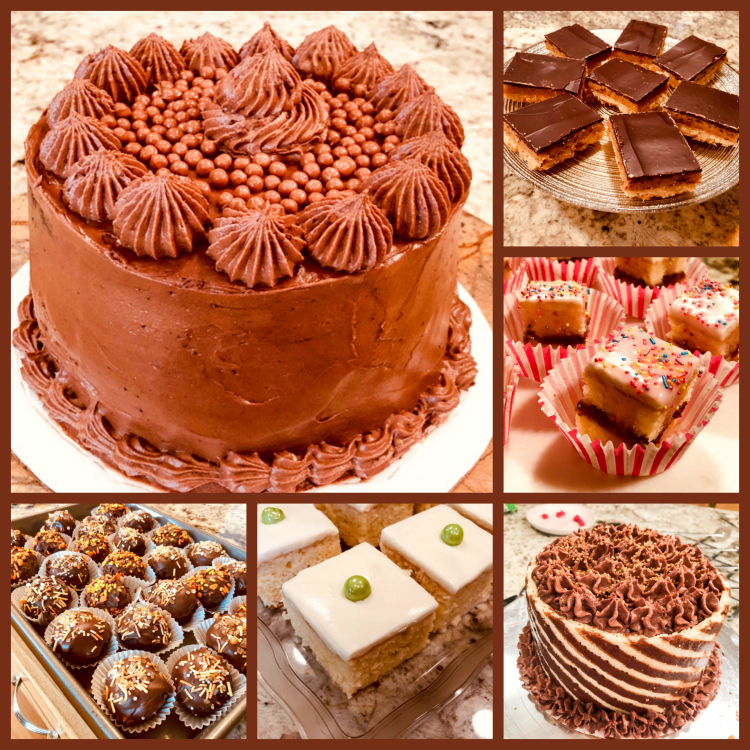
And now, let me share the bakes I’ve made since then…

Millionaire’s Shortbread Bars
(May 3rd)


Raspberry-Rose Petit Fours
(May 10th)


Chocolate Cake Pops

(May 17th)


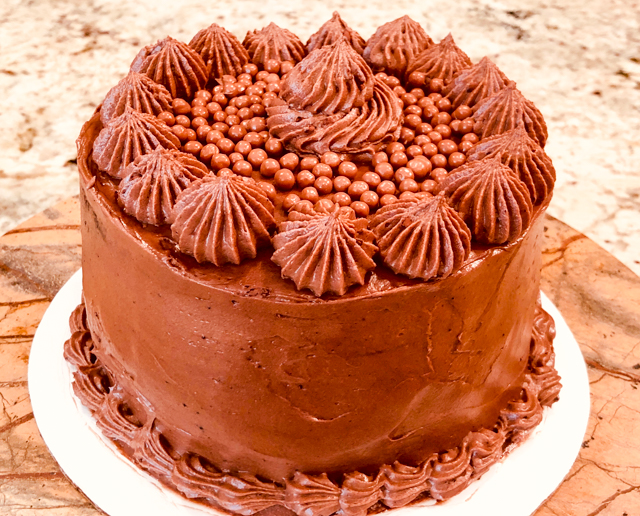
Chocolate Raspberry Celebration Cake
(a smaller version of this one)

(May 24th)

Chocolate Blood Orange Curd Cake
(May 31st)


Come to think of it, it’s clear I’ve been playing the chocolate tune quite strongly…
Must add a bit more variety from now on.
😉

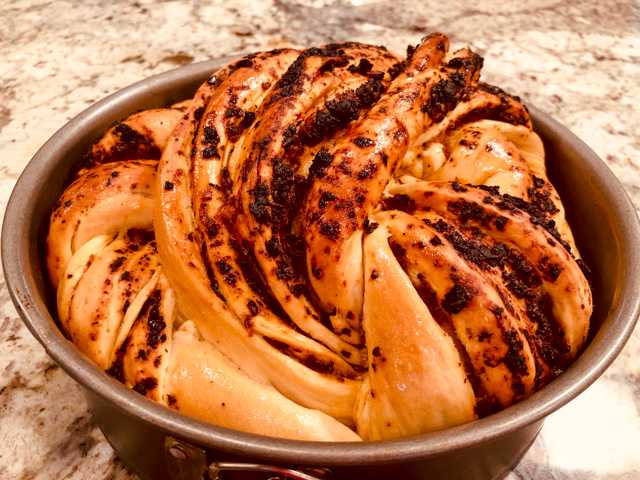
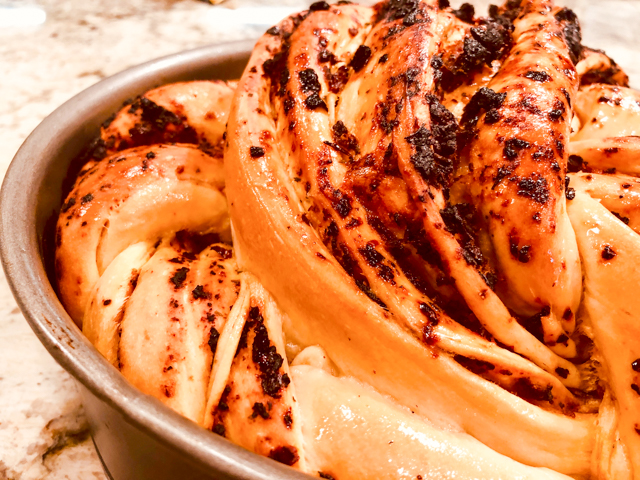
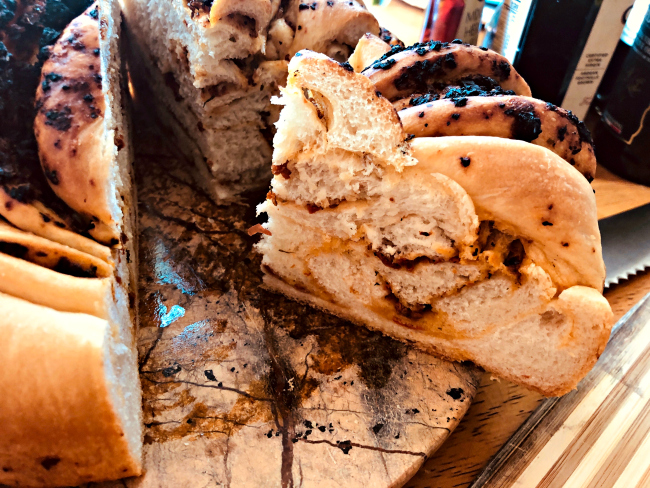
ONE YEAR AGO: The Daisy, a Bread with Brioche Alter-Ego

TWO YEARS AGO: Pork Tenderloin, Braciole Style

THREE YEARS AGO: Raspberry Buckle

FOUR YEARS AGO: Seafood Gratin for a Special Dinner

FIVE YEARS AGO: Cooking Sous-Vide: Sweet and Spicy Asian Pork Loin

SIX YEARS AGO:  Farewell to a Bewitching Kitchen

SEVEN YEARS AGO: In My Kitchen. June 2012

EIGHT YEARS AGO: Goodbye L.A.

NINE YEARS AGO: 7-6-5 Pork Tenderloin


PURPLE STAR MACARONS

When it comes to macarons, people are divided in two teams, those who think the color of the shells should match the type of filling, and those who could not care less. I can go either way, but with this bake I joined the rebels. Shells are purple, filling is strawberry-based. My goal was to make macarons with the colors of KSU (purple and silver), but I wanted to use my made-from-scratch jam as part of the filling. So there you go, purple macarons with a strawberry-balsamic-black pepper buttercream.

PURPLE STAR MACARONS
(adapted from Colette Christian’s Craftsy version)

for the shells:
198 g powdered sugar
113 g almond meal
113 g egg whites at room temperature
a pinch of cream of tartar
100 g granulated sugar
purple food gel from Chefmaster
1/8 tsp vanilla extract

for the filling:
3 tablespoons (40gr) unsalted butter, softened
3/4 cup (100gr) powdered sugar
2 teaspoons heavy cream
2 tablespoon strawberry jam (I used this recipe)
½ teaspoon pure vanilla extract
1/8 teaspoon salt

to decorate:
white candy melts dyed purple
silver pearl dust
vodka or lemon extract

Line 2 or 3 heavy baking sheets with parchment paper or Silpat mats. Layer the powdered sugar and almond meal   in a food processor. Pulse until the mixture looks like fine meal, about 15 seconds. Pass through a sieve and transfer to a small bowl. Set aside.

Place the egg whites and pinch of cream of tartar in the bowl of a stand mixer fitted with the whisk attachment. Make sure that the bowl and the whisk are impeccably clean. Starting on medium speed, whip the whites with the cream of tartar until they look like light foam. The whites should not appear liquid. The foam will be light and should not have any structure.

Slowly rain in the granulated sugar, trying to aim the stream between the whisk and the side of the bowl. Turn the speed up to medium-high. Continue to whip the meringue until it is soft and shiny. It should look like marshmallow creme. Add the gel color and the vanilla. Staying at medium-high speed, whip the egg whites until the mixture begins to dull and the lines of the whisk are visible on the surface of the meringue. Check the peak. It should be firm.

Switch to paddle attachment. Add half the almond meal mixture, turn the mixer on low and mix for about 3 seconds. Stop and add the rest of the almond mixture, turn the mixer on low, and process for about 5 more seconds. It should still be reasonably thick, but the grains of almond should be more or less disappearing in the batter.  Remove the bowl from the mixer, and finish the macaronage by hand.  Put the mixture in a piping bag fitted with one of the tips listed above. Pipe on the prepared baking sheets.

Slam each sheet hard four to six times on the counter. Then fist bump each end of the sheet’s underside twice. Let the unbaked macarons dry until they look dull but not overly dry. Drying time depends on humidity. Ina dry climate, the macarons can dry in 15 to 20 minutes; in a humid climate, it can take 35 to 40 minutes.

While the macarons are drying, heat the oven to 300 F. Bake one sheet at a time on the middle rack. Check in 11 minutes. If the tops slide, then bake for 2 to 3 more minutes. The macarons should release without sticking. Check one or two. If they stick, put them back in the oven for 1 to 2 more minutes. Let the macaroons cool for 10 minutes before removing from the pan.

Make the filling:  Whisk the butter with the powdered sugar until creamy, slowly add the heavy cream and continue whisking until fluffy and smooth. I used a hand held electric beater. Add the vanilla, salt, and finally the strawberry jam. Whisk to incorporate, keep in the fridge until needed.  Place it in a piping bag fitted with a star tip like Wilton 1M.

Paint each shell before assembling.  In a very small bowl, mix silver pearl dust with vodka or lemon extract until it has a nice consistency to brush on the shells. Use a fan brush to get a nice effect. Assemble the macarons: find two macarons similar in size and add a good amount of buttercream filling on top of one shell, close with the other, and squeeze gently.

To make the stars, dye a small amount of melted candy purple. Spread on a piece of parchment as a thin layer. Let it set at room temperature, cut star shapes.  Right before using, add a bit of silver pearl dust and shake them gently around to cover lightly. Glue one or more stars to the top of each assembled macaron using candy melts.

Store in the fridge for 24 hours for perfect texture.

ENJOY!

to print the recipe, click here

Comments: The stars can be a bit tricky to make because the points are very fragile and tend to break, so make more than you think you’ll need.  I coated them with a bit of silver pearl dust, the same one used to brush the shells, except that I added them dry to the candy melt stars.

The strawberry jam is absolutely delicious, and I’ve used it in two other desserts that should be featured in the near future. The recipe comes from the most trustworthy baking website in the known universe: Pastries Like a Pro, from Helen Fletcher. If you want to improve your baking skills, you must follow her. Making the jam was a lot less complicated than I expected, so I see other jam adventures in my horizon. I have plans for a mango version to materialize in the Bewitching Kitchen sometime soon.

ONE YEAR AGO: Smoked Salmon, Fait Maison

TWO YEARS AGO: Kouign-Amann, Fighting Fire with Fire

THREE YEARS AGO: In My Kitchen, Yin and Yang

FOUR YEARS AGO: Chocolate Toffee Banana Bread

FIVE YEARS AGO: In My Kitchen, June 2014

SIX YEARS AGO:  Strawberry Frozen Yogurt

SEVEN YEARS AGO: Baked Coconut and “The Brazilian Kitchen”

EIGHT YEARS AGO: Honey-Glazed Chicken Legs

NINE YEARS AGO: French-Style Rolls


CHICKPEA BURGERS: VEGAN AND DELICIOUS

No, I am not turning vegan. How could I? Not only I am quite fond of animal protein in my diet, but I am too passionate about patisserie and once you get dairy and eggs out of that world, things get a bit dicey. But as it seems to be the case for many people, we are reducing the amount of meat we consume – particularly red meat – and incorporating some vegetarian-friendly meals in our routine. These veggie burgers are quite amazing. The tahini sauce is based on yogurt, so there goes the vegan component out the window. Such is life.

CHICKPEA BURGERS WITH TAHINI SAUCE
(adapted from Veggie Burgers Every Which Way)

for the veggie patties:
1 cup dried chickpeas, rinsed thoroughly
1 celery rib, roughly chopped
½ cup roughly chopped fresh parsley
Zest of 1 lemon
Juice of ½ lemon
1 tsp ground cumin
1 tsp za’tar
½ teaspoon baking soda
¾ teaspoon salt
½ teaspoon freshly ground black pepper
1 tablespoon chickpea flour (or substitute all-purpose flour)

for the sauce:
1/2 cup Greek-style plain yogurt
2 Tablespoons tahini
1 teaspoon lemon juice
salt to taste
Sriracha sauce to taste  

Cover the chickpeas by 4 inches of water in a bowl and let sit for 24 hours. Drain thoroughly.

Heat  the oven to 400°F.  Combine the chickpeas, celery, parsley, lemon zest and juice, cumin, za’tar, baking soda, salt, and black pepper in a food processor. Pulse until coarsely combined. If the mixture is struggling to come together, add a bit of water, but no more than 2 tablespoons.  If it seems a bit too lose (it was the case for me), add the chickpea or regular flour.

Place the patties on a liberally oiled baking sheet. Bake for 15 to 20 minutes, flipping them once halfway through, until golden and firm.

Combine all the ingredients for the tahini sauce in a small bowl, serve with the chickpea burgers, with the toppings of your choice. 

ENJOY!

to print the recipe, click here


Comments: This was adapted from a great book by Lukas Volger, with all kinds of veggie burgers you might dream of, unusual combinations of flavors, I had a hard time deciding which one to cook first. I can tell you the next might be Butternut Squash, Black Bean and Chestnuts Burger… how about that? 

These Chickpea version had me worried all the way through serving time, and I even told the husband that we could be facing a Plan B, aka as Going Out for Dinner. I thought they were going to crumble in the oven, they seemed too delicate and not quite holding together. But the secret for all these burgers that incorporate grains and mashed veggies is to place them over a baking sheet well coated with oil, and let the oven do its magic. It forms a crust that gets things going in the right direction. Flip it once, gently, and that’s it.

I had to include the above picture because once I realized what I was doing, I laughed at myself. The drizzle of tahini sauce? I used a mini-piping bag, designed for ganache or tempered chocolate or Royal icing drizzles. Yeap. I might be just a tad obsessed.  You can use a fork, a spoon… or follow my twisted path. I won’t judge.

Please notice that the chickpeas are incorporated in the patties raw, just soaked in water for 24 hours. According to Lukas, that’s the best way to use them in veggie burgers, otherwise they will crumble as you try to cook them.  Something to consider if you try to design your own version.

The tahini sauce. Most recipes, in my opinion, add way too much tahini, to the point that the taste seems to glue to the back of the tongue and sit there until next day.  I prefer to have a hint of tahini, a bit more lemon, and the more pleasant saucy texture of a higher proportion of yogurt. You do what feels right for you, it’s your kitchen…

Leftovers were still pretty good next day, after a very quick warming up in the microwave. They go well with Kaiser rolls. I thought about including the rolls in this post, but I need to improve my shaping skills. If you like to see the recipe I used (everything was excellent, except my work shaping them), pay Karen a visit with a click here.

ONE YEAR AGO: Macarons with Ganache Noisette

TWO YEARS AGO: Quiche with Asparagus and Fennel

THREE YEARS AGO: Fakebouleh

FOUR YEARS AGO: Yellow Squash Soup

FIVE YEARS AGO: Grilled Chicken with Tamarind and Coconut Glaze

SIX YEARS AGO: Chicken-Apricot Skewers

SEVEN YEARS AGO:  Asparagus Quiche

EIGHT YEARS AGO: Two-stage Pea and Prosciutto Risotto

NINE YEARS AGO: Mellow Bakers: Corn Bread