THE QUASI-VEGAN QUICHE

As you know, we are members of the Omnivores Without Guilt Club, but what you probably don’t know is that I own many cookbooks on Vegan cooking. I like the concept and the challenge of preparing food that tastes great but is more limited in the ingredients used.  I had very good intentions to make a fully vegan quiche for our dinner, but ended up adding 1 egg to the filling. Oh, well. It turned out very good, and even the resident critic, who considers tofu to be penitence, loved it!
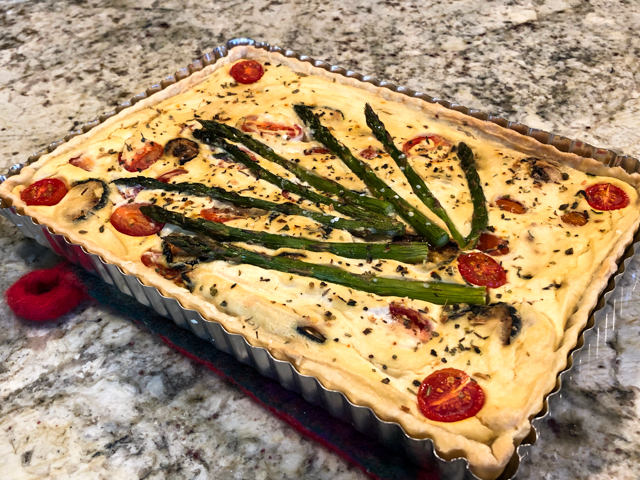
ALMOST VEGAN TOFU QUICHE
(inspired by The Minimalist Baker)

1 rectangular pie pan, 8 x 11 in

for the olive oil crust:
for the pie crust:
250g all-purpose flour (260 grams)
1/8 teaspoon salt
50g olive oil (50 grams)
125 g cold water

for the filling:
12.3 ounces extra-firm silken tofu (patted dry)
2 Tbsp nutritional yeast
3 Tbsp hummus
Sea salt and black pepper (to taste)
1 egg
2 medium zucchini (thinly sliced)
1 Tbs olive oil medium diced onion per 2 leeks)
3/4 cup cherry tomatoes (halved)
1 stalk asparagus
Herbes the Provence (as much as you like)

Make the crust. Whisk together the flour and salt in a large bowl, then add the olive oil, stir with a fork until the flour gets coated with it, forming a crumbly ness. Slowly add cold water and knead gently just until the dough starts to comes together.  Wrap the dough in plastic and refrigerate one hour before using.

Roll it over plastic wrap lightly coated with flour, then use it to cover a rectangular pie pan (8 x 11 in) with removable bottom (or a 9-inch round quiche pan). Reserve in the fridge until you have the filling ready to bake. No need to blind-bake.

Make the filling. Roast slices of zucchini coated with olive oil and seasoned with salt and pepper for about 15 min in a 420F oven. Reserve. Add drained tofu to a food processor with nutritional yeast, hummus, egg, and a heaping 1/4 tsp each sea salt and black pepper. Process until fully smooth.

Spread the zucchini slices in the bottom of the pie crust. Spread the hummus mixture, gently spreading it over it with a small offset spatula. Distribute the cherry tomatoes over the filling, then the asparagus (if they are too thick, sprinkle them with water and microwave for 60 seconds to soften ever so lightly).

Bake quiche at 375 degrees F total of 30–40 minutes or until the top appears golden brown and firm. If the crust begins to get too brown, loosely tent the edges with foil. Let cool for 10 minutes before slicing.

ENJOY!

to print the recipe, click here
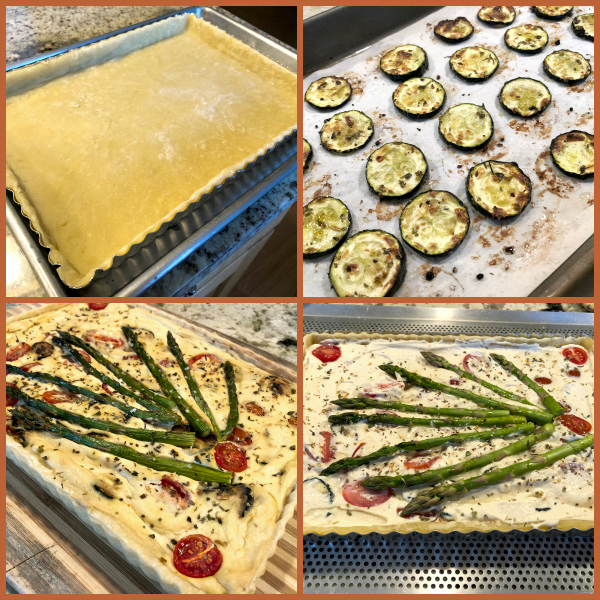
Comments: If you remember my previous post on a pie using olive oil crust, you will notice that I blind-baked it at that time. Now I tried without this step, and was quite pleased with the result. Omitting the blind baking makes this dish even easier to bring to the table. You can roll the crust hours earlier, or even a day before and keep it in the fridge, protected with plastic wrap.
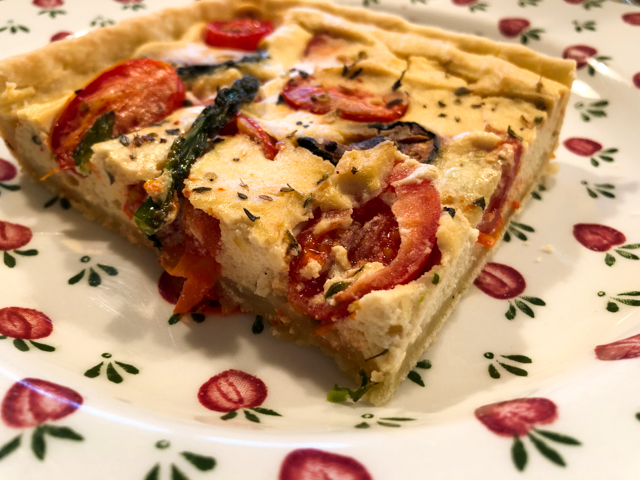
I promise you, there is no “tofu-taste” in the filling. Until I added the egg, it seemed a bit too coarse and grainy, but the egg smoothed things out and I guess made it all a bit lighter during baking. If you want to make it fully vegan, just omit the egg. One interesting idea to lighten it up but keep it vegan could  be folding into the tofu mixture some whipped aquafaba. Hummmm… something to try. Leftovers were delicious on day 2 and day 3. After that? After that they were gone.
ONE YEAR AGO: Not Quite Moqueca

TWO YEARS AGO: Roasted Butternut Squash with Cashew Nuts

THREE YEARS AGO: Mississippi Roast and the Open Mind

FOUR YEARS AGO: Walnut-Raisin Bran Muffins

FIVE YEARS AGO: A Star is Born!

SIX YEARS AGO: Chestnut Flour Sourdough Bread

SEVEN YEARS AGO: Kinpira Gobo and Japanese Home Cooking

EIGHT YEARS AGO: Walnut Sourdough

NINE YEARS AGO: Thai Chicken Curry

TEN YEARS AGO: Zen and the art of risotto
HAPPY SWIRLS TONKA MACARONS

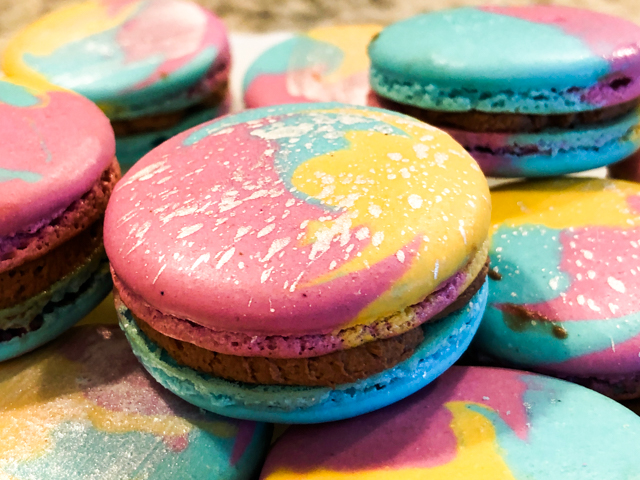
Remember when I shared the video that was going to be used for a bake-along in the Great British Bake Off Fan page? Well, that happened this past weekend. I did not know exactly what to expect, but I can tell you this was one of the most rewarding experiences ever for me!  Many, many bakers took the challenge of baking French macarons, most doing it for the first time, and I kept following their pictures and questions as they did it. I know macarons are finicky, I have bakes that turn into epic disasters, but everybody seemed to have fun and made some pretty awesome-looking macs! Of course, seeing so  many macarons popping on my screen, made me itchy to bake some. I wanted them to be colorful, fun, with a happy aura, because happy is how I still feel about the bake-along. Thank you to all who participated, thank you Caroline and Christine for making it happen… I am still in awe.

HAPPY SWIRLS TONKA MACARONS
(from the Bewitching Kitchen)

For the shells:
200g  Icing/powdered sugar (1 ⅔ cups)
115 g Ground Almonds/Almond Meal (1 + scant ¼ cup)
115 g egg whites at room temperature (approx. 4 eggs)
1/8 tsp of cream of tartar (optional)
100 g granulated sugar (½ cup)
¼ tsp vanilla paste or extract
pink, blue, and yellow gel food color

Line 3 heavy baking sheets with parchment/baking paper or Silpat mats. Layer the powdered/icing sugar and ground almonds/almond meal  in a food processor. Pulse until the mixture looks like fine meal, about 12 pulses. Pass through a sieve and transfer to a small bowl or to a sheet of parchment/baking paper. Set aside.

Place the egg whites and cream of tartar in the bowl of a stand mixer fitted with the whisk attachment. Make sure that the bowl and the whisk are impeccably clean. Starting on medium speed, whip the whites with the cream of tartar until they look like light foam. The whites should not appear liquid. The foam will be light and should not have any structure.

Slowly rain in the granulated sugar in five additions, trying to aim the stream between the whisk and the side of the bowl. Turn the speed up to high. Continue to whip the meringue until it is soft and shiny. It should look like marshmallow creme (marshmallow fluff). Add the vanilla. Whip the egg whites until the mixture begins to dull and the lines of the whisk are visible on the surface of the meringue. Check the peak. It should be firm. Transfer the whites to a medium bowl.

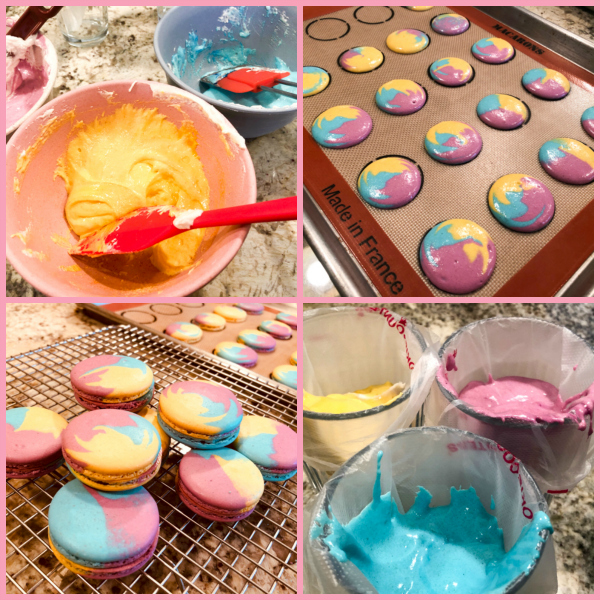
Fold in the ground almond/almond meal mixture in two increments. Paint the mixture halfway up the side of the bowl, using the flat side of a spatula. When the mixture is starting to get incorporated but still looks a bit rough, divide in three equal amounts in small bowls (eyeballing is fine). Add color to each bowl and proceed to finalize the macaronage with the color mixed in. With such a small portion, they get to the smooth stage quickly, so be careful, the moment you can do a figure 8 as you pour the batter from the spatula, stop folding it.

Put the mixtures in three different small piping bags.  Prepare a large piping bag with a large round piping tip (WILTON 1A) and place the three smaller bags inside after cutting them open.   Pipe shells, I like to count numbers in my head and use the same count for each shell so they end up similar in size.

I pipe inside the circles to about 1 ¾ inches/4.5cm but you can go to 1 ½ inches (3.8cm) & the macarons will spread & fill the circle while drying.

Slam each sheet hard four to six times on the counter/worktop. Let the unbaked macarons dry until they look dull but not overly dry. Drying time depends on humidity. In a dry climate, the macarons can dry in 15 to 20 minutes; in a humid climate, it can take 35 to 40 minutes.

While the macarons are drying, heat the oven to 300 F (150 C/130C Fan oven/Gas Mark 2). Bake one sheet at a time on the middle rack. Check in 11 minutes. If the tops slide or move (independently of the ‘feet’ when you gently twist the top), then bake for 2 to 3 more minutes. Check one or two. If they move when gently touched, put them back in the oven for 1 to 2 more minutes until they don’t move when touched.   Let the macaroons cool for 10 minutes before removing from the pan.  The macarons should release without sticking.

Assemble the macarons: find two macarons similar in size and add a good amount of filling to the bottom of one of them. Place the other on top and squeeze gently to take the filling all the way to the edge.  Store in the fridge for 24 hours for perfect texture.

for the filling: use the tonka bean whipped ganache as described in this post.

ENJOY!

to print the recipe, click here

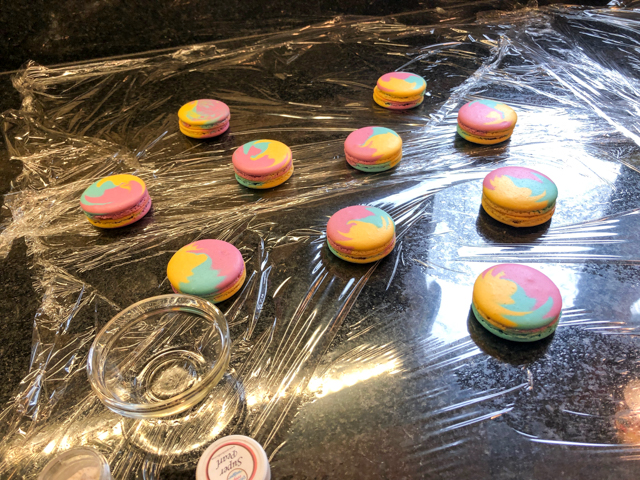
Comments: I am still debating whether I like the additional decoration of the silver “splash.”  Sometimes less is more, right? But I wanted to take them into the “galaxy environment.  Basically you mix pearl dust powder with alcohol, and use a brush or a toothbrush to flicker little spots on the shells, after they are cold. Keep in mind that it is going to be messy, so I advise you cover your working surface with some plastic wrap and then space the shells a bit to work on each one independently.

I think that the splashing effect is better with a solid color or maybe with two colors only.  Still, it was fun to do it.  The tonka bean ganache was hanging around in the fridge since my last adventure with it (remember the bonbons?) so I just used it all up for this little project.


One more thing to keep in mind if you mix three colors. In my tutorial video I tell you to keep the piping bag vertical and just pipe the shells without moving it. Well, if you want to get a more swirled effect with the colors, you should VERY GENTLY make a circular movement with the tip as you pipe. Be gentle, it is a very subtle movement.  You can do that for some shells, pipe vertically for others, pretty soon you’ll realize how to get the effect you like.

Macarons are just so much fun! Everybody agrees….

If you did the bake-along and for some reason your macs did not turn out the way you wanted, don’t be discouraged. They are finicky creatures and often small details can make them fail. Just try to do another batch as soon as possible, while you have all the boo-boos fresh in your mind. Send me an email if you need help at sallybr2008 at gmail dot com.

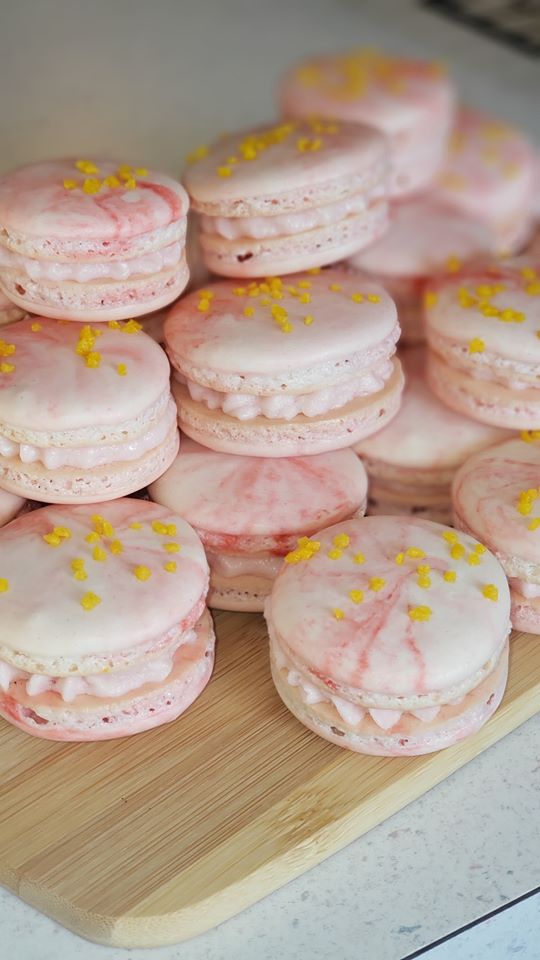
Before I leave you, I would like to share a photo of macarons made by Amanda, who participated of the bake-along. The reason I picked her photo when there were so many wonderful ones made in the group?  She failed at her first attempt, they did not turn out good. She went back next day, after going over the video and the recipe again, and made these babies, that would make Pierre Herme’ proud.


They are delicate, perfectly shaped, elegant, with perfectly piped filling.  I swear she made me do a Super Extended Version of the Very Happy Dance.

Again, thank you to all who participated, I had no idea it would be so exciting to be the hostess of a bake-along.  I might have to come up with another tutorial at some point. Just let me make one thing clear. Gingerbread sculptures are OUT of the question!

ONE YEAR AGO: Chocolate Tartlets with Honey-Caramel Filling

TWO YEAR AGO: Zucchini Soup with Tahini

THREE YEARS AGO: Black Sesame Macarons

FOUR YEARS AGO: Fine Tuning Thomas Keller

FIVE YEARS AGO: Cauliflower Tortillas

SIX YEARS AGO: Majestic Sedona, Take Two

SEVEN YEARS AGO: Secret Ingredient Turkey Meatballs

EIGHT YEARS AGO: Swedish Meatballs and Egg Noodles

NINE YEARS AGO: Italian Easter Pie

TEN YEARS AGO: Black Olive Bialy

366 DAYS

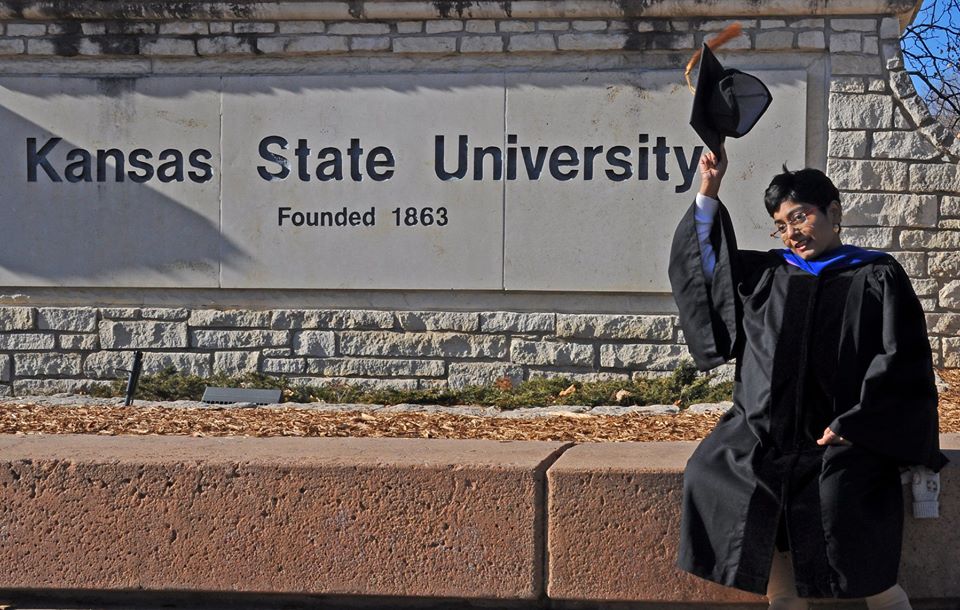
Today it’s been one full year since a bright star left us. I’ve lived long enough to witness plenty of unfairness in life, plenty of horrible things happening to wonderful people. But your story was particularly sad and tough and difficult to witness. Little things pop up in my mind. The way you moved your head to get that incredibly beautiful hair out of the way as you worked on your bench right there by mine. You walking around the lab with headphones singing (probably a bit louder than you imagined) those beautiful songs you were soon going to perform on stage. Your laughter that involved your whole body. Not very many people laugh like that. I think about you a lot, and I think about your Mom and Dad a lot too. I am not sure how a parent survives the loss of a child. I hope they find some comfort in knowing you’ve touched the lives of many.

Dr. Aritri Majumdar, December 2018

(comments are shutdown for this post)

A DUET OF CHOCOLATE BONBONS

I am sure we all agree that social isolation is not easy. I enjoy being home and if I had my choice would rather stay in than go out on a Friday or Saturday night. A perfect evening for us is being cozy at home, cooking together, and just taking it easy. However, there’s something about being forced to stay home, the stress of associating going out with the danger of catching COVID-19 that makes it all pretty draining. Parents of young kids and teenagers have it a lot harder than we do. Those at risk of losing their jobs have it a lot harder than we do. Essential workers, particular those who work at hospitals? Same. So I feel almost guilty admitting that social isolation allowed me to try new things and expand my horizons in baking. Can you call chocolate bonbons baking? Well, not quite but close enough. I’ve always been fascinated by bonbons but too afraid to try. Until very recently, that is.  I share with you my two first adventures.

CHOCOLATE BONBONS WITH SALTED CARAMEL FILLING

Recipe from Matt Adlard, at Bake it Better

Huge thank you to Matt because his tutorial (freshly uploaded this month in his online class, see members area on link above) allowed me to make some nice bonbons on my very first attempt. I cannot share his recipe and many helpful tips, but here is a little overview.

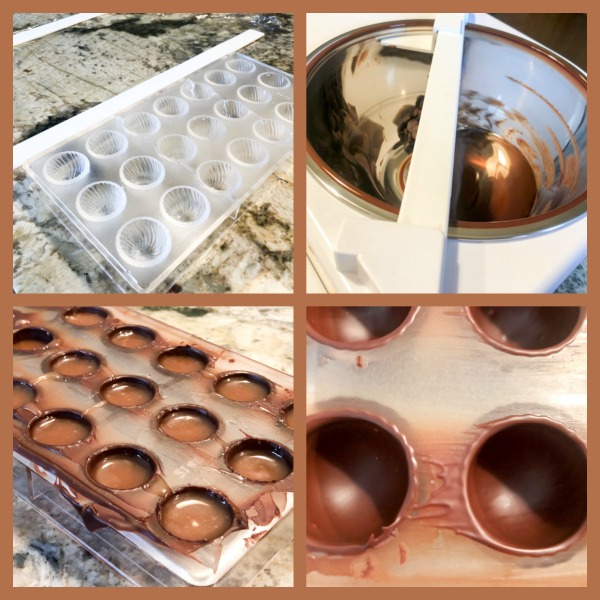
I used Callebaut 54% couverture chocolate… and tempered 400g in my little machine, using that to coat a semi-spheric mold with decorating ridges.

I used Matt’s recipe for salted caramel, and poured it into the tempered shells after they set for about 1 hour at room temperature. A little more chocolate was tempered and used to close the semi-spheres, and the whole tray set at room temperature for 24 hours. They un-molded beautifully next day, and we loved the combination of salted caramel with the semi-sweet chocolate.

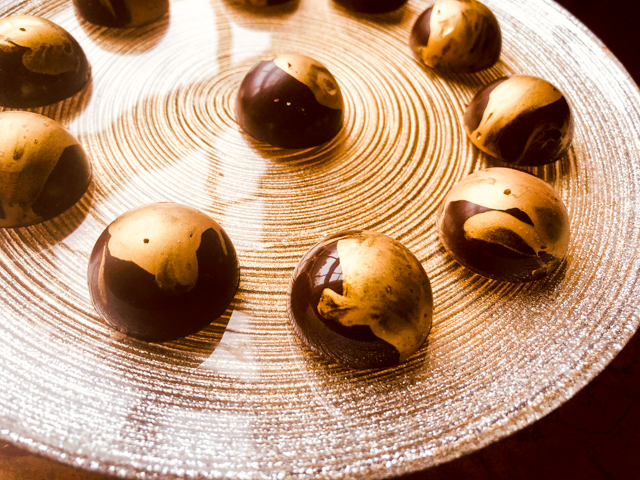
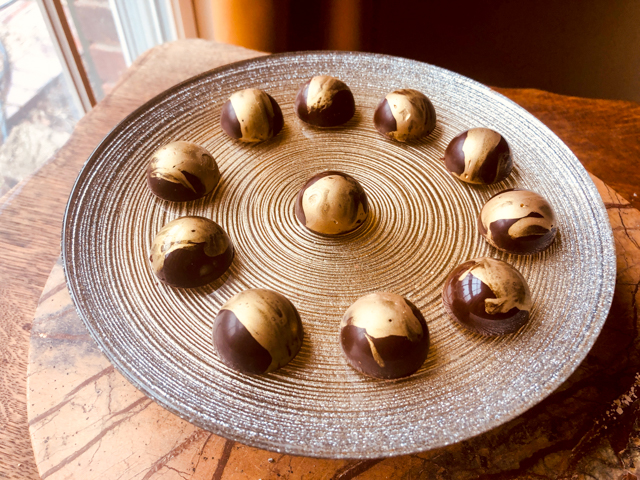
On my second attempt, I wanted some gold color on the surface and after reading a few recipes, went with a technique of finger-painting gold luster mixed with alcohol.

CHOCOLATE BONBONS WITH TONKA BEAN GANACHE FILLING
(from the Bewitching Kitchen)

for the gold coating:
2 tsp golden pearl dust
2 to 3 tsp Everclear or lemon extract
for the shells:
350 g Callebaut couverture chocolate 54%
for the filling:
65g Callebaut chocolate 54%
1 small tonka bean, grated
70mL + 170mL heavy cream, divided

Mix the gold luster powder with alcohol in a very small bowl. Dip a gloved finger into the emulsion and quickly smear it inside each little semi-sphere, smooth mold. Allow the alcohol to evaporate sitting at room temperature while you temper the chocolate

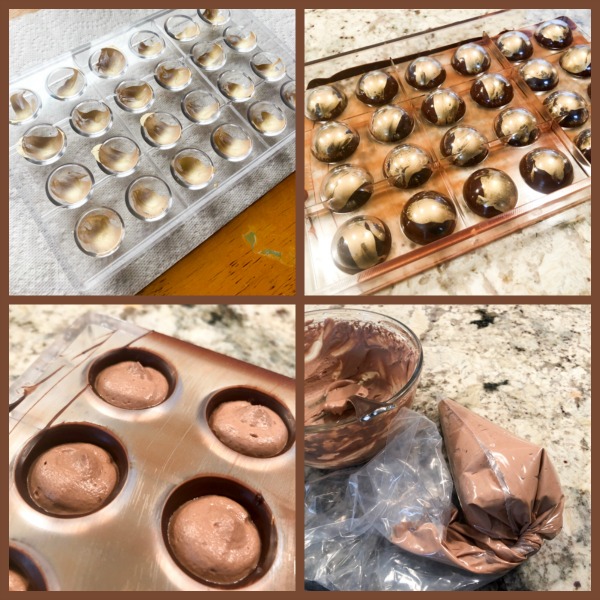
Temper the chocolate using your favorite method and coat the gold-decorated molds. Leave them at room temperature for one hour.

Make the tonka bean ganache. Heat 70mL heavy cream to simmering, grate the tonka bean, mix with the simmering cream. Close the lid, let it sit for a few minutes. Bring to simmering again and add to the chocolate in a bowl. After a couple of minutes, whisk the chocolate gently until it dissolves smoothly. Add the remainder of the heavy cream, mix well and cool for an hour or so. Whip the ganache and use it to fill the semi-spheres.

Let the open shells sit for 12 hours or overnight, then temper 100g of chocolate and cover the shells with it. Before you cover it, it is a good idea to heat the bottom of the spheres with a hair dryer to gently melt a bit the edge, that provides a nice tight closure of the base and prevents leaking of the filling later. Let the bottoms crystalize for a few hours if possible, then un-mold them by banging the mold with a lot of authority showing it who is boss. Most chocolates will be well-behaved and jump off beautifully. Some might need some choice words of encouragement. It is a fun process, I swear!

ENJOY!

to print the recipe, click here

Comments: My gold painting did not turn out like I imagined. The gold dust I used is really quite potent and I should have applied a bit less. Maybe flickering the emulsion as little dots would have worked better. But it’s the kind of thing you learn by doing.  Also I used two different methods to temper the chocolate. To cover the shells I used my little tempering machine. Then, whatever was left from that messy step I gathered, melted again and since I only needed a small amount (100g), I used Mycryo to temper manually.   I also opted for an alternative way to cover the spheres. I cut a piece of acetate the exact size of the bottom of the mold, spread the tempered chocolate over it and laid that on the spheres. Then I used a spreader to press it hard, leaving the acetate in place until the chocolate crystalized. However, I made a few little mistakes (chocolate was a bit too cold when I finally laid it on top of the spheres), and I scraped the bottom of the mold too soon and took away some of the beautiful shine that bottom layer had.  I hope to fix all these little boo-boos on my next adventure.

Special thanks go to my friend Nancy, who has been pushing me to try and make bonbons for over a year now. I am slow, but finally caved. And she was also the inspiration behind the tonka bean ganache, which is amazing. Cuts the sweetness of the chocolate in a very nice way. She is a fantastic patissière, with a unique sense of elegance and beauty in everything she makes. I am lucky to have her as a source of constant inspiration. Check her instagram page with a click here.

Enjoyed the post?  Grab a pin…. 


ONE YEAR AGO: Chocolate Tartlets with Honey-Caramel Filling

TWO YEAR AGO: Zucchini Soup with Tahini

THREE YEARS AGO: Black Sesame Macarons

FOUR YEARS AGO: Fine Tuning Thomas Keller

FIVE YEARS AGO: Cauliflower Tortillas

SIX YEARS AGO: Majestic Sedona, Take Two

SEVEN YEARS AGO: Secret Ingredient Turkey Meatballs

EIGHT YEARS AGO: Swedish Meatballs and Egg Noodles

NINE YEARS AGO: Italian Easter Pie

TEN YEARS AGO: Black Olive Bialy

SMOKED PORK TENDERLOIN WITH ROASTED PARSNIPS

You know those dinners you think might turn out pretty tasty and they go on to blow your mind in the deliciousness department? This was it. I had never smoked a pork tenderloin, but it sounded like a simple, new way to enjoy one of our favorite cuts of meat. Parsnips are the classical example of under-rated root veggie, but paired with maple syrup and harissa? Yes, please. Great dinner, and thanks to social isolation quite doable any day of the week.

SMOKED PORK TENDERLOIN
(from the Bewitching Kitchen)

1 pork tenderloin, silverskin removed
olive oil to rub, about 2 Tablespoons
coarsely crushed peppercorns, about 1 Tablespoon
1 Tablespoon turbinado sugar
salt to taste
applewood for smoking

Mix the peppercorns and sugar in a small bowl. Dry the meat well. Rub with olive oil, then coat with a small amount of the spice mixture. Season with salt to taste.

Place in smoker set at 225 F with a small amount of applewood chips. Smoke for 3 hours.

Let it sit for 10 minutes, tented with foil. Slice the meat and serve.

ENJOY!

to print the recipe, click here

ROASTED PARSNIPS WITH MAPLE AND HARISSA
(from the Bewitching Kitchen)

Parsnips, peeled and cut in steak-fries style
4 Tablespoons olive oil
1 Tablespoon maple syrup
1/2 tsp Rosey Harissa (or substitute smoked paprika + harissa or other seasoning of your choice)
Salt to taste
(asparagus are optional)

Heat oven to 425F. Make a spice mixture with the olive oil, maple and Rosey Harissa or another seasoning of your choice.

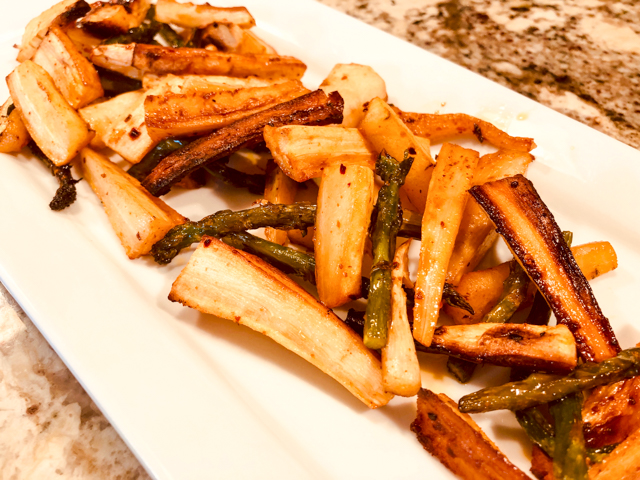
Coat the pieces of parsnips with the mixture. Add to a roasting pan covered with aluminum foil, season with salt. Add a splash of water to the pan, cover with aluminum foil and roast for 20 minutes. Remove foil, add asparagus (if using), mix well and roast for 20 minutes more, until veggies are nicely browned.

ENJOY!

to print the recipe, click here

Comments: The Rosey Harissa spice has been on my list of things to try for a long time. I don’t even remember where I read about it for the first time, it’s been a while. I finally caved and ordered a bottle (it is a bit pricey), but I’m glad I did. It conveys a similar flavor of my recent passion (Ottolenghi’s Rose Harissa paste), but because it is dry, you can use it in different ways and it can sit in your pantry for a longer time. Smells wonderful.

The meat was tender, juicy, and with a nice hint of smoke. It went perfectly well with the roasted veggies.  I had some leftover asparagus sitting in the fridge, so I roasted with the parsnips, but you can omit that or even add other root veggies, just keep in mind their roasting times. Sweet potatoes, butternut squash, turnips, they would all work great.

I know not everyone has a smoker, so you can do a similar preparation cooking the pork tenderloin in the oven, after searing it on the stove top. Use smoked paprika to season it, and you will be on your way for a delicious meal.

ONE YEAR AGO: Fresh Take on Farro with Roasted Veggies

TWO YEARS AGO: Secret Recipe Club Reunion 2018

THREE YEARS AGO: Parsnip and Tomato Soup

FOUR YEARS AGO: A Retro Dessert

FIVE YEARS AGO: Cauliflower Tortillas: Going low-carb and loving it!

SIX YEARS AGO: Clementines in Cinnamon Syrup

SEVEN YEARS AGO: In My Kitchen, April 2013 

EIGHT YEARS AGO: Thrilling Moments

NINE YEARS AGO: Maple-Oatmeal Sourdough Bread

TEN YEARS AGO: Pork Trinity: coffee, mushrooms, and curry