PAN-STEAMED BROCCOLI WITH MISO VINAIGRETTE

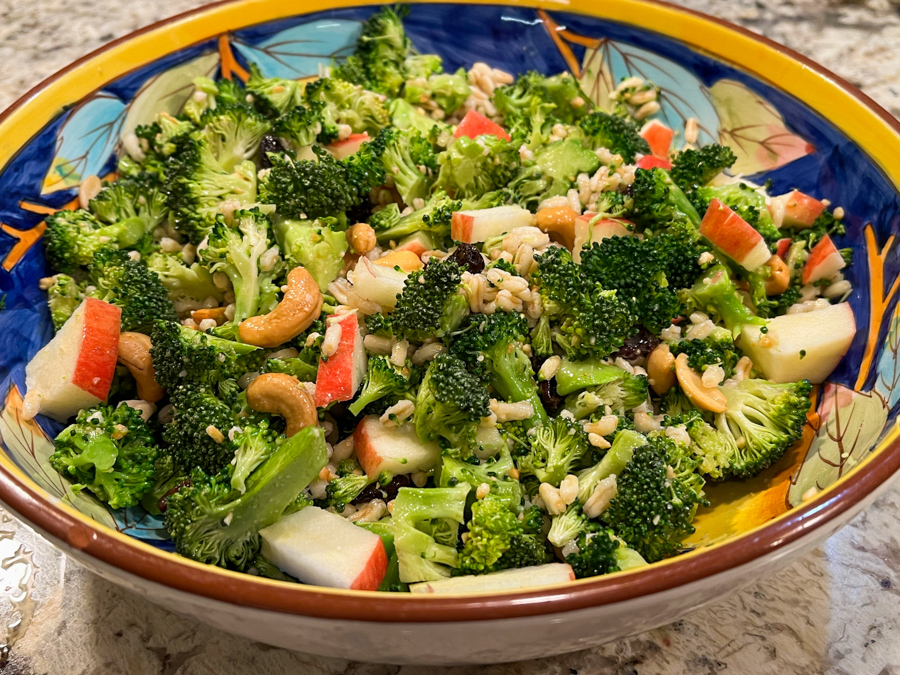
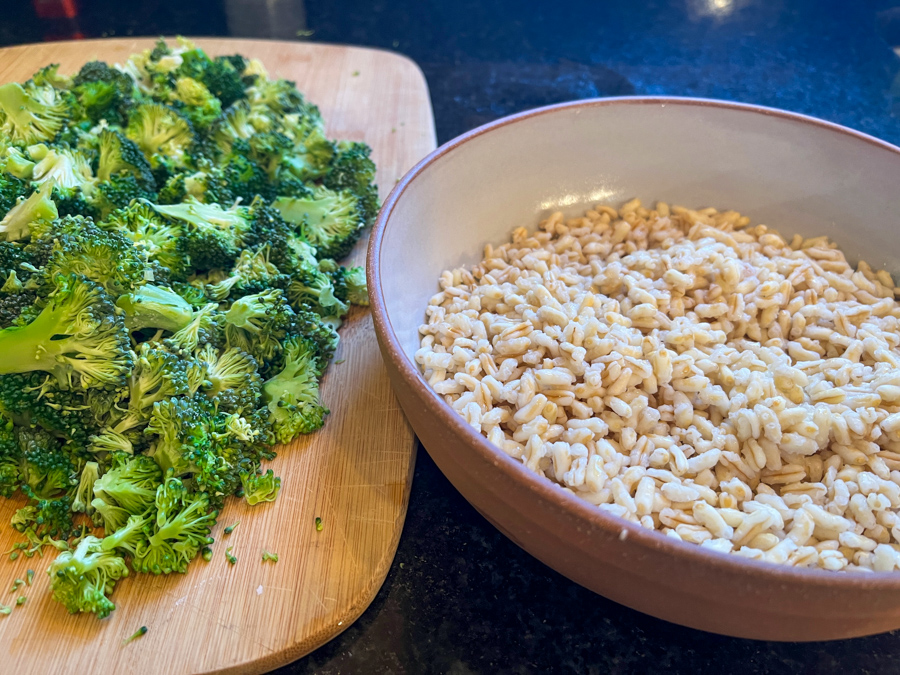
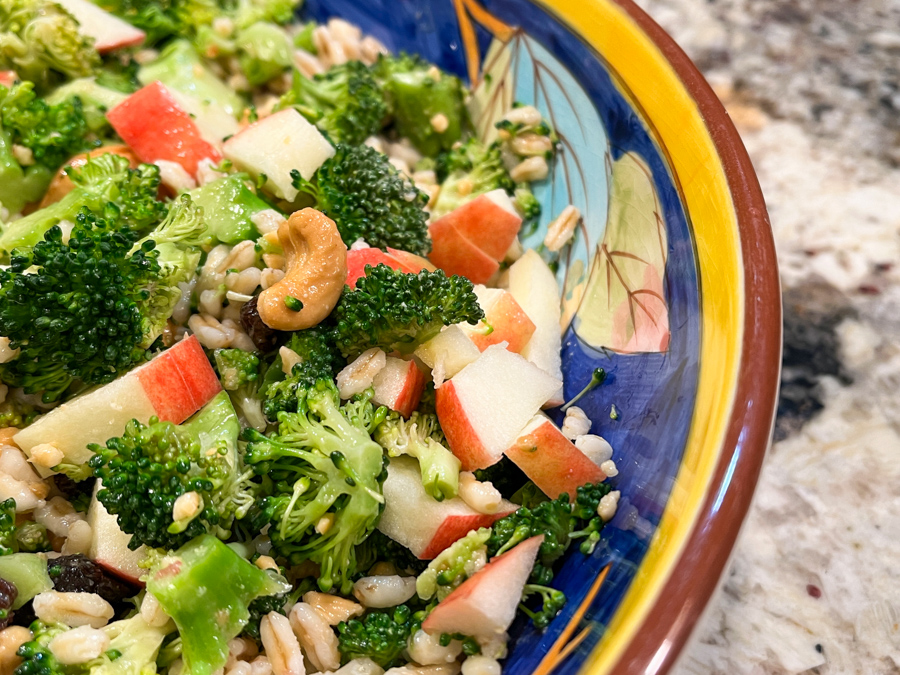
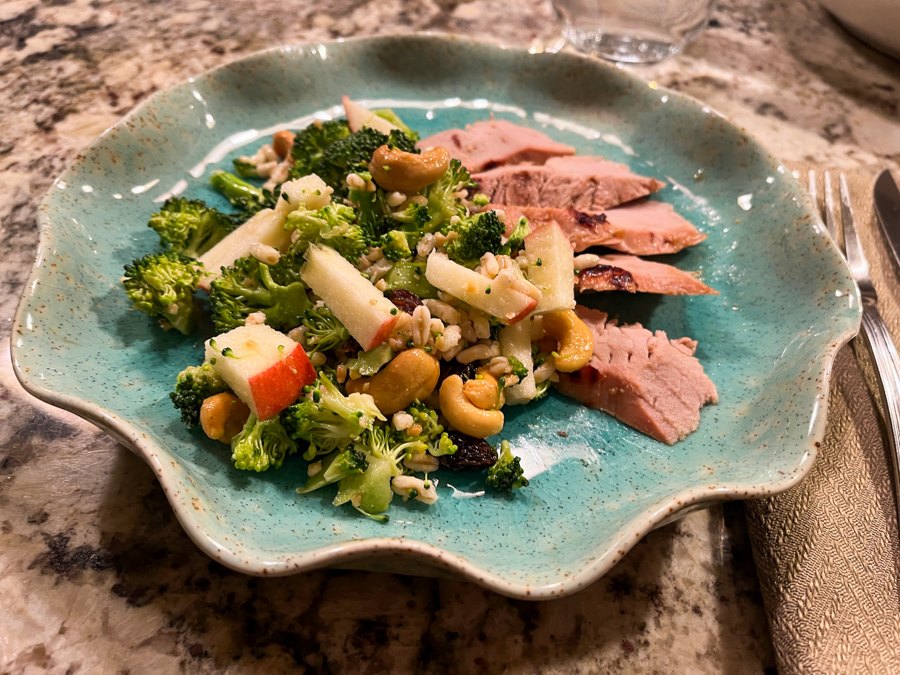
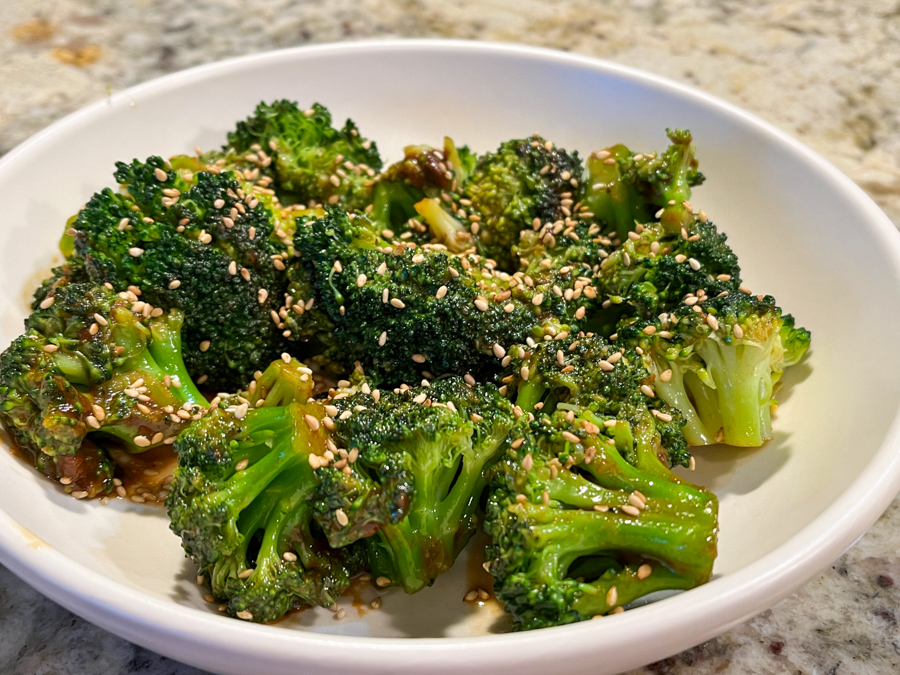
Some recipes become part of our routine and the pan-steamed broccoli is my default. Six exact minutes cooking. Six minutes that I use to make a simple dressing as described in the original blog post of years ago (click here). This time, I took the flavor into a Japanese territory, and used miso, vinegar, and ginger. Sesame seeds closed the deal. If you find broccoli flavor too strong, this method might please you, because it masks it quite a bit. If you prefer to taste the real flavor of broccoli, stay with a simpler dressing as previously blogged.

PAN-STEAMED BROCCOLI WITH MISO VINAIGRETTE
(adapted from Ellie Krueger)

1 large head of broccoli florets (1½ pounds)
1/2 cup water
salt to taste
1 tablespoon white miso
1 tablespoon olive oil
2 tablespoons lemon juice
1 tsp honey
grated fresh ginger, to taste
sesame seeds to garnish

Place the broccoli florets more or less in a single layer inside a saucepan. Add ½ cup water, sprinkle salt all over. Cover and cook over a high heat for 3 minutes. Reduce the heat to medium and cook for an additional 3 minutes. Do not remove the lid during cooking. When the broccoli is done, it will be cooked to crisp-tender. If you prefer it a bit softer, remove it from the heat and allow it to sit, covered, for another minute or two.

While the broccoli is cooking, make the dressing whisking all ingredients (from miso to ginger) vigorously until smooth.

Using a slotted spoon, transfer the broccoli to a serving bowl, toss gently with the dressing, and garnish with sesame seeds. Adjust seasoning if needed.

ENJOY!

to print the recipe, click here

Comments: I share the picture of what the pan will look like once you open it at the end of 6 minutes, because if I don’t you will be shocked and hate me for a few minutes. It will look bad. However, it cleans like a breeze, do not worry about it, the moment you rinse the pan that brown residue goes away. And you are left with perfectly cooked broccoli that can be dressed in any way you like. As I mentioned, this is a recipe I cook all the time, probably once/week. We love it, and it is sooooo simple! The dressing tames the natural funky flavor of broccoli. It will please that family member who twists the nose at this beautiful vegetable.

ONE YEAR AGO: Cookies and Rubber Stamps

TWO YEARS AGO: Macarons for all Seasons and Reasons

THREE YEARS AGO: Lentils and Radicchio? Yes, please!

FOUR YEAR AGO: Tres Leches Cake

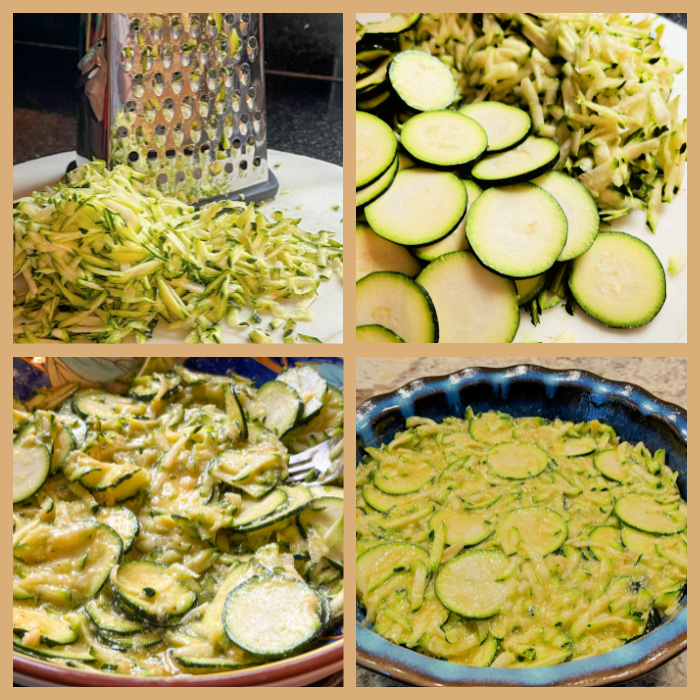
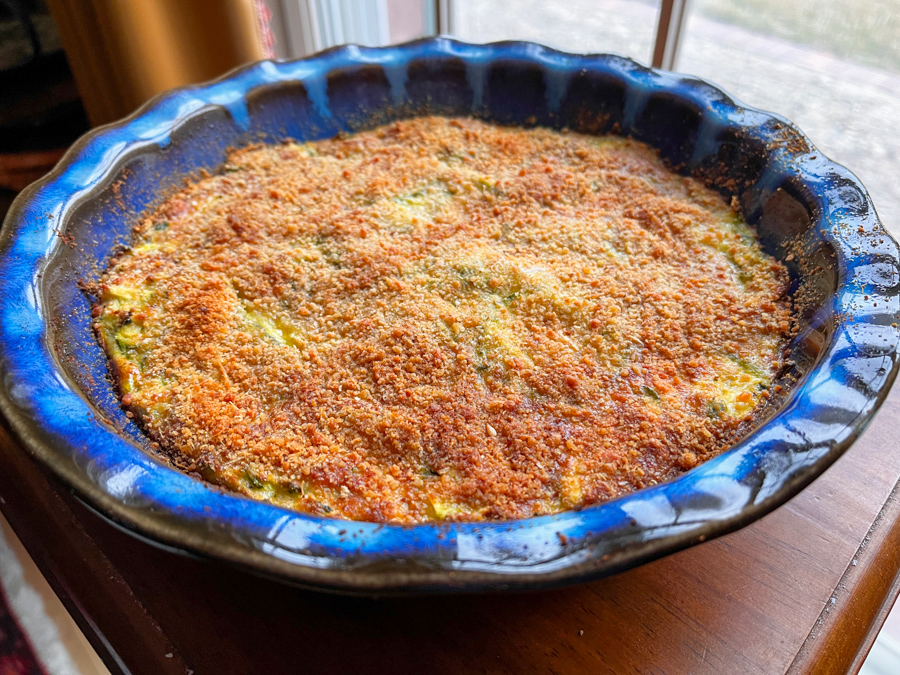
FIVE YEARS AGO: The Joys of Grating Squash

SIX YEARS AGO: Auberge-Pecan Walnut Bread

SEVEN YEARS AGO: Gluten-free and Vegan Raspberry Bars

EIGHT YEARS AGO: Lasserre, a French Classic

NINE YEARS AGO: Sourdough Bread with Walnuts and Dates

TEN YEARS AGO: Braised Brisket with Bourbon-Apricot Glaze

ELEVEN YEARS AGO: The Real Vodka Sauce

TWELVE YEARS AGO: Pork Tenderloin and Blue Cheese

TORTA DI ZUCCHINI, A FLASHBACK

This is a recipe I used to make all the time and for some odd reason disappeared from our menu. The other day I was searching the blog for ideas, and fell on this post from twelve years ago! I made it twice, two in a row, and tweaked it slightly. This is a lower-carb version, and if you skip the breadcrumbs on the topping it can also be gluten-free.

LOW-CARB TORTA DI ZUCCHINI
(from the Bewitching Kitchen)

4 zucchini, 2 grated, 2 thinly sliced
4 eggs
zest of 1 lemon
1/2 tsp Herbes de Provence
1/2 tsp salt or to taste
black pepper, to taste
1/4 cup almond flour plus more to sprinkle on plate
1/4 cup finely grated Parmigiano cheese
topping: 1/4 cup breadcrumbs + 1/8 cup Parmigiano cheese
drizzle of olive oil

Grease a pyrex pie dish with butter. Sprinkle some bread crumbs or almond flour to coat.

Mix the beaten eggs with the lemon zest, herbs, Parmigiano cheese, 1/4 cup of almond flour, salt and pepper. In another bowl, place the grated and sliced zucchini. Shake the dish carefully to distribute the slices more or less evenly. Add the egg mixture to it, mix gently, and pour into the prepared pie dish. Sprinkle the remaining mixture of bread crumbs (or you can use almond flour) and cheese on top, forming a very light coating. You may not need to use it all. Drizzle a bit of olive oil.

Bake in a 375F until set and golden on top, 25 to 30 minutes. Allow it to cool for at least 15 minutes before serving. Serve warm or at room temperature.

ENJOY!

to print the recipe, click here

Comments: This is the type of recipe that makes the cook a bit nervous. As you put it together, it seems impossible to work. But trust me, it does. Normally recipes using zucchini tell you to squeeze the liquid, but this one does not. The mixture of grated zucchini with the slices is what makes the whole texture perfect. Think about a baked frittata, but without that intense eggy flavor that some people object to. I used almond flour in place of bread crumbs in the body of the recipe, but added some bread crumbs to the topping. You can just use almond flour instead for an even lower in carb concoction.

It is very important to let the torta rest for at least 15 minutes before slicing. I actually like to leave it for about half an hour and enjoy it barely warm. That’s when everything sets nicely. I don’t know why this delicious side dish left our rotation, but it is so simple and so tasty, I felt it was worth re-blogging, with the minor modifications I introduced in this version. I hope you give it a try… Next on my plans? To make a mixture of carrots and zucchini. Stay tuned!

ONE YEAR AGO: Woodland Creatures Cookies

TWO YEARS AGO: Incredibly Simple… Crunchy Asparagus

THREE YEARS AGO: A Sourdough Quartet

FOUR YEARS AGO: When bad things happen to good people

FIVE YEARS AGO: Sweet Potato “Hummus”

SIX YEARS AGO: Cauliflower Crust Pizza

SEVEN YEARS AGO: Silky Rutabaga Puree

EIGHT YEARS AGO: Bon Bon Chicken: Light and Spectacular

NINE YEARS AGO: Red Wine Sourdough Bread with Cranberries

TEN YEARS AGO: Award-Winning Sourdough Baguettes

ELEVEN YEARS AGO: Country Rye (Tartine)

TWELVE YEARS AGO: Penne a la Vechia Bettola

KAMUT AND BROCCOLI SALAD

If I am going to have a salad, my preference is a salad with substance, and a variety of textures and colors. No need to go all the way into a Chicken Caesar or a Steak Salad, but the addition of grains is more than welcome. I used quick-cooking kamut, but any type will work, just pay attention to the timing. Also, any other will be fine: barley, cracked wheat, or the beautiful farro.

KAMUT & BROCCOLI SALAD
(adapted from many sources)

1 cup cooked kamut, or amount to taste
2 broccoli heads, or amount to taste
1/2 cup roasted, salted cashews
1/4 cup raisins
1/2 apple, cut in pieces (I used Pink Lady)
1/4 cup olive oil
juice and zest of 1 lemon
grated ginger to taste
salt and pepper to taste

The kamut can be prepared a day in advance if you like. Make sure it is cold when you make the salad. If you make it in advance, drizzle just a touch of olive oil to prevent the grains from sticking together. Separate the broccoli into florets and steam them for 3 minutes. Immediately run very cold water to stop the cooking. Cut the steamed broccoli into pieces. Reserve.

Make the dressing by whisking the olive oil with lemon juice, add ginger, salt and pepper.

In a large serving bowl, add all the ingredients for the salad, pour the dressing and mix gently. Adjust seasoning with salt and pepper if needed. Allow the salad to sit for 30 minutes before serving, if possible.

ENJOY!

to print the recipe, click here

Comments: The main inspiration for this recipe came from a cookbook I own, but that version served the broccoli raw and passed by the food processor. The pieces of raw broccoli were very small and lost in the middle of the grain, all acquiring the same green color. The way I chose to make it, was barely steaming the broccoli. This simple step tames its raw sharpness. Next, I cut the pieces with a knife, in small chunks. In my opinion, this makes the final product much more appealing not only visually, but as far as texture goes.

The apples and raisins are a must, and the cashews give that extra crunchiness that will leave you smiling… peanuts, walnuts, or pecans, can be used instead.

The added bonus of this salad: it holds quite well in the fridge. I made such a big portion that in fact it lasted two days, and on the second day I decided to warm it in the microwave for a minute. Perfect! A light lunch that needed absolutely nothing else to go with it.

ONE YEAR AGO: Charcoal Peanut Sourdough

TWO YEARS AGO: Chocolate Cake with Coconut Buttercream

THREE YEARS AGO: Berry Rebellion Tarts 

FOUR YEARS AGO: Bergamot-Cherry Macarons

FIVE YEAR AGO: Roasted Veggies with Queso Cotija Dressing

SIX YEARS AGO: Creamy Broccoli and Mushroom Casserole

SEVEN YEARS AGO: Maple Walnut Biscotti

EIGHT YEARS AGO: Barley Risotto with Peas

NINE YEARS AGO: Oatmeal Fudge Bars

TEN YEARS AGO: Cauliflower Steaks

ELEVEN YEARS AGO: Soft Spot for Chevre

TWELVE YEARS AGO: Quick sun-dried Tomato Crostini

PASTA CHIP BHEL

Can you tell I am in love with this salad?

But first, a disclaimer… This is by no means an authentic bhel. If you are new to the term, bhel is a concoction from India, made with puffed rice and crispy sev noodles. I’ve found this version by complete accident and was so intrigued by it, I could not wait to try it. However, I have modified it substantially so if there was any resemblance with the authentic bhel, it is pretty much all gone… Can we still be friends?

PASTA CHIP BHEL
(adapted from Naturallynidhy)

for pasta chips:
1 cup cooked pasta (I used fusilli)
2 tbsp grapeseed oil
2 tsp black and white sesame seeds
1/2 tsp black pepper
salt to taste

for the salad:
1 cup mixed colors shredded cabbage or store-bought cole slaw mix
1/2 cup matchstick carrots (or shredded in food processor)
1/2 red bell pepper, finely diced
1/2 yellow bell pepper, finely diced
fresh cilantro leaves
2 tbsp grapeseed oil
2 tbsp soy sauce
1 tbsp sweet red chili sauce (I used Thai Kitchen)
1 tbsp black vinegar (or another vinegar of your choice)
1/2 tsp red chili flakes
juice of 1/2 lime (or to taste)
salt to taste
sesame seeds to serve

Turn the air-fryer to the highest temperature (mine is 390F). Mix the pasta with oil, sesame seeds, salt and pepper. Air-fry for about 10 minutes, until crispy and fragrant. If you don’t have an air-fryer, roast in the oven at 400F for about 15 minutes. Let it cool in a single layer over paper towels.

In a large bowl where you will serve the salad, make the dressing by mixing all oil, soy sauce, red chili sauce, vinegar, and chili flakes. Whisk well, then add a little lime juice, taste, and see if you’d like more lime juice. Add the pasta chips and all other ingredients to the bowl, toss well and adjust seasoning with salt and pepper if needed. Let it sit at room temperature for about 15 minutes before serving, or longer in the fridge.

Add cilantro and more sesame seeds right before serving.

ENJOY!

to print the recipe, click here

Comments: Talk about exotic flavors and textures, this salad has it all. I am now quite eager to make the real bhel, so stay tuned for that. One of my modifications was using the pasta more like you would “croutons” in a Caesar salad, just like an accent. I believe that in bhel the pasta is a main component.

All the amounts of veggies are suggestions, and super flexible. Use what you like, add other veggies if you prefer. But the idea is to have a lot of texture, and let the sauce barely smooth things out. The salad is vegan-friendly , but we “corrupted” it with grilled pork tenderloin. If you make the pasta as a main component of the salad, this could well work as a full dinner. One more thing, pay close attention to the air-frying step, and shake that pan often. It is easy to end up with some pasta crisps over-cooked. I am definitely making this or modifications of this version again and again.

ONE YEAR AGO: Be My Valentine Sourdough Bread

TWO YEARS AGO: Orange Streusel Cake

THREE YEARS AGO: Pink Praline Brioche

FOUR YEARS AGO: A Spinach Salad to Write Home About

FIVE YEARS AGO: Karen’s Four Hour French Country Bread

SIX YEARS AGO: The Siren’s Song of the Royal Icing

SEVEN YEARS AGO: Blog-worthy Roasted Butternut Squash

EIGHT YEARS AGO: Chocolate Currant Sourdough Loaf & Roasted Beet Hummus

NINE YEARS AGO: Sesame and Flax Seed Sourdough

TEN YEARS AGO: Spanakopita Meatballs

ELEVEN YEARS AGO: Saturday Morning Scones

TWELVE YEARS AGO: Pain de Mie au Levain

COLE SLAW WITH ALMOND DRESSING

Let’s get the V word in the open right away: vegan. This is vegan. And also very tasty. If you are not too fond of mayonnaise, this cole slaw will have your name written all over. Low in saturated fat, high in flavor. I did not add red cabbage because I wanted to keep a milder texture but consider including some if you prefer more crunch.

VEGAN COLESLAW WITH ALMOND DRESSING
(adapted from The Complete Vegan Cookbook)

for the dressing:
½ cup blanched, slivered almonds
1/2 cup water
½ teaspoon salt
2 tablespoons apple cider vinegar
1 tablespoon Dijon mustard
1 tablespoon agave nectar
2 tablespoons grapeseed oil
juice of 1 lemon
water as needed to adjust consistency

for the coleslaw:
1 small head of cabbage, cored and very thinly sliced
3 large carrots, shredded in the food processor
1 yellow bell pepper, seeded, cut into matchsticks
1/3 cup fresh parsley, minced
1/2 tsp dried dill
salt and pepper to taste
fresh lemon juice, to serve

Combine the almonds with ½ cup water and a pinch of salt in a small saucepan. Bring to a boil over high heat, cover, remove from the heat, and let the almonds soak for 20 minutes. In a blender, combine the almonds with their soaking water, vinegar, lemon juice, mustard, agave, salt,, and oil. Blend until creamy, adding water if needed to bring the consistency to that of mayonnaise or a little thinner. Reserve.

Add the cabbage, carrot and yellow pepper pepper to a large bowl and toss with the dressing. Fold in the parsley and dill, season with salt and pepper, and serve with a fresh squeeze of lemon juice all over.

ENJOY!

to print the recipe, click here

Comments: I was very intrigued by this dressing, which goes in the direction of the cashew cream, but using almonds instead. I advise you to make the dressing a little thinner than mayo, because it tends to get drier as it sits. Leftovers lasted for two days without getting soggy – maybe everything turned slightly softer but not by much. The flavor actually intensified a bit.

The vegan aspect of our meal was destroyed by associating the coleslaw with grilled pork tenderloin. Of course, if you are vegetarian, pick other dishes to enjoy with this delicious slaw. We don’t eat mayo, some versions we like use yogurt instead, but for my personal taste, this is the best alternative dressing for coleslaw we’ve had so far.

ONE YEAR AGO: Busy Bee Sugar Cookies

TWO YEARS AGO: Mincemeat Pies, when the third time is a charm

THREE YEARS AGO: Shibari Bread]

FOUR YEARS AGO: Incredibly Simple Times Four – January 2018 

FIVE YEARS AGO: Two Salads and a Blog Award!

SIX YEARS AGO: When Three is Better than Two

SEVEN YEARS AGO: Somebody Stop Me!

EIGHT YEARS AGO: Zucchini Pasta with Cilantro-Cashew Pesto

NINE YEARS AGO: Bran Muffins, Take Two

TEN YEARS AGO: Brown Butter Chocolate Chip Cookies

ELEVEN YEARS AGO: Mogo Mojo

TWELVE YEARS AGO: Slow-Roasted Chicken Thighs: an Ice-Breaker