POMEGRANATE CHICKEN THIGHS & CARROT MASH

chickencarrot
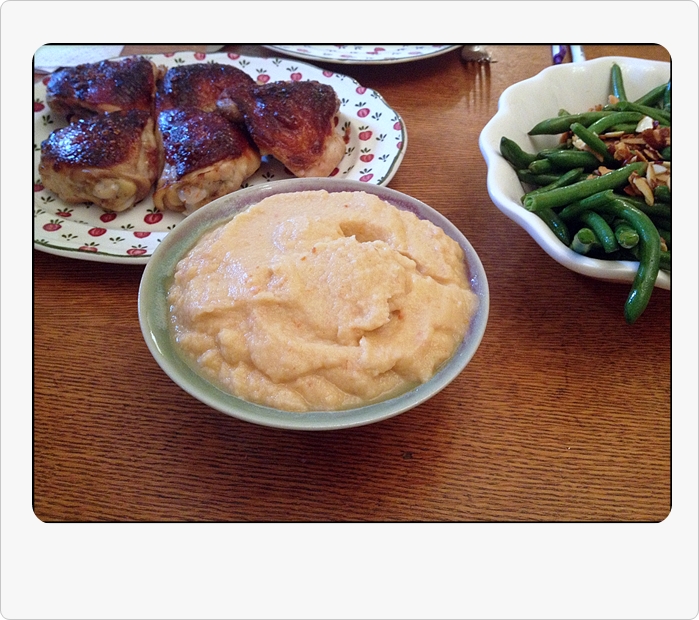
I am feeling quite generous these days, so you’ll get two recipes in a single post. It turns out they went so well together, that it would be sad to separate them.  The source of inspiration for the chicken was a blog I found not too long ago, and started following right away: The View from Great Island, hosted by Sue. Her photography is beautiful, and I’d be happy sitting at her dinner table anytime! The mashed carrot was in  the latest issue of Fine Cooking magazine  as an option for Thanksgiving side dish. Roasted asparagus rounded our meal quite nicely.

Pomegranate Chicken ThighsPOMEGRANATE AND LIME CHICKEN THIGHS
(adapted from The View from the Great Island)

for the chicken
1 cup Greek yogurt
1/2 cup pomegranate juice
1 tsp salt
4 bone-in skin-on chicken thighs
for the glaze
1/4 cup pomegranate molasses
juice of 1 lime
2 Tbsp agave nectar
1 Tbsp Dijon mustard

To marinate the chicken, put the yogurt, pomegranate juice, salt, and chicken in a large zip lock bag. Massage everything until well combined. Put in the fridge to marinate for at least 2 hours or overnight.

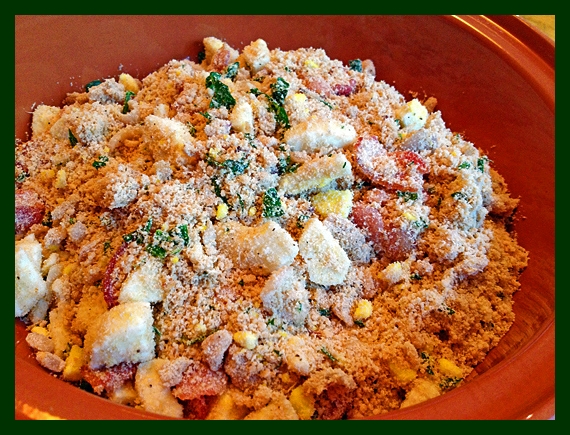
Set the oven to 300 F.  Remove the chicken from the marinade, place the pieces skin side down on a large baking dish, and cover with aluminum foil.  Bake for 45 minutes to 1 hour at this low temperature.  Remove the foil, if there is a lot of liquid accumulated in the dish remove most of it and discard.  Turn the pieces skin side up, cover with foil again and bake for another 20 minutes.  At this point, prepare the glaze by combining all ingredients together.   If too thin, gently warm it on a small saucepan to thicken it a little.  Watch it carefully because it can burn due to all the sugar.

Remove the aluminum foil from the baking dish, increase oven temperature to 425 F.  Bake for 15 minutes, once the skin starts to get some color brush the glaze all over the chicken thighs and bake for 10 more minutes or until very dark.  You can also broil the pieces at this point, but pay attention to prevent it from burning.  Serve with lime wedges.

ENJOY!

to print the recipe, click here

Carrot Mash1

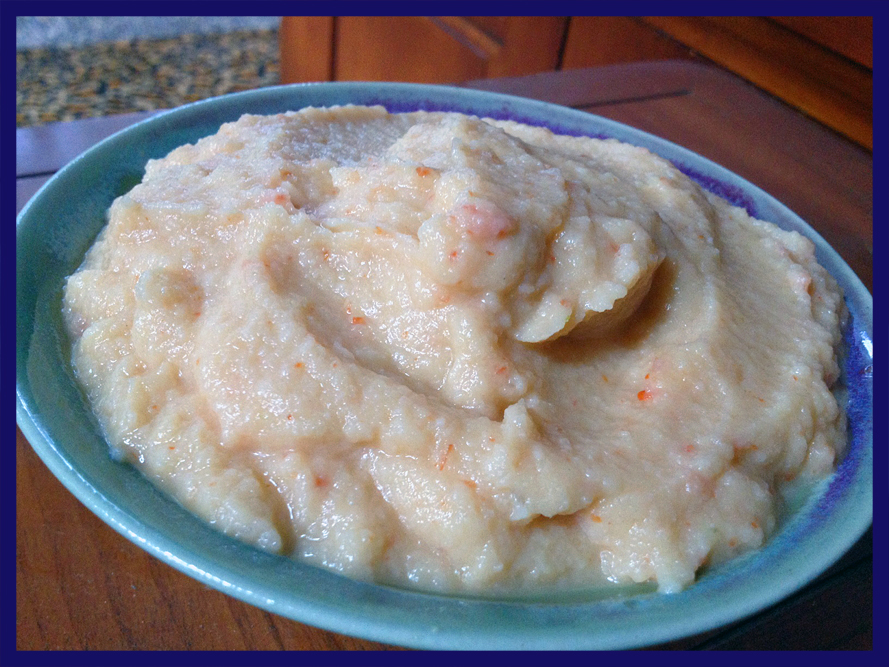
    CARROT MASH WITH ORANGE AND MINT
    (adapted from Fine Cooking magazine)

    2 lb. carrots, peeled and cut into 1-inch pieces
    salt
    1 oz. (2 Tbs.) unsalted butter, cut into 2 pieces
    2 Tbs. almond milk, unsweetened
    2 Tbs. extra-virgin olive oil
    1 tsp dried mint
    1 tsp finely grated orange zest
    Put the carrots in a large saucepan with enough cool water to cover by at least 1 inch. Add 1 tsp. salt and bring to a boil. Turn the heat down and cook at a gentle boil until the carrots can be easily pierced with a fork, about 25 minutes.

    Drain well in a colander, letting the steam rise for a few minutes. Meanwhile, heat the butter, almond milk, oil, mint, orange zest, and  1/2 tsp salt in the saucepan over low heat until the butter melts.

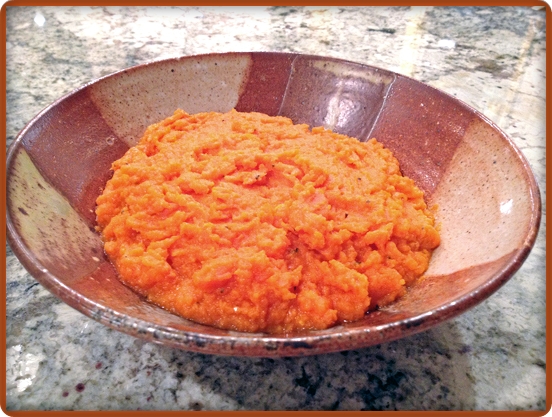
    Purée the carrots in a food processor until smooth and then add them to the pan, stirring well to combine.

    Adjust seasoning and serve.

    ENJOY!

    to print the recipe, click here

    Comments: My main modification of the chicken recipe was to adapt it to my favorite method of cooking chicken thighs: low and slow followed by high and fast.  I like the way the meat gets super tender and the skin super crisp.  You should stop by Sue’s blog and check her version too.  She actually made the glaze from pomegranate juice, reducing it with sugar. Since I had a bottle of pomegranate molasses, I followed a slightly different path.  The full idea is to have a reasonably thick glaze to coat the chicken.

    orangezest

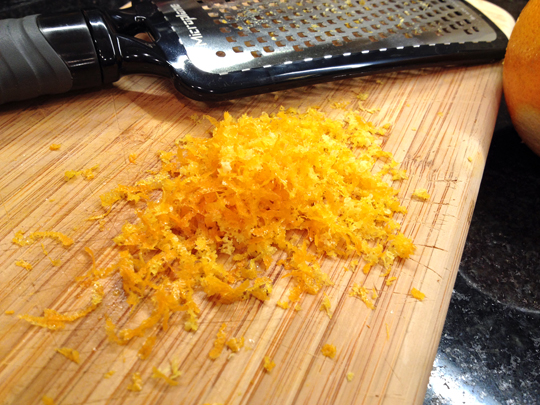
    The carrot mash: my only tweak was to use almond milk instead of heavy cream.  I love almond milk and use it every chance I get.  A lot more orange zest went into the recipe then called for, because the music playing got me carried away with the Microplane. Such a cool gadget!  Phil thought it was slightly too orange-y and not enough carrot-y, but when we had leftovers next day that flavor had mellowed down considerably.  As to a side dish for Thanksgiving, I was a bit shocked by how little puree 2 pounds of carrots produced… If you will be feeding an army of people, be ready to peel a ton of carrots and scale this recipe up by a factor of 3 or 4.  😉  Still, a delicious option, bright color, bright flavor, it will shine on your Thanksgiving table next to that big bird.

    ONE  YEAR AGO: The Many Faces of Kale

    TWO YEARS AGO:  Short and Sweet

    THREE YEARS AGO: Ciabatta, a Classic Italian Bread

    FOUR YEARS AGO: Magical Lamb Stew

    SILKY CAULIFLOWER PUREE WITH ALMOND MILK

    I am not sure why it took me so long to try almond milk, but  I fell in love with it the moment I tasted it.  This one is my favorite, the plain and lighter version made by Silk.   It is part of my daily routine now, half a glass of almond milk right before going to work, and another half after lunch.  Shockingly cold is best, by the way.   Phil used it in his lunch smoothies in place of  yogurt and loved it too. My passion for almond milk started me on a virtual expedition in the internet chasing for recipes using it in cooking.   I was pleasantly surprised to find quite an extensive number of possibilities.  My first adventure with Silk was a winner:  cauliflower puree.  I share with you the recipe,  inspired by Food and Wine.

    AlmondCauliPuree1

    SILKY CAULIFLOWER PUREE WITH ALMOND MILK
    (from the Bewitching Kitchen)

    1 medium-sized head of cauliflower
    1 tbsp grapeseed oil
    1 celery stalk, diced
    1/2 red bell pepper, diced
    1 shallot, diced
    Half gallon Light Almond Milk (or slightly less)
    salt and pepper

    Prepare the cauliflower by removing the outer leaves and the central core.  Cut the florets off, slicing the large ones in two or three pieces.

    Heat the oil on a skillet. Saute the celery, onion, and red bell pepper until the onion is golden, and the mixture is very fragrant. Season with a little salt and black pepper.   Add the cauliflower to the skillet and cook it on high heat for a couple of minutes, stirring often.  Transfer the mixture to a saucepan so that the cauliflower fill it no more than halfway up.   Add almond milk to the saucepan and bring the mixture to a boil.   Reduce the heat, cover the pan keeping the lid slightly ajar, and simmer for 15 to 20 minutes, until the cauliflower is tender.

    Transfer the cooked cauliflower to the bowl of a food processor, keeping the almond milk in the pan.  No need to drain it completely, the amount of liquid that stick to the florets will help ensure a nice texture.   Process until smooth.  If necessary, add a little more warm almond milk.   Test for seasoning.   Serve warm.

    ENJOY!


    to print the recipe, click here

    As I said, my first adventure with almond milk in cooking won’t be the last. In fact, I have this recipe on my “to try soon” folder, and hope I can actually switch it into the “tried and true”  in the near future.  One store in town normally carries Marcona almonds, which is the only tricky ingredient to find. With that in hand, I should be good to go.

    Probably because I used light almond milk instead of full fat, the liquid seemed to separate a little as the cauliflower cooked. It definitely did not harm the dish, so if you use the light version, ignore its looks.  It will all come together in a silky happy ending!

    dinner

    Our dinner felt quite special, considering it took place at the height of our kitchen renovation. Here is the full menu for that evening:  roasted chicken thighs marinated in beer-soy-orange (marinade to be blogged about soon), green beans with almonds, and the cauliflower puree.  Mr. Hamilton roasted the chicken thighs, Mr. Breville broiled the skin for a couple of minutes, and our single burner induction stove took care of the rest.  A few sautéed almonds on top of the puree tied both side dishes together quite nicely… even if I say so myself…   😉

    plate

    .
    THREE YEARS AGO:
    Popeye-Pleasing Salad
    .
    FOUR YEARS AGO: Summer’s Finale

    DITALINI PASTA SALAD

    I am not at all fond of pasta salads that are loaded with oily dressing, or the dreadful mayo to weigh things down even further. I like a salad that leaves me feeling refreshed and light. Ditalini is a shape normally used in soups, but I thought it would work well in this type of recipe. It has slightly more body than orzo, and is not as “slippery” . Rather than a strict recipe, this is all about flexible amounts, so play with it, and make it shine!

    IMG_0320

    DITALINI PASTA SALAD
    (from the Bewitching Kitchen)

    Ditalini pasta, cooked all dente and rinsed in cold water
    1/4 cup grape seed oil
    1/8 cup red wine vinegar
    1 Tbs lemon juice
    Dried oregano to taste
    Dried mint to taste
    Red pepper flakes, a pinch or two
    Cherry tomatoes, red and yellow
    Green onions, sliced thin
    Salt and pepper to taste

    Place the cooked and cooled ditalini pasta on a large bowl.

    Make the vinaigrette by mixing and whisking well the grape seed oil, vinegar, lemon juice, oregano, mint, and red pepper flakes.

    Cut the cherry tomatoes in half, and season lightly with salt and pepper.

    Add the vinaigrette to the pasta and mix well.  Incorporate the cherry tomatoes, add the green onions, adjust seasoning with salt and pepper.  Keep cold…  and….

    ENJOY!
    .

    to print the recipe, click here

    .

    Comments:  Feel free to use fresh mint instead of dried, as well as fresh oregano, although I find fresh oregano too overpowering and always use dried instead.  I kicked myself for not thinking about adding capers, so keep that in mind, this salad begs for a handful of those.   We like our vinaigrette to be more about the vinegar than the oil. We also prefer the milder taste of grape seed compared to olive oil, so grape seed was my choice.  You should make it the way you prefer, more oil, olive oil, a little mustard, maybe some garlic.  As you may have noticed, we are not garlic people.  It is quite possible that if they sequence our genome, a few vampire genes might be found here and there.  But, nothing to worry about, we are usually very well-behaved, your neck is safe with us.   😉

    VP
    Are you familiar with Vincent Price’s cookbook?  A classic, a real classic….

    .

    ONE YEAR AGO: Celebrate Wednesday with a Thai Seafood Curry

    TWO YEARS AGOPost-workout Breakfast

    THREE YEARS AGO: Semolina Barbecue Buns

    FOUR YEARS AGO: Lavash Crackers

    SEA SCALLOPS WITH PEA PUREE & CILANTRO GREMOLATA

    Preparing this dinner was not easy.  It was probably not very wise to make it during the kitchen hellnovation, but I was craving a nicer meal to make our Sunday evening feel special.  It can be very stressful to be in a house undergoing renovation, so having a slightly fancier meal seemed like a good idea.  However, what used to be a kitchen is now an almost empty space with no finished floors or appliances.  We are lucky to be able to keep the fridge turned on in our garage, and to have improvised two cooking areas: one in the laundry room, another in our enclosed patio.  Still, pantry items are in boxes, a few dishes are piled in the dining room for our daily use, a few pans at close reach, but not that many.  I wish you could see a video of me preparing this meal.  Actually, I am very glad there is no video documenting the process.  It involved me dashing a few times across rooms, forgetting that some passages are blocked by heavy plastic.  It involved a mildly twisted ankle while balancing scallops on a baking dish and “almost” losing them all to a floor covered in rough concrete bits. It also involved a scorched pan,  but the pea puree, even after subjected to torture tasted absolutely awesome!  So, allow me to share with you one of the toughest meals I prepared in the past year, a recipe that I first saw on a favorite food blog of mine, Taste Food.  Yes, I cooked from Lynda’s blog before…  😉

    served1

    SEA SCALLOPS WITH GINGERED PEA PUREE AND CILANTRO GREMOLATA
    (adapted from Taste Food)

    for the scallops:
    12 sea scallops
    salt and pepper to taste
    sprinkle of Mycryo

    for the pea puree:
    2 cups shelled English peas
    salt
    1 tablespoon freshly grated ginger
    2 tablespoons extra-virgin olive oil
    2 tablespoons freshly squeezed lemon juice
    freshly ground black pepper
    pinch of cayenne

    for the gremolata:
    1 cup cilantro leaves, chopped
    1 garlic clove, minced
    2 tablespoons finely grated lemon zest
    1/2 teaspoon salt
    1/2 teaspoon freshly ground black pepper

    Make the gremolata by combining the cilantro, garlic, lemon zest, salt and pepper in a small bowl. Set aside.

    Bring 4 cups water to a boil in a large saucepan. Add 2 teaspoons salt and the peas. Cook until peas are tender. Remove from heat and drain peas, reserving 1 cup cooking liquid.

    Combine peas, ginger, olive oil, lemon juice, 1 teaspoon salt, 1 teaspoon black pepper and cayenne in bowl of food processor. Purée until smooth. Add some of the reserved water (approximately 1/4 cup) to thin to desired consistency; the purée should not be too thin. Discard remaining water. Transfer purée to a bowl and keep warm. Pat scallops dry and sprinkle all over with salt and pepper. Add a sprinkle of Mycryo right before cooking. Heat a non-stick skillet over medium-high heat. Add half of the scallops, taking care not to overcrowd the pan. Cook, turning once, until brown on both sides and just cooked through, about 4 minutes. Transfer to plate and keep warm. Repeat with remaining scallops.  No need to add any oil to the pan, just the sprinkle of Mycryo will be enough.

    To assemble, spoon pea purée on serving plates. Top with scallops. Sprinkle scallops and purée with gremolata.  Serve immediately.

    ENJOY!

    to print the recipe, click here

    peapuree

    Comments:  Mycryo is a great product with a poorly chosen name, if you ask me.  The word –  Mycryo – makes me think of tears, sadness, despair.  But that could not be farther from the truth:  they gave sea scallops THE most perfect brown ever, even though they were prepared in THE most rudimentary cooking conditions available to a cook (the Drama Queen says hello). I even conducted a small experiment by preparing two batches of sea scallops.  One cost a small fortune, they were the ultra-special, huge dry sea scallops.  The other was a frozen type that while thawing released a gallon of white milky liquid.  No bueno.   With a light sprinkle of Mycryo (and no oil added to the non-stick pan), all scallops browned like a Brazilian under the tropical sun!   We could not tell the difference in texture or taste between the two types, which was quite amazing to me.   Great product! You can order here, they shipped very quickly, contrary to what I heard from customers who got it through amazon.com.

    composite11

    The pea puree competed heavily with the scallops to win the spotlight of this meal.   Bright flavor with the ginger and just a slight heat from the cayenne.  Lynda really came up with a perfectly balanced side dish.

    I close this post with a little snapshot of our laundry room.  In one side we installed the induction cooktop + microwave. On the other side, where we do have a large sink, we stuffed together the coffee machine, coffee grinder, and our beloved Penguin Sodastream.  It’s cozy in there, folks. Cozy.

    cookingcomp

    ONE YEAR AGO: Mediterranean Skewers with Balsamic Dressing

    TWO YEARS AGO: Five Grain Sourdough Bread

    THREE YEARS AGO: The Nano-Kitchen

    FOUR YEARS AGO: Kaiser Rolls

    FAROFA BRASILEIRA

    farofa
    Many of the classic recipes of Brazilian cooking have a counterpart  in other cuisines, be it French, Italian, or American. For instance, feijoada,  the  famous Brazilian concoction,  could be described as a type of cassoulet using different kinds of meat, and black beans instead of the French Tarbais.  Other dishes are a bit hard to “explain” for those who are not familiar with it.  Farofa is one perfect example.  The closest culinary item that I can use to describe farofa would be the toasted rice powder used on larb.  It’s about texture.   Just like Bolognese sauce and chili, each Brazilian family will swear by their recipe.  I will give you my own family version, the one that Phil fell in love with the first time he’s tried it.

    FAROFA BRASILEIRA
    (from the Bewitching Kitchen)

    4 strips of bacon, center-cut, diced
    2 Tablespoons butter
    1 onion, diced
    1 clove garlic, minced
    2 cups manioc flour (see comments)
    salt and pepper to taste
    3 hard-boiled eggs, coarsely diced
    parsley leaves, minced

    Cook the bacon on low heat on a large, non-stick skillet. No need to add any oil, the bacon will release its own fat.  Once the fat starts to accumulate in the pan, increase the heat slightly and allow the bacon to get some color.  Add the butter and the diced onion, cook over medium-heat stirring often until the onion gets light golden. Add the garlic, cook for a minute, then dump all the manioc flour.  Season with salt and black pepper, and keep stirring until the flour starts to get toasted.  Make sure to stir the flour from the top to the bottom of the pan, so that the whole amount gets cooked.

    Remove the pan from the heat, add the hard-boiled eggs and the parsley. Serve warm or at room temperature, preferably over a nice helping of white rice and beans.

    ENJOY!

    to print the recipe, click here

    served1
    Comments: If you want to make this Brazilian delicacy, it’s absolutely essential to find the right type of manioc flour.  It is NOT the fine powder used to bake items such as Brazilian cheese bread.  The manioc flour used for farofa is coarse, and sold in two different forms: white and toasted.  You can use either one for this recipe. If you start with the toasted flour your farofa will have a slight more intense flavor. To order some online, click here.  I really like Yoki brand, you can get “cruda/crua” (white) or “torrada” (toasted).  For a delicious farofa variation that includes corn, visit Angela’s blog (in Portuguese). I intend to make her recipe soon.

    Farofa is best enjoyed over black beans and rice, or a nice moqueca.  Anything with a spicy sauce only gets better with a nice coating of farofa.  But, I must say that once you get hooked on it, you will find yourself reaching for the bowl with a spoon and enjoying it all by itself.  Gotta tell a little story here.  My Dad was the utmost farofa-lover.  He developed a very interesting skill to enjoy it, in which he grabbed a fork, balanced a big load of farofa on it, then launched it up in the air, catching it all with his mouth! Believe it or not, not a single crumb would fall on the floor…  It’s really too bad in those days cell phones with camera did not exist or he could have been be a super-star on youtube.  It’s ok, though.  He was and will always be a super-star for me.

    ONE  YEAR AGO: Thai-Inspired Pork Tenderloin

    TWO YEARS AGO: A yummy Brazilian cake: Bolo de Fuba’

    THREE YEARS AGO:  Summer’s Tomatoes

    FOUR YEARS AGO: Leaving on a jet plane…