SECRET RECIPE CLUB: CARROT FLAN WITH GREENS AND LEMON VINAIGRETTE

flanJune, folks. We are in June. That means half of this amazing year is pretty much over.  Carpe diem. The months always end on a nice note for me, because the last Monday brings Reveal Day of The Secret Recipe Club.  I was paired this month with Dena from Oh! You Cook!”. Dena describes herself as a librarian by day, recipe blogger by night, except on nights in which she works as a librarian…  Not only she works around books, but she is an author herself, having published last year “The Everything Kosher Slowcooker Cookbook”.  Check it out here.  Reading her blog is a lot of fun! She is quite witty, and often opens her articles with remarks that will bring a smile to your face.  For instance, the recipe I chose, carrot flan, is under a post entitled “Go Forth on the Fourth…”  I quote straight from her blog:

Go Forth on the Fourth…  and barbecue, of course! 

Steaks… check!

Skewered chicken… check!  

Carrot flan… huh?   🙂

So there you go. Whether you are making this dish as a side for a barbecue or as a light meal, it will turn your day into something unique. Elegant, light, sophisticated, and the best part: it’s actually quite simple to make.

top

CARROT FLAN WITH GREENS AND LEMON VINAIGRETTE
(adapted from “Oh! You Cook!”)

Makes 6 individual servings.

for the flans:
12 ounces carrots (enough to make 2 1/2 cups of chopped pieces)
4 eggs
4 ounces (1/2 cup) heavy cream
1/2 teaspoon sea salt
1/4 teaspoon ground black pepper
pinch of grated nutmeg

for the vinaigrette:
1/4 cup olive oil
3 tablespoons fresh lemon juice
1 teaspoons Dijon mustard
1/2 teaspoon grated lemon peel
1/2 teaspoon honey

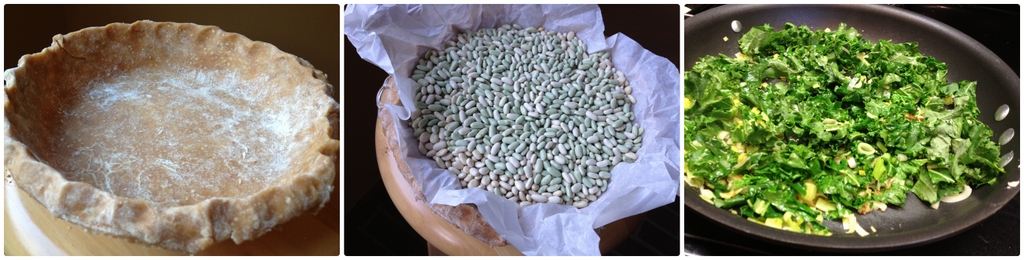
Make the flans: Heat the oven to 325 degrees F. Butter 6 ramekins (3/4-cup size). Cook the pieces of carrots in boiling salted water until tender, about 8 minutes. Drain and puree in a food processor or blender until smooth, and let cool slightly.

Whisk the pureed carrots together with the eggs, heavy cream, salt, pepper, and nutmeg. Divide the mixture among the buttered ramekins, and place the ramekins in a baking pan. Add enough hot water to the baking pan so that the water goes halfway up the sides of the ramekins. Cover the pain with foil and bake until the custards are set and a knife inserted near the middle of one comes out clean. (In my pathetic oven it took almost 1 hour, but you should start checking it at 40 minutes, normally it should take around 45 minutes). Remove the ramekins from the baking dish and let cool slightly before unmolding.

For the vinaigrette:  whisk together the lemon juice, lemon peel, mustard, and honey. Stream in the olive oil, whisking constantly, until an emulsion forms. Season well with salt and pepper,  and store in the refrigerator.

Final assembly of the dish:  Place a handful of salad greens of your choice for each serving of flan in a large bowl. Drizzle some vinaigrette over the greens, season with coarse salt and freshly ground black pepper, and toss to dress. Run a knife around the inside of the ramekins to loosen the flans, then invert them over a plate to unmold. Serve the flans with the salad  and an additional drizzle of the vinaigrette.

ENJOY!

to print the recipe, click here

composite-001
Comments: This might be a bold statement, but I’ll go ahead with it: I think this was my favorite recipe of all the “Secret Ones” I’ve made in the year and a half participating in the event.  Phil raved about it from the first bite, and said that these flans could be served on the best bistrots of Paris. How’s that for a compliment?  The leftover flans were warmed in a microwave for 40 seconds, and they unmolded perfectly then.  So, this recipe is a wonderful option for a dinner party.

tiedie
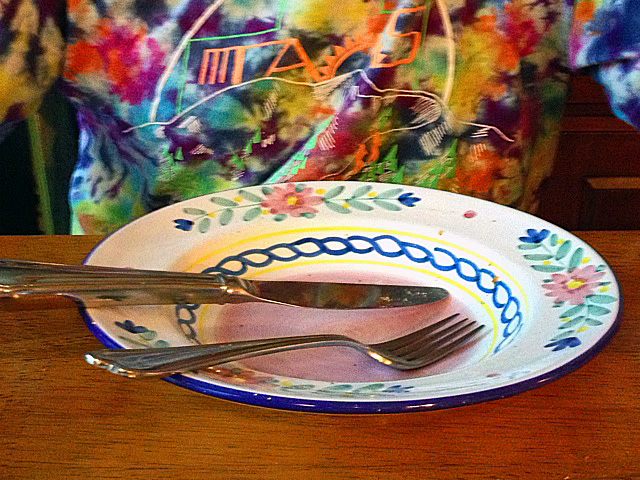
Polishing off the meal with non-stop compliments: Nice! Wearing a tie-die shirt with more colors than the dinner plate? Optional, but so very cool… 😉

If you want to see what my friends from Group D cooked up for this Reveal Day, click on the blue frog at the bottom of the post…. have fun!

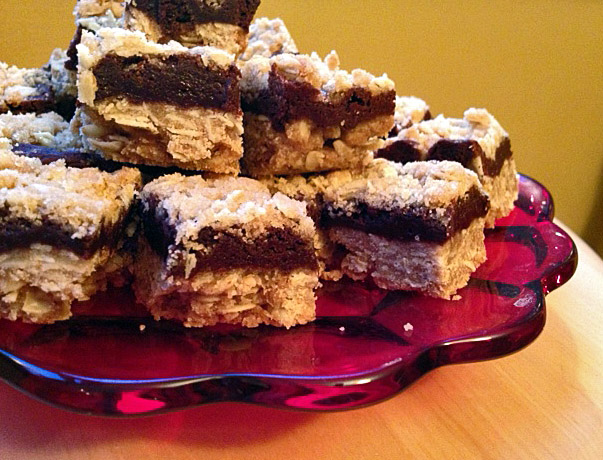
ONE YEAR AGO: The Secret Recipe Club: Granola Bars

TWO YEARS AGO:  Awesome Broccolini

THREE YEARS AGO:  A Twist on Pesto

FOUR YEARS AGO: Ciabatta: Judging a bread by its holes


SECRET RECIPE CLUB: PENNE WITH TRAPANESE PESTO

noname
Not sure how we made it so fast to the end of May, but here we are!  And the last Monday of the month brings with it the Reveal Day for The Secret Recipe Club.  Bloggers are paired in secret, stalk each other’s site for a nice recipe, and blog about it on the same day.  This month I was paired with Erin, from The Spiffy Cookie.  She is a graduate student working on her PhD in Microbiology and that immediately puts us both in a similar page.  Granted, I probably had my PhD before she was born, but still… I know what it takes and how frustrating it can be to get there.   As I always say to the students in the lab, “science is not for sissies“.  But, I digress.   I spent quite a bit of time on her site, tempted by many of her recipes. A few examples for you:  Chicken Burgers with Garlic & Rosemary Yogurt, Apple Oatmeal Breakfast MuffinsNutella Mousse (that almost made my final cut), and Nutella-Swirled Banana Bread Snack Cake (do I need to say anything more?).  But, in the end, my heart was set on Penne with Trapanese Pesto, because it seemed like the type of recipe Phil and I would love.  Plus, the almonds in the sauce take me to a Persian aura that is quite welcome in our kitchen these days. So, without further ado, my contribution to the SRC this month…

Sally(photo kindly optimized by an angel called Sawsan…)

PENNE WITH TRAPANESE PESTO
(slightly adapted from The Spiffy Cookie)

2 cups cherry or grape tomatoes
1/3 cup almonds, lightly toasted
1 clove garlic
12 basil leaves
1-2 anchovies filets (or to taste)
2 tsp capers
1 pinch crushed red pepper
1/4 cup freshly grated Parmesan cheese
3 Tbsp extra-virgin olive oil
1 pound whole wheat penne pasta
Coarse salt and freshly ground pepper

In a food processor, combine the tomatoes, almonds, garlic, basil, anchovies, capers, crushed red pepper, cheese, and a good pinch of salt and pepper. Pulse a few times to get it going. With the motor running, add the oil in a thin stream. Taste it. Add a little more salt if needed.

Meanwhile, cook your pasta in a large pot of salted water until al dente. Drain and return to pot.  Pour the pesto over the pasta and toss to combine.  Store whatever is left in a sealed container in the fridge for a week. Serve  with more cheese and basil.

ENJOY!

to print the recipe, click here

ingredients
Comments: I made two small modifications in the recipe, adding capers and anchovies to the pesto. Now, for those who personally know me, it will be shocking to learn I added anchovies were anchovies were not called for.  Yes, indeed, I don’t like anchovies, but have been working on improving our relationship.  For one of those virtual coincidences, a food blog I recently fell in love with (Chef Mimi Blog) had a post on Trapanese Pesto, and she added anchovies.  Being a certified anchovy-wimp, I added only 1 small filet, carrying it with the tip of the fork, arm extended as far as I could to avoid its pungent aroma…   🙂  Capers seemed like a natural partner for all other ingredients,  so into the pesto they went.

This was a delicious meal! For my taste, Trapanese pesto beats the Genovese by a long shot.  Less oily, less pungent.  The recipe made more sauce than needed for our pasta dinner, leftovers will keep in the fridge for a few days.

composite
Erin, it was great to stalk your blog for recipes and get to know your site better (although I’ve visited your blog many times before) through this month’s adventure with SRC.  For those who want to see the full collection of recipes posted by members of our group, click on the funky frog and have fun!

ONE YEAR AGO: Superman

TWO YEARS AGO: Spring Pasta

THREE YEARS AGO: Ice Cream Melts for Mango


SECRET RECIPE CLUB: LEEK AND CHEESE TART

tart1

One more month flew by us! Last Monday of April, first Secret Recipe Club of a favorite season, Spring!  I was paired with the blog Food Baby Life, and had a blast browsing Susan’s site. She has a well-organized index which makes life a lot easier for the stalker.  Being a busy mom, many of her recipes are compatible with our own life style. You know, that life style in which the day doesn’t seem to have enough hours, and each night we ask ourselves “why isn’t tomorrow Saturday instead of Tuesday?”   😉    I had quite a few recipes on a list of favorites to choose from, including her  Spiced Meatball Wrap, but settled on this tart because of the unusual crust: instead of butter, olive oil. Instead of white flour, a combination of 50/50 white and whole-wheat. A few modifications of my own for reasons specified in the comments, and there you have it: a Leek and Kale Tart with Olive Oil Crust!

LEEK AND KALE TART WITH OLIVE OIL CRUST
(adapted from Food Baby Life

for the filling:
2 large leeks, washed and sliced thinly
1 small bunch kale, sliced thinly
1 tbsp olive oil
1 clove garlic, crushed
dash of nutmeg
salt and pepper to taste
4 eggs
1 cup (250ml) evaporated milk
125g cheddar cheese, grated (see comments)
for the crust:
125g plain flour
125g whole -wheat flour
1 ts salt
60 ml olive oil
100-120ml cold water
Lightly grease a 28cm (11 inch) tart dish, preferably one with a removable bottom, but a Pyrex type will work too.  Heat  the oven to 390 F  (200 degrees Celsius).
To make the pastry, place the flours and salt in a large bowl and whisk to combine. Pour in the oil and stir with a fork. Add the water and continue to stir with a fork until it is just absorbed then start to knead with your hand, until the dough forms a ball and comes away from the sides of the bowl.

Turn the dough out onto a floured surface and roll out to fit the tart pan. Transfer the dough to the pan, trim the edges and place in the fridge for 30 minutes.

While the pastry is chilling, make your filling. Melt the olive oil in a large saucepan over medium heat. Add the leeks and garlic and cook, stirring often for about 10 minutes, then add the kale and cook for a few minutes more, until wilted. Season with nutmeg and remove from the heat and allow to cool for 10 minutes or so. In a separate bowl whisk together the eggs and milk along with salt and pepper to taste.

Blind bake the pastry for 10 minutes lining it with parchment paper and filling it with beans. Remove the beans and paper and bake for a further 10-15 minutes or until the edges are golden and the base is totally dry to the touch. Remove and allow to cool for 10 minutes.

To assemble the tart, fill the pastry shell with the cooked leek and kale mixture, sprinkle over the cheese and then pour over the egg mixture. Bake for approximately 25 minutes. The filling should be just set and the edges of the pastry a deep golden brown. Cool for at least 15 minutes before serving.

ENJOY!

to print the recipe, click here

composite
Comments:
What’s life without a little adrenaline rush? You would think that by staying away from cakes I’d be safe, right?  Not so fast.  Things were going quite well up to the moment of adding evaporated milk to the game. I grabbed my can opener, a little gadget that works like a charm, smooth, graceful, leaving no sharp edges. It usually performs a little magic around the edges, so that you cannot quite tell the can is open, but it is.  Or is it really?  Something about the edge of the can of evaporated milk simply would not cooperate and it refused to open.  I had a second can in the pantry, tried to work on it,  again no luck. I searched everywhere for an old-fashioned type can opener, but apparently ours was lost during the move.  A few slammed doors and drawers, a few words not fit to print, I finally had the brilliant idea of pairing an oyster knife with a hammer.  Punched a square hole on top of the can, and back in business I was.  (BTW, I don’t recommend doing that, it is both messy and dangerous).

IMG_1627
To add a little more emotion to the day, I forgot to buy Cheddar cheese for the recipe!  I had no cheese around, except for three little triangles of “Laughing Cow Light Original Swiss Cheese”.   I ended up mixing it as well as I could to the evaporated milk, and that was that. Finally, If you followed the original link to Baby. Food. Life, you will notice that she removed the excess dough after covering her tart pan, for a very polished look. I don’t know what I was thinking, but obviously I went into a different direction.  Oh, well…   What matters is that this crust might very well become my default recipe from now on.  We both absolutely loved it, it does have a more rustic quality thanks to the whole-wheat flour and the olive oil.  Plus, making it in a bowl using just a fork and your hands was awesome!

Susan, it was great to meet you and your blog through The Secret Recipe Club, we loved this recipe, enjoyed it three days in a row, it only got better and better!

slice

For those who want to see what my fellow friends from group D cooked up this month, don’t be shy, just click on the blue frog at the very end of my post, and happy browsing!  And those who are curious to see which recipe was chosen from my blog, and who had it, jump here for a fantastic article by Fran!  She made a favorite of ours, Vietnamese Spring Rolls.

ONE YEAR AGO: Secret Recipe Club; Triple Chocolate Brownies

TWO YEARS AGO: Shaved Asparagus Salad

THREE YEARS AGO: Indonesian Ginger Chicken


SECRET RECIPE CLUB: PORTOBELLO CAPS STUFFED WITH GOAT CHEESE AND PROSCIUTTO

servedThe month of March brought a little too much snow and cold to The Little Apple, but we escaped to warmer weather for a week, arriving from Brazil right before the last Monday of the month.  Why is the last Monday of the month so important in the food blogging world?  Well, by now you should  know it’s The Secret Recipe Club Reveal Day!  This month, with all our activities and travel, it was a bit of a stretch to participate, but I’m very glad I did.  I was paired with a blog I had not visited before, The Saturday Evening Pot.   The host is a trained chef, and that immediately got the adrenaline pumping in my system as I browsed his site in search of recipes.  He cooks for a family of four: himself, his wife, and two kids, but to make things a lot more interesting they have food sensitivities that need to be taken in account. Not an easy task.  He does so beautifully, though, and in his site you will find extensive nutritional information for all recipes and plenty of advice for adapting recipes in case you face similar issues.  I highly recommend a visit to The Saturday Evening Pot.   It did not take me very long to choose a recipe, because I’ve been thinking of trying stuffed Portobello mushrooms for quite some time.  Great opportunity to go for it, wouldn’t you say?

served2
PORTOBELLO MUSHROOM CAPS STUFFED WITH GOAT CHEESE AND PROSCIUTTO
(from The Saturday Evening Pot)

3-4 large Portobello mushroom caps
olive oil
balsamic vinegar
4-6 ounces crumbled goat cheese
3-4 slices prosciutto

Heat oven to 350 degrees. Using a small dinner spoon, remove stems from mushroom caps and scrape out brown ribbing on underside of mushroom caps. Lay mushroom caps, stem side up, on sheet pan.  Brush each lightly with olive oil. Bake approximately 10 minutes or until mushroom browns lightly.

While mushrooms are baking, take each slice of prosciutto and cut using a chiffonade pattern.  Set aside.

Remove mushrooms from oven and turn oven setting to broil. Drizzle each mushroom cap with a small amount (approximately 1/4 teaspoon) of balsamic vinegar.  Spread vinegar evenly with the back of a spoon over inside of mushroom cap. Place one slice shredded prosciutto in each mushroom cap and sprinkle goat cheese on top of prosciutto. Place sheet pan under broiler and melt cheese until lightly browned.  Remove and serve immediately.

ENJOY!

to print the recipe, click here

cleanprepared

Delicious recipe, we will definitely be making this over and over and over, adding all kinds of goodies on the Portobello base.  My only modification was to use fig balsamic vinegar, but other than that, I followed his recipe to a T. Three mushrooms were more than enough for Phil and I, we even had half of the small one leftover.  We enjoyed them as our main dish, next to a little spaghetti with olive oil and lemon zest.  You may notice there is no salt in the recipe. Both goat cheese and prosciutto can be very salty, particularly when you roast them, so make it as written and see how you like it.  I love salt, but did not miss it.  For a full vegetarian version, sun-dried tomatoes could replace the prosciutto, or a mixture of black olives, roasted red bell peppers…  this is a nice basic method to improvise according to your mood.

If you want to see the other recipes made by friends in my group, click on the blue frog that is smiling at you at the bottom of the post.

ONE YEAR AGO:  Orange and Rosemary Pork Tenderloin

TWO YEARS AGO: Pistachio-Walnut Sourdough Bread

THREE YEARS AGO: Cottage Loaf and Yeasty Dogs


SECRET RECIPE CLUB: OATMEAL FUDGE BARS

platter2

Mondays keep coming, rushing over me, but the toughest day in the week is made brighter when it’s…. Reveal Day of The Secret Recipe Club!  This club is getting more and more interesting, as new food bloggers join in. I heard the waiting list is huge, so if you have any interest in this type of group event, get yourself in line!    This month I was paired with the blog Everyday Insanity. The name describes my days quite closely… 😉  I also love her tag line: Tackling life, one brownie recipe at a time!  Everyday Insanity is hosted by Cindy, and her choice of name for the blog might be due to her having 6 kids and 14 grandchildren!  My life all of a sudden feels like a walk at the park. Seriously.  Her blog is full of tasty recipes, not only sweets.  I was very tempted to make her Thai Coconut Chicken soup, but these bars won me over. Plus, the timing was perfect: I brought them to our department on Valentine’s Day!

OATMEAL FUDGE BARS
(from Everyday Insanity)

1 cup quick-cooking oats
1+1/4 cup light brown sugar, divided
1 cup all-purpose flour, divided
1/4 tsp baking powder
1/4 tsp baking soda
1/4 tsp salt + 1 pinch, divided
10 tbsp unsalted butter, divided
1 + 1/2 cups chocolate chips
1 egg

Heat your oven to 325 degrees. Line an 8 inch square baker with aluminum foil, allowing excess to hang over the edges of the pan.  Grease foil; set pan aside.

Combine the oats, 1 cup of brown sugar, ¾ cup of flour, baking powder, baking soda, and a pinch of salt.  Stir together in a bowl to combine.  Melt 8 Tbsp butter and stir into the oat mixture until combined.  Reserve ¾ cup of the mixture for the topping.  Sprinkle the remaining oat mixture over the bottom of the prepared pan and press into an even layer.  Bake until light golden brown, about 12 minutes.  Cool completely, about 1 hour.

Combine the remaining ¼ cup flour, the remaining ¼ cup brown sugar, and the remaining  ¼ tsp salt in a bowl.  Set aside.

Melt the chocolate chips and the remaining 2 Tbsp butter in a large bowl, microwaving at 50% power in 30 second intervals, stirring after each.  Let cool slightly.  Add the egg and whisk until combined.  Use a rubber spatula to fold in the flour mixture, stirring until just combined.

Pour the chocolate filling over the cooled crust and sprinkle with the remaining oatmeal mixture.  Bake until a toothpick inserted into the center comes out with a few moist crumbs attached, 25-30 minutes. Cool completely on a wire rack.  Using the foil overhang, lift the bars from the pan and cut into squares.  Store leftovers in an airtight container at room temperature.

ENJOY!

to print the recipe, click here

cutting
Comments:  Valentine’s Day this year fell on a Thursday, so I bravely decided to tackle this recipe the evening before. After work. After dinner. Not a smart move.  I completely overlooked the instruction to “reserve part of the mixture for the topping”, and of course got into full-blast panic mode when I noticed my mistake.  By then the base of the bar was already in the oven.   I rushed to make a little more topping, calculating proportions of all ingredients quickly in my mind, hoping for the best.  Probably due to my level of stress, the chocolate seized in the microwave, prompting me to throw one of those fits that brings Phil back into the kitchen, already holding a box of Kleenex.  To make a long story short, without him, there would be no bars.  Unbearable thought.

So, when you make these absolutely delicious bars, do yourself a favor and follow the recipe as written.  That way the base of your bar will the thinner, and the crumb topping will be lighter, as intended.

Cindy, it was wonderful to get to “meet” you through this baking adventure!  Thanks to you (and also to the imperturbable man I married), I could take a platter full of sweetness to work on the sweetest day of the year!

department

To see what others in my group prepared for Reveal Day, click on the funky little frog smiling at the end of the post. Do you want to know who got my blog and what she cook from it?   Jane, from The Healthy Beehive picked a favorite recipe of mine, check it out by clicking here

ONE  YEAR AGO: Cauliflower Steaks

TWO YEARS AGO: Soft Spot for Chevre

THREE YEARS AGO: Quick sun-dried Tomato Crostini