Today I share a couple of recipes that have my name written all over. They are low in carbs, full of flavor and… loaded with eggs! I am after all, a very enthusiastic egg-cheerleader. I probably enjoy them for lunch in some version (scrambled, omelette, over-easy) several times per week. Without further ado, here they are…

Let’s start with the Low-Fat Quiche, courtesy of Helen Fletcher
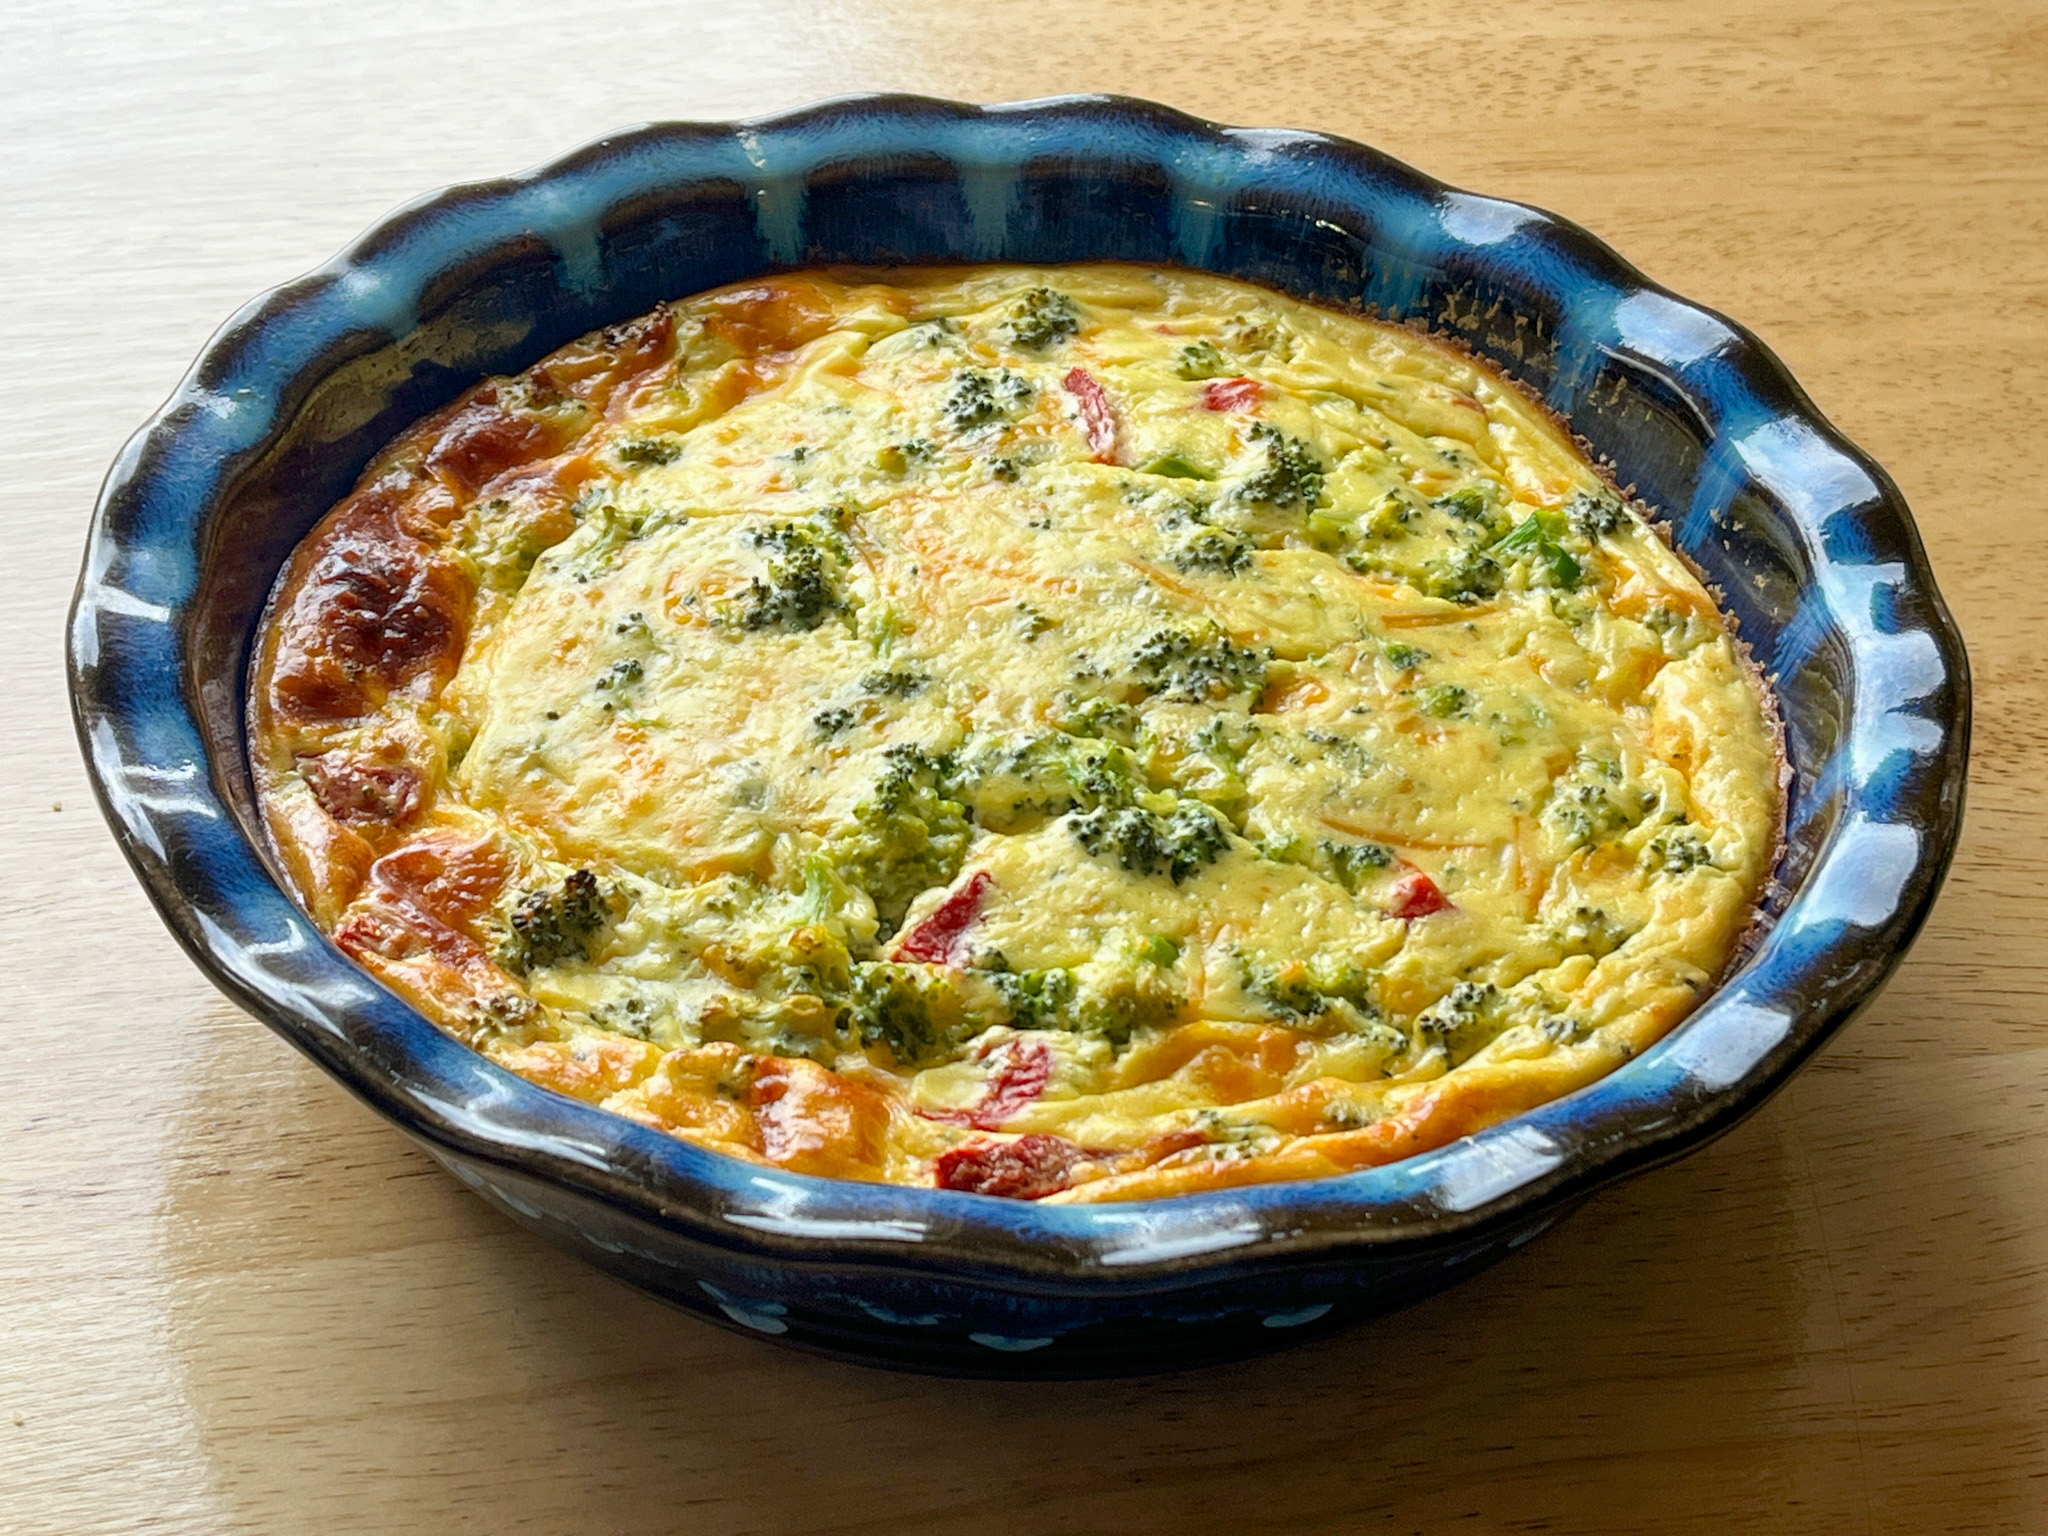
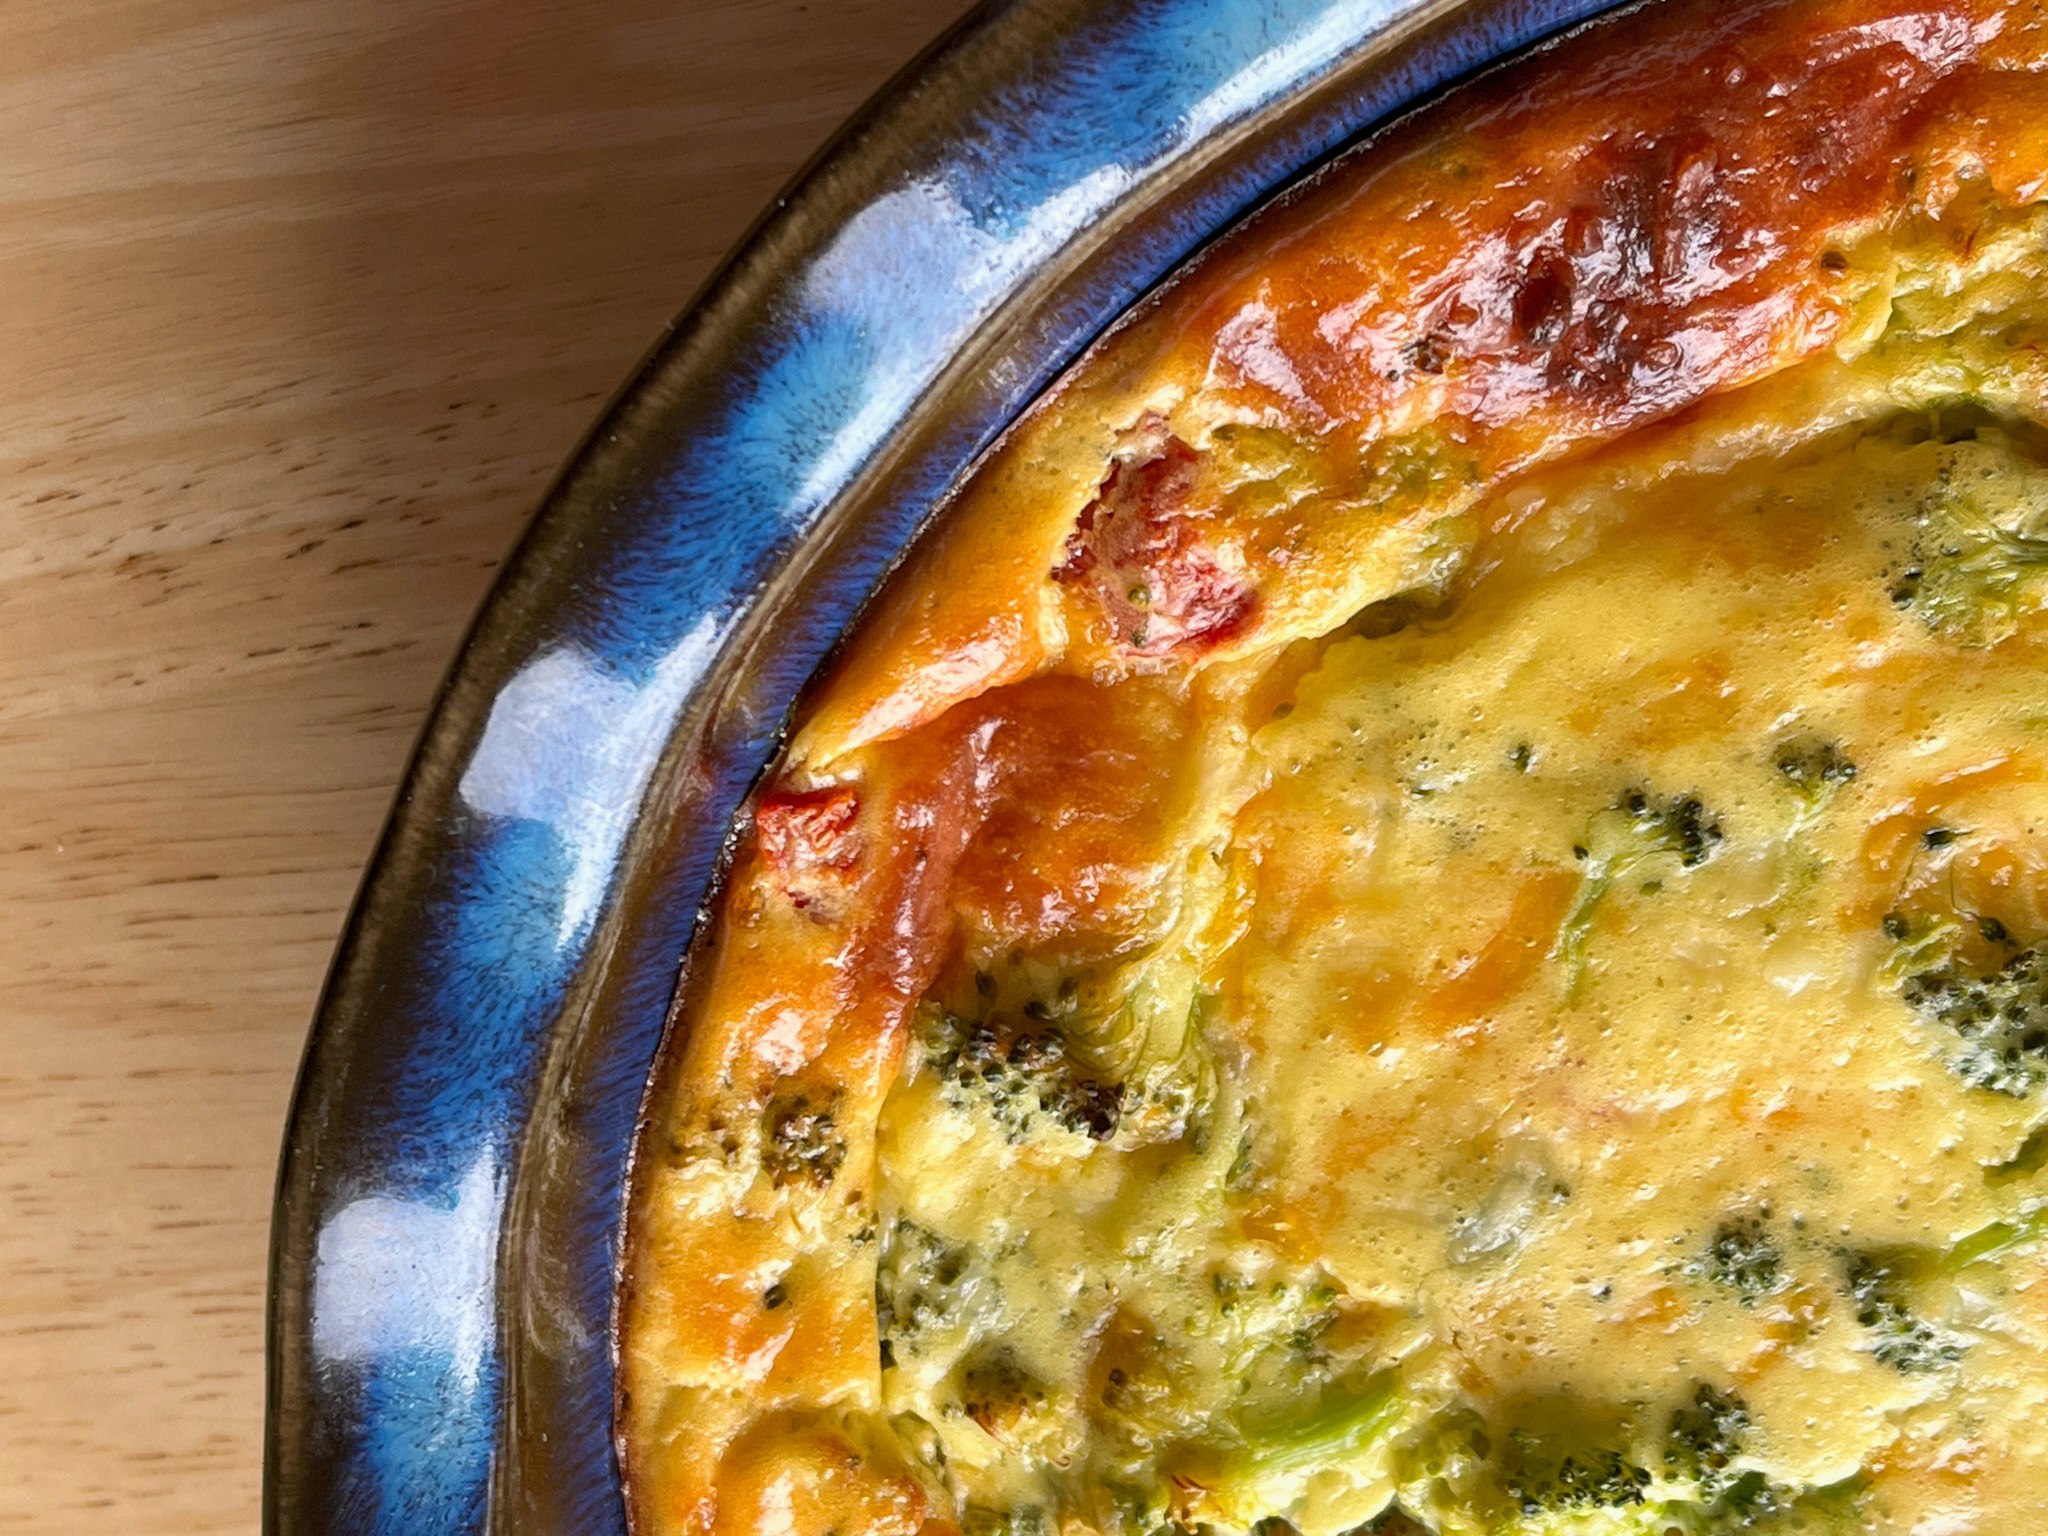
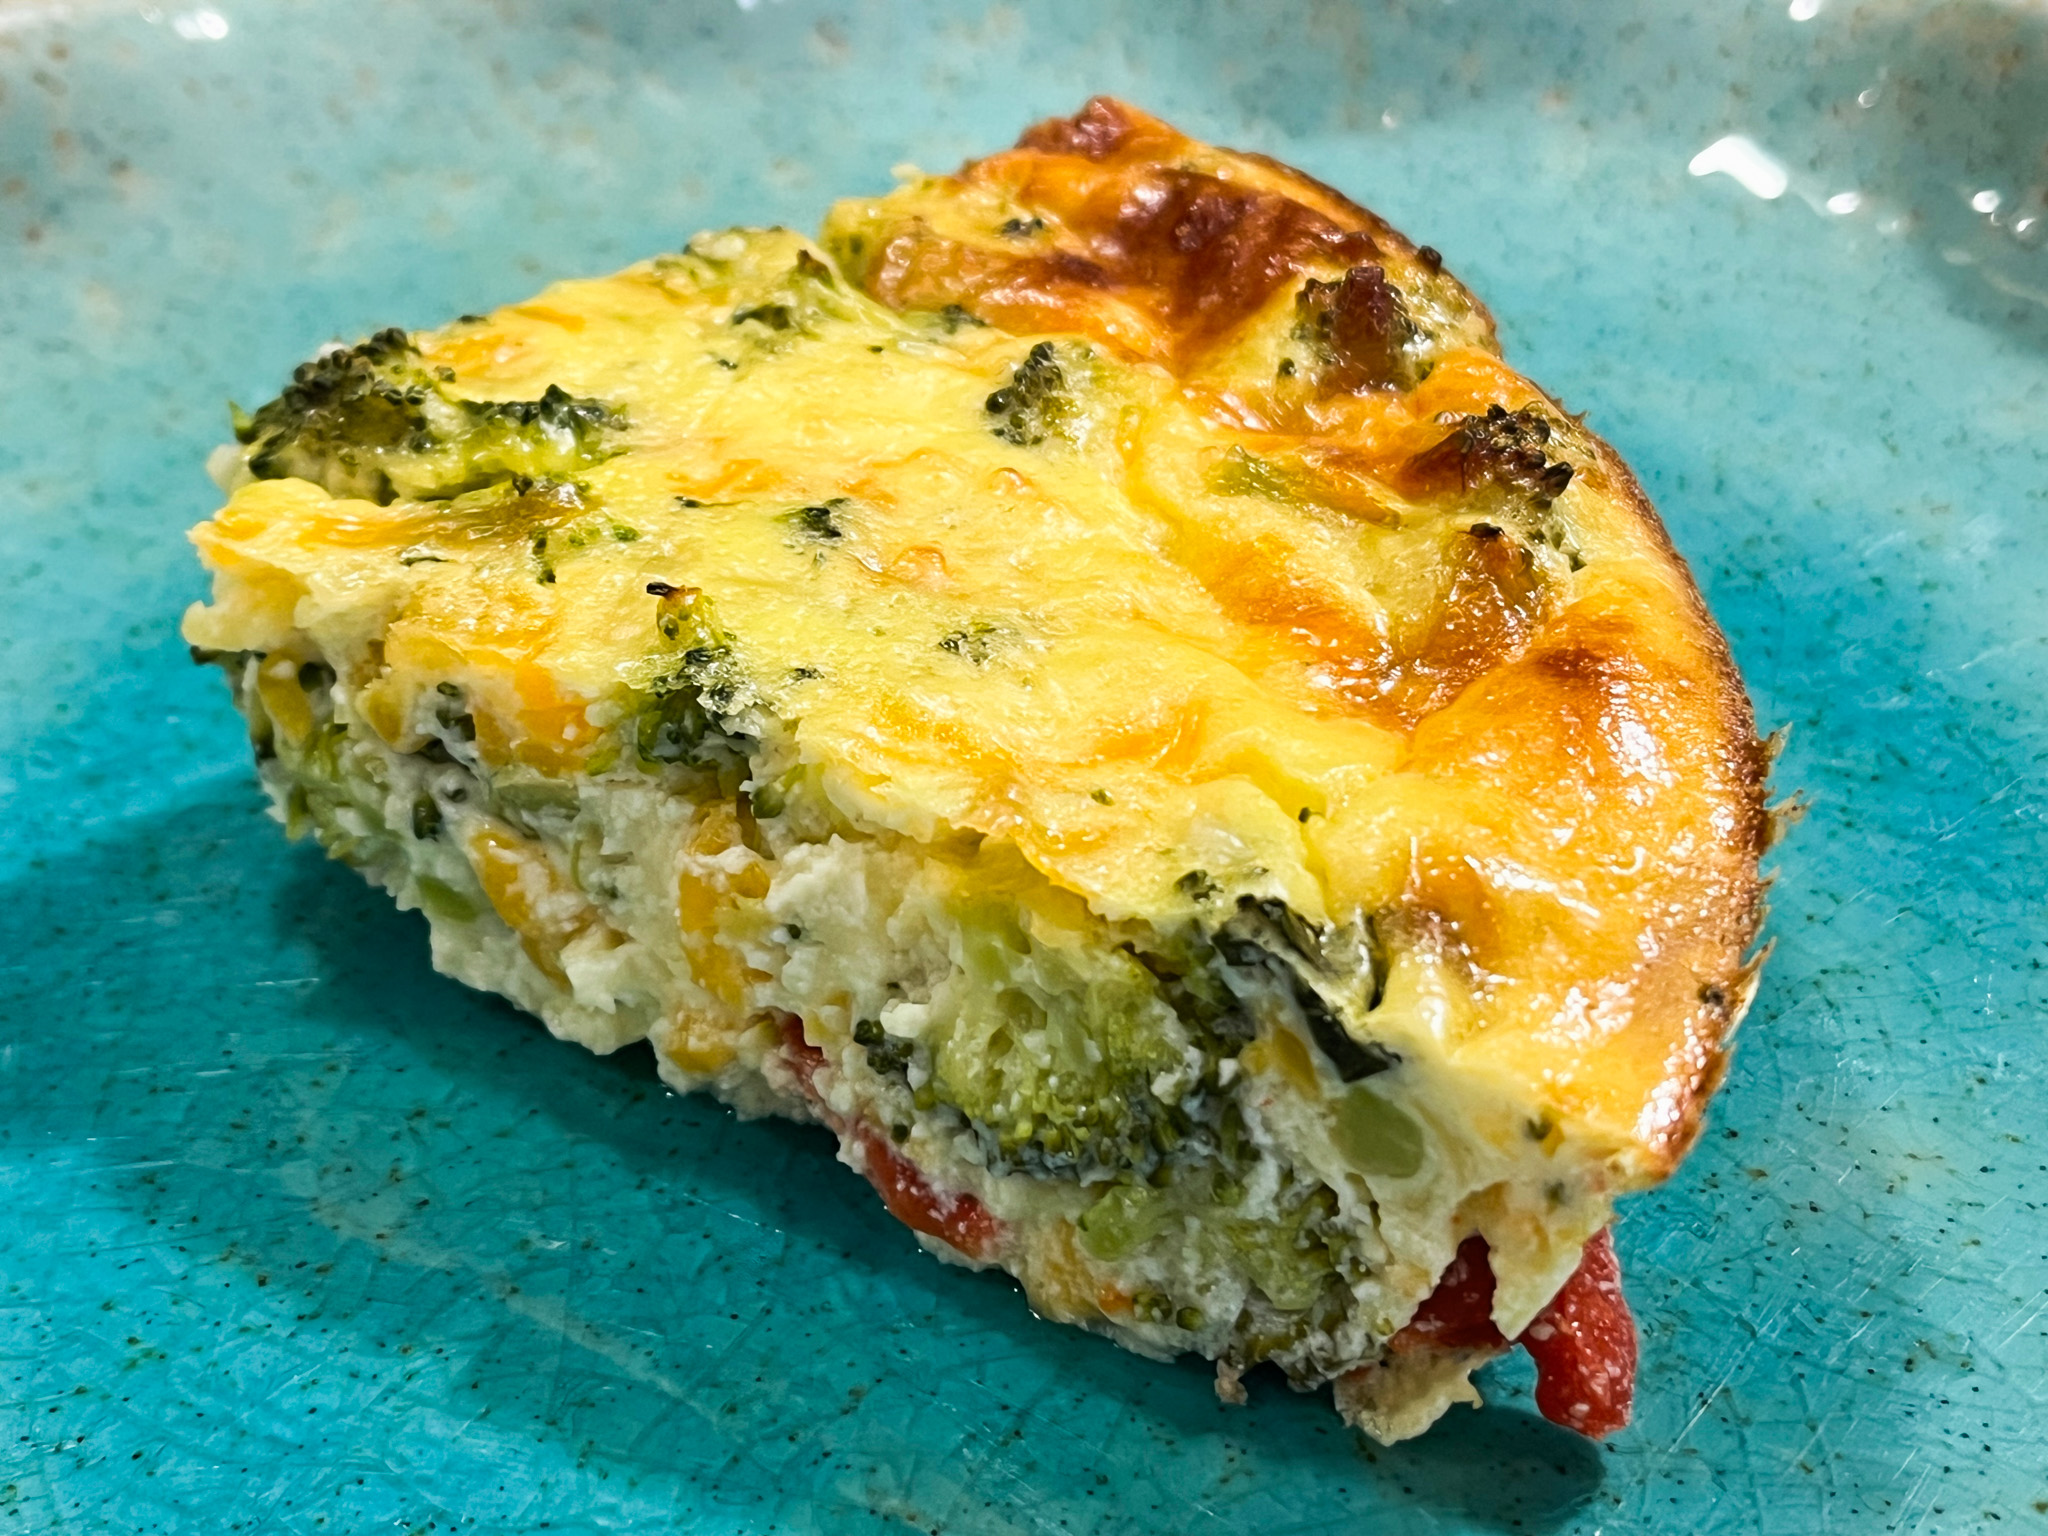
SIMPLE LOW-FAT QUICHE
(slightly modified from Helen Fletcher’s Pastries like a Pro)
1 cup low-fat yogurt
½ cup cottage cheese
3 large eggs
1 tablespoon cornstarch
1 teaspoon salt
½ teaspoon black pepper
4 cups broccoli, trimmed closely and cut
½ cup roasted red peppers
6 ounces sharp cheddar cheese, grated (170 grams)
½ cup parmesan cheese, grated (58 grams)
½ teaspoon dry mustard
⅛ teaspoon cayenne pepper
Heat the oven to 350F. Spray a 9-inch pie plate with non-stick baking spray. Reserve.
Place the yogurt and cottage cheese in the bowl of a processor. Process until smooth, scraping down as necessary. Add the eggs, cornstarch, salt and pepper. Process until smooth, it will be a very loose mixture. Add the mustard and cayenne pepper and give it a final processing.
Place the broccoli in the microwave with just a spray of water. Cover with plastic wrap and microwave for 2 minutes at 80% power. Dry the broccoli well, transfer to a bowl and add the red pepper. Add the yogurt mixture, them the cheeses and mix it all well. Pour into the pie pan and bake for about 40 minutes. It should be set in the center and lightly browned.
Allow it to cool for 15 miutes before slicing. It can be consumed warm or cold.
ENJOY!
to print the recipe, click here
Comments: Make sure to visit Helen’s blog since that post is a full lesson on how to make any kind of savory quiche (low-fat) that you might desire. The fact that it does not need a crust makes it also much lower in carbs, which is something I don’t mind for my lunch.
.
x
Moving on, Prosciutto Egg Muffins…

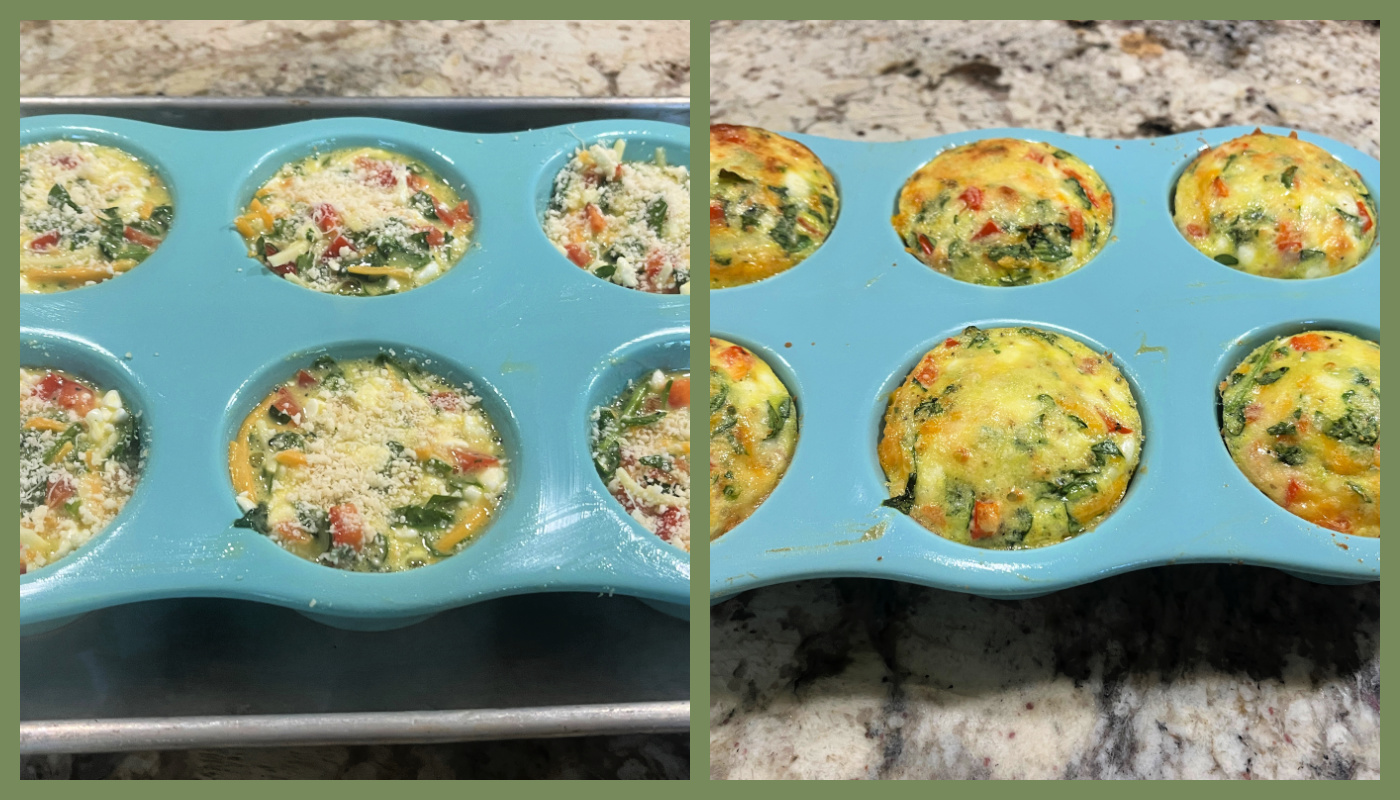
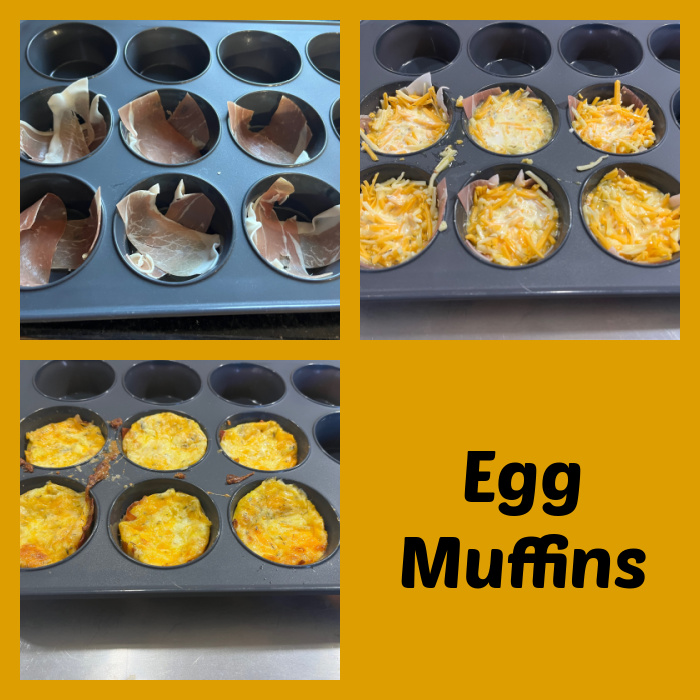
PROSCIUTTO EGG MUFFINS
(from The Bewitching Kitchen)
3 eggs
2 cups shredded Mexican blend cheese
1/2 tsp cumin
1/4 tsp cayenne pepper (or to taste)
6 slices proscuitto
salt to taste
Heat oven to 350℉. Line a muffin tray with paper liner or spray with olive oil. If using a silicone tray, no need to do that.
In a medium mixing bowl, add in the eggs and beat well. Next add in the cheese, spices and salt. Whisk vigorously until combined. Cover the slots of the muffin tray with the prosciutto slices. You should have enough for 6 egg muffins. Pour the mixture into the slots. Bake for 20 minutes or until set and starting to get golden on top.
ENJOY!
to print the recipe, click here
Comments: Even though I make this type of food for myself, the husband approved them both and we ended up sharing them. Light and delicious, leftovers can be warmed in the microwave at low power for a minute and the a brief heating in a 350F oven for perfect texture. This is the perfect opportunity to put this amazing pan to use, by the way. It was featured in my latest In My Kitchen post (click here to read it).
ONE YEAR AGO: Three Adorable Cookies
TWO YEARS AGO: Ube Sourdough, Two Ways
THREE YEARS AGO: Brown Butter Dulce de Leche Cookie Cups
FOUR YEARS AGO: Chicken Poblano Tortilla Soup
FIVE YEARS AGO: Kung Pao Chicken
SIX YEARS AGO: Galette de Rois
SEVEN YEARS AGO: Sous-Vide Overnight Oatmeal
EIGHT YEARS AGO: A Valentine’s Day Opera
NINE YEARS AGO: Incredibly Simple Times Four
TEN YEARS AGO: Walnut-Cranberry Sourdough Bread
ELEVEN YEARS AGO: Ottolenghi in Brazil?
TWELVE YEARS AGO: Roasted Winter Vegetables with Miso-Lime Dressing
THIRTEEN YEARS AGO: 2012 Fitness Report: P90X2
FOURTEEN YEARS AGO: Caramelized Bananas
FIFTEEN YEARS AGO: Roasted Lemon Vinaigrette
SIXTEEN YEARS AGO: Whole Wheat Bread