TWO APPETIZERS FOR THOSE WHO LIKE IT HOT

These appetizers would be great for a tapas party or to share with guests before a Tex-Mex meal.  They are very simple to prepare and both can be assembled in advance. Conveniently, both recipes are baked at the same temperature, 375 F.   When your guests arrive, stick the dishes in the oven, and they will be done by the time everyone is settling down, getting ready to enjoy the evening. I cannot decide which one I liked more, but chorizo has been a favorite ingredient these days, so maybe I lean towards the stuffed mushrooms as the winner. The recipe I’m sharing with you today came from Melissa’s blog,  “I Breathe I am Hungry“, which is a great site for those into low-carb and gluten-free nutrition. Even though I don’t fall into any strict category, whenever I  host a dinner party I like to include options that are lower in carbs, especially when it comes to appetizers because carbo-loading before a full meal seems a bit excessive.  The second recipe I won’t be sharing with you, but you can get it by ordering Melissa’s e-book The Gluten-Free Low Carber, which is a fantastic source of recipes, many of them not available in her blog.  Remember that  even if you do not own an iPad or Kindle, e-books can be assessed from your laptop.

ChorizoStuffedMushroomsCHORIZO, SPINACH & MANCHEGO STUFFED MUSHROOMS
(very slightly modified from I Breathe I am Hungry)

12 – 15 button mushrooms
6 ounces (about 3 links) chorizo
1 shallot, chopped
2 ounces cream cheese
1/2 cup grated Manchego cheese (or sharp Cheddar)
3 cups fresh baby spinach leaves
salt to taste (you will need very little)

Remove chorizo from its casing and saute in a medium frying pan for a few minutes. Add the chopped shallot and cook for about 3 minutes until translucent. Meanwhile, clean off the mushrooms and remove the stems. Place the caps on a large plate and microwave for 2 minutes to soften.

Add the cream cheese, shredded cheese, and baby spinach leaves to the chorizo mixture. Stir well and cook for a minute or two until the spinach wilts. Remove from the heat. Stuff the mushrooms with about a tablespoon each of the filling. Place on a cookie sheet and bake in a 375 F oven for about 10 minutes. Longer if you like your mushrooms really soft. Remove and cool for a few minutes before eating.

ENJOY!

to print the recipe, click here

composite

Comments: These are addictive. Now, Melissa herself warned about how hot they are once baked. Be careful and give them a little time to cool down before you bite into these babies. If you are serving them to company, I suggest offering small appetizer forks, so your guests can cut them in half with the fork.  It is hard to keep your composure if you bite into these and find out that the center feels like molten lava on your tongue. Please, don’t ask me how I know… (sigh)

And now the second appetizer: a Jalapeno Popper dip, creamy, spicy, truly delicious!

JalapenoDip

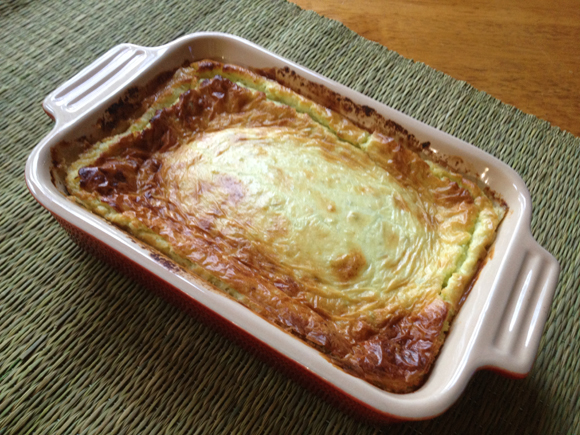
Of course, you could send the low-carb for a walk and dive into this dip with crackers, toasted baguette rounds, and tortilla chips.  But if that’s not acceptable think about slicing jicama very thinly and using the slices as a chip.  Whatever rocks your boat.

For the full recipe get Melissa’s e-book, The Gluten-Free Low Carber. I highly recommend it!   Her recipes are very creative, and even if you don’t worry about carbs and gluten, you will find plenty of stuff to drool over. Some of my favorites: Spaghetti Squash Carbonara (a happy accident in her kitchen). three versions of Flax Crackers, Buffalo Balls (don’t worry, it calls for ground chicken… ), Ham and Spinach Calzones (yes, gluten-free, very interesting dough using cream cheese), Faux-lafel with Tahini Sauce (creative twist on a classic) and of course I absolutely must make her Brazilian Chicken Pies. She also offers recipes for gluten-free pie and pizza crust, as well as low-carb ketchup, barbecue sauces, and salad dressings.

ONE YEAR AGO: Baked Ricotta, Take Two

TWO YEARS AGO: Pumpkin Uncanned

THREE YEARS AGO: Pork Ragu

FOUR YEARS AGO: Friendly Kuri Squash

FIVE YEARS AGO: Celery and Apple Salad


ZUCCHINI “HUMMUS”

Once more I shall commit the sin of stretching the name of my favorite dip, traditionally made with garbanzo beans, tahini, and very few other additions.  I think zucchini is one of the most versatile veggies, and this dip proves the point.  Plus, it is delicious! I originally saw it at Angie’s blog Divalicious Recipes in the City, and tweaked her recipe ever so slightly.  Angie has a ton of creative recipes in her site, I actually linked one of her cauliflower concoctions in a recent post, and intend to make it soon. As far as this dip goes, you should definitely play with the amount of tahini, lemon juice, and feel free to even add some garbanzo beans in case you want to get one step closer to the title of the dish.   😉

unnamed
ZUCCHINI HUMMUS
(slightly adapted from Divalicious)

2 medium zucchini
1/4 cup tahini
1 tablespoon olive oil
1 clove of garlic (optional)
1/4 cup lemon juice
zest of half lemon
1/2 teaspoon salt
1/2 teaspoon ground cumin

Combine all the ingredients in a food processor and process until smooth.

Taste and adjust the seasonings. I like to sprinkle a little smoked paprika on top of the dip before serving, but that is totally optional, of course!  Ak-Mak crackers are the perfect carrier for this dip.

ENJOY!

to print the recipe, click here

We had a pizza party the other day. My favorite type of get-together, in which I make plenty of balls of dough, and we take turns adding all sorts of toppings, some will be vegetarian-friendly, some loaded with meat, according to the mood of the moment. The house is kept cool because we grill the pizzas outside.   In this type of event, appetizers must be light, and for obvious reasons, cheese is out. Who wants to load up on cheese before facing a pizza dinner?   I prefer to serve hummus, either the traditional version or some variation, like my edamame hummus of the past.  This version with zucchini turned out super light and flavorful, a perfect option for our evening.

If you are a zucchini-lover, don’t skip this one. Winner!

ONE YEAR AGO: In My Kitchen – October 2013

TWO YEARS AGO: Bourbon and Molasses Glazed Pork Tenderloin

THREE YEARS AGO: Crimson and Cream Turkey Chili

FOUR YEARS AGO: Taking a break from the nano-kitchen

FIVE YEARS AGO: Chocolate Chip Cookies


PEA PANCAKES WITH HERBED YOGURT

This recipe was on a recent issue of Food and Wine magazine, and I could not wait to try it, because at our recent rehearsal dinner in Sedona we ordered a batch of pea pancakes as an appetizer course, and they were a big hit.  René Restaurant’s version was gluten-free, this one takes a small amount of all-purpose flour. A very elegant and tasty way to celebrate spring…

PeaPancakes1

PEA PANCAKES WITH HERBED YOGURT
(slightly adapted from Food and Wine magazine)

3/4 cup plain low-fat yogurt
2 tablespoons finely chopped parsley, plus sprigs for garnish
2 tablespoons of finely chopped tarragon, plus sprigs for garnish
1/4 tsp dried mint
Kosher salt and freshly ground black pepper
1 + 1/2 cups frozen peas (8 ounces), thawed, plus more for garnish
1 large egg + 1 large egg yolk
1/4 cup heavy cream
1/4 cup low-fat yogurt
1/4 cup all-purpose flour
1 teaspoon finely grated lemon zest
1/2 teaspoon baking powder
1/4 teaspoon ground cardamom
pinch of cayenne pepper, or more, to taste
olive oil spray, for coating griddle

In a medium bowl, mix the 3/4 cup of yogurt with the chopped parsley, tarragon and mint and season with salt and black pepper. Cover with plastic wrap and refrigerate the herbed yogurt until chilled, at least 15 minutes.

Meanwhile, in a medium saucepan of salted boiling water, blanch the peas until crisp-tender, about 1 minute. Drain well and let cool.

In a food processor, mix cooked peas with egg, egg  yolk, cream and 1/4 cup yogurt, and process until smooth. Add the flour, lemon zest, baking powder, cardamon, and cayenne pepper. Process a minute or so more, stopping to clean the sides of the bowl midway through.

Heat a large cast-iron skillet or griddle. Spray the surface with olive oil, and spoon 1-tablespoon mounds of batter into the skillet and cook over moderate heat until lightly browned on the bottom, about 2 minutes. Flip the pancakes and cook for 1 to 2 minutes longer, until lightly browned and cooked through. Transfer the pancakes to a platter and keep warm.  Repeat with the remaining batter. Serve the warm pancakes topped with the herbed yogurt and garnished with peas and herb sprigs.

ENJOY!

to print the recipe, click here

Griddle-side
Comments:  This recipe was originally designed to make 18 tiny rounds, but  I made 6 medium-sized pancakes.  They were absolutely delicious, great texture, moist, tender, and with that perfectly bright taste of green peas.  The lemon zest, as usual, adds a lot of spark to the flavor.  I loved the herb yogurt, Phil preferred to enjoy his pancakes without adornment, or with a very light smear of butter.  For my taste, the tarragon in the yogurt made this dressing a perfect match to the peas.  Of course, if you are not too fond of tarragon, use another herb, I think fresh dill could be delicious too. I also enjoyed the contrast of the warm pancake with the cold dressing.

If you have a special dinner party coming up, think about these for your appetizer course. They would be amazing served just like small blinis, with some smoked salmon on top. They are very tasty at room temperature too, so play with different toppings and awe your guests!  Probably other types of flour could be used, like almond or coconut, turning these babies into gluten-free entities.

peas

 ONE YEAR AGO: Mushroom Stroganoff

TWO YEARS AGO: Tomato Sourdough

THREE YEARS AGO: Gamberetti con rucola e pomodori

FOUR YEARS AGO: Flirting with Orzo

SMOKED SALMON APPETIZER

If you want to serve an elegant appetizer for your next dinner party, but would rather pick something simple to prepare, this recipe is just what you are looking for. All you need is a couple of endives, some smoked salmon (get the best quality you can afford),  and a little Boursin cheese thinned with creme fraiche.

IMG_4132

ENDIVE WITH SMOKED SALMON AND CREAM CHEESE
(inspired by Gluten Free Blondie)

1 or 2 endives (see comments)
Boursin cheese, room temperature
creme fraiche to taste (you can also use sour cream or yogurt)
smoked salmon, very thinly sliced
ground black pepper
fresh dill leaves, minced
.
Cut about 1/2 inch off the bottom of an endive spear. Start pulling off individual leaves. As you uncover leaves that are still attached at the base, cut another 1/2 inch off the bottom. Continue separating the endive leaves until you get to leaves that are too small.  One endive will give you about 12 leaves large enough to serve in this type of appetizer.

In a small bowl, mix the Boursin cheese with enough creme fraiche to give it a nice spreading consistency. Arrange the endive on a platter. Spread each leaf with about 1 teaspoon of the Boursin mixture. Top with a sliver of smoked salmon. Sprinkle all of the salmon and cheese topped endive with freshly ground, coarse black pepper, and a little dill.

Refrigerate until serving.
.
ENJOY!

to print the recipe, click here

Comments:  We loved this appetizer, it is luscious enough with the creamy cheese, but the use of endive instead of a cracker gives it a much lighter feel. Next time I will go one step further and add a couple of capers to each of the servings.  Two endives were butchered to get  enough leaves for the platter you see in the photo.   You might do a lot better than me, but just in case, save yourself some trouble and bring an extra endive home.  I made it 2 hours before serving and the leaves retained their texture reasonably well.  I would not make it more than 3 hours before serving.

I hope that next time you have a dinner party on the horizon, you’ll consider this recipe.
So simple to put together, but it will impress your guests for sure.


ONE YEAR AGO: Clementine Cake

TWO YEARS AGO: Springtime Spinach Risotto

THREE YEARS AGO: The end of green bean cruelty

FOUR YEARS AGO: Torta di Limone e Mandorle


VALENTINE’S DINNER FOR TWO: OPENING ACT

I am absolutely thrilled about this post!  I usually don’t publish blogs linked to special celebrations such as Thanksgiving, Christmas, or 4th of July.  However, this Valentine’s Day will receive special attention from the Bewitching Kitchen. I was invited by Jamie (who hosts the great blog “Cooking in Red Socks“)  to write a collaborative series of posts to celebrate it.  So here is the deal: we will both be blogging three days in a row to cover the appetizer course, dinner, and dessert. My posts will center on a romantic meal for two.  Jamie will blog on the same courses, but her posts will be about Valentine’s Dinner for Friends. Her posts are made super special as one of her best friends, Allie, celebrates her Birthday on V-day.   How cool is that?  😉 Make sure to stop by her blog and marvel at her choice for the appetizer course: Sun-Dried Tomato Palmiers… WOW!

To start the day on a great note, I offer a perfect Valentine’s Day breakfast bread: Chocolate Currant Sourdough.  A slice, slightly toasted, and a cup of hot cappuccino: heavenly!

Chocolate Currant Sourdough

ChocolateSourdoughCHOCOLATE CURRANT SOURDOUGH BREAD
(from Farine’s blog, original recipe from How to Make Bread)

Recipe overview:  This bread takes a regular sourdough starter, at 100% hydration.  The starter is incorporated into a final dough containing white flour, cocoa powder, chocolate chips, and currants. After a series of foldings, the dough is shaped, either as two small loaves (as shown in Farine’s blog), or as a large round boule (as I did).  My shaped loaf fermented for 4 hours in our bread proofing box, temperature set to 78 F.   I baked it inside a covered clay pot for 30 minutes at 435 F, then removed the lid, and baked for 15 more minutes.

For the detailed recipe, visit Farine’s site or get  your copy of Emmanuel Hadjiandreou’s book.  Both links are included underneath the recipe’s title. 

Comments: Even though this bread contains a good amount of chocolate and currants, it is not overly sweet. The cocoa powder and the sourdough starter  act together to counteract excessive sweetness.  We loved it, in fact I did not expect to like it as much as I did.  If you have a starter going on in your kitchen, add this bread to your “to bake soon” list.  And don’t keep it there for too long…

♥♥♥♥♥♥♥♥

Now, let’s move on to the appetizer course of our romantic meal for two… I wanted something light, and red. Hummus is a favorite in our home, so I went with a twist on this classic, turning it into a shockingly red dip. Food coloring? No way!  This is a Roasted Beet Hummus, and it was absolutely wonderful…

Roasted Beet Hummus

ROASTED BEET HUMMUS
(from the Bewitching Kitchen)

1 medium beet
olive oil
salt and pepper to taste
1 can (15 ounces) of chickpeas, drained, rinsed, peeled
1 lemon, zest and juice
1/4 tsp ground cumin
1/4 cup tahini
2 Tbs olive oil
salt and pepper to taste
cold water to desired consistency
sesame seeds and lemon zest for decoration

Peel the beet, cut it in quarters, coat with a little olive oil, season with salt and pepper.  Place in a roasting dish covered with foil, and roast at 400 F for 30 minutes or until fully cooked through.

Place the roasted pieces in the bowl of a food processor, and process it for a few seconds.  Add all other ingredients, up to olive oil.  Process until completely smooth.  Season with salt and pepper, and adjust consistency with water if necessary. Taste and adjust seasoning if necessary.   Depending on the acidity of your lemon and your personal taste, a little more lemon juice right before serving might be a good idea.  Sprinkle sesame seeds and lemon zest on top, and…

ENJOY!

to print the recipe, click here

RoastedBeets

Comments:  Phil is not too fond of beets, so I took a risk by choosing it for a Valentine’s Day menu.  But the flavor of this spread is very complex, and the beets stay mildly sitting in the background, their presence big in color but mellow in flavor.  Perfect for those who don’t jump up and down with joy when such bright red beings are found in the middle of the groceries. Serve this spread with crackers, or for a lighter appetizer course, celery or carrot sticks.

Make sure to visit Jamie’s site for her appetizer course on a Valentine’s Day Party for Friends! Stay tuned for the dinner course tomorrow…

♥♥♥♥♥♥♥♥

ONE YEAR AGO: Sesame and Flax Seed Sourdough

TWO YEARS AGO: Spanakopita Meatballs

THREE YEARS AGO: Saturday Morning Scones

FOUR YEARS AGO: Pain de Mie au Levain