A BEWITCHING MOVE AHEAD

.
“There’s no place like home”
(Dorothy Gale,  The Wizard of Oz, 1934)

My life has been an amazing journey.  I’ve lived in different countries, worked in different labs, and changed my line of research quite a bit over the years.  The last drastic move was from Paris, France to Norman, Oklahoma, in what was classic “culture shock.”   However,  the past 18 years in this small town were the happiest of my life.   It’s always great to go back to Paris, or visit New York,  to spend time in California, or chill out with my folks in Sao Paulo, but life in a college town has unique appeal.  And because we’ve had such a great time living and working here, we expected to call Norman our home forever.

But it was not meant to be.  A new, exciting adventure lies ahead: Phil accepted the position of the Head of the Department of Biochemistry at Kansas State University, so we’ll move our home (and our lab) to another college town!   About the same size of Norman when we first arrived here almost 20 years ago, Manhattan seems like a great place.  We are ready to face this  challenge together.   If it all goes according to plan, we will move around the last week of June, and then move the lab a couple of months after that.

“Home is wherever I’m with you.”
(Edward Sharpe and The Magnetic Zeroes,  2009)

THE DEVIL MADE ME DO IT

Things were going well, perhaps too well.   My decision of not buying a single cookbook during the year of 2012 had me strong and confident until April 19th. The date is a personal record, as in the past 5 years I caved before sunset on the last day of February.   But, reading this passionate review by Farine set the stage for my demise.   How could I possibly resist a book called “How to Make Bread?”    I succumbed. I got it.  And, you know what?  I LOVE IT!

TOMATO SOURDOUGH
(from “How to Make Bread“, published with permission from Emmanuel Hadjiandreou)

400 g (3 + 1/2 cups) bread flour
10 g (2 tsp) salt
2 + 1/2 Tbsp chopped rosemary leaves
6 g (1 + 1/4 tsp) nigella seeds
40 g (2 Tbsp) tomato paste
200 g (3/4 cup) warm water
300 g (1 + 1/2 cups) sourdough starter (100% hydration)
2 tsp olive oil

Add into one bowl the flour, salt, seeds, and rosemary. This is your dry mixture.

In another, larger bowl, mix the tomato paste, water, sourdough starter, and olive oil. This is  your wet mixture.

Add the dry mixture to the wet mixture and mix until it all comes together. Cover with a plastic wrap and let it stand for 10 minutes.  After 10 minutes, knead the dough in the bowl, by pulling one portion of the dough from the side and pressing it down in the middle.  Repeat it turning the bowl slightly at each kneading, doing this kneading motion about 8 times and covering the full circumference of the ball of dough. The whole process should take about 20 seconds.   Cover the dough again and leave it resting for 10 minutes.

Repeat this kneading cycle three more times, 10 minutes apart.  Cover the bowl and let it rest for one hour.

Turn the dough onto a floured surface, and shape it either as a round ball, or an oblong format, place it in a suitable container for the final rise.  Let the dough rise until doubled in size, which should take from 3 to 6 hours, depending on how active your starter was.

Heat the oven to 475 F, and have your method to generate steam ready.   Slide the bread on a parchment paper or a wooden peel, slash it, and place it in the oven.  I like to bake it over tiles, and place an inverted roasting pan moist with hot water over it for about 30 minutes, then remove it.   Once the bread is in the oven, reduce the temperature to 425 F.  Bake for a total of 40 minutes, or until the internal temperature is over 200F.

Let the bread cool completely on a rack before slicing.

ENJOY!

to print the recipe, click here

About the book:  if you are into bread baking and think you’ve got enough books on the subject, think again.  You need this one.  Your library won’t be complete without it, no matter what is your skill level.  Emmanuel is a natural teacher, and the step by step photos arranged in a single page will give you a very clear idea of how to handle the dough at the different stages of fermentation and shaping.

One of the things I love the most about the book is how it makes me want to design my own recipes, using his basic method.  He simplifies the instructions by describing each recipe as “this is your dry mixture” &  “this is your wet mixture” &  “mix one with the other”.  Basically, that is what bread baking is all about, and you can customize and be creative  if you keep this basic formula in mind follow his minimalist approach to kneading.  Plus, he will expand your horizon on ingredients to add to a bread.  A few examples are his beetroot sourdough, fig, walnut and anise sourdough,  chocolate and currant sourdough…   Emmanuel’s book made me want to experiment, and that is the mark of a great cookbook.  It shows you a path without restricting you to it.

You can tell that a lot of dedication and attention to detail went into the making of this book.  From photos to text, a real masterpiece!

Emmanuel, thank you for giving me permission to feature your recipe in my blog…

I am submitting this post to Susan’s Yeastspotting…

ONE YEAR AGO: A Focaccia Experiment

TWO YEARS AGO: Pierre Nury’s Bougnat

Add to FacebookAdd to DiggAdd to Del.icio.usAdd to StumbleuponAdd to RedditAdd to BlinklistAdd to TwitterAdd to TechnoratiAdd to Yahoo BuzzAdd to Newsvine

A GUEST POST!

I am so excited this Sunday morning!  Jenni, from “The Gingered Whisk” had me over at her great virtual spot as a guest blogger!

And, believe it or not, I decided to bake a cake for the special occasion… and you’ll also find a little extra to go with it.  Please jump there to see the post, and browse through her  blog, she loves to bake bread, particularly sourdough, so you see we are pretty much virtual sisters!

CELEBRATE WEDNESDAY: HEIRLOOM TOMATOES STEAL THE SHOW

Ideally, my Wednesday special meal will catch Phil by complete surprise, but this time he had been snooping around the depths of our fridge. Just as I was getting ready to cook dinner, he asked me with a big smile “we’re having scallops tonight for dinner, aren’t we?”.  Bummer. Just could not get him this time.

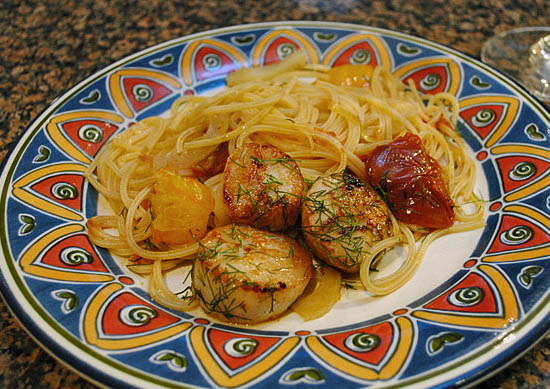
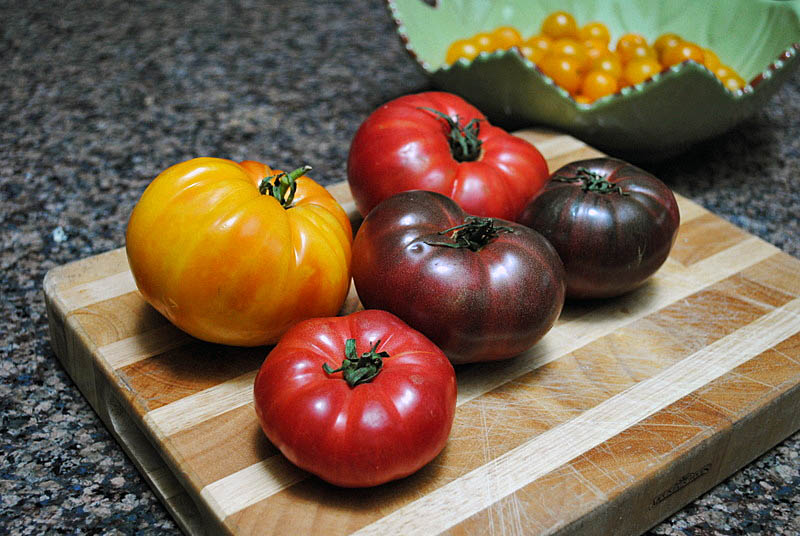
I had the inspiration for this meal when I brought home a couple of heirloom tomatoes, and was blown away by how juicy and delicious they were.  I went right back to the store and bought some more.    They turned into a fantastic sauce, paired with leeks and a thinly sliced fennel bulb.  Scallops crowned the meal with their touch of class, always welcome. Another Wednesday evening made ultra-special!

PASTA WITH SCALLOPS IN HEIRLOOM TOMATOES AND FENNEL SAUCE
(from the Bewitching Kitchen)

1 Tbsp olive oil (+ a little more for searing scallops)
1 leek, white part only, thinly sliced
1 fennel bulb, thinly sliced, frowns reserved
3 to 4 heirloom tomatoes, depending on their size
salt and pepper
1 Tbsp orange zest, divided
8 sea scallops
¼ tsp ground fennel
spaghetti, or pasta of your choice

Boil the water to cook the pasta.

Core the tomatoes and cut them in large chunks, but don’t seed them.  Reserve.

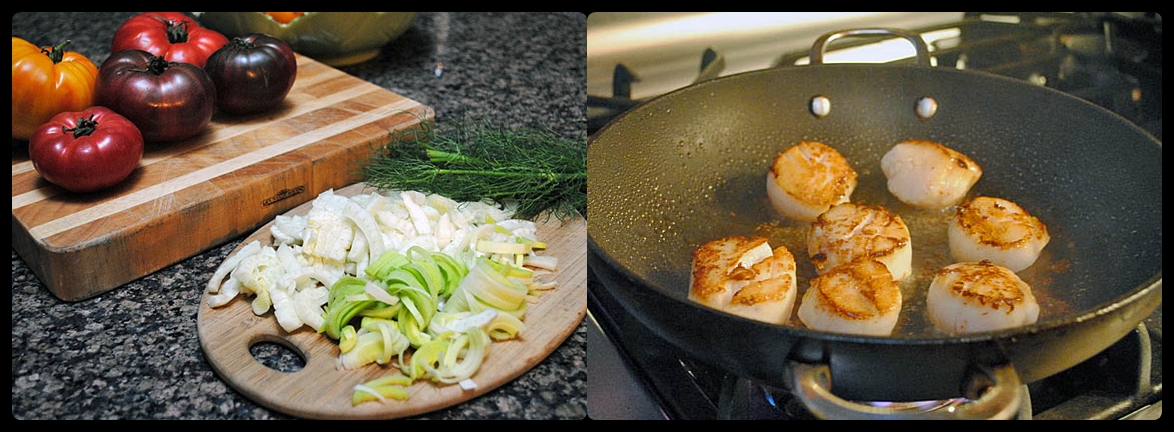
In a large skillet, heat the olive oil, then saute the leeks and the sliced fennel for about 5 minutes, seasoning with salt and pepper.  When they are soft and starting to get some golden color, add the tomatoes and half the orange zest. Cook, stirring, until the tomatoes start to melt and release a lot of juice.  Cover the pan, and keep at a simmer.

Cook the pasta, and when it’s 5 minutes from being ready, heat a non-stick skillet on high heat, add olive oil just to coat the surface lightly.  Pat the scallops dry, season lightly with salt, pepper and ground fennel, and sear them, 1 to 2 minutes per side.

Reserve some of the pasta water, drain the pasta and add to the tomato/fennel pan, increase the heat slightly, and let the pasta and the sauce cook for a minute or so together. If needed, add some of the pasta water to the sauce.  Add the remaining orange zest, the scallops on top, and sprinkle with minced fennel fronds right before serving.

ENJOY!

to print the recipe, click here

If you make this dish with “regular” tomatoes, it simply won’t be the same, so try to find these funky looking babies, they are superb, particularly the brown ones.  We could not get over the flavor of this dish, so few ingredients, but they work together beautifully, and the scallops (make sure you get a nice sear on the outside) are not overpowered by the sauce.

Normally I reserve the pasta water to adjust the consistency of a pan sauce, but in this case it was not necessary to add any.   The tomatoes did their job providing all the moisture to coat the pasta strands.

If you don’t like scallops,  shrimp could be a good option, or chicken breast filets.  If you want to keep it vegan,  maybe grilled tofu could work too.  But don’t mess with the heirloom tomatoes!

ONE YEAR AGO: Pain de Provence

TWO YEARS AGO: Golspie Loaf

Add to FacebookAdd to DiggAdd to Del.icio.usAdd to StumbleuponAdd to RedditAdd to BlinklistAdd to TwitterAdd to TechnoratiAdd to Yahoo BuzzAdd to Newsvine

THE SECRET RECIPE CLUB: TRIPLE CHOCOLATE BROWNIES

The last Monday of the month is the much awaited Reveal Day for Group D of The Secret Recipe Club!  For those who don’t know about it,  The Secret Recipe is an event in which food bloggers from the same group are paired (in secret), and have about 3 weeks to choose a recipe from their assigned blog, cook it, and compose a blog.  Everyone publishes their post on reveal day at the exact same time. How cool is that?  If you want to become a member (beware, there is a waiting list), visit the site and get in touch with Amanda, the founder of this fun group.

For my sixth participation at the SRC I was paired with “The More than Occasional Baker”,  a virtual spot hosted by a very accomplished baker from London.   She defines herself as a “baking addict”, and as I browsed through her blog, it was clear she was not kidding!  What is a poor cake-o-phobe blogger to do when faced with such a Herculean task?  Knowing my limitations, I searched for something that wouldn’t involve creaming butter with sugar, preparing an Italian meringue, or handling icing bags.  Suddenly, three beautiful words comforted my soul:  triple chocolate brownies.   Anything with triple chocolate makes me go weak in the  knees, and I am quite fond of brownies because for the most part they are fuss-free.   Plus, once I read her post about the recipe,  I wanted to stop everything and go buy  the three kinds of chocolate (and a little extra of the white, just because… 😉 )

TRIPLE CHOCOLATE BROWNIES
(from The More than Occasional Baker)

200g bittersweet chocolate (1 cup)
50g milk chocolate (1/4 cup)
225g butter (1 cup  or 2 sticks)
4 eggs
325g unrefined golden caster sugar (I used light brown sugar) (1 + 1/2 cups)
0.5 tbsp  vanilla essence
200g white chocolate (1 cup)
150g plain flour, sifted (1 + 1/2 cup)
pinch of salt

Heat the oven to 360 F (180 C).  Line a baking dish (11in x 7in x 2.5 in) with parchment paper.  Break the bittersweet and milk chocolate into pieces, and melt in the microwave with the butter.  Let the mixture cool slightly.
.
Chop the white chocolate not too finely. Reserve.
.
In a separate bowl, beat the eggs, sugar, and vanilla. Whisk this mixture in the cooled chocolate/butter, then fold the flour, the salt, and finally the chunks of white chocolate.
.
Pour the mixture in the prepared baking dish, place in the oven and bake for 35 to 40 minutes, until the top is dry and cracked, and the center still moist when tested with a toothpick.
.
Remove from the oven, cool over a rack, and when the brownie is at room temperature, remove from the pan and cut in squares.
.
ENJOY!

to print the recipe, click here

Comments:  If you are not too fond of white chocolate, MAKE THESE BROWNIES ANYWAY.  They are amazing!  We took them to the lab to celebrate one of our students passing his qualifying exam, and they disappeared in a few minutes!  The crumbs left on the serving plate were fought over with  considerable enthusiasm by two members of our group, normally quite well-mannered.

They are fudgy, dense, moist, sweet, decadent, with a nice crunchy surface that provides a perfect contrast with the creamy center.    The white chocolate, kept in chunks, is a superb touch, don’t skip it. I didn’t add nuts (macadamia would be the number 1 choice), because one of our students is allergic to them.

I couldn’t be happier with this month’s adventure!  Stop by “The More than Occasional Baker” to see all the goodies she makes on a regular basis.  Maybe I should become a more regular baker myself  😉

Check out all other posts from bloggers in my group, by clicking on the blue frog at the very end of this post…

ONE YEAR AGO: Springtime Salad

TWO YEARS AGO: Indonesian Delight

Add to FacebookAdd to DiggAdd to Del.icio.usAdd to StumbleuponAdd to RedditAdd to BlinklistAdd to TwitterAdd to TechnoratiAdd to Yahoo BuzzAdd to Newsvine