SECRET RECIPE CLUB: GREEN RICE

THREE YEARS AS A MEMBER OF THE SECRET RECIPE CLUB!

Last Monday of the month. You probably expect me to whine about the cold, but guess what?  As you read this post, I should  be far, far away in Brazil, enjoying balmy temperatures, wearing shorts, t-shirts, and recharging my batteries to face the frigid months ahead.  But the last Monday means fun, because it’s Reveal Day for The Secret Recipe Club! I was paired with the blog “A Day in the Life on the Farm“, hosted by Wendy. Her story is fascinating: she and her husband were police officers in a large city (which of course meant a ton of trouble in their hands…), but when they retired they moved to a tiny little town of 4,000 people, and bought a house on 12 acres of land.  They raise meat chickens, turkeys, and pigs, and Wendy – to fight her empty nest syndrome  –  decided to host foreign students in their place.  Now she works part-time for the World Heritage, placing students into homes for a year of schooling here in the US.  Being in academia and therefore often exposed to the troubles that foreign students face (plus, I was one myself), I know how important this type of work can be.  Please, stop by her about page and read more about their life on the farm, and how on top of everything she also takes care of her Mom, who suffers from Alzheimer’s. She actually devotes a section in her blog to talk about it, under Life with Mom. Beautiful, touching, and at times funny.

We had so much going on this past month, that I needed to jump on my assignment right away.  The recipe I set my eyes on was a drool-inducing dessert, a Caramelized Almond Apple Upside Down Cake. But, I decided against it.  Why? With Thanksgiving saying hello, then the holidays, a lot of heavy food will be popping everywhere.  I did not want to start early with the excesses, so this cake shall wait. Sorry, folks, but better safe than sorry.  Then, I almost went with her cute Pretzel Dogs. Finally it was a tough decision between Zucchini Enchiladas, or Green Rice.  As you can see, I went green.  Green is good for you, and this was one of the most flavorful rice dishes I’ve made.
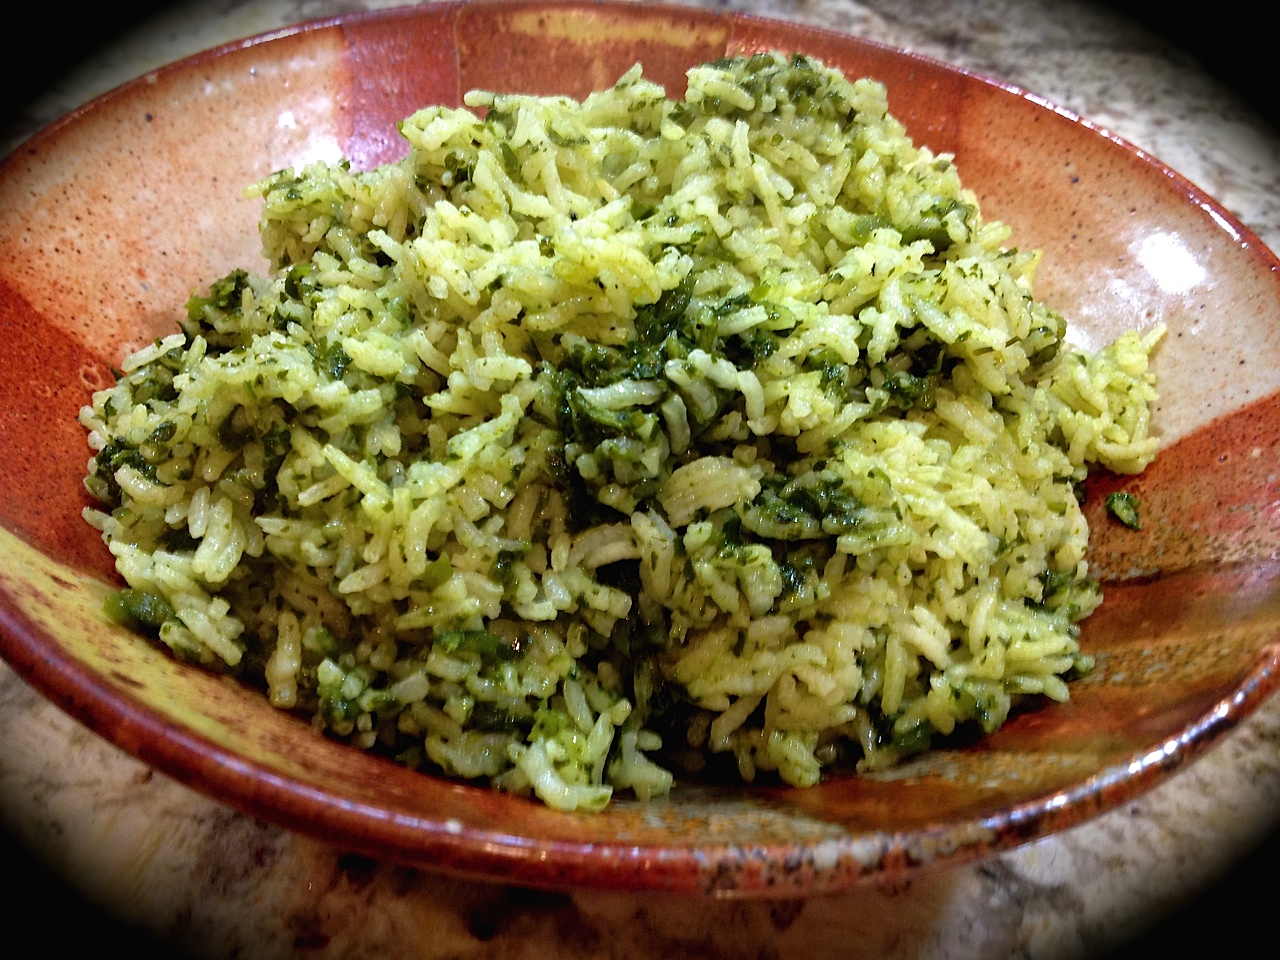
Green Rice

GREEN RICE
(very slightly modified from A Day in the Life on the Farm)

2 poblano chile peppers
1 green pepper (I used half a Serrano)
1 cup long grain rice
1 large bunch of cilantro
1 small bunch of flat leaf parsley
2 cups chicken stock
1/2  teaspoon salt
2 Tablespoons olive oil (I used grapeseed)
1 small shallot, minced
Dry roast the peppers in a griddle pan (or on a grill), turning frequently so the skins blacken but the flesh doesn’t burn.  Place in a strong plastic bag, seal and set aside for 20 minutes
.
Put the rice in a heat proof bowl, pour in boiling water to cover and let stand 20 minutes.
.
Drain the rice, rinse well under cold water and drain again.  Remove the peppers from the bag and peel off the skins.  Remove any stems, then slit the peppers and scrape out seeds with a sharp knife.
.
Put the peppers in a food processor, strip the leaves from the cilantro and parsley and add to peppers.  Pour in half the chicken stock and process until smooth.  Add remaining stock and puree again.
.
Heat oil in a saucepan, add the rice and minced shallot and fry for 5 minutes over med heat until the rice is golden and the shallot is translucent.  Add the salt, stir in the green puree, lower heat, cover and cook for 25-30 minutes or until all the liquid is absorbed  and the rice is just tender. Taste and adjust seasoning, if needed.
.
ENJOY!
to print the recipe, click here
 
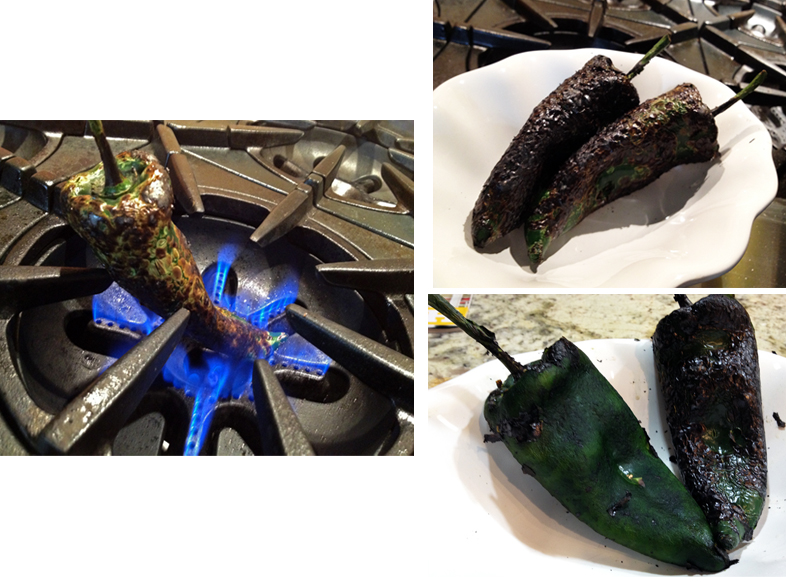
Comments:  Lately I’ve been quite smitten with poblano peppers.  Very little heat, but so much flavor! Our stove did a great job charring them, I don’t think I was ever able to get such a beautiful blackened skin with almost no effort.   Using a paper towel to remove the charred skin was also a great move, a tip I got from watching Marcela Valladolid in her show Mexican Made Easy.  I never liked the idea of rinsing the peppers because there’s quite a bit of flavor loss if you do that.  The paper towels removed just the skin and I could leave little bits here and there for an extra smoky flavor.   Aren’t they cute?

compositePeppers

Adding boiling water to the rice and waiting for 20 minutes was also something I had never done, and I liked the texture of the finished product.  If you are a cilantro-hater, this rice is not for you, its flavor is obviously very prominent.  You could substitute spinach.
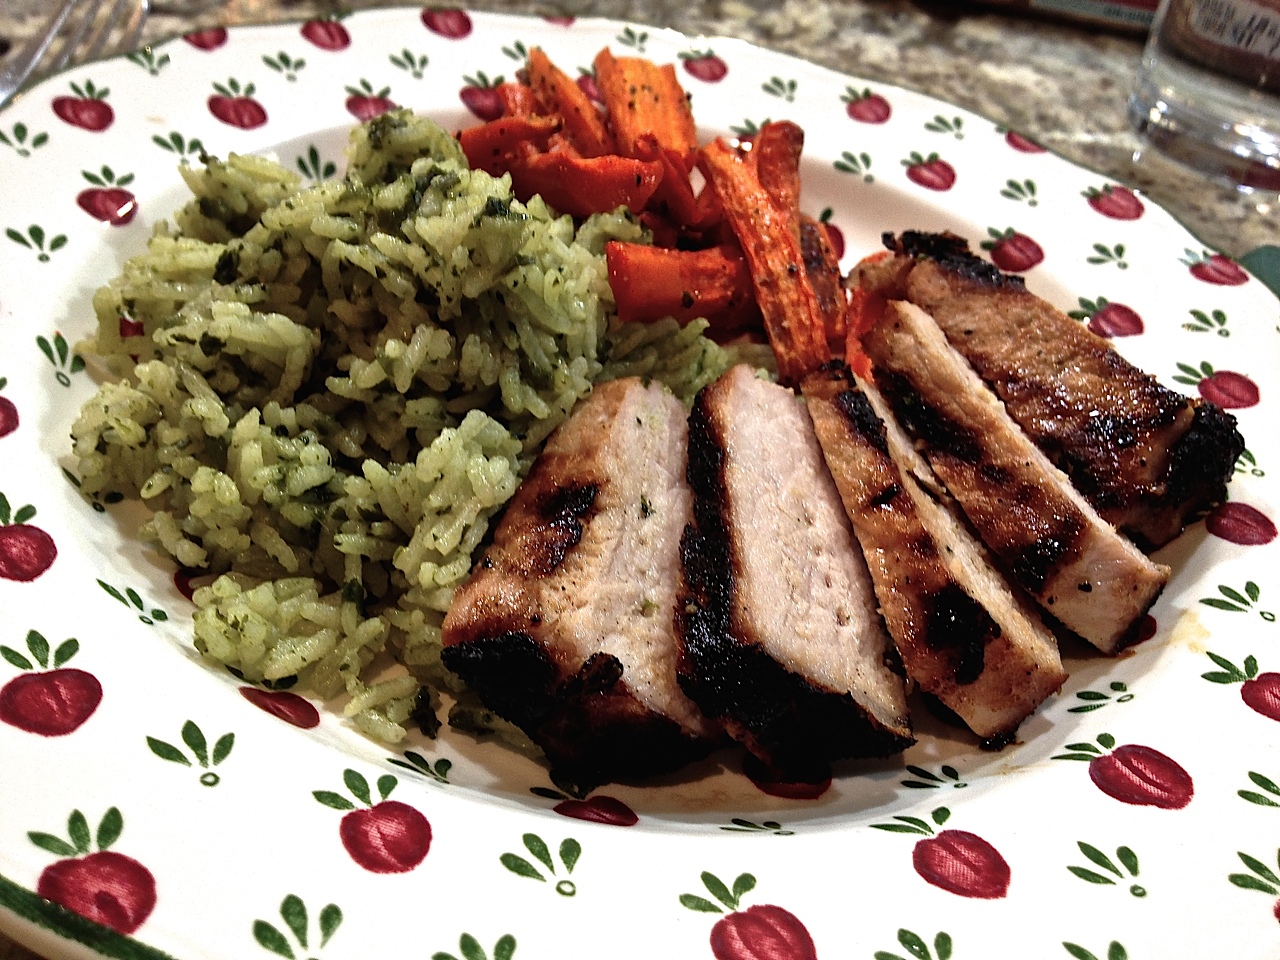
GreenRiceServed
This was a delicious dinner!  Green rice, simple roasted carrots, and for our protein a few slices of center-cut pork chops, cooked sous-vide, and finished off on the grill.   Life is good!

Wendy, I hope you had a great time this month with your assignment!  It was wonderful to browse through your site, I read all your posts about your Mom, and am still in awe of your ability to do so much Everyday in your Life on the Farm… 

For my readers: if you want to see what my fellow Secret Friends cooked up this month, give a little click on the blue frog at the end of this post.   Normally Groups C and D would take a break in the month of December, but apparently me and Dorothy from Shockingly Delicious whined so much about withdrawal syndrome, that The Secret Recipe Club will have a little surprise reserved for both groups.  It will be awesome, so stay tuned!

ONE YEAR AGO: Potato-Crusted Italian Mini-Quiches

TWO YEARS AGO: Beetroot Sourdough for the Holidays

THREE YEARS AGO: Cod Filet with Mustard Tarragon Crust

FOUR YEARS AGO: Soba Noodles: Light and Healthy

FIVE YEARS AGO: Potato-Rosemary Bread

GOING SKINNY AND LOVING IT!

No, my weight has not dropped that much.  What is going skinny is my Eggplant Parmigiana, since I radically changed my recipe after stumbling on this post by Mike at The Iron You. Mike’s blog line is “Eat Well – Exercise More – Become a Healthier You”.  I can definitely sign below that. He knows how to match nutrition with a challenging exercise routine, and his posts are always super-fun to read.  Anyway, he started that particular article with a mild rant about the way most people approach this classic dish.  Reading it, I was forced to admit to being guilty of some of the crimes. Granted, I’ve never went to the extent of frying my eggplant slices, but I definitely used a heavy hand with the cheese and sauce. My version of eggplant parm made me leave the table feeling heavy and sluggish, a feeling I don’t care for at all. Mike proves that there’s no reason for it. Just a few tweaks and you will have a fantastic dish, still able to carry the label of comfort food, but considerably lighter than 99% of the recipes in restaurants, cookbooks, and the blogosphere.  I hope you will give this version a try, it will knock your socks off.  And, apparently in English that is a very good thing.

SkinnyEggplantParmigiana

SKINNY EGGPLANT PARMIGIANA
(very slightly modified from The Iron You)

3 medium eggplants
2 garlic cloves, peeled (I omitted due to our vampire genes)
1 29 oz / 820 gr can diced tomato
1 cup / 1.8 oz / 50 gr Parmigiano-Reggiano cheese, grated
2 eggs, beaten
2 teaspoons almond milk (my adaptation)
1 medium shallot, chopped
2 tablespoons olive oil, divided
handful of fresh basil leaves, roughly chopped
2 teaspoons fine grain sea salt, divided
black ground pepper to taste

Preheat oven to 400°F (200°C) and place a rack in the middle. Line two baking sheets with parchment paper and lightly grease with some olive oil. Set aside.

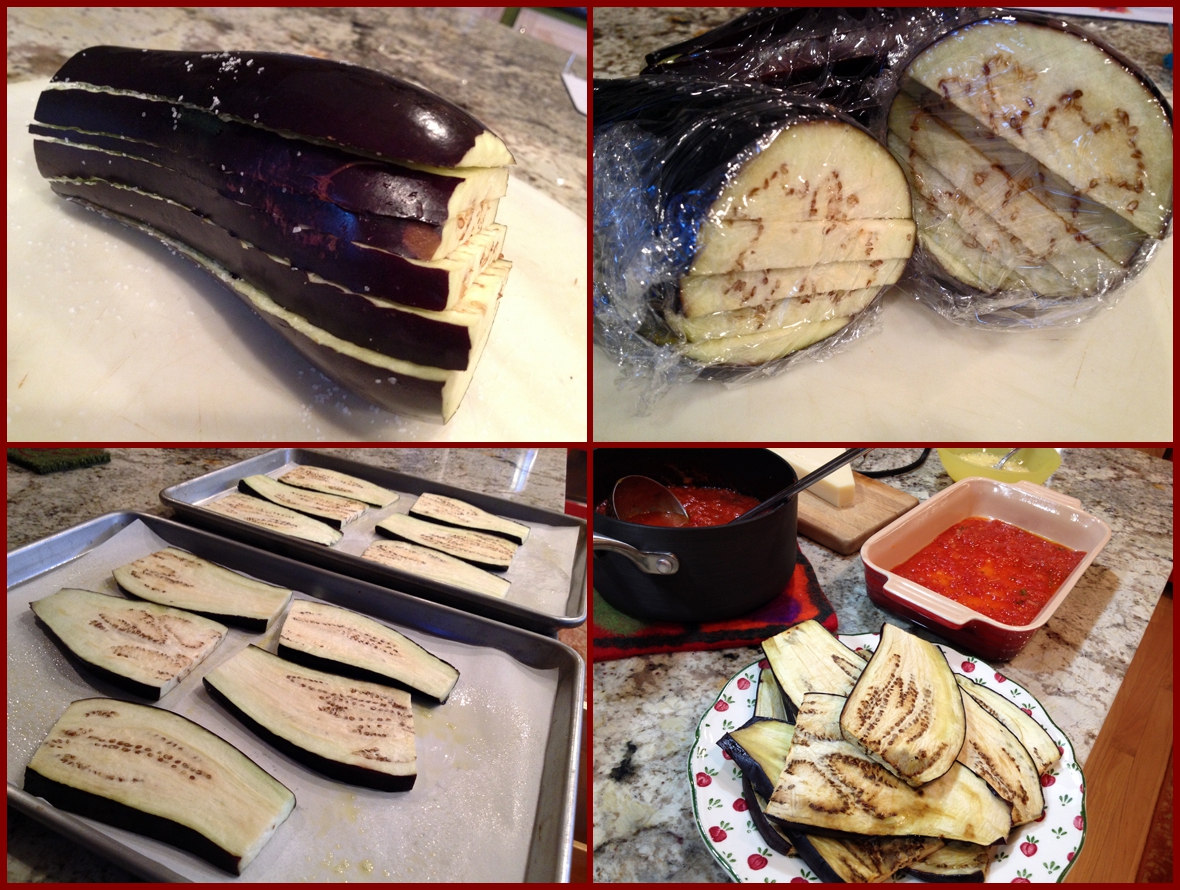
Cut each eggplant lengthwise in 1/4 inch slices, liberally sprinkle with salt on one side, and add the slices back together, tightly assembling the eggplant and wrapping with plastic wrap.  Leave them over the counter for about 20 minutes. You will notice a darkish liquid forming inside the package. Open the package over the sink, and briefly rinse the slices, drying them with paper towels.

Arrange the eggplant slices on a single layer on the baking sheets. Bake in the oven for 12 to 15 minutes, until the slices begin to turn deep brown on top.  Remove the slices to a platter and allow them to cool slightly before proceeding.

In the meantime make the tomato sauce. Heat the olive oil in a large saucepan over medium heat, add shallots and garlic and saute’ for 5 minutes, until onion begins to golden. Add diced tomatoes, 1 teaspoon of salt, basil, reduce the heat to low and let simmer for 15 minutes. Turn the heat off and set aside.

Lightly grease with 1 tablespoon of olive oil the bottom and sides of an 8 by 12-inch baking pan. (a brownie pan works perfectly). Beat two eggs with the almond milk and reserve. Cover the bottom of the baking dish with some tomato sauce and arrange eggplant slices on top to form a uniform layer. Cover the eggplant with some tomato sauce, some Parmigiano cheese and top with 2 tablespoons of beaten eggs . Repeat to make 3 layers, making sure to end with a uniform layer of tomato sauce and top with the remaining cheese.
.
Bake in the oven for about 40 minutes until hot and beginning to brown. Let rest at for 10 minutes before serving.

ENJOY!

to print the recipe, click here

And now it’s time for me to brag a little… Many years ago, I sent a cooking tip to Fine Cooking magazine, and my tip won the best of the issue!  I got several cool gifts, including a salad spinner I still own, and love.  It was a nice surprise to win.  The cooking tip I submitted was what I just shared here with you, the way I draw the bitter juices out of eggplant. Most instructions involve salting the slices and weighing them down, or submerging them in salted water.  I find my method very convenient, and quite efficient.  It is explained in detail in the recipe, in case you missed it. The secret is to tighten the package of plastic well around the eggplant.

SkinnyEggplanComposite

I cut the eggplant lengthwise, and when assembling the dish,  each layer goes in one orientation, so that they criss-cross. That makes slicing the casserole a lot easier later.  Also, since the beaten eggs are a little hard to spread over the layers, I added a touch of almond milk to thin it, a la egg wash.  You can omit it, or use milk or even water if you prefer, but don’t add too much, just enough to make it easier to spread.

It was so much fun to make this dish, that I feel like sharing a couple of shots of the process…

firstlayerHere is the first layer ready, just a little cheese and a little beaten egg on top of the eggplant…

LayersReadyAnd the dish, ready to go into the oven… make sure to bake it over a larger baking sheet to avoid messing up your oven.

It is very important to let the dish rest for at least 10  minutes, but longer will be better. Next day, leftovers were perfect warmed up for a few minutes in the microwave.  In fact it tasted even better than the first day, so if you have a dinner party to host, this could be a nice option to make in advance.  It is also gluten-free, in case you have friends with gluten issues.

Leftovers

We loved this preparation so much,  there is no way I’m going back to my former recipe!  I also think that if you cut the eggplant parmigiana in small squares they could work well as appetizers for a dinner party.  Substantial for an appetizer course, but so very delicious!  You would definitely have to cut it the following day, because  when it comes out of the oven it will be too tricky to do it.

Mike, thanks again for the wonderful take on one of our favorite eggplant preparations!


ONE YEAR AGO: Supernova Meets Wok

TWO YEARS AGO: 500 Posts and The Best Thing I ever made

THREE YEARS AGO: Back in Los Angeles

FOUR YEARS AGO: White House Macaroni and Cheese

FIVE YEARS AGO: Korean-Style Pork with Asian Slaw


LEAVING ON TWO JET PLANES!

jetplane
Once again we embark on a big adventure…  Today we fly to Chicago – against my will, I must add – to attend a scientific meeting.  The idea of being in that city at the same time as the entity called Polar Vortex terrifies me, to put it  mildly. But the meeting was scheduled months ago, when they thought Chicago would still be a safe place for humans at this time of the year.

Straight from Chicago – assuming I survive it – we fly to Brazil, where we’ll spend most of Thanksgiving week. We will have a chance to see our colleagues and give a talk at the University of São Paulo, but what is even better, we’ll get to visit my family, especially my Mom!

SAMSUNG DIGIMAX A503

 Parque Ibirapuera, very close to my niece’s home, where we will be staying this time…


As usual, the Bewitching Kitchen will go on, I have posts scheduled to go live during our trip.  However, my ability to answer comments and visit other food blogs will be limited until our return on November 28th.

Enjoy your Thanksgiving celebrations, and save some turkey for me!

(comments are shutdown for this post)

PAN-CHARRED VEGGIES FROM COOKING LIGHT

Cooking Light magazine, in their April 2014 issue published a nice article about pan-charring veggies for a boost in flavor. More than simply offering a recipe, they shared a general method to deal with veggies like asparagus and green beans. Veggies that can take the heat, so to speak. All you need to do is choose three basic components: the fat to coat the veggies after the initial charring, the acidic ingredient to brighten things up and the herbs added right before serving.  No matter which veggies you are dealing with, they will be ready in no time.  I know I sound like a broken record, but when I get home from work and it’s my turn to cook, the last thing I want is a side-dish that takes 45 minutes to prepare.  Give me something fast and flavorful, and I am game!

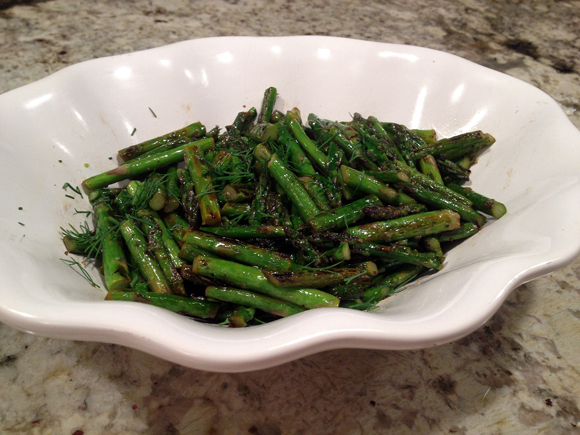
So here is my take number one on this method: charred asparagus flavored with lemon juice and fresh dill at the end… Before you accuse me of the capital culinary sin of non-seasonal cooking, let me say that this dish was made last May, not too long after I got the magazine. As usual, it takes me a while to go from table to blog. But, since last week I used this method to cook delicious green beans, I am taking the opportunity to talk about both dishes. Clearly, it’s all about the char…

AsparagusDill

PAN-CHARRED ASPARAGUS
(adapted from Cooking Light, April 2014)

Cooking spray
8 ounces asparagus, cut in pieces
1 + 1/2 teaspoons walnut oil
2 teaspoons lemon juice
2 teaspoons chopped fresh dill
1/4 teaspoon salt
.
Heat a medium, heavy skillet (not nonstick) over high heat for 2 minutes.

Coat pan with cooking spray. Immediately add asparagus pieces to pan, shaking them into a single layer; cook, without stirring, 2 minutes or until asparagus is very lightly charred. Cook asparagus 5 more minutes or until crisp-tender and evenly charred, tossing occasionally.

Remove pan from heat. Let asparagus rest 1 minute. Add walnut oil; toss to coat asparagus pieces. Add lemon juice; toss. Turn on heat if necessary to evaporate most of liquid. Sprinkle asparagus with dill and salt; toss. Serve right away.

ENJOY!

to print the recipe, click here

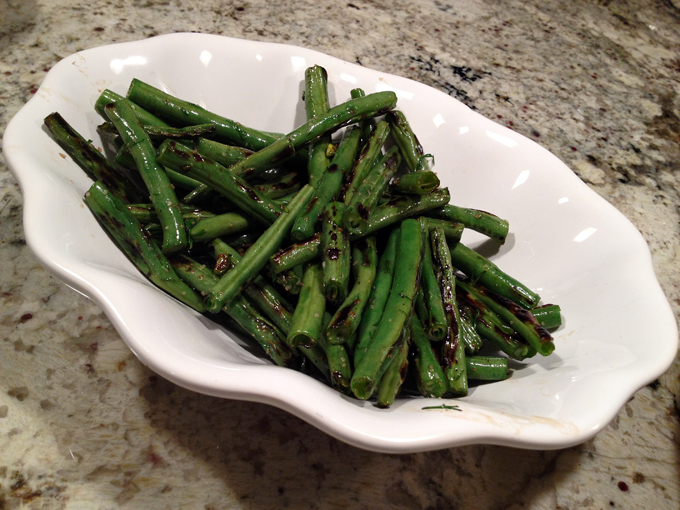
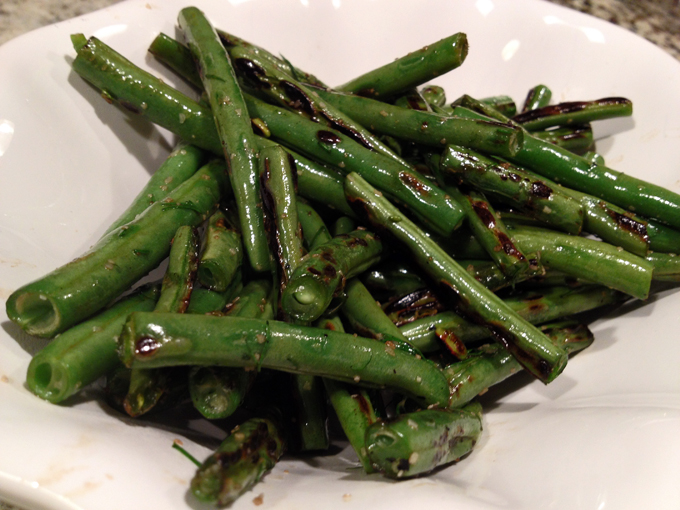
And here is my take number two: the exact same method, using olive oil to coat green beans, a touch of apple cider vinegar as the acidic component, and fresh tarragon added at the end. Tarragon straight from the garden of our friend Cindy, who recently visited us with her husband. Remember, I am the lucky woman with the super generous friends…

GreenBeansTarragon2
Now, as I mentioned, this is all about the char… Look at these dark spots, aren’t they making you crave some green beans?

GreenBeansTarragon

Back in 2010 I  wrote a blog post about “Blasted Broccoli“, stove-top version. We loved that recipe so much that I went through a long phase of cooking it weekly. I can see that this method could be adapted for broccoli too. Or sugar snap peas.  Avocado oil, coconut oil, use your imagination (and your pantry) and play with this method.  You won’t be disappointed…

ONE YEAR AGO: Pomegranate Chicken Thighs and Carrot Mash

TWO YEARS AGO: The Many Faces of Kale

THREE YEARS AGO:  Short and Sweet

FOUR YEARS AGO: Ciabatta, a Classic Italian Bread

FIVE YEARS AGO: Magical Lamb Stew


FETA-STUFFED TURKEY MEATLOAF

Let me set the record straight right now. This recipe is not going to win a beauty contest.  It is definitely not the best looking dish in the world, but sometimes beauty is in the eye of the fork-holder. Once again – in fact two posts in a row – I am joining spinach and feta to bring a humble ingredient (first cauliflower, now ground turkey) into the spotlight.  This meatloaf turned out moist, and quite flavorful with the salty bite of feta cheese in the middle.  I think this recipe could work very nicely made in muffin tins, with feta cheese in the center. Individual servings are always a lot of fun.  Note to self: try that next time.

TurkeySpinachMeatloaf

FETA-STUFFED TURKEY MEATLOAF
(adapted from All Day I Dream about Food)

1 large shallot, chopped
1 tbsp olive oil
1 tsp salt
1/2 tsp freshly ground pepper
1 package frozen spinach, thawed and drained
2 lbs ground turkey
1/4 cup coconut flour
1/2 cup chicken stock
1 large egg, lightly beaten
2 tbsp Worcestershire sauce
1 cup crumbled feta cheese
.
Line a baking sheet with parchment paper and heat your oven to 325 F.
.
Heat oil in a large skillet over medium heat. Stir in shallots, salt and pepper and saute until shallots are translucent but do not allow them to brown.  Add in spinach and stir until heated through. Allow it to cool before proceeding with the recipe.
.
In a large mixing bowl, combine sautéed shallots, ground turkey, coconut flour, chicken stock, egg and Worcestershire sauce. Mix until very well combined.  Place half of the turkey mixture on prepared baking sheet and shape into a flat rectangle, about 1 inch thick. Cover with feta cheese, pressing on feta to adhere to meatloaf. Place remaining turkey mixture over top of feta and shape the whole thing into a rough loaf.
.
Bake for 1 to 1 1/4 hours, or until
internal temperature reaches 160 F on an instant read thermometer.

Cut into slices and serve.

ENJOY!

to print the recipe, click here

thatsauce(image from Google database)

Did you know that there are some words in English that I am a bit afraid of?  Worcestershire is one of them.  I refer to it as “that sauce”, so that my dignity is preserved. In Brazil we call it “molho inglês” (English sauce), a clever move if you ask me.  Speaking of tricky words, I also avoid saying “beach” and “sheet” because apparently I tend to lead both words into the wrong direction.  But, I digress. That sauce is very important in this recipe, it adds the umami component so fashionable right now. Or maybe it was so fashionable a couple of years ago, and I’m slow to catch up.  Still, add it. If you can pronounce it correctly, even better!  😉

This topic of tricky words for foreigners made me think of the name of a city in the state where I was born, São Paulo.  Please try to say it before you listen to the correct pronunciation in the file below it. Ready?

The name of the city is… ITAQUAQUECETUBA

and now see how you did, by listening to yours truly…


.
In closing, a little language trivia for you: the name Itaquaquecetuba comes from tupi-guarani, meaning “a place of abundant bamboo sharp as knives”.  


ONE YEAR AGO: Artichoke-Saffron Souffle

TWO YEARS AGO: Cinnamon-Wreath
.
THREE YEARS AGO:
  Yeastspotting 11.11.11
.
FOUR YEARS AGO:
 Oven-baked Risotto
.
FIVE YEARS AGO:
  Potato-Roquefort Cakes with Ripe Pears