WALNUT CRANBERRY SOURDOUGH BREAD

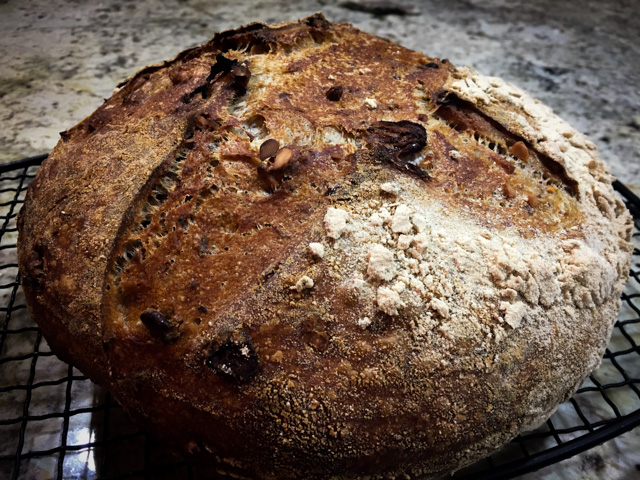
Not too long ago I shared with you The Best Sourdough Recipe, and in that post mentioned that a second bread from Maurizio’s site was undergoing fermentation. So, here I am to talk about that bread, probably one of the top ten best we’ve enjoyed in the Bewitching Kitchen. Considering how many loaves of bread I’ve baked through several years of blogging (almost seven, my friends), I wouldn’t take such a remark lightly…  Something about mixing a sweet and tart fruit with toasted walnuts, plus the complex flavor of the sourdough makes this loaf pretty spectacular.  It was superb with a nice Roquefort cheese, but toasted and enjoyed even without adornments it was a feast for the taste buds.

Cranberry Walnut Sourdough2

WALNUT CRANBERRY SOURDOUGH
(adapted from The Perfect Loaf blog)

for the liquid levain starter:
(make 12 hours before making the dough)
35 g liquid starter (at 100% hydration)
35 g whole wheat flour
35 g bread flour
70 g water

for the final dough:
400 g white bread flour
88 g whole wheat flour
12 g rye flour
440 g water at about 90 degrees F (divided, 400 g + 40 g)
10 g sea salt
100 g toasted walnuts, in pieces
70 g dried cranberries
125 g levain (made as above)

Build the liquid levain 10 to 12 hours before you want to make your final dough. Leave it at room temperature (around 72 F).

Next morning, mix flours and  400 g of water very well in a bowl and cover. Ensure all dry flour is hydrated. Leave it to autolyse for 1 hour.  Add the levain with the reserved water and hand-mix it into the dough until it is very well incorporated.  Leave it 30 minutes at room temperature, or if you have a proofer, set it to 78 F and keep the dough at this temperature all the way through. After 30 minutes, add the salt, and mix well.

After the salt is incorporated perform folds for about 2-3 minutes in the bowl. Grab under one side, pull up and over to the other side, then rotate the bowl a bit and repeat. Do this about 30 times or so (it goes fast and easy). At the end the dough should still be shaggy, but it will be a little more smooth and will slightly start to hold itself together more in the bowl. Now you are ready to start bulk fermentation.  If your home is at 78 to 82 F, bulk fermentation should last 4 hours.

During fermentation, do 4 to 5  sets of stretch and folds (I did five), adding the walnuts and cranberries on the second cycle of folding. Perform the first three foldings at 15 minute intervals, the remaining ones at 45 minute intervals then leave the dough to ferment for a full hour undisturbed.  If your dough is too “weak”, seeming to lack structure, add one extra cycle of folding, then leave the dough undisturbed for another hour.

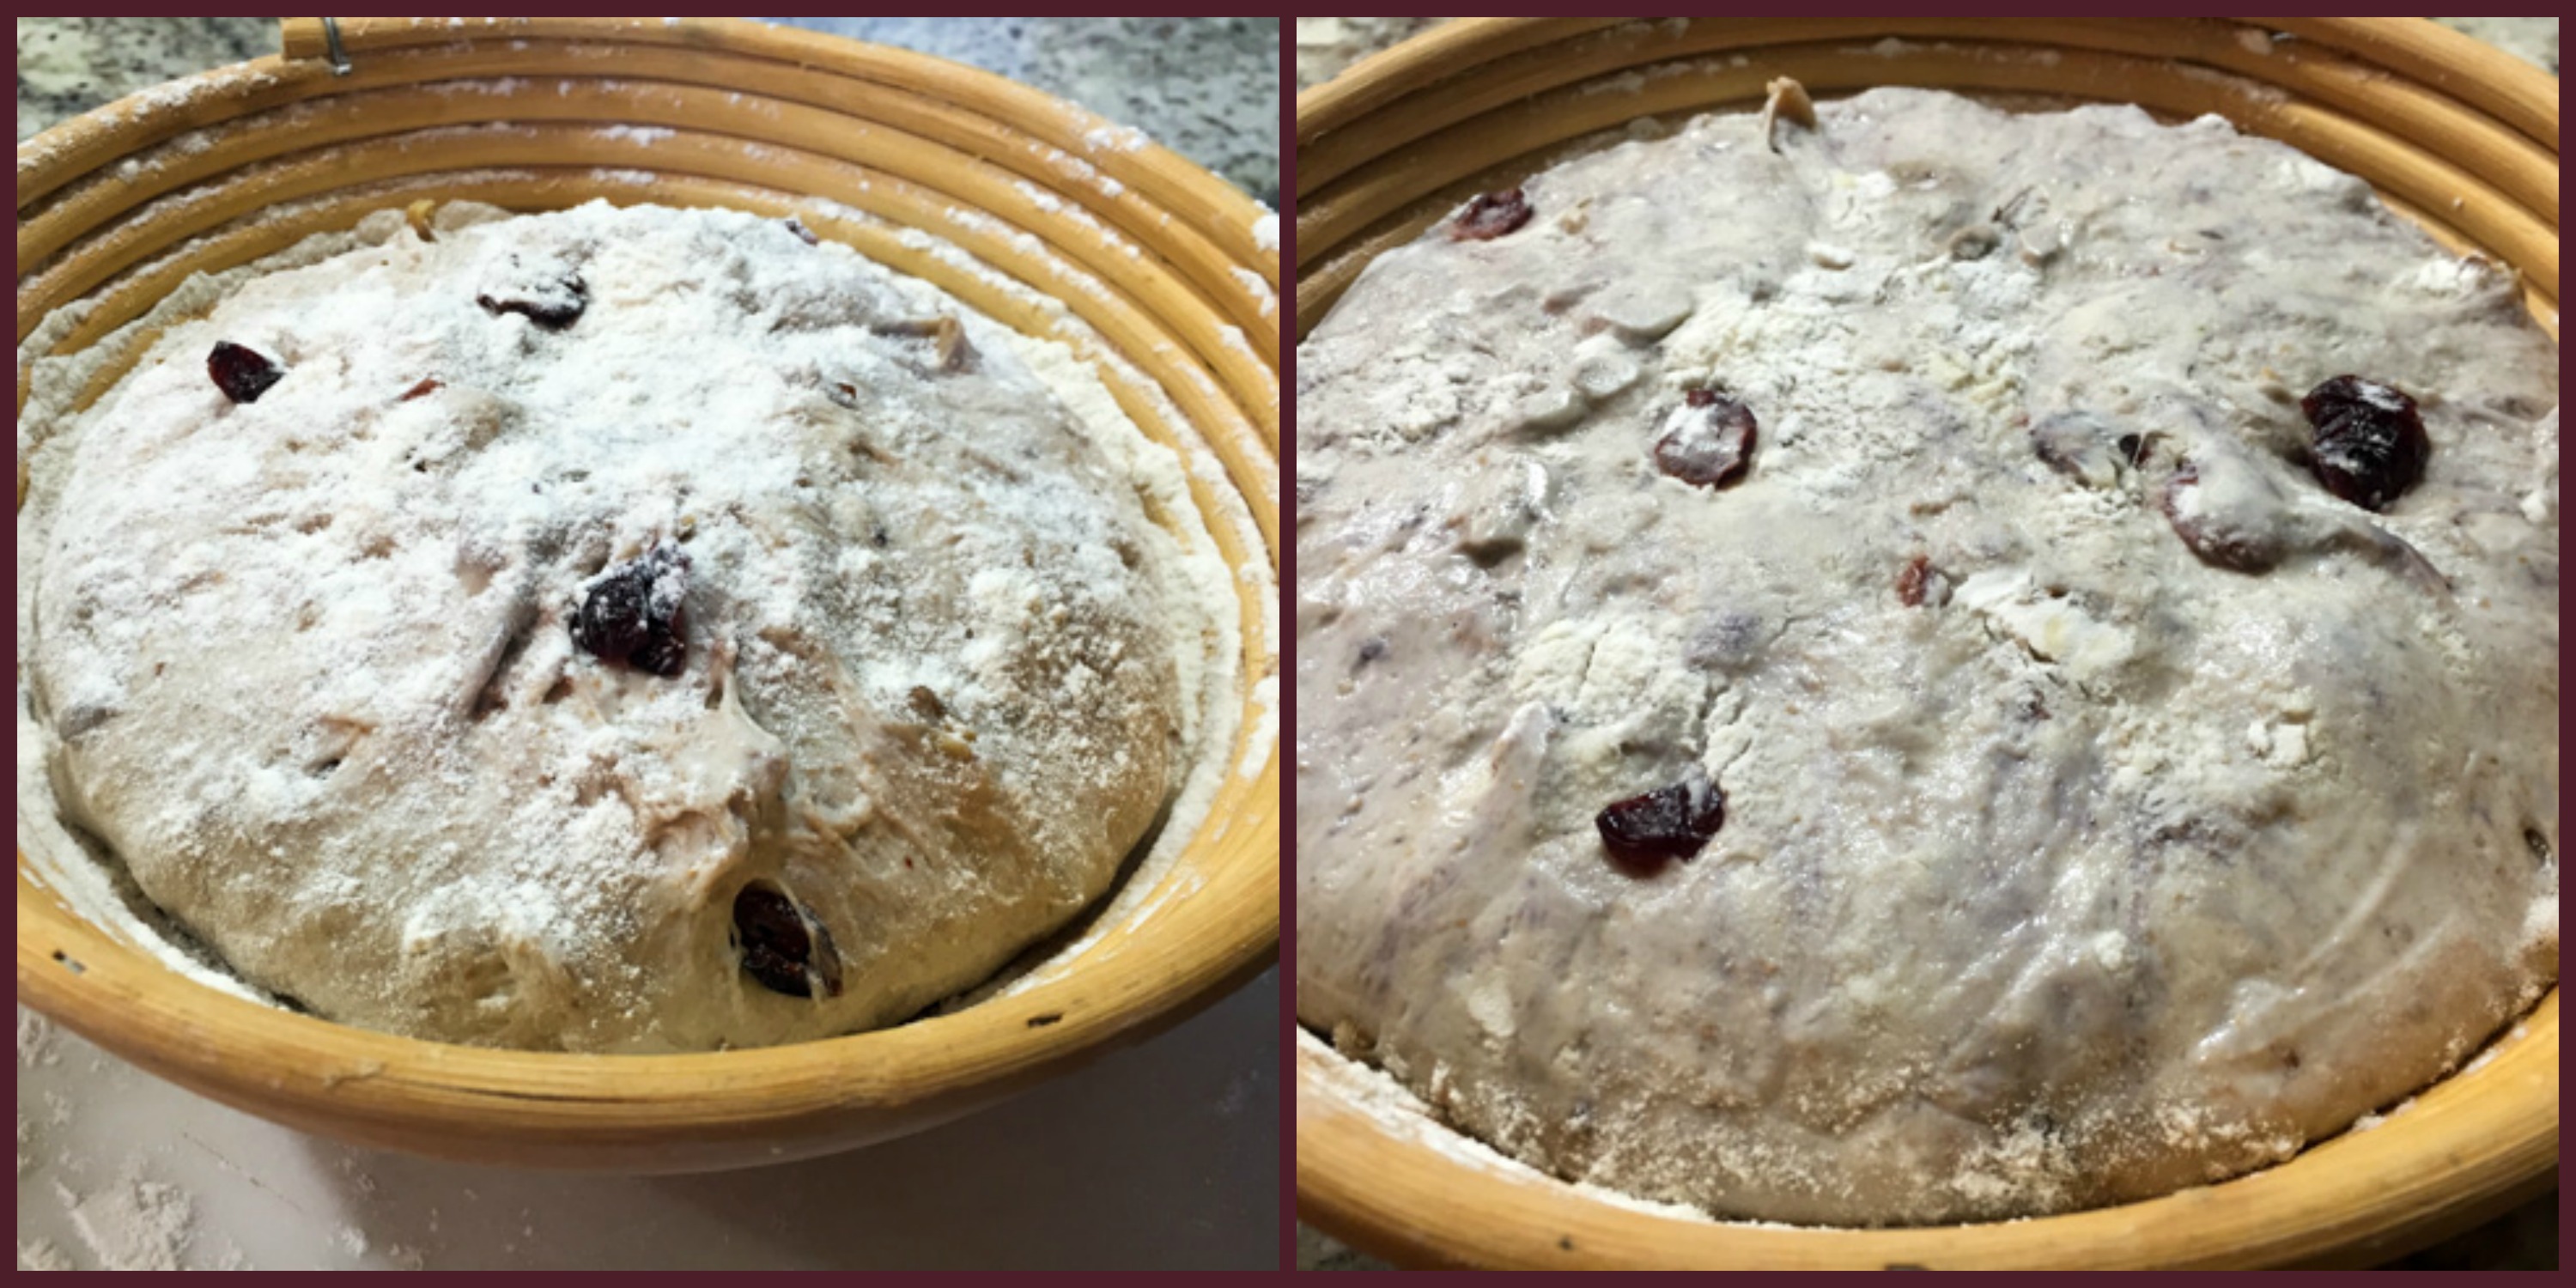
Lightly shape the dough into a round, cover with inverted bowl or moist towel, and let rest for 20 minutes.  After 20 minutes remove the towel or bowl and let the dough rest 5 more minutes exposed to air. This step helps dry out the dough just a bit so it’s not too sticky during shaping.  Lightly flour the top of your dough rounds and flour the work surface. Shape into a batard or boule. Place in a banneton very well floured, leave it at room temperature for about 20 minutes, then retard in the refrigerator  for 15-16 hours.

Heat oven at 500ºF. Bake 20 minutes at 500ºF with steam, and an additional 25-35 minutes at 450ºF, until done to your liking. Cool completely on a rack before slicing.

ENJOY!

to print the recipe, click here

doughcollage

Comments: For a bread so heavy with goodies, the crumb turned out a lot more open than I expected. I decided to add one extra cycle of folding (for a total of five) because I felt the dough was asking for it. When the dough speaks to me, I listen.  This method of retarding the dough in the fridge overnight and baking early next morning is perfect. You can use this basic recipe and add other nuts, seeds, dried fruits, olives, just use it as a basic formula.  If your additions are heavy, wait for the second cycle of folding to incorporate them, because it will be easier.  The proportion of white, whole wheat and a touch of rye was perfect to our taste, I would not change it a bit.

Maurizio, thanks again for a great recipe!

crumb shot
ONE YEAR AGO: Ottolenghi in Brazil?

TWO YEARS AGO: Roasted Winter Vegetables with Miso-Lime Dressing

THREE YEARS AGO: 2012 Fitness Report: P90X2

FOUR YEARS AGO: Caramelized Bananas

FIVE YEARS AGO: Roasted Lemon Vinaigrette

SIX YEARS AGO: Whole Wheat Bread

RASPBERRY CHOCOLATE TRUFFLES

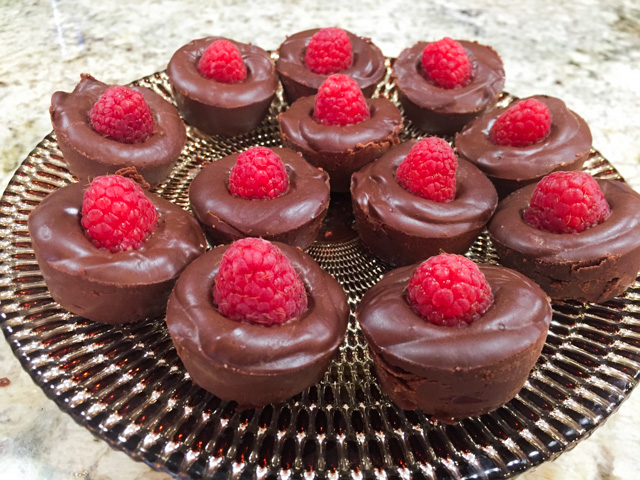
I feel the need to redeem myself after sharing a recipe that reduced my life expectancy a little, and added considerable more gray hair around my face. Maybe you are like us and prefer to stay home in Valentine’s Day? After all, it’s hard to beat a home-cooked dinner with the fireplace going and a nice glass of wine… Maybe you are planning on a store-bought dessert to make your life easier?  Well, I am here to change your mind. This is one of the simplest ways to end a romantic meal, and so easy to put together it is almost a non-recipe.  You can make it the day before, you can make it in the morning, you can make it just a couple of hours before showtime, whatever suits your schedule.  Come to think of it, it is the antithesis of a sugar cookie with royal icing.  And, let’s face it, a truffle is a lot more elegant and grown up. Plus no need to spend 1 hour and 49 minutes cleaning up the kitchen when you’re done. The recipe comes from the new FoodTV show Giada Entertains, which truth be told puts me in a compulsive eye-roll mode. Still, some recipes seem like winners, and this is definitely one. She called them poppers, I am calling them truffles, and you’ll soon understand why.

Raspberry Chocolate Truffles

RASPBERRY CHOCOLATE TRUFFLES 
(from Giada de Laurentiis)

3/4 cup heavy cream
8 ounces dark chocolate (70 percent), chopped fine
Three 0.33-ounce packages cherry Pop Rocks
12 raspberries

Add the heavy cream to a small saucepan and warm it gently over medium heat until small bubbles form around the edges. Place the chopped chocolate in a medium bowl and pour the hot cream over the chocolate. Let sit for about 2 minutes, then stir with a whisk, working from the center of the bowl outwards, until the ganache mixture is smooth and well incorporated.

To a 12-cup silicone mini muffin pan, sprinkle 1/2 teaspoon Pop Rocks in each cup. Divide the ganache evenly among the cups and press the raspberries on top. Refrigerate until set, at least 2 hours. I refrigerated them overnight. Just before serving, unmold the tarts.

ENJOY!

to print the recipe, click here

compositegiada

Comments: As you know, I did not grow up in the US, so most  kid-friendly candies are unknown to me. For instance, popping candy, or pop rocks. I was clueless about them, but when I saw Giada’s face as she poured some in her mouth, I could not wait to try some myself. Problem is, they were nowhere to be found. I searched all grocery stores, even tried Walgreens, but no luck. So I did what any sensible human being does, took a virtual stride to amazon.com and placed an order. I specified the flavor used in the show, Original Cherry.  The package took forever to arrive, but when it did, watermelon pop was inside. Oh, well, it’s also pink, and it pops. I decided to go with it.

The crystals made cute noises  when I poured the ganache on top, but by the time we enjoyed the truffles, no one could tell there was anything in them apart from chocolate and the crowning raspberry. Still, they were perfectly delicious, fantastic texture, creamy, luscious, dream-inducing… just pop-less.  Oh, well. Maybe you need to consume them within a couple of hours so that the candy won’t completely dissolve in the truffle?  A carefully controlled experiment is needed. At any rate, if you don’t have popping candy around, don’t let that stop you.  They will be perfect to close your romantic meal…

Untitled design-2

Happy Valentine’s Day!


ONE YEAR AGO: Red Velvet Cupcakes

TWO YEARS AGO: Happy Valentine’s Day!

THREE YEARS AGO:  A Few Blogging Issues

FOUR YEARS AGO: Dan Dan Noodles

FIVE YEARS AGO:  Sophie Grigson’s Parmesan Cake

SIX YEARS AGO: Antibiotics and Food

THE SIREN’S SONG OF THE ROYAL ICING

Life can take sharp twists. Sometimes you’re sailing smoothly, one careless decision later and hell breaks loose. Last month I watched a youtube of a baker working on Valentine cookies with  royal icing.  Picture beautiful heart-shaped cookies, all pink, decorated with perfectly round white dots, red hearts. red lips. It was amazing, truly awe-inducing. You too can watch it here.  I showed her video to Phil, he got all excited and urged me to do it. C’mon, it’s just some sugar cookies with icing, you can do it!  I was quite insecure about it, but after intense inner deliberations, decided to go for it. Next, I laid a plan of action for the task. Make cookie dough Sunday before noon. Let dough cool in the fridge while having lunch.  Bake cookies.  Do a quick stop by the lab while cookies cool. Come back home, make the icing. Let the artistic vibes flow free. Take perfectly iced cookies to the department next morning.

All steps went according to plan up to the “come back home.”   That innocent video was indeed the perfect example of a siren’s call. A beautiful, irresistible song that you simply must follow. To your demise. Royal icing. Not. For. Sissies.

Valentine Cookies2

HEART-SHAPED SUGAR COOKIES WITH ROYAL ICING
(cookies from Mom Advice …. and icing from Karen’s Kitchen Stories)

2 1/2 cups flour
3/4 cup superfine sugar
1/4 teaspoon salt
16 tablespoons (2 sticks) unsalted butter, cut into 1/2″ pieces & softened
2 tablespoons cream cheese, softened
2 teaspoons vanilla extract

Heat the oven to 375 F.

Whisk the flour, sugar, & salt together in a large bowl. Beat the butter into the flour mixture, one piece at a time using an electric mixer on medium-low speed, then continue to beat until the mixture looks crumbly and slightly wet, 1 to 2 minutes. Beat in the cream cheese & vanilla until he dough just begins to form large clumps, about thirty seconds.

Knead the dough in the large bowl by hand a few times until it forms a large, cohesive mass. Turn the dough out onto a clean counter, divide it in half, and pat each into a disk shape. Wrap the disks tightly in plastic wrap and refrigerate until they begin to firm up, about 30 minutes.

Work with one disk at a time, roll out the dough to a 1/8″ thickness between two sheets of parchment paper.  Cut out shapes using cookie cutters and lay on two parchment-lined baking sheets, spaced about 1″ apart. Bake the cookies until light golden brown, about ten minutes, rotating the baking sheet halfway through baking.

Let the cookies cool on the baking sheet for two minutes before transferring them to a wire rack to cool completely, about thirty minutes. When completely cooled, the cookies will be ready for icing.

Make sure you are well rested. Think happy thoughts before proceeding.

ROYAL ICING

4 cups powdered sugar, sifted
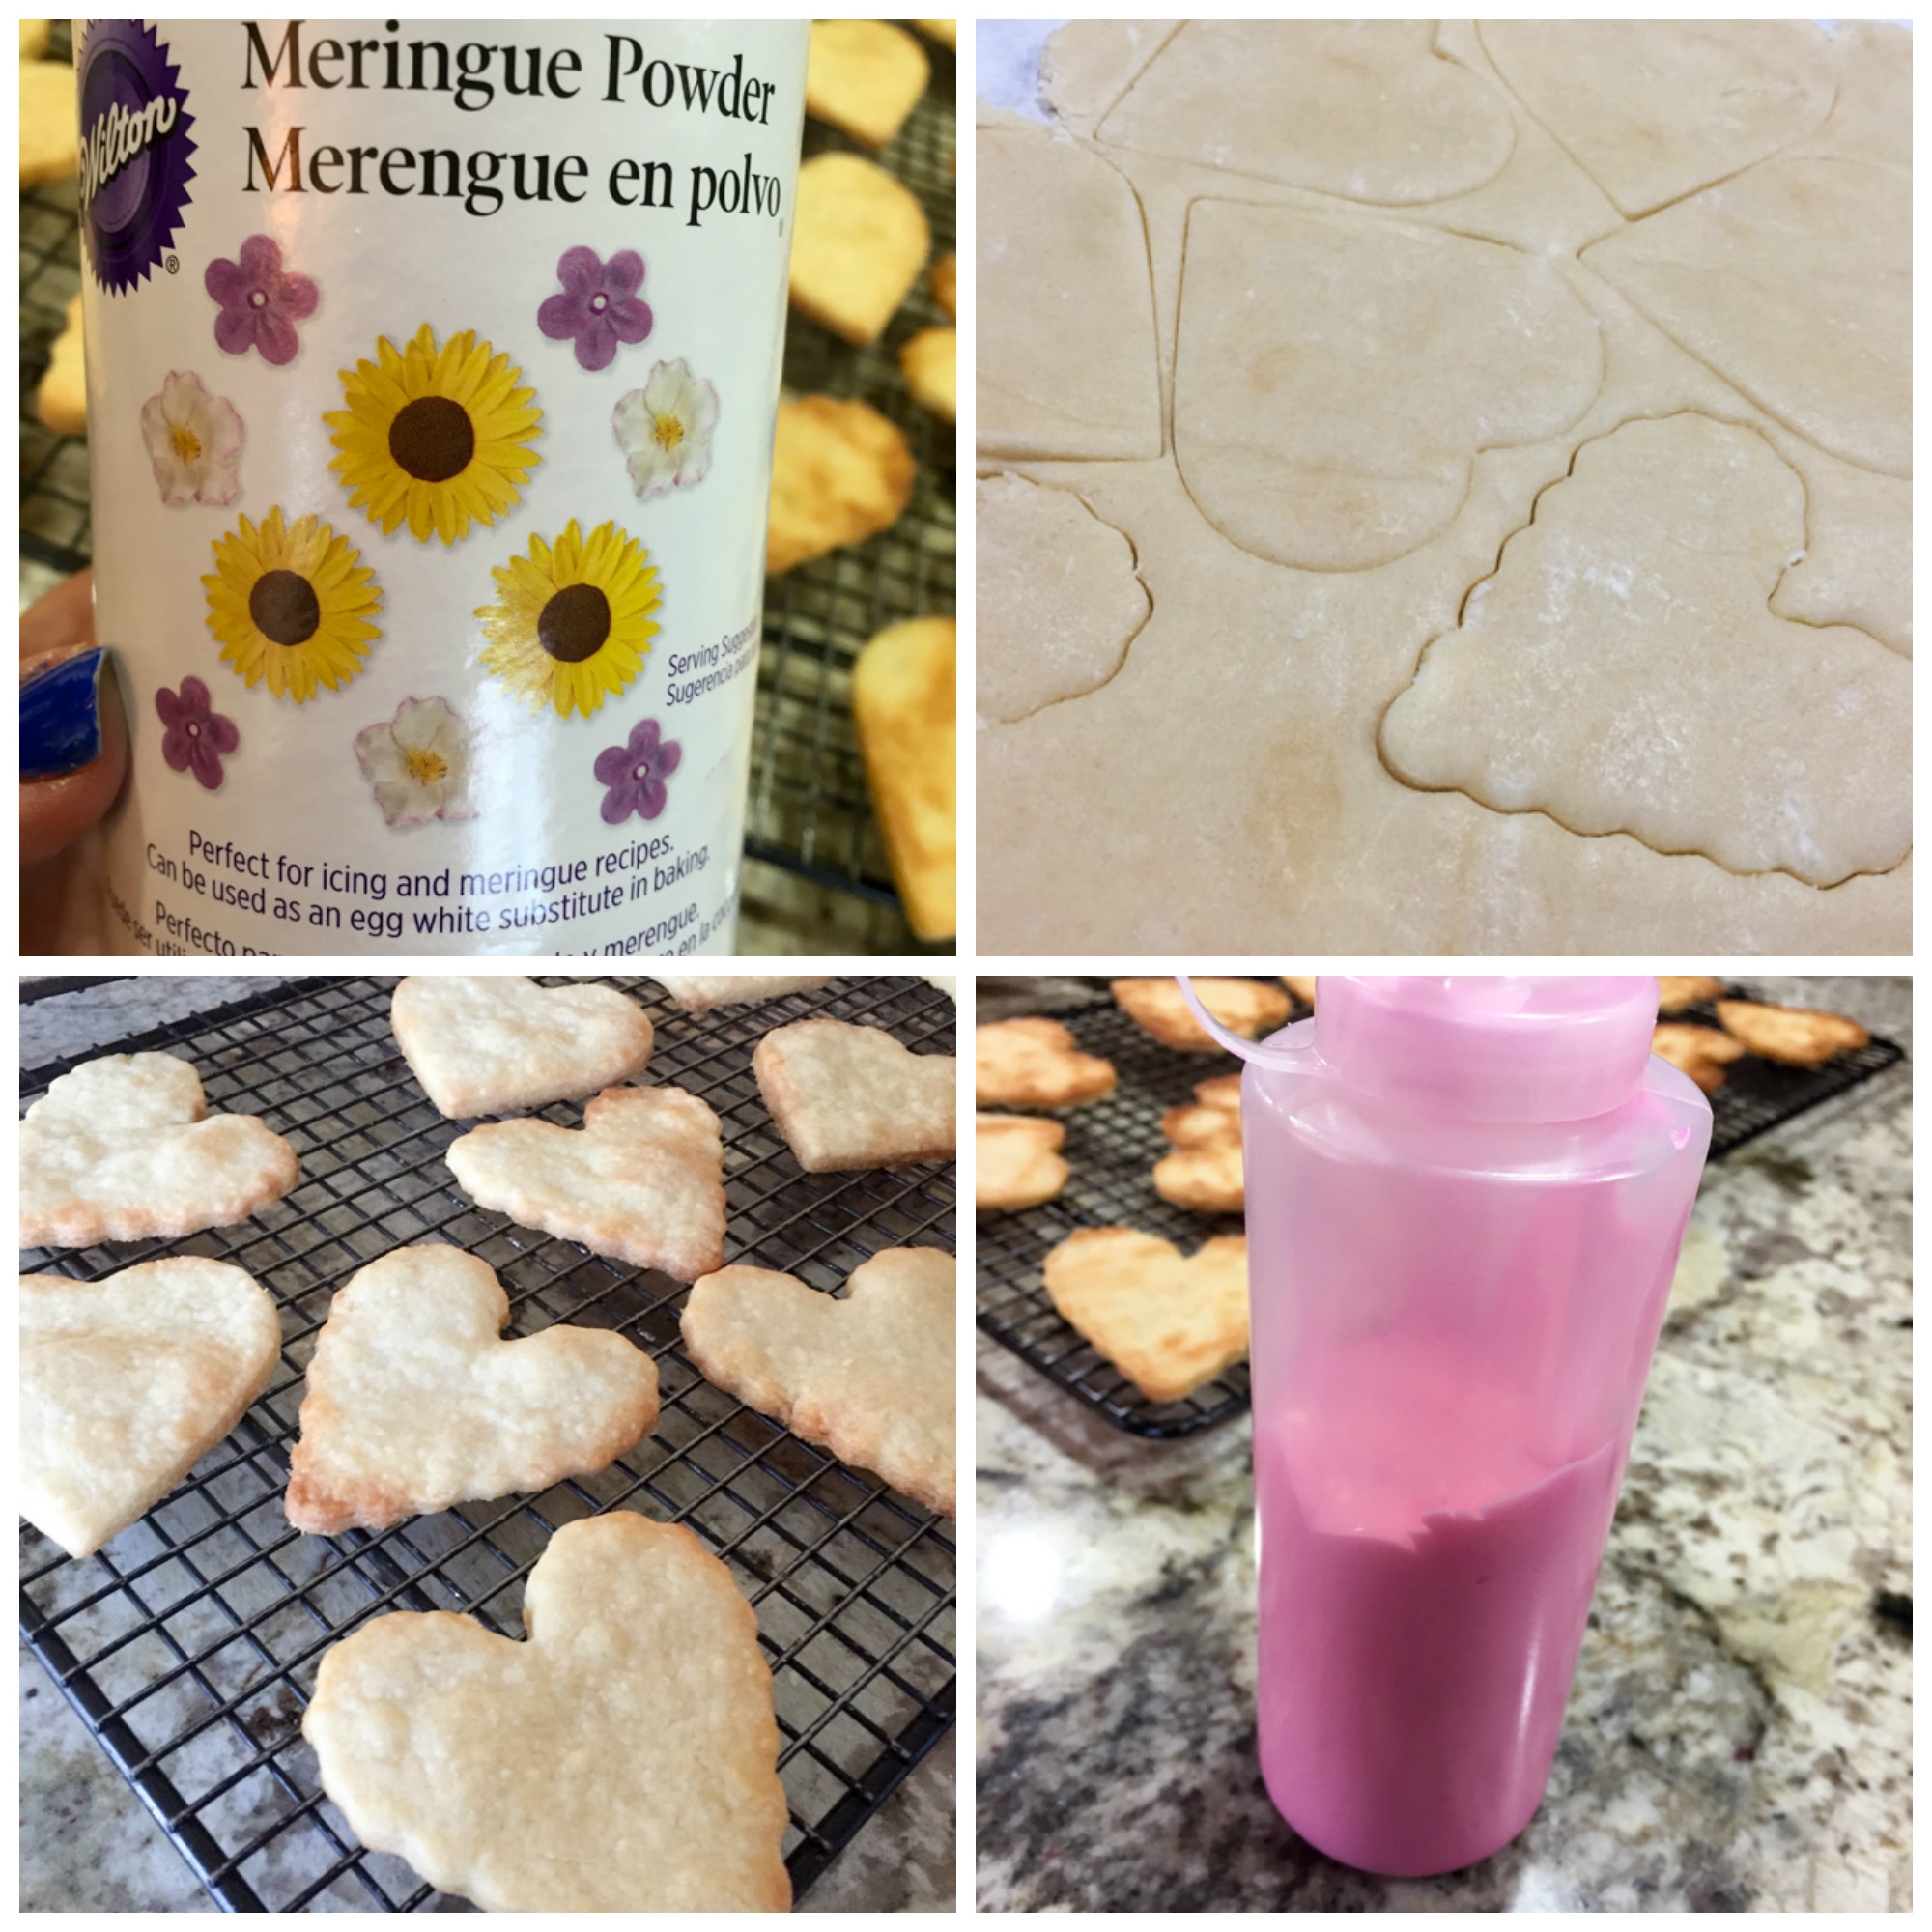
2 tbsp meringue powder
5 tbsp water, plus more to thin the icing
Gel food coloring
endless amount of Zen

Call Happy Maids and set an appointment for home cleaning.

Place the powdered sugar, meringue powder, and water into a bowl of a stand mixer and mix with the paddle attachment on medium low for about 7 to 10 minutes, until the mixture looks matte. Transfer the mixture to an airtight container.

At this point, the mixture is too thick to pipe. Add more water by tablespoon to the mixture, stirring thoroughly between additions, until it is at a consistency that can be piped. Add any coloring you might be using. If you are using more than one color, divide the mixture among airtight containers before adding the color. In my case, I used some pink gel to turn the mixture pink for piping and flooding, and red gel  for the decorations.

Place the flooding icing into plastic squeeze condiment bottle. Line the outer edge of each cookie with icing, allow it to set for about one hour. One cookie at a time, squeeze some of the icing in the center and spread it with a toothpick to the edges. Dot a contrasting color onto the icing with more icing of the same consistency. Drag a toothpick through the dots to create “artsy” hearts. Let the icing dry for about 3 hours.

ENJOY!

to print the recipe, click here

Valentine Cookies3

Beware, long saga ahead…

The sugar cookies worked like a charm, I highly recommend the recipe and the method of rolling the dough in between two sheets of parchment paper.  I think I overbaked mine slightly, but other than that, no problems. Best part? Absolutely no mess in the kitchen. Considering the state of my environment once I was done decorating the cookies, it was a blessing to have to wash only once the floor, walls, countertops and a dog.

The Royal Icing. That’s when things got dicey, and they got dicey fast. After sifting the powdered sugar (boy, that thing flies through the air like nobody’s business), adding the meringue powder and the water, I turned the KA on and walked away since it would be doing its magic for several minutes. It did not take long for the machine to make odd noises, as if badly struggling to move the paddle around.  To my horror, I saw this huge white rock inside the bowl, no wonder the poor machine was having a tough time.  I turned it off  to lower the bowl, but the rock was bonded as a single happy entity with the paddle. Hyperventilating, I gave up on the hammer and instead turned the KA back on while drizzling cold water around the bowl. Much to my relief, that worked, and the rock slowly turned into a very thick paste.  It was hard to judge how much water to add for proper consistency, but at least I had averted tragedy number one.  Next, it was time to divide the icing in two batches: a bigger portion to be dyed pink, a smaller for red. I eyeballed the icing into two bowls, added pink gel, mixed very well, then tried to pour it into a squeeze bottle, only to realize that the bottle had a sadistically narrow opening. A funnel was desperately needed. We have many in the lab, none at home. Bummer. I filled the bottle with a small spoon, in a tedious and messy process. Not exactly my idea of fun, but… the afternoon was young, and I had already overcome two tragedies.

The_Mermaid_and_the_Satyr

Ferdinand Leeke, 1917-  via Wikimedia

I proceeded to dye the second batch. adding what seemed like a lot of red gel to get it right. Then I placed the Wilton tip #2 (as recommended in the youtube) inside a disposable plastic pastry bag. Opened the bag around my hand like I see the pros doing, but adding the icing to the bag was a nightmare. It simply would not slip down the bag like it does on TV. I suspect they use special effects, cheaters! At that point I was dealing with a bowl of red icing over the counter, a spoon on my right hand, and a pastry bag in precariously open situation on my left hand.  Some help would have been nice, but the man I married  had decided to go play golf the moment I grabbed the box of powdered sugar. Mind you, it was 50 F outside, with gusty winds. He told me I would need peace and quiet to ice the cookies, and it was best if he left. I married Gandhi. Can you grasp the full irony of it? The golfer was the one cheerleading me into this royal pain!
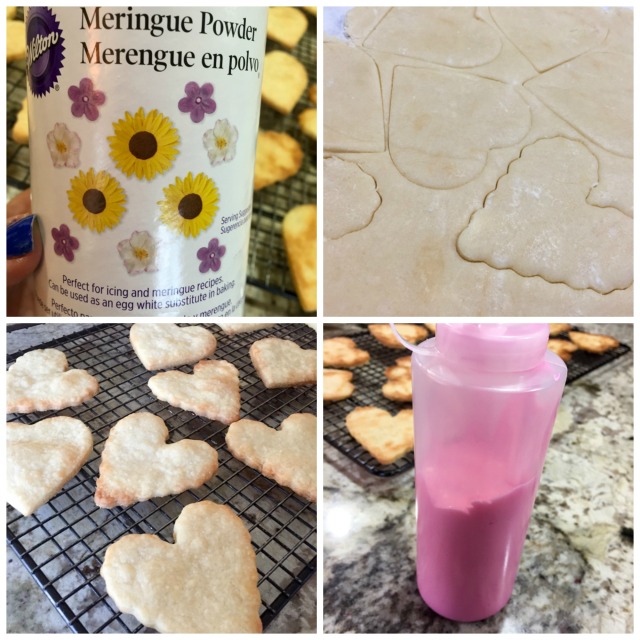
PicMonkey Collage

But Thelxiepeia was not done singing yet. The pink icing apparently got too hard and refused to flow down the squeeze bottle. Hyperventilation back in full blast, I added water to the bottle and stirred it as well as I could with a wooden chopstick.  Disaster number three averted. Flooded the first cookie with pink icing, completely forgetting Karen’s instruction to pipe a border and let it set. Grabbed the bag with the red icing. I decided to start humble and do just a few round dots. Almost nothing came out from the tip. A lot leaked from the top, and then from the spot between tip and bag, as the bag teared right in front of my eyes. I will now pause and give you a moment to imagine the scene. Christmas Red Icing pretty much all over my hands, sweater sleeves, and the vicinity of the cookie. I concluded that the number 2 tip requires an experienced pair of hands to maneuver it. I had another tip with a slightly larger opening, so all I had to do was to transfer the icing to a new bag with the larger tip. “All I had to do” sounds pretty tame in comparison to what it involved. I make another pause so that you can imagine the process as it developed in the Bewitching Kitchen. One thought briefly crossed my mind… you should be wearing gloves... but that train had long left the station.  It was a royal mess, which probably explains the choice of name for the icing. Some patissier with a sick sense of humor, no doubt. After that disaster was averted (sort of),  I was pretty much spent. Emotionally drained, with shockingly pink-red hands in a kitchen that looked like a crime scene.  I took a deep breath and started the process of icing twenty-seven sugar cookies, one by one. It is a lot harder than the video makes it seem, trust me on that. By cookie number 23 I felt I was getting the hang of it, but lost the touch at cookie 25. Such is life.

icedcookies

Just to illustrate the extent of my saga… my hands four hours later, after a few rounds of soap and hot water (sigh).

stain2

The verdict?  The cookies tasted great, and were well received by our colleagues, even if they would not win prizes in a beauty contest (the cookies, not the colleagues). I was so traumatized by the process that the idea of icing cookies again made me physically ill.  But now that a few days have gone by, I feel the need to re-visit the issue, knowing what to expect.  I won’t overbake the cookies. I will wear gloves. I will stick with squeeze bottles as Karen did, and bag the icing bags (pun intended). I will use the needle tool the way it was meant to be used (enough said on that).  And I will never ever allow a new siren song to work its magic. No doubt in my  mind, that woman is some type of a goddess. My bets are on Aphrodite.

Medusa_head_by_Gianlorenzo_Bernini_in_Musei_capitolini

I thought French macarons were tricky, but icing these cookies was like facing Medusa’s head. It’s a good thing that in the end of that evening, Dionysus came to my rescue…


ONE YEAR AGO: Blog-worthy Roasted Butternut Squash

TWO YEARS AGO: Chocolate Currant Sourdough Loaf & Roasted Beet Hummus

THREE YEARS AGO: Sesame and Flax Seed Sourdough

FOUR YEARS AGO: Spanakopita Meatballs

FIVE YEARS AGO: Saturday Morning Scones

SIX YEARS AGO: Pain de Mie au Levain

MAPLE PUMPKIN PECAN SNACKING CAKE

SOMEONE TURNS SEVENTEEN TODAY!

Happy Birthday, Chief! You’ll always be a puppy for us…

ChiefNewBed
Birthday requires cake. Obviously.

The other day I saw a compilation of cakes by Food & Wine, a sort of  “bucket list of cakes.” You can check it out here. According to the article, if you bake one of those cakes each month, at the end of the year you will become a very accomplished baker, mastering all techniques that matter.  Danger attracts me, because I was immediately mesmerized by the list and next think I knew, the first one was in the oven. No idea what makes it a “snacking cake” but the name has a good vibe. Plus, it mixes two flavors I love, maple and pumpkin. I am not too wild about pecans, but it’s always good to have an excuse to crack open that bag hibernating in the freezer.  This cake is incredibly easy to make, smells amazing, and everyone raved about it.  Now, before  you get too excited: NO, I am not baking the other 11 cakes.  And YES, this is my final answer.

Snacking Cake

MAPLE PUMPKIN PECAN SNACKING CAKE
(adapted from Food and Wine magazine)

1/2 cup whole wheat flour (I used white whole wheat)
1/4 cup all-purpose flour
1/2 teaspoon cinnamon
1/4 teaspoon salt
7 ounces pecans (about 1 to 1 + 1/3 cups)
1/2 cup pumpkin puree
2 large eggs, at room temperature
2/3 cup dark brown sugar, packed
1/4 cup maple syrup
1/4 cup plus 2 tablespoons coconut oil, melted
1/2 teaspoon vanilla
3 tablespoons demerara sugar for sprinkling

Heat the oven to 325° and grease an 8-inch square cake pan,

In a medium bowl, whisk together the two types of flour, cinnamon, and salt and set aside.

In a small frying pan over medium-high heat, toast the pecans until fragrant, stirring occasionally, about 4 minutes. Transfer half of the nuts to a small food processor and pulse until a coarsely ground flour forms. Roughly chop the remaining pecans over a cutting board into small-sized pieces. Add both the pecan meal and loosely chopped pieces to the bowl of dry ingredients.

In a large bowl, whisk together the pumpkin puree, eggs, brown sugar, maple syrup, coconut oil, and vanilla extract until very smooth. Gently fold in the dry ingredients until incorporated. Using a spatula, scrape the batter into the prepared pan. Smooth out the surface of the cake batter with the spatula and sprinkle the demerara sugar evenly over the top. Bake for 45 minutes until a toothpick inserted in the center comes out clean. The top of the cake should be crispy from the scattered sugar-coating.

Let the cake cool for 15 minutes before slicing and serving.

ENJOY!

to print the recipe, click here

compositesnack


Comments: The cake is baked in an 8-inch square pan, so it is reasonably small. Food and Wine lists 8 servings, but I cut it into 20 small squares so that more colleagues could be happy in a cold and foggy Monday morning.  Perfect antidote for that type of day, if you ask me.  What I loved the most about it was the crust that the demerara sugar formed while baking. Delicious contrast with the brownie-type cake underneath.  Notice the lack of leavening agents, the cake is pretty similar to a one-pan brownie, easy and straightforward. Pecans were perfect, but I bet walnuts would work equally well.

Cake number one was pretty painless, I must admit. I like to leave the game while I’m winning, so I’ll stop right here. Although a certain gentleman is lobbying quite heavily for a particular six-layer coconut nightmare. Yeah, when pigs fly over Kansas wearing pink tutus.

molly-in-tutu

Hi, my name is Molly Merlot, I am awfully cute, but I promise you, I don’t fly!

(photo published with permission from Wilson Creek Winery)


ONE YEAR AGO: Silky Gingered Zucchini Soup

TWO YEARS AGO: Sweet Fifteen!

THREE YEARS AGO: Sesame and Flaxseed Sourdough

FOUR YEARS AGO: Green Beans with Miso and Almonds

FIVE YEARS AGO: Saturday Morning Scones

SIX YEARS AGO: White Bread


SECRET RECIPE CLUB: SUNDAY GRAVY WITH BRACIOLE

New Year, New Life, New Secret Recipe Group!

Those who follow my blog might be used to my Secret Recipe Club participation on the fourth Monday of each month. However, I’ve been a member for so long that it seemed like a good idea to move to a new group in the club. So, I switched to Group A, and my SRC posts will fall instead on the first Monday of each month.  Of course it is a bit sad to leave the comfort of my old group, where so many ties were made, but I know they won’t be broken. Actually, if I may share something special, take a look at this post written by our wonderful moderator, Sarah Ellis. What a nice surprise it was! She does that type of Gold Member post on a regular basis, but it was my first time in her spotlight… Felt great!

Obviously, I was anxious to get my first assignment of the year, and was overjoyed when I got the email. Why? Because I was assigned to Sid’s site, a blog I’ve been following for a long time, so it felt like the warmest possible welcome for me…  Sid has been blogging since June 2011 (see her first post here), although in fact she used to have another blog earlier, dedicated to pictures and crafts. Then she decided to start Sid Sea’s Palm Cooking to concentrate on food blogging. Well, I am thrilled she did it!  One of the things  I love the most about her site is her energy, upbeat mood, and wit. Every post gives me a big smile. Plus, she cooks amazing stuff all the time. Two features are quite interesting in her site, the “Tapas” and “Boat Club” posts, organized together in a page you can access here.  Those are monthly events she participates (in real life), and then shares with her readers. If you need inspiration for a tapas or cocktail type party, look no further! I had quite a few recipes selected as possibilities for this assignment like her Yorkshire puddings, her Sweet Potato Samosas, her Sweet and Sour Chicken Meatballs, her elegant Leek Pancakes, but ended up settling for the Sunday Gravy with Braciole because it seemed perfect for the weather: luscious, filling, very complex flavors.  Of course, brown food is not very camera-friendly, but it is fantastic for the taste buds. So there!

Braciole with Sunday Gravy


SUNDAY GRAVY WITH BRACIOLE
(slightly modified from Sid’s Sea Palm Cooking)

for Sunday Gravy:
1/4 cup olive oil
6 mild Italian Sausages, cut in thirds
1/2 large onion, finely chopped
2 cloves garlic, minced
1 (5 oz) can of tomato paste
1/2 cup dry red wine
3 (28 oz.) cans Italian Plum Tomatoes (San Marzano if possible)
2-3 Tbsp. of equal parts of dried basil, thyme, sage and oregano
1/4 cup rye whiskey (optional, I used regular whiskey)
 .
for Braciole: 
4 slices of round steak 1/2 inch thick pounded to about 1/4 inch thick
4 slices of bacon
2 tbsp chopped parsley
2 tbsp bread crumbs
1 clove finely minced garlic
salt and pepper to taste.
olive oil for browning
.
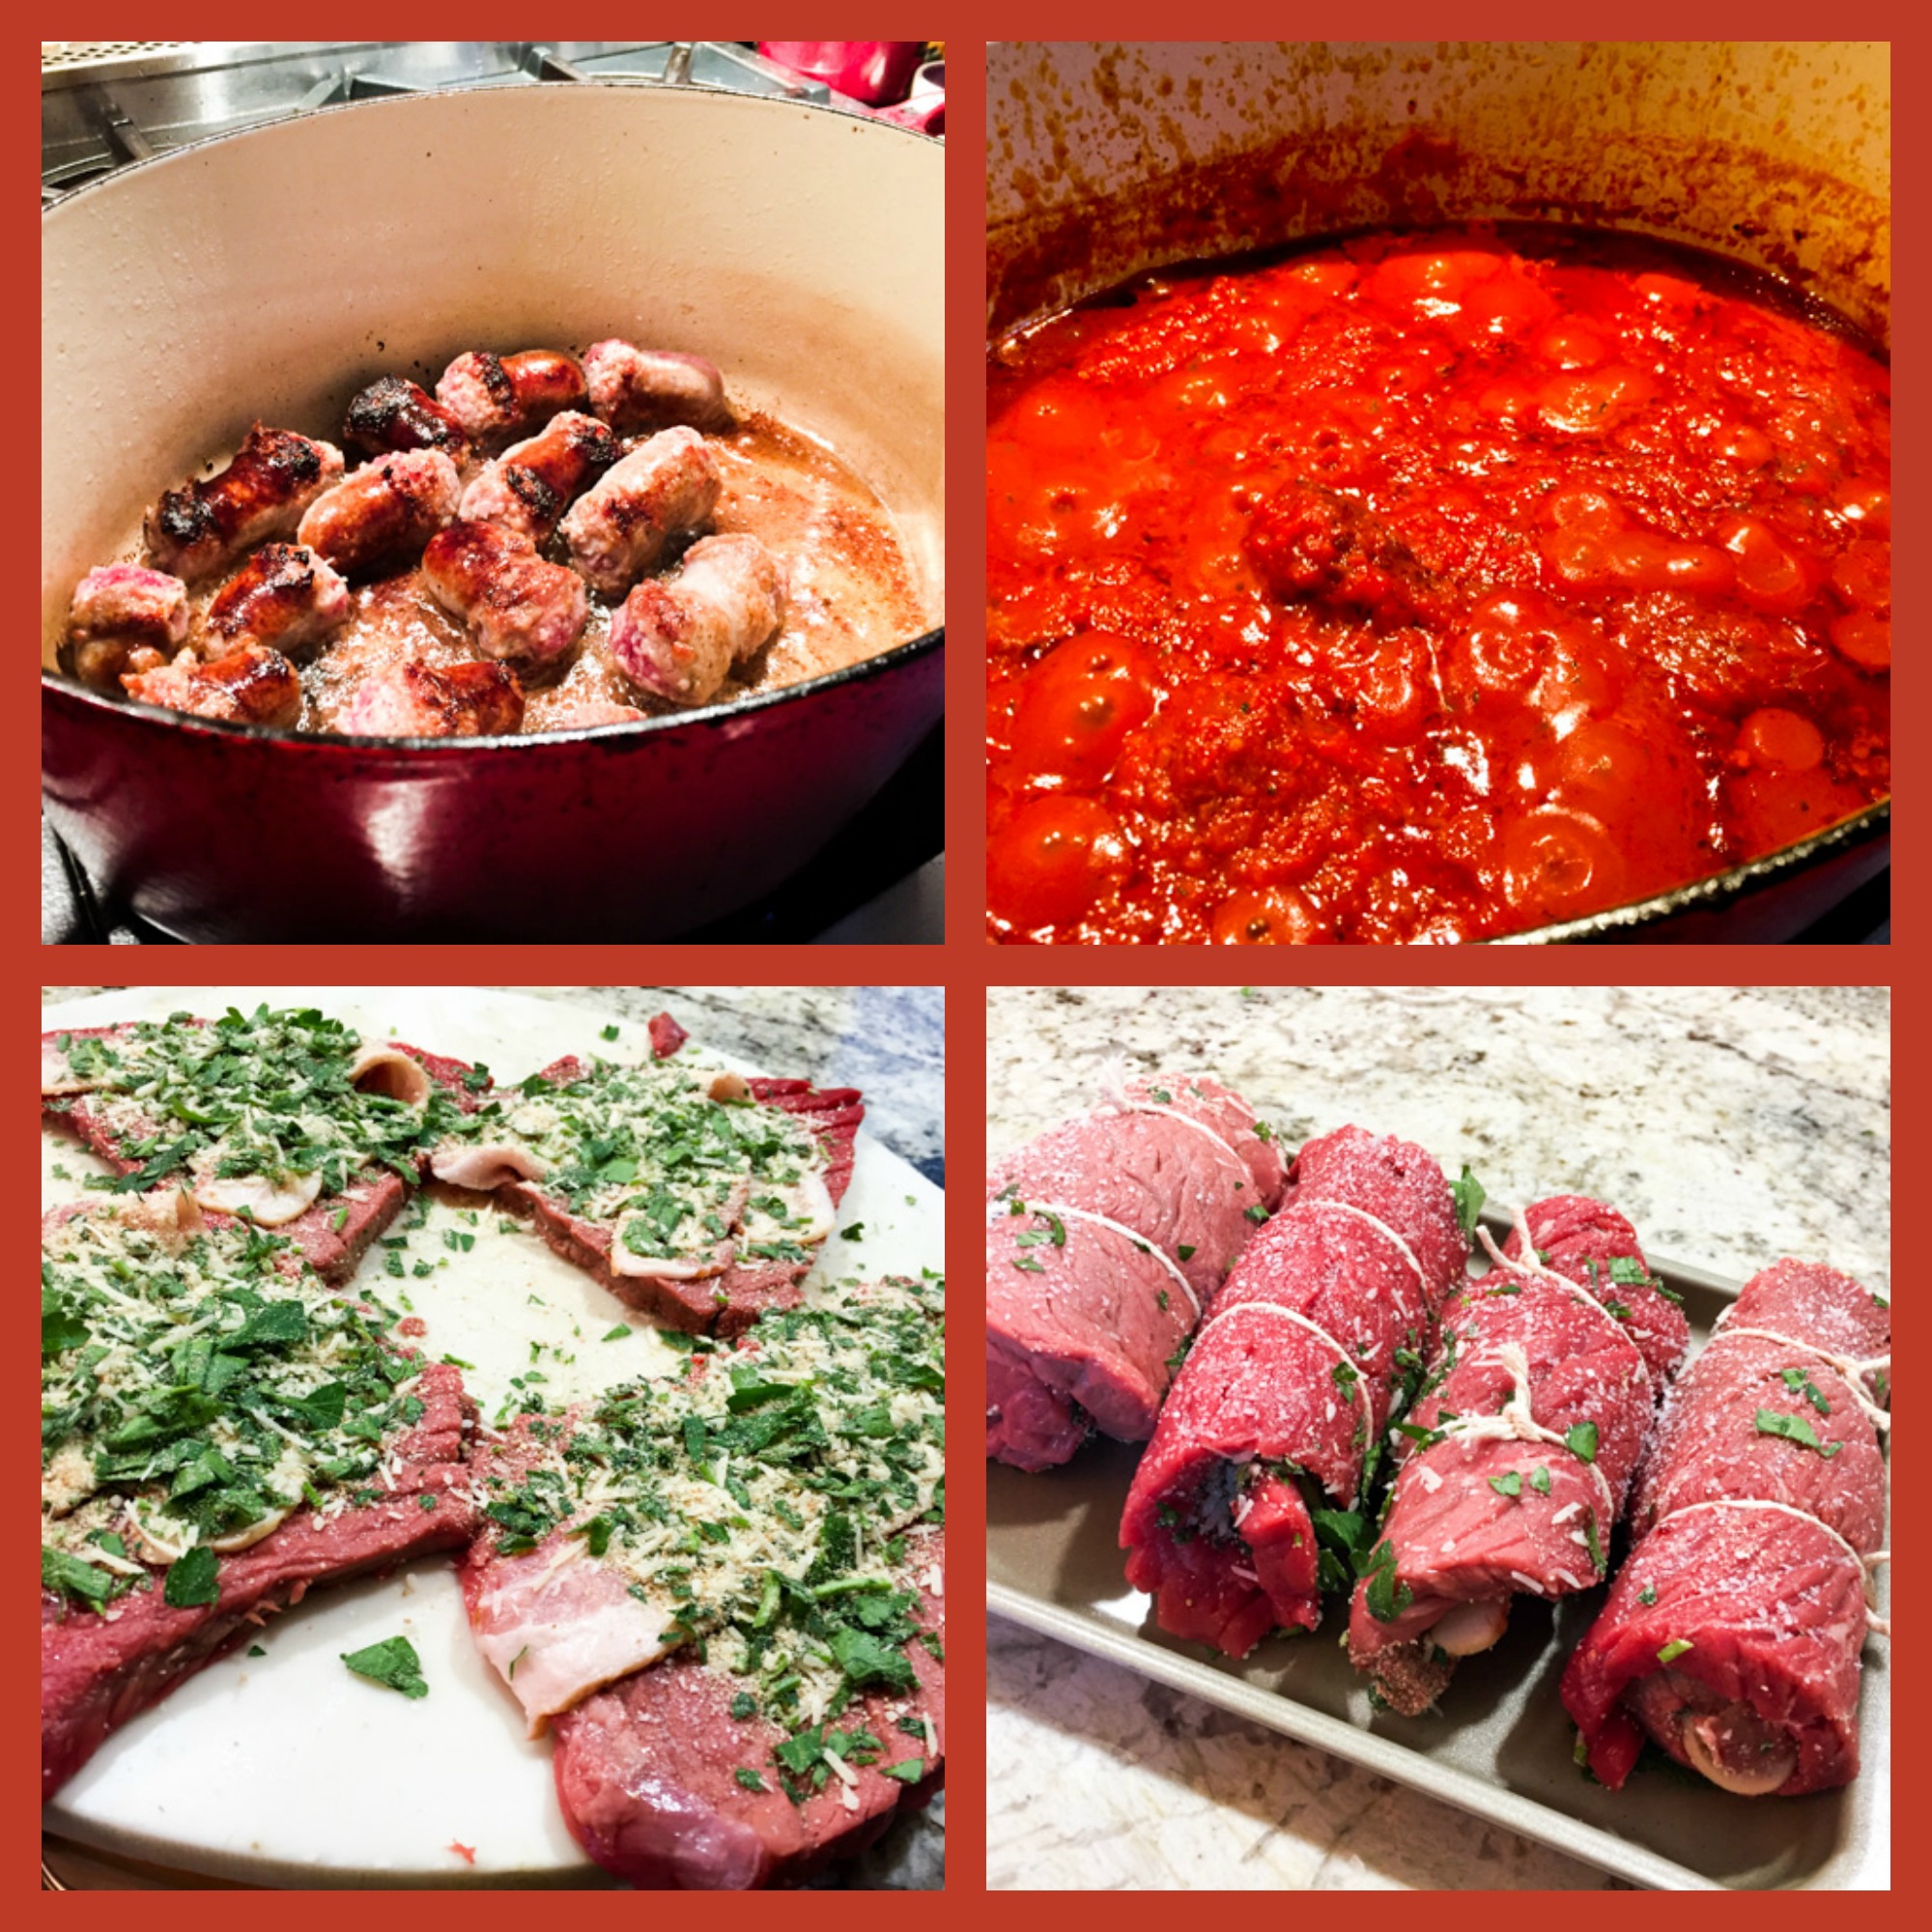
Make the gravy: Heat olive oil in a heavy-bottomed 6 quart pot, preferably non-stick, brown sausages on all sides.  Add onion and garlic and saute until just soft.    Don’t burn the garlic.   Stir in tomato paste and cook gently 15 minutes being careful not to burn or have mixture stick to pot. Deglaze pot with the red wine and reduce out alcohol.Process in blender the tomatoes with their liquid until slightly chunky and puree like.   Add tomatoes to the pot and bring to a simmer.    Stir in seasonings and herbs.  Adjust to taste, especially the salt.  Add whiskey if using. This will cut acidity and make a slightly sweeter sauce.  Simmer partially covered for about 3 hours, stirring occasionally. Sauce can be made in advance.
.
Make the braciole: Mix the parsley, bread crumbs, cheese, garlic, salt and pepper in a small bowl. Lay 1 strip bacon on each braciole, sprinkle cheese mixture evenly over braciole, roll up and tie securely with string.   Heat oil in skillet and brown meat evenly on all sides.   Transfer to the simmering ‘gravy’ and cook at least 2 hours.
.
My modification: I simmered the gravy for 2.5 hours.  Used 1/3 of it to cook the braciole under pressure for 35 minutes, after browning them. Froze the leftover gravy for later, in two portions.  Sprinkled grated Parmesan cheese over the braciole when serving.
 .
ENJOY!
to print the recipe, click here

braciolecomposite

Comments: I’ve always wanted to make Sunday Gravy. The name promises something delicious, don’t you think? Something that cooks slowly for hours… But, I confess I messed it up really bad. Sorry, Sid, I did. I made it on a Saturday. I know, I know, what was I thinking?

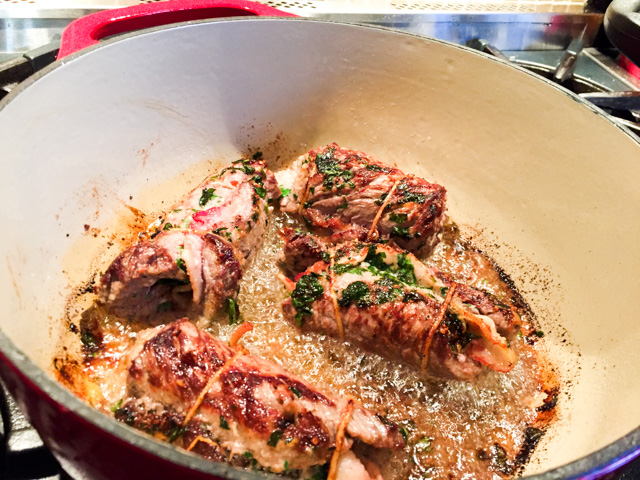
Apart from that, I followed the recipe to a T, and loved the outcome! The change in the sauce as it simmered down for 3 hours was a pleasure to witness. I made the gravy on Saturday, saved it in the fridge, removed the congealed fat from the surface on Sunday, and made the braciole that afternoon. Most important step? Browning them well before simmering with the sauce. A process that should not be rushed, allow the browning to take place and it will reward you with amazing flavor later. I promise.

braciole3


Another small change I made was to cook the braciole in the pressure cooker. I had the gravy ready, so after browning the little rolls of meat I transferred them to the pressure cooker, added the sauce and cooked under pressure for 35 minutes. After cooking I tasted the sauce and adjusted seasoning just lightly with a bit of salt and pepper.

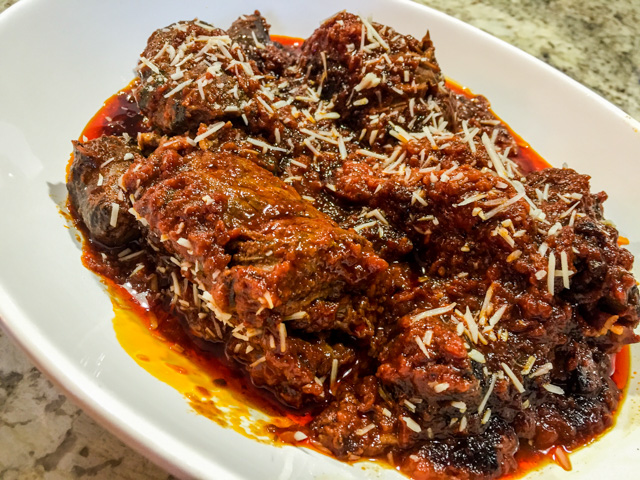
There you have it, a fantastic meal, meat falling apart tender, a sauce that tastes almost sweet from the long simmering. Comfort food, all the way…

Braciole with Gravy Served


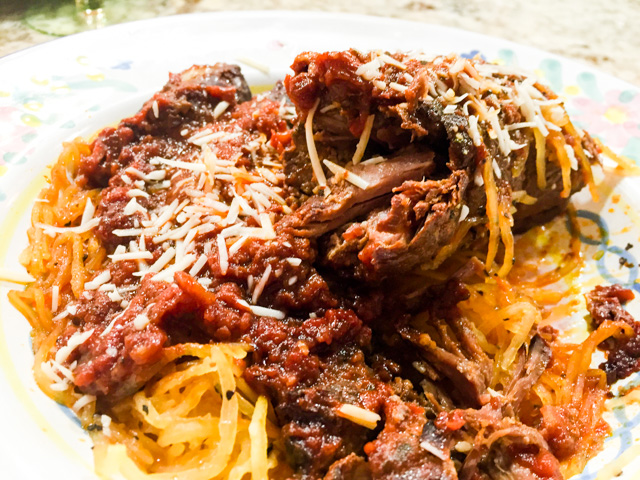
I enjoyed it with some spaghetti squash, but of course you can go the more authentic route of polenta, mashed potatoes, pasta, risotto…  I prefer to balance a heavy dish with a lighter side. Do what feels right for you.

closeup

Dinner is served! You won’t even need a knife….


Sid, I had a great time stalking your site, it was a thrill to get your blog as my first assignment with the new group… I hope you had as much fun as I did this month!
To see what my new friends cooked up this month, click on the blue frog at the end of this post.


ONE YEAR AGO: In My Kitchen, February 2015

TWO YEARS AGO: Avocado and Orange Salad with Charred Jalapeno Dressing

THREE YEARS AGO: Green Olive, Walnuts and Pomegranate Salad

FOUR YEARS AGO: Romanian Flatbreads

FIVE YEARS AGO: Ziti with Artichokes and Meyer Lemon Sauce

SIX YEARS AGO: Blasted Broccoli, Stove-top version