PECAN CRUSTED CHICKEN FROM SOUTHERN AT HEART

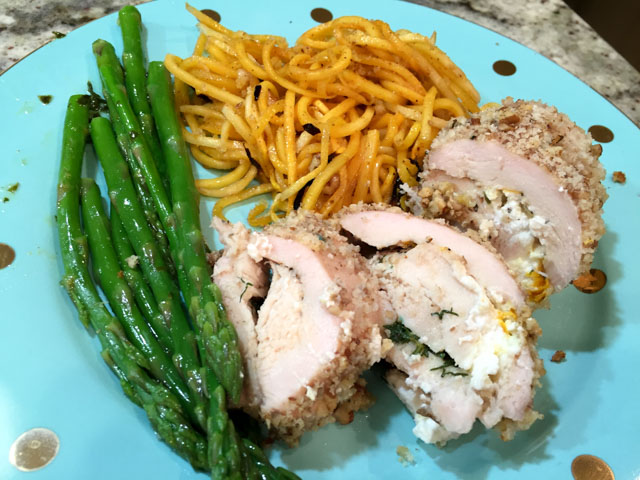
Some recipes sound quite tasty but disappoint when you make them.  Not this one. Tasted as good as it sounded…  Funny thing is, I wasn’t sure it would be a winner because chicken breasts can be a bit tricky when baked.  However,  the meat was tender and moist, it looked pretty nice when sliced, and I heard “this is really good” several times during our Sunday dinner. It is a bit involved to make on weeknights, but I guess one could spread the preparation, assembling the “roulades” the evening before and keeping them in the fridge without the pecan coating. Next evening, all that’s left to do is coat the meat with crumbs and bake. The recipe comes from Damaris Phillips show on FoodTV, Southern at Heart.  I find her delightful, upbeat and funny. Even though for the most part her style of cooking is a bit too heavy for my taste, every once in a while I find something that calls my name. Like this chicken. Flavorful and quite elegant to boot.

Pecan Crusted Chicken Breasts

PECAN CRUSTED STUFFED CHICKEN BREASTS
(adapted from Damaris Phillips)

Four boneless, skinless chicken breasts
salt and ground black pepper
4 ounces fresh goat cheese, crumbled
1 tablespoon chopped fresh dill
2 teaspoons grated orange zest
2 eggs
2/3 cup dried breadcrumbs
2/3 cup ground pecans
Coconut oil spray

Heat the oven to 400 degrees F.

Place the chicken breasts between two pieces of plastic wrap and pound to 1/4-inch thick. Pat the chicken dry and sprinkle liberally with salt and pepper on both sides. Sprinkle the goat cheese lengthwise on one half of each breast; then sprinkle with dill, and orange zest.  Fold in the short ends as if folding a Mexican burrito, then, starting on the half with cheese, roll up into a tight cylinder. Close the seams with toothpicks or tie with kitchen twine.

Whisk the eggs in a wide, shallow dish with 1 tablespoon water. In a separate dish, combine the breadcrumbs and ground pecans. Sprinkle the stuffed chicken with salt and pepper. Dip in the egg mixture and then in the breadcrumb mixture; shake off excess breading.

Place the breaded chicken on a wire rack set over a baking sheet and spray with coconut oil. Bake to an internal temperature of 160 degrees F, about 25 minutes. Remove from the oven and let rest for 5 minutes. Remove the toothpicks. Cut in slices and serve.

ENJOY!

to print the recipe, click here

chickencomp

Comments: I know that goat cheese and dill are a match made in heaven, but you know what made this dish a real winner? The orange zest. In fact, the sweet citric flavor was even more intense two days later when we had leftovers for dinner. I served it with butternut squash “noodles” and asparagus, but of course the chicken would go well with many different side dishes. For instance, Damaris paired it with a Southern risotto, very hearty.

This recipe would be great for a dinner party, as you can prepare it all in advance and place the meat in the oven half an hour before you want to sit down for dinner. Keep in mind not to over-process the pecans, so that you get a bit more crunch on the topping.  In typical Sally mode, I totally forgot that I have some pecan flour in the freezer. I bet it would be great to use maybe 50-50 with the bread crumbs, intensifying the pecan flavor.  Something to consider for next time…

ONE YEAR AGO: Lamb Shanks en Papillote with Cauliflower-Celeriac Purée

TWO YEARS AGO: Chestnut Brownies and a Blog Award!

THREE YEARS AGO: Quinoa with Cider-Glazed Carrots

FOUR YEARS AGO: Celebrate Wednesday: Heirloom Tomatoes Steal the Show

FIVE YEARS AGO: Pain de Provence

SIX YEARS AGO: Golspie Loaf, from the Scottish Highlands


SECRET RECIPE CLUB: CHOC-ORANGE MINI CAKES & A BONUS RECIPE

13082596_1327954120553739_3054889855668038106_n(Reprinted with permission from Adrienne Hedger)

And here we are landing firmly in the month of May. This year is flying by, if you ask me… First Monday of the month means fun. It is Reveal Day for The Secret Recipe Club, that event in which bloggers are paired in secret and cook a recipe from their assigned site.  This month I got a food blog that was new to me: Chit Chat Chomp, hosted by Leigh, who blogs from Melbourne, a place I would love to visit one day. Leigh’s site is a thing of beauty, very stylish, elegant, amazing photos, and great prose. Basically, a must-read food blog!  She summarizes her approach to cooking in a delightful way:

Recipes inspired by my travels through France, adapted for everyday simplicity and filled to the brim with nutrition.  Mostly gluten and refined sugar-free, my recipes lean towards food that inspires, heals and nourishes, but above all else, it’s fresh, organic and simple.

Recipes inspired by my travels through France… She’s got my full attention!  In fact, she describes herself as a lover of all things French. You can imagine the smile I opened when I read that line, right?  I spent quite a bit of time stalking her blog, but jumped on a recipe right away for a reason I will classify as “The Swedish Effect.” Small parenthesis is needed.  We have an undergraduate student from Sweden in our lab called Olivia. She happened to mention that April 15th was her “name day” back home.  I was puzzled, but then learned that in Sweden each day of the year is associated with a particular name, as you can see in this site. April 15th is the name day for Olivia (girls) and Oliver (boys). Olivia said that her Grandma always gave her a nice card on that day to celebrate the occasion. So, I thought it would be cool to bake something starting with the letter O and bring to the lab on that day. Orange-Chocolate mini-cakes seemed perfect! Obviously, I jumped on the recipe with no hesitation whatsoever. But, my decision had a small problem associated with it, which led me to make a second recipe for today’s reveal. Read on…

Choc Orange Mini Cakes
ORANGE-CHOC MINI CAKES
(from Chit Chat Chomp)

Makes 6 mini-cakes

1 orange
1 cup almond meal
1 tsp baking powder
2 large eggs
1 Tbsp raw cacao powder
1 Tbsp rice malt syrup or raw honey
handful of raw cacao nibs
handful of sunflower seeds (I omitted for lack of sunflower seeds)

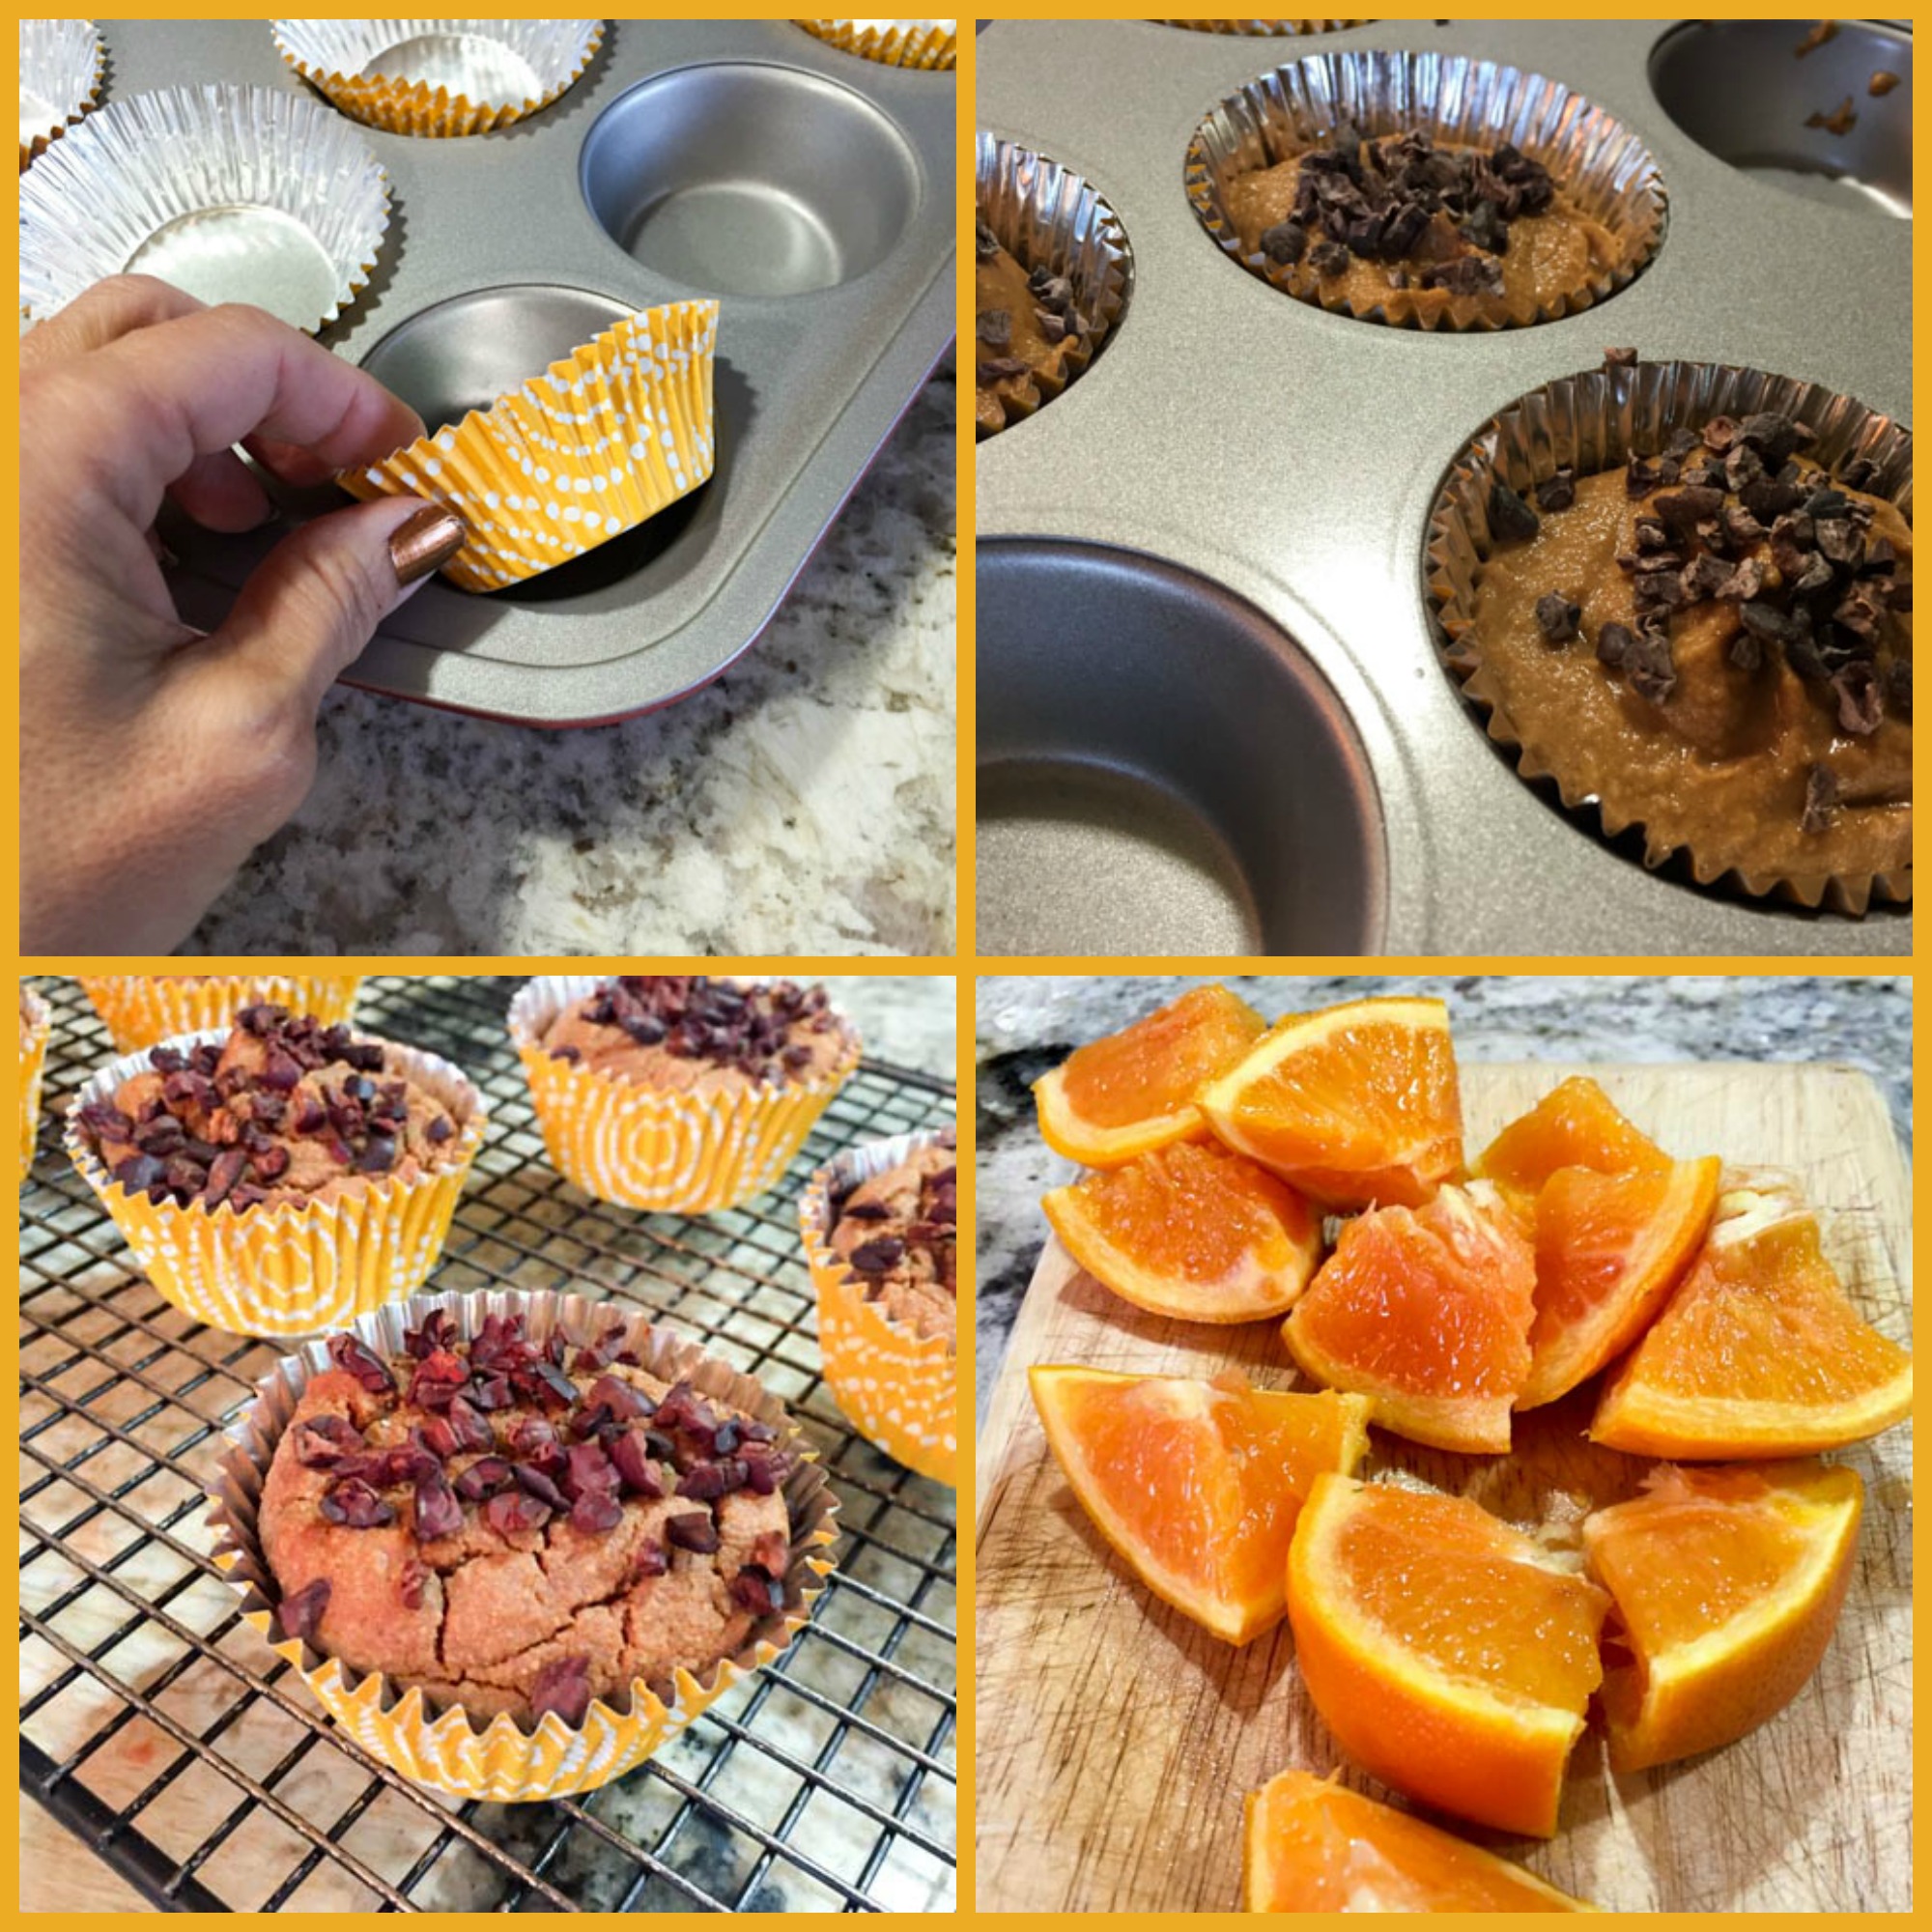
Heat oven to 320 F and line a mini cupcake pan with 8 cupcake papers

Place the orange in a pot and cover with water. Bring to the boil then reduce the heat to low and simmer for 1 hour. Allow to cool.

Chop the cooked orange into chunks and place in a blender and blitz until smooth. Add all other ingredients (except cacao nibs and sunflower seeds) to the blender and pulse until combined.

Divide the batter between your cupcake papers, filling close to the top as they will not rise by much, and top with the cacao nibs and sunflower seeds. Pop into the oven for approximately 30 to 40 minutes, or until a skewer comes out clean when inserted in the middle.

ENJOY!

to print the mini-cake recipe, click here
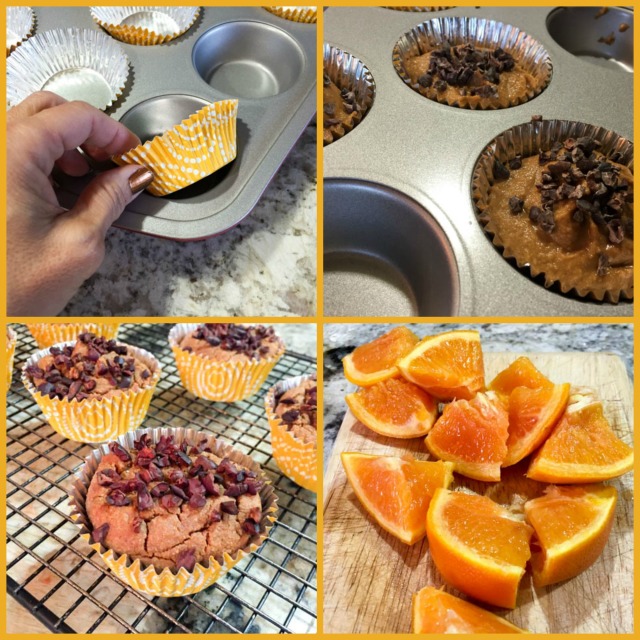
orangecakecomp
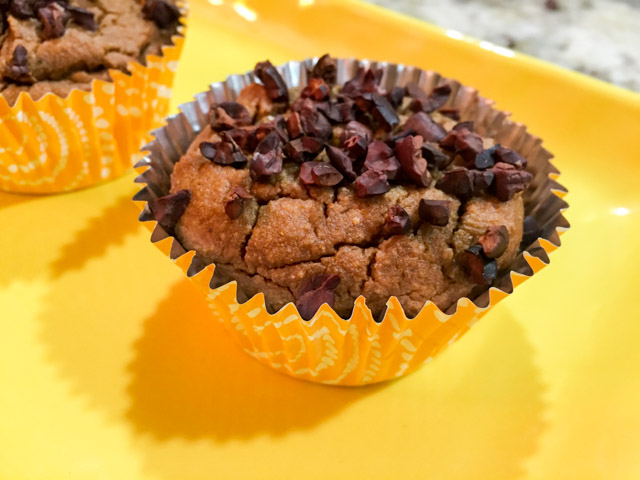
Comments: As Leigh mentioned, the only tricky part of this recipe is to boil the orange. Tricky in the sense that you need to dedicate one hour for that step. Essentially hands-free, though. The smell in the kitchen as the orange simmers…. wonderful!  Once the orange is ready and cooled down, the batter will be ready in minutes. Now, let’s talk about the “small problem.”  The recipe made six cupcakes, enough for each of our lab members to enjoy, but Phil and I could not have any. In short, I made a recipe for The Secret Recipe Club, but never got to taste it. I had only one way to restore my dignity as a blogger: choose a second recipe from Chit Chat Chomp, and make it too… and that’s what I did, so today you get two recipes instead of one. How’s that for problem solving?

Without further ado… my bonus recipe from Leigh’s great blog:
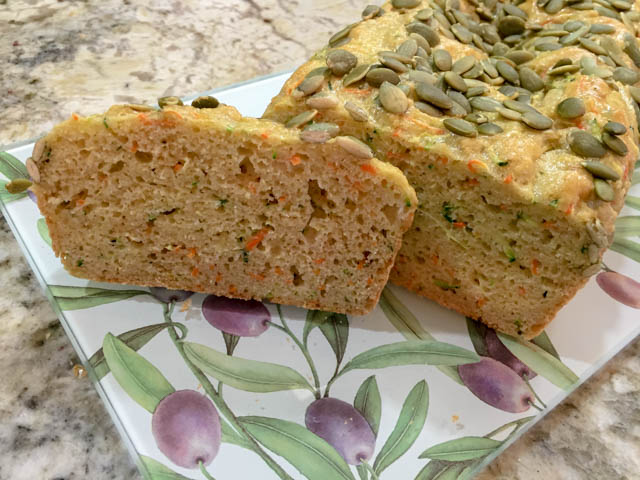
Veggie Bread

VEGGIE BREAD
(from Chit Chat Chomp)

1 + 1/2 cup almond meal
3/4 cups arrowroot flour
1/2 teaspoon sea salt
1/2 teaspoon baking soda
5 eggs
1 + 1/2 teaspoon apple cider vinegar
1 large zucchini, grated
1 large carrot, grated
1/2 cup finely grated Parmesan cheese
2 tablespoons pepitas.

Heat the oven to 325 F and line a standard loaf pan with parchment paper.

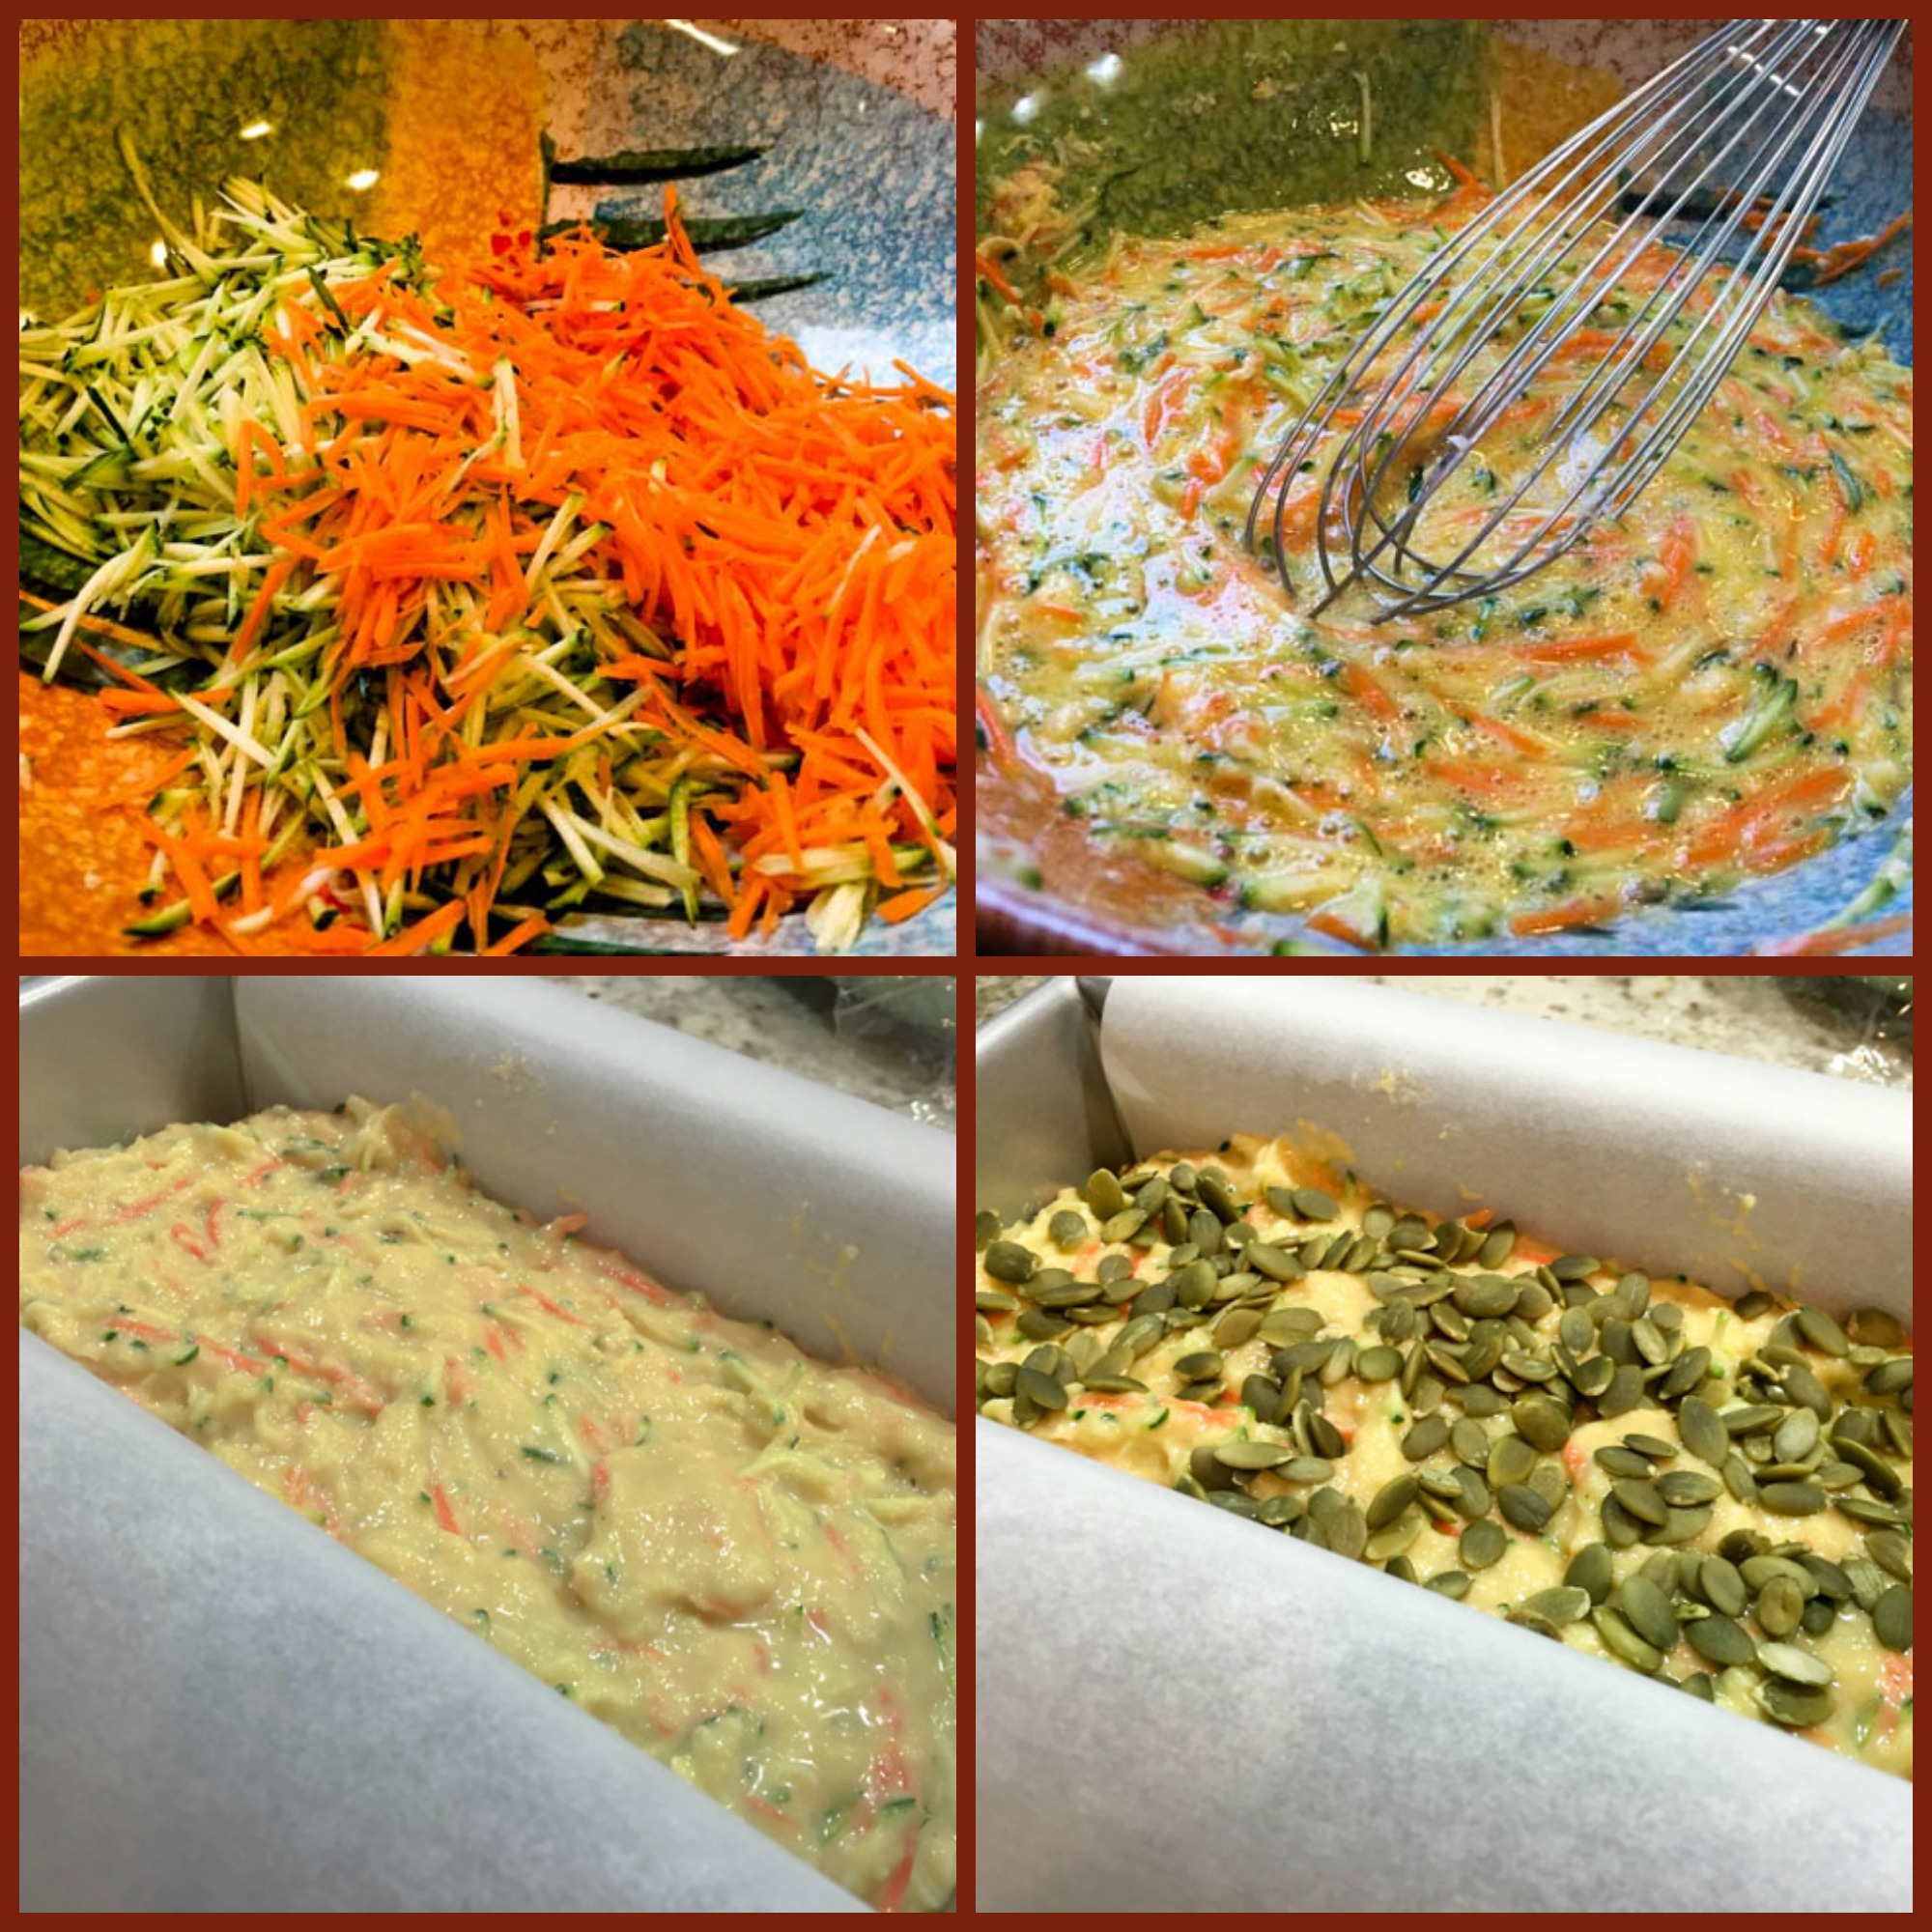
In a large bowl, mix together the almond meal, arrowroot, salt and baking soda. In a separate bowl whisk the eggs lightly with the apple cider vinegar. Add zucchini, carrot and cheese and mix well.

Add the egg mix to the dry ingredients. Mix to combine. Pour the dough into the prepared loaf tin and sprinkle with pepitas.

Bake for 35-40 minutes or until the top starts turning golden and a skewer comes out clean. Remove from the oven and transfer to a wire rack. Allow to cool for five minutes before cutting into slices.

ENJOY!

to print the Veggie Bread recipe, click here

veggiecomposite

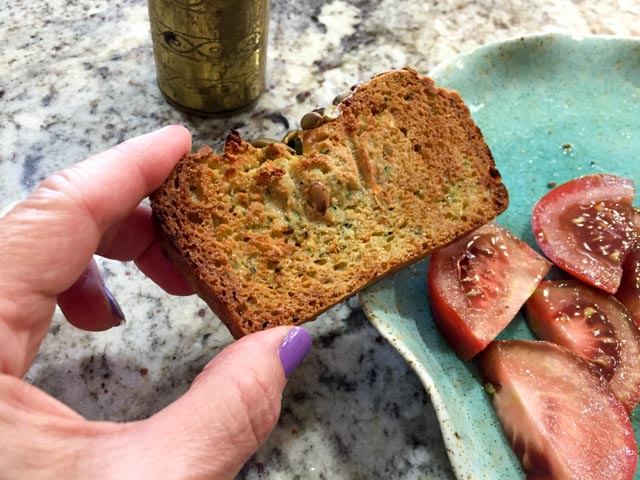
Comments: We loved this bread! It is obviously gluten-free, no regular flour, but the texture reminded me of quick breads, except that this had considerable more moisture. Not too dense like some gluten-free breads turn out.  Leigh said it freezes well, but we did not get to test that, in three days it was gone. I enjoyed a slice at lunchtime, and was surprised that Phil did that too, he prefers his bread to be loaded with gluten. This one had so much flavor that the lack of wheat flour was not a big deal.  Once it sits in the fridge for a while, the best way to bring it back to life is toasting it…  paired with juicy tomatoes, it was out of this world delicious!
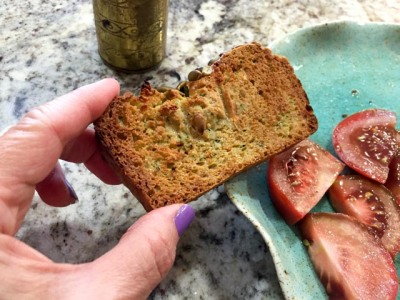
toasted

I wanted to try to make croutons out of it.  Not sautéed because I am afraid they would crumble, it is a very delicate bread. But maybe spraying the croutons with coconut or olive oil then toasting them in the oven. I bet they would turn out amazing on a kicked-up version of Caesar salad, or over a massaged kale concoction. Definitely a bread to play with.

I must say it was not easy to decide on which recipe to make as the bonus.  I really wanted to make her Savoury Muffins, not only because the recipe enticed me, but for the write-up about it. You gotta go and read it… it has to do with France…   And, if the weather was a little more appropriate, I would love a bowl of her luscious Carrot Soup… Another heavy contender was the Zucchini Noodle with Kale Pesto, which is pretty much my favorite type of meal these days.

Leigh, I loved getting your blog as my assignment this month, and feel sorry I could not taste those cute mini-cupcakes… Thinking back, I should have made a double batch, but I only thought about it after they were all baked and I had no time to boil another orange and start over. It was getting close to bedtime then… oh, well. Such is life!

Please make sure to click on the blue frog sitting patiently at the end of this post, so you can marvel at the posts that my virtual friends from Group A made for their assignments.

Adrienne, thank you again for allowing me to share your cartoon on the blog!
I love your work!

ONE YEAR AGO: In My Kitchen, May 2015

TWO YEARS AGO: P90X3, a Review of Tony Horton’s Latest Fitness Program 

THREE YEARS AGO: Pasta and Mussels in Saffron Broth

FOUR YEARS AGO: Triple Chocolate Brownies

FIVE YEARS AGO: Shanghai Soup Dumplings

SIX YEARS AGO: Bite-sized Chocolate Pleasure

WALNUT-RAISIN BRAN MUFFINS

Every single time I type raisin it comes as raising instead. Pumpkin more often than not becomes pumpking. You could assume I have issues with words that end with “in”, but when sous-vide first gets written as sous-vice, and kitchen turns to chicken that hypothesis falls flat on its face. Oh, well. The mind works in mysterious ways. Even more mysterious, though, is what constitutes the perfect bran muffin as far as my beloved is concerned.  It’s been a while since I baked a batch, so it’s time to share my latest attempt at reaching his Bran Muffin Nirvana. Keep in mind that they have to be big, very bran-y, and loaded with nuts and raisins. I adapted a very popular recipe from Heidi Swanson and surprised Phil one early Sunday morning with six jumbo-sized muffins. Just a side benefit of waking up full of energy at 4:30am…

Bran Muffin


BRAN MUFFINS WITH WALNUTS AND RAISINS
(adapted from Heidi Swanson’s recipe)

1 cup bran flake cereal
12 ounces full-fat yogurt
8 tablespoons unsalted butter, melted
1/2 cup all-purpose flour
1/2 cup whole wheat flour
1/2 cup wheat germ
1 teaspoon baking soda
1 teaspoon baking powder
1/4 teaspoon salt
4 tablespoons sugar
2 large eggs
4 tablespoons honey
1/2 cup raisins
1/2 cup diced walnuts, slightly toasted

Heat the oven to 400, and line 6 cups of a jumbo muffin pan with paper liners or grease them with butter.

In a small bowl, combine the cereal, yogurt and melted butter. Stir together very well, and let the cereal soak while you work with the dry ingredients. Whisk together the flours, wheat germ, baking soda, baking powder, salt and sugar.

Stir the eggs and honey into the bowl with the bran cereal, then stir in the dry ingredients. Gently add the raisins and walnuts. Divide the batter between the muffin cups and bake for about 22 minutes. Let the muffins cool in the pan for a couple of minutes, then move them to a wire rack to cool completely.

ENJOY!

to print the recipe, click here

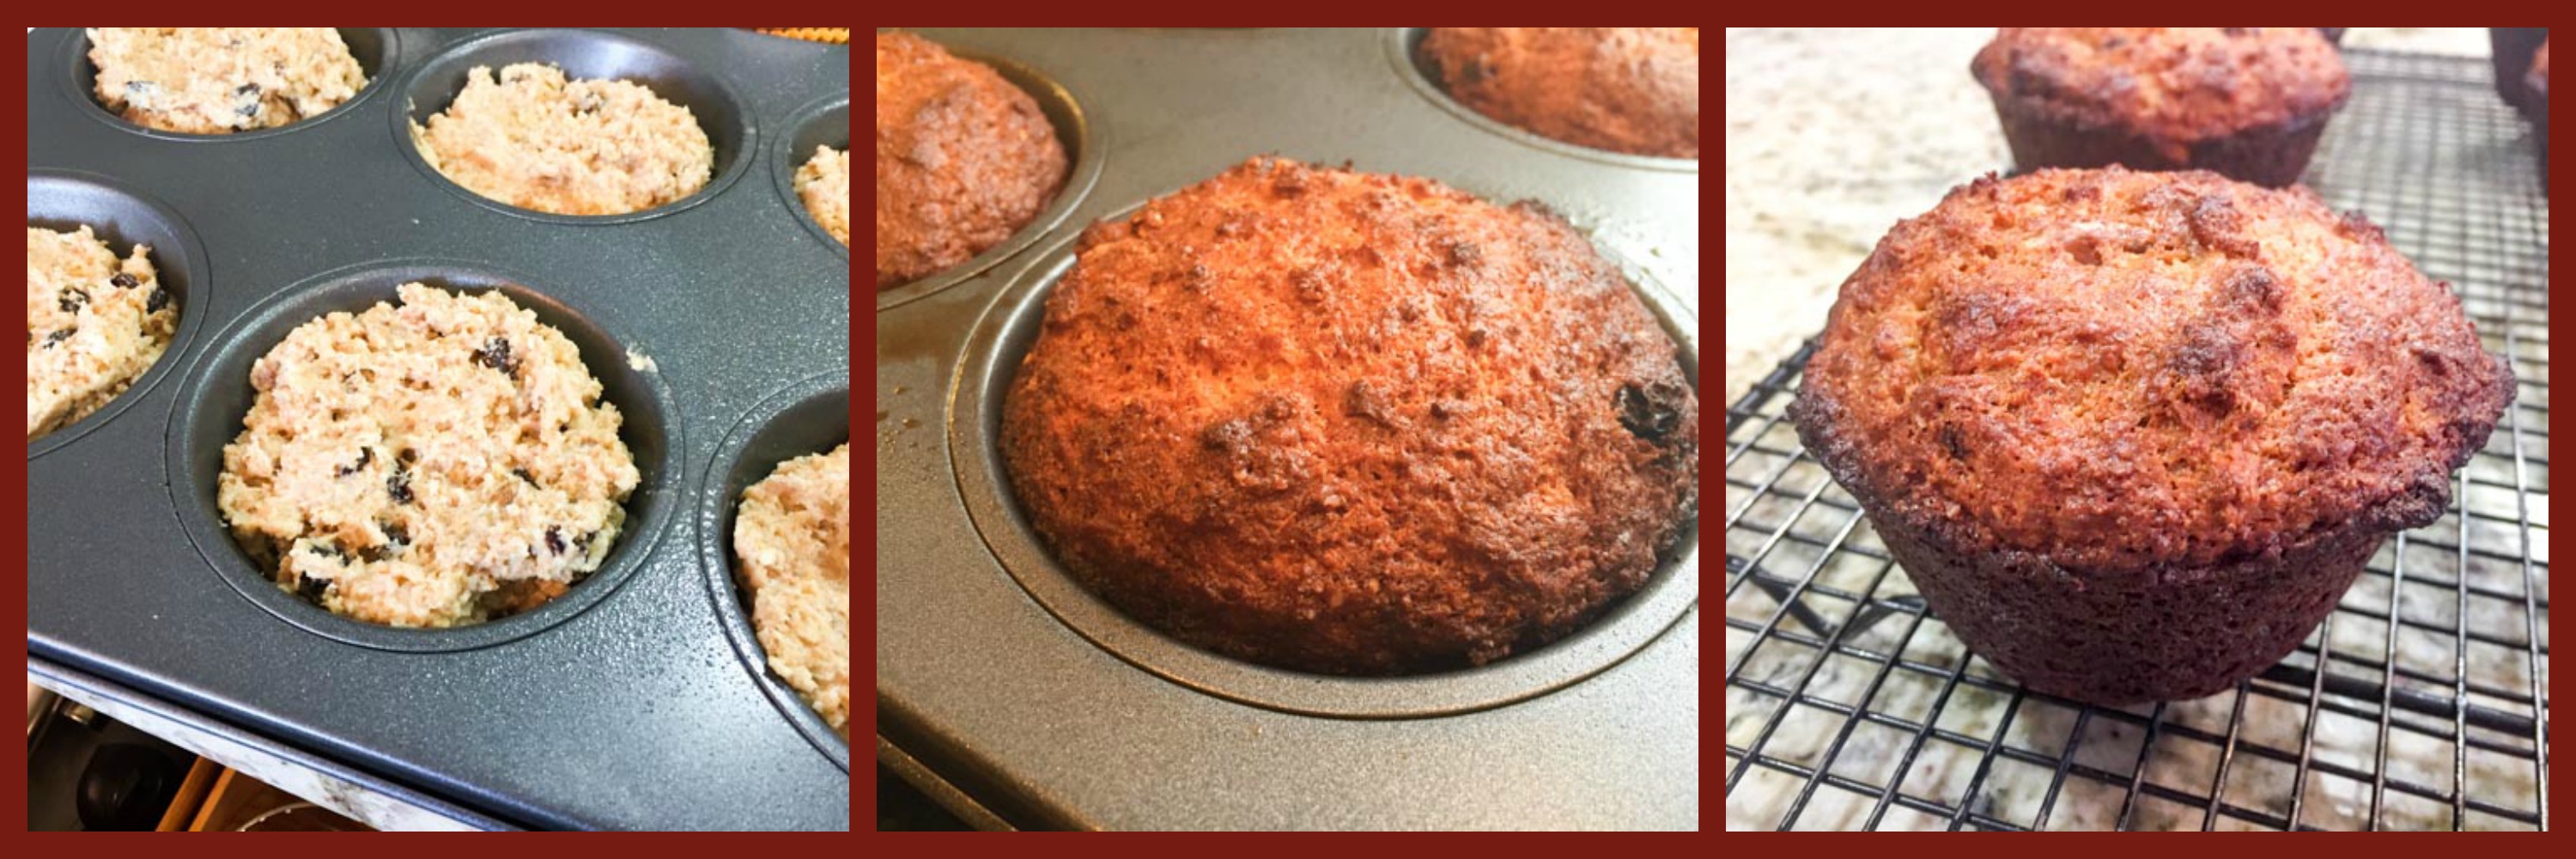
muffincomp

Comments: Amazing what almost seven years of blogging can do. I knew I had bran muffins on the site, but was shocked to see that this is my sixth recipe for this delicacy. What can I say? They are Phil’s favorite kind and my goal from the start was to bake the bran muffin of his dreams. Did I get there?  The asymptotic curve is getting closer to the top, I am told. The resident critic thought the amount of walnuts and raising raisins were spot on. The size was adequate. The texture got a nod of approval too. So, what’s the improvement needed? More bran. Not bran-y enough. Some people demand “more cowbell“, others demand more bran.  The quest for perfection is still on. But, in a way it’s  nice to have something to strive for…

muffin crumb

I wonder if Christopher Walken would also request a little more bran?

😉

ONE YEAR AGO: A Star is Born!

TWO YEARS AGO: Chestnut Flour Sourdough Bread

THREE YEARS AGO: Kinpira Gobo and Japanese Home Cooking

FOUR YEARS AGO: Walnut Sourdough

FIVE YEARS AGO: Thai Chicken Curry

SIX YEARS AGO: Zen and the art of risotto

FINE TUNING THOMAS KELLER

If you are interested in  sous-vide cooking,  chances are you either own or have heard of the book Under Pressure: Cooking Sous-vide,  by Thomas Keller (a dear friend gave me a copy, am I lucky or what?). When it comes to sous-vide, the outcome is all about the combination of temperature and time in the water bath, and Keller’s book is an amazing source of information to get you going.  I have already shared in the blog a few recipes for chicken thighs sous-vide that relied on the temperature that Thomas Keller recommends,  around 150 F. They turned out delicious, with homogeneously cooked meat, and good flavor. But they lacked a quality I happen to love in this type of meat: the falling off the bone tenderness. I browsed around cooking forums, but found no specific advice to help me out. Then I stumbled more or less by accident into this article and decided to re-visit the issue. Basically, the article states that a temperature of 150 F  will produce very juicy chicken, but with a firm texture. If you increase the temperature to 165 F, your outcome will depend on the time of cooking, going from tender (1 to 4 hours) to “falling off the bone tender” (4 to 8 hours).  I decided to try  the combination of 168 F for 5 hours. Results? Oh Em Gee perfection! Exactly what I’ve been hoping for.  You should have seen me doing the Happy Chicken Thigh Dance. Wait, maybe not.  Some things are better staying in the privacy of a home. So, with apologies to Mr. Keller, I dare say that I prefer my tweaked version, a drastic departure from his. If you don’t own a sous-vide gadget, no need to worry, I give you the specifics to make it in a regular oven too.

Chicken Thighs Sous-vide


ORANGE-SOY CHICKEN THIGHS
(sous-vide or regular oven)
(from the Bewitching Kitchen)

8 chicken thighs
1/2 cup soy sauce (or coconut aminos)
zest and juice of a large orange
1 tablespoon Dijon mustard
1 tablespoon agave nectar
2 tsp lime juice
1 tsp grated ginger
salt and black pepper to taste

Make a marinade whisking well all the ingredients.  Add the pieces of chicken to a large bag, pour the marinade over and let it sit in the fridge for a few hours, or at room temperature for 30 minutes.

If cooking sous-vide:
Remove the chicken from the marinade (save the marinade in the fridge), vacuum-seal four pieces in each of two bags. Place the bags in a water-bath set to 168 F for 5 hours. Close to the end of cooking time, place the reserved marinade in a small pan and cook it over medium-high heat for a few minutes to reduce it slightly. Remove the chicken pieces from the bag, place over a roasting pan, and brush the skin with the reduced marinade. Add a little more salt if you like. Place the pieces under the broiler and roast until dark and crispy.

If cooking in a regular oven:
Place the chicken pieces skin down in a roasting pan with enough marinade all over to keep them moist during roasting.  Season lightly with more salt if you like (we do). Cover with aluminum foil and roast at 325 F for 1 hour.  Remove the foil, turn the pieces over and finish roasting at 425F until the skin is crispy.

ENJOY!

to print the recipe, click here


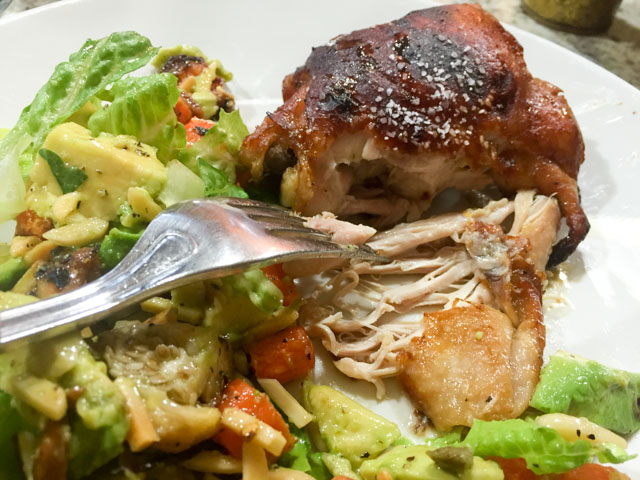
tender


Comments: What I like the most about sous-vide cooking is how forgiving it is in terms of timing. Take this recipe, for instance, if you set it up at lunch time but do not expect to be home until 6 hours later, no problem. One hour more, two hours more won’t affect the outcome.  Some say that the crock pot behaves the same way, but I don’t think so. Poultry can develop a sort of chalky texture when sitting in a slow-cooker past a certain point.

We enjoyed the chicken thighs with the salad I blogged about not too long ago. I simply do not get tired of it, it is perfect!  If you haven’t yet tried the combination of roasted carrots with avocados, don’t wait for too long…

ONE YEAR AGO: Cauliflower Tortillas

TWO YEARS AGO: Majestic Sedona, Take Two

THREE YEARS AGO: Secret Ingredient Turkey Meatballs

FOUR YEARS AGO: Swedish Meatballs and Egg Noodles

FIVE YEARS AGO: Italian Easter Pie

SIX YEARS AGO: Black Olive Bialy


A RETRO DESSERT

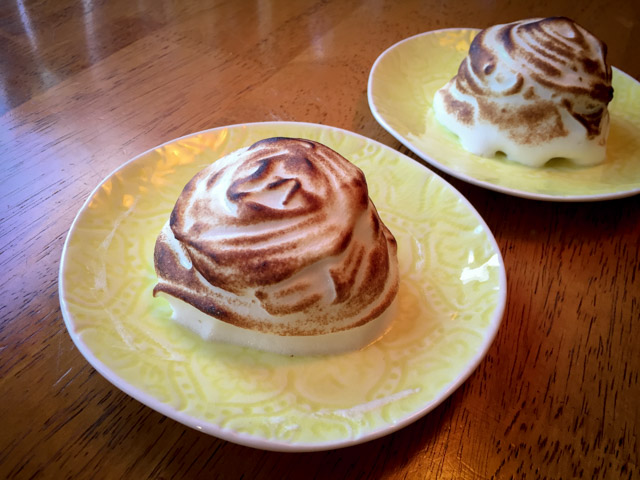
A couple of days before Easter we still had no idea what to make for our dinner, all we knew is that we would be cooking something together. We ended up with two recipes that are already in the blog: a rack of lamb with cranberry reduction sauce, and a mushroom soufflé.  We rarely make dessert for just the two of us, so at first we considered skipping it altogether. Then Phil mentioned that there was one particular dessert he had only enjoyed a few times, always in restaurants and maybe I could try and make it for us. He added “it may be a bit involved, though.”  Visions of a six-layer coconut cake flashed in my  imagination, but he definitely had something quite unexpected in mind: Baked Alaska!  My gosh, the last time I had it I was a teenager in Brazil, so that’s a little more than five years ago (wink, wink)…  We had this conversation 24 hours before Easter dinner, so I felt a rush of adrenaline pumping in my veins, and went to work. By work I mean “furiously googling.” I found the perfect recipe in a blog called “Dessert for Two.” How appropriate! It’s a great blog, by the way, make sure to visit… It goes without saying that Baked Alaska doesn’t keep very well, so making a small batch just for the occasion was a must. This was super fun to make and I must say one of the most delicious sweets made in our kitchen. You could of course double or triple the recipe, keeping the amount of meringue unchanged (it made more than needed for two small servings).

Baked Alaska2

INDIVIDUAL BAKED ALASKAS
(from Dessert for Two)

for the cake base:
2 tablespoons + 1 1/2 teaspoons all-purpose flour
1/4 teaspoon baking powder
1/4 teaspoon cornstarch
2 tablespoons + 1 1/2 teaspoons granulated sugar
1 large egg, at room temperature
1 tablespoon + 1 1/2 teaspoons milk
1 1/2 tablespoons unsalted butter
1/4 teaspoon almond extract

for assembling the Alaskas:
1 pint ice cream of your choice
3 egg whites
1/3 cup granulated sugar

Heat the oven to 350 F.

Use a 9 x 5″ metal bread loaf pan for this recipe; it needs to have sharp corners. Do not use ceramic bakeware with rounded corners. Line the bottom of the pan with parchment paper. Trim it very well to fit perfectly. Do not grease the pan in any way.

In a medium bowl, sift together the flour, baking powder, and cornstarch twice.

In a separate bowl, combine the granulated sugar and egg. Beat on high-speed until it reaches the consistency of soft whipped cream. This can take anywhere from 5-8 minutes. It will be fluffy and pale yellow with soft, floppy peaks. Melt the butter and milk together in the microwave. Stir in the almond extract

Fold one-third of the flour mixture into the eggs. Take your time and do this carefully until all of the flour mixture is incorporated, adding 1/3 of the flour mixture at a time. Finally, stir in the hot milk and butter mixture all at once and fold in well. Pour the batter into the pan, and bake for 10-12 minutes, or until a toothpick inserted in the center comes out clean.

Remove the pan from the oven, and let cool for 10 minutes. Then, run a knife along the edges of the pan and invert the cake carefully onto a cooling rack. Gently peel the parchment paper off, but if any more than a thin layer of cake sticks to it, let it cool completely before pulling it off. You can make the sponge cake the day before.

Scoop two perfect spheres of the sorbet by using an ice cream scoop. Level off the surface of the sorbet with the scoop to make a flat bottom.  Move the sorbet scoops to cupcake liners (or parchment paper) and freeze until very firm.

To assemble, use the edges of your ice cream scoop to cut out perfect-sized rounds of sponge cake. Top each cake round with one of the sorbet scoops. Place back in the freezer. Next, whip the egg whites in a medium bowl on high-speed until soft peaks start to form. Stream in the sugar and beat until combined. Don’t beat the egg whites past the point of soft peaks.  When ready to serve, pipe the egg whites (or use a spoon) over the sorbet mounds. Use a fork to make ridges in the egg whites.

Using a culinary torch, brûlée the egg whites and serve the dessert immediately.

ENJOY!

to print the recipe, click here

compositealaska

Comments:  I never imagined I would re-visit a cake that is pretty much like a genoise, my nemesis. And, to make matters worse, this one was baked in a tiny loaf pan. But, I must say it all went flawlessly, which worries me a little. Next time I bake a cake, I will pay my dues to the universe, obviously.  I wish I had more pictures of the whole process, including the drawing of circles in parchment paper to cut the base, but things were a bit frantic as they always are when I’m around cake batter.

When I make these again (and I definitely will), I might omit or reduce the almond extract because I felt it was too prominent in the final cake. However it is quite possible that the smell of the extract was too vivid in my mind. It is so potent! Phil did not feel the same way at all, he thought the cake was perfect. Still, I would like to try a little bit of Fiori di Sicilia instead of almond just for a change. As to the ice cream component, I went with two different flavors that we shared: the first Alaska made with Dulce de Leche because to me that is the flavor numero uno in the known universe. And the second one was White Chocolate-Raspberry-Truffle. I know. Your knees just got a bit weak, right? Mine too…

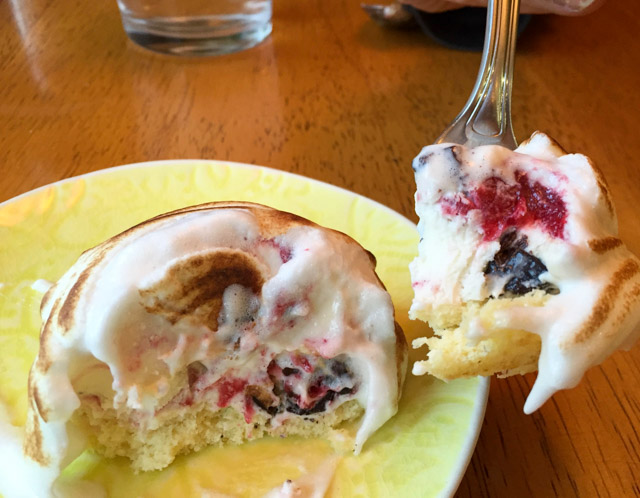
closeup
The contrast of slightly warm and toasted meringue, cold ice cream, with the base of the cake is a complete feast, perfect way to end a romantic meal, if you ask me.  Plus, it is a reasonably small portion that will not make you sit down at the sofa, tilt your head back and start snoring, possibly drooling. Nope.  The rest of your evening will be safe…

Baked Alaska

ONE YEAR AGO: Cauliflower Tortillas: Going low-carb and loving it!

TWO YEARS AGO: Clementines in Cinnamon Syrup

THREE YEARS AGO: In My Kitchen, April 2013 

FOUR YEARS AGO: Thrilling Moments (CROISSANTS!)

FIVE YEARS AGO: Maple-Oatmeal Sourdough Bread

SIX YEARS AGO: Pork Trinity: coffee, mushrooms, and curry