MEET THE PRINCE!

We are thrilled to introduce you to our new family member, Prince Freckles. Prince was born on June 12th, and joined our home 24 hours ago. Having a puppy is like falling in love with a special someone. Everything makes you smile, fills your heart with joy, and you cannot quite understand how you’ve lived your life without that being as part of it. We are absolutely smitten by this bundle of energy. His heart-shaped nose, his delicate black spots very similar to those of our dear BogeyQT. In less than 24 hours he learned to go down the two steps from kitchen to TV room, which scared him beyond belief at first. He almost did a full body flip the first time, and how we wish we had captured it on video! The images are already so many, as I type this post they fly through my mind and I cannot stop smiling. We needed him. And he is here. Welcome to the Bewitching Kitchen, Little Prince!

INCREDIBLY SIMPLE: KOREAN CHICKEN THIGHS

Mix a few ingredients, marinate the chicken. Grill. Done. It will go into our rotation, which tells you how much we loved it. Spicy to the right level. Sweet to the right level. Tender and moist.

KOREAN CHICKEN THIGHS
(from the Bewitching Kitchen)

8 boneless, skinless chicken thighs
3 tablespoons Gochujang sauce
3 tablespoons soy sauce
2 tablespoons honey
2 tsp toasted sesame oil
1/2 tsp salt plus more to taste

Mix all ingredients for the marinade, whisking them well. Add the pieces of chicken and move them around to coat each piece with the marinade. Leave it in the fridge from 2 hours to overnight.

Sprinkle a little more salt on the pieces of meat and grill until done, about 7 minutes per side, depending on how hot your grill gets.

ENJOY!

to print the recipe, click here

Comments: Two of my best buddies are Gochujang and Sriracha. I like to drizzle Sriracha over turkey burgers or other things ready to eat, but Gochujang I prefer to cook with. I find it a bit too strong on its own. In this marinade it is the dominant flavor, but unless you really dislike spicy food, it is not overpowering. I was quite amazed by how tasty leftovers turned out even when tortured fora couple of minutes in the microwave. We had them with air-fried zucchini (which I did not do a good job, over-crowded the basket and they turned out mushy), and British-style roasted potatoes (Sally pats herself on the back, they were perfect).

ONE YEAR AGO: Zucchini with Quick-Pickled Vegetables and Peanut Sauce

TWO YEARS AGO: Nha Benta (Brazilian candy)

THREE YEARS AGO: The Best, The Very Best Hummus

FOUR YEARS AGO: Chicken Katsu

FIVE YEARS AGO: Whole-Lemon Marinade: Long Overdue

SIX YEARS AGO: Tomato and Cucumber Salad with Almond Vinaigrette

SEVEN YEARS AGO: Eggplant Tomato Stacks

EIGHT YEARS AGO: The Couscous that Wasn’t

NINE YEARS AGO: Apple-Cinnamon Bread

TEN YEARS AGO: Blueberry Galette

ELEVEN YEARS AGO: In My Kitchen, August 2011

TWELVE YEARS AGO: Journey to a New Home

THIRTEEN YEARS AGO: Friday Night Dinner

BANANA BREAD FROM THE EXPERTS

This is a recipe from America’s Test Kitchen, the folks who test every single variable in a recipe multiple times until they come up with perfection. With the best. Or, as they called this one, The Ultimate Banana Bread. They’ve been known to go after food bloggers who either share their recipes without permission, or tweak their versions. I find the tweaking part a bit funny. Taste is so subjective that adjusting any recipe to suit the palate is what any cook should be doing…

THE ULTIMATE BANANA BREAD

The recipe is available online, so you can get it with a jump here. I actually did not see that review until after making the recipe, but I read it smiling all the way through… It turns out that I removed all the fuss and no major harm was done.

As the folks at thekitchn mentioned, the addition of turbinado sugar on top is brilliant. I actually added it in two installments, first right before placing in the oven…

And the second time another sprinkle just over the bananas when the bread had been baking for 40 minutes. I baked for a total of 55 minutes, in a 9 x 5 inch pan. The other tweaking I did was using frozen bananas without worrying about draining excess liquid. I also measured the amount of mashed bananas that went into the bread, as the fruit varies so much in size: 600g of banana pulp. One single fresh banana was used for the slices on top. Doing that, the recipe is really super simple, two bowls, one for dry ingredients, one for wet. Done.

Keep in mind that going at the sugary crust to peel it off and eat it is considered a faux-pas. Stealing extra slices of banana and running away? Equally distasteful. What you should do is make this recipe, available online in the link I provided or in this cookbook. Tweaking is optional. Your kitchen, your rules!

ONE YEAR AGO: Shrimp Stir-Fry with Snow Peas and Cashews

TWO YEARS AGO: Pickled-Roasted Chickpeas with Cashew Cream

THREE YEARS AGO: Twice-Baked Goat Cheese Souffle

FOUR YEARS AGO: A Star from England in the Bewitching Kitchen

FIVE YEARS AGO: Hommage to the Sun

SIX YEARS AGO:The Fabulous Three
.
SEVEN YEARS AGO: Turkey-Chorizo Burger with Green Chile Dressing
.
EIGHT YEARS AGO:Taco Salad
.
NINE YEARS AGO: Semolina Sourdough Boule
.
TEN YEARS AGO:Forgive me, for I have sinned
.

ELEVEN YEARS AGOCracked Wheat Sandwich Bread
.
TWELVE YEARS AGO:  Au Revoir, my Bewitching Kitchen
.
THIRTEEN YEARS AGO:French Bread

KASHMIRI CHICKEN THIGHS

This is a pressure cooker (or Instant Pot) recipe. I am afraid that to get the texture of the meat and depth of flavor in the sauce just right, you’ll need to use it. Also, don’t be tempted to keep the skin on the chicken thighs, because they will make the sauce very fatty and heavy. So take a deep breath and remove it.

KASHMIRI CHICKEN THIGHS
(from the Bewitching Kitchen)

2 tablespoons olive oil
2 medium shallots, minced
4 whole cardamom pods, lightly crushed
1 cinnamon stick
2 tablespoons finely grated fresh ginger
2 tablespoons tomato paste
1 tsp kashmiri chili
1/2 tsp cumin
1/2 tsp paprika
5 bone-in, skinless chicken thighs
1 tsp salt
1 cup water
1/2 cup yogurt, full-fat
1 tsp cornstarch
fresh cilantro, to serve

Heat the oil in a pressure cooker (or your Instant Pot using the sauté function), add the shallots, cardamon pods, cinnamon stick and salt. Cook until the shallots are soft and fragrant. Add the ginger, tomato paste, chili, cumin, and paprika. Cook for about 1 minute, add 1 cup of water, gently stir, then add the chicken pieces.

Close the pan and cook in full pressure for 12 minutes, then let the pressure reduce naturally for 15 minutes. Release any pressure left (running water over the lid or doing whatever method is called for in the Instant Pot), open the pan and remove the chicken pieces to a serving bowl, keeping it tented with foil. Remove the cinnamon stick and cardamon pods, then reduce the sauce by simmering for 10 to 15 minutes. Mix the yogurt with cornstarch, add to the simmering sauce, return the chicken to the pan, and simmer it all together for a few minutes, until the sauce is slightly thickened. Sprinkle fresh cilantro. Serve over rice or with your favorite side dish.

ENJOY!

to print the recipe, click here

Comments: Kashmiri chili is a great spice, with subtle heat and unique flavor. The pressure cooker does a wonderful job tenderizing the meat and allowing the sauce to develop that complex taste usually reserved for things cooked for hours and hours. Adding a little amount of cornstarch to the yogurt prevents it from separating during simmering, and gives a velvety texture I am quite fond of. If you rather not use it, whisk the yogurt as you pour it into the pan, and avoid cooking for very long. The sauce will be obviously a lot thinner, but still taste wonderful.

ONE YEAR AGO: A Vegan Trilogy

TWO YEARS AGO: The Mystifying Hurricane Roll

THREE YEARS AGO: Pop-Tarts with Strawberry Balsamic Jam

FOUR YEARS AGO: Ptichye Moloko, a Russian Dessert

FIVE YEARS AGO: Cheesy Low-Carb Zucchini Tarts

SIX YEARS AGO: Blogging Hiatus

SEVEN YEARS AGO: Apricots, Three Ways

EIGHT YEARS AGO: Up Close and Personal with Kale

NINE YEARS AGOBlack Berry Cherry Sorbet

TEN YEARS AGO: Asparagus Pesto

ELEVEN YEARS AGO: Chocolate and Chestnut Terrine

TWELVE YEARS AGO: Under the spell of lemongrass

THIRTEEN YEARS AGO: Greens + Grapefruit + Shrimp = Great Salad!

EARL GREY SHORTBREAD COOKIES

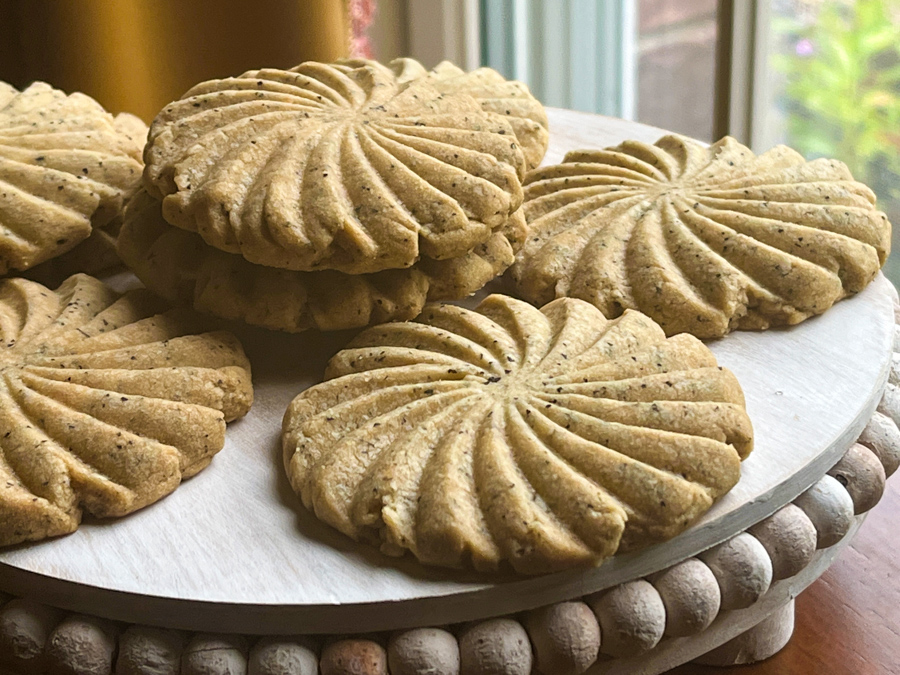
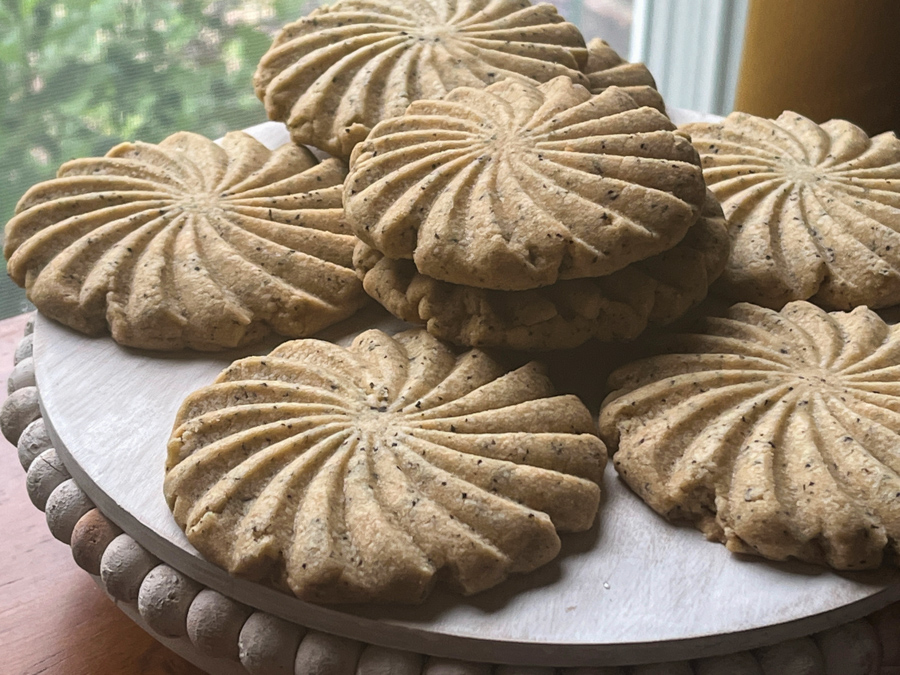
Shortbread cookies have unique texture, and are surprisingly addictive. This version, flavored with tea and a touch of orange extract, followed the basic method from Helen Fletcher, described in her cookbook: Craving Cookies, The Quintessential American Cookie Book. The food processor makes perfect shortbread dough every single time.

EARL GREY SHORTBREAD COOKIES
(inspired by several sources)

4 bags of Earl Grey tea (about 8g tea, I used decaf)
310 g all purpose flour
48 g cornstarch
1/2 tsp salt
227 g butter, very cold, cut into pieces
115 g powdered sugar
1/2 tsp orange extract

Heat the oven to 275 F.

Add tea, flour, cornstarch and salt to the food processor and process a few seconds to mix. Add the butter, process until it is dispersed in small pieces, stop the processor, add the powdered sugar and orange extract, and process it again until a dough forms. You can turn the processor on and off a few times for more efficient mixing. Once the dough starts to form and dance around the bowl, stop and gather it gently with your hands, forming a disc over parchment paper.

If you worked fast, you can proceed right away forming balls, each with 33g of dough. If the dough it too soft or feels at all warm, place it in the fridge for 30 minutes or so.

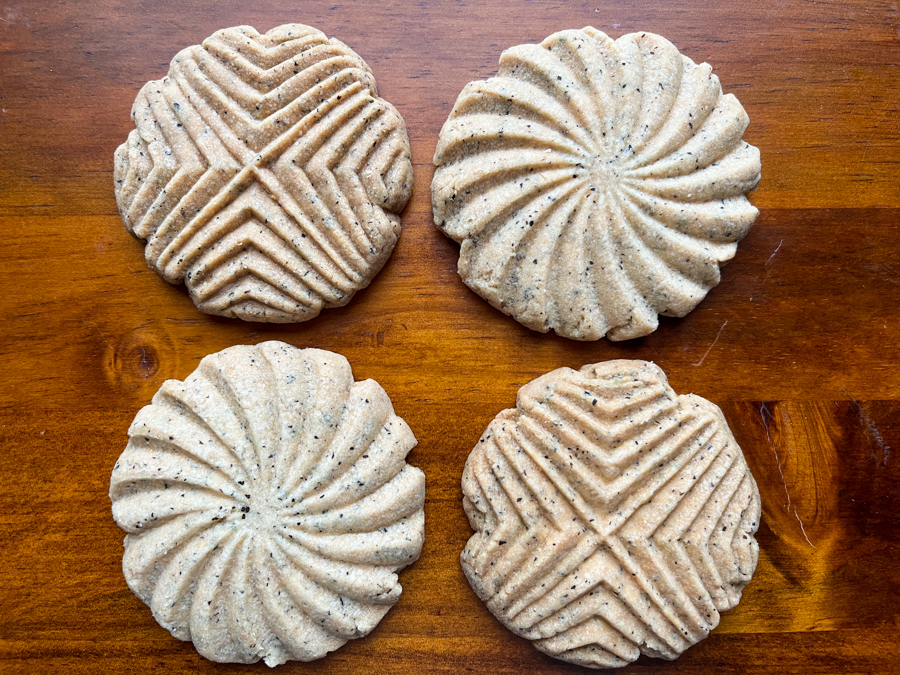
Working with one little ball at a time, press a design using your favorite cookie press coated with flour so it won’t stick. Freeze the cookies for 10 minutes, then bake at 275F for about 50 minutes over parchment paper. Let the cookies cool for a few minutes then transfer to a cooling rack.

ENJOY!

to print the recipe, click here

Comments: Shortbread is perfect for pressing a pattern or using decorative molds, as there is no leavening agent in the dough. Freezing is an additional step that helps the pattern stay even better during baking. As to the low temperature, 275 F gives shortbread a wonderful texture. I saw that recommended in a couple of websites and cookbooks and gave it a try in this bake. Loved it. If you are not pressed for time, consider this little twist. I baked them for 55 minutes exactly, the edges were starting to get golden.


ONE YEAR AGO: Summertime Macaron Duet

TWO YEARS AGO: Pain de Mie Dressed up for Party

THREE YEARS AGO: Five-Stranded Bread

FOUR YEARS AGO: Green Olive Salad

FIVE YEARS AGO: Coffee Macarons Dressed up to Party

SIX YEARS AGO: Blogging Hiatus

SEVEN YEARS AGO: Tomato Tatin

EIGHT YEARS AGO: Headed to Colorado!  

NINE YEARS AGO: Farofa Brasileira

TEN  YEARS AGO: Thai-Inspired Pork Tenderloin

ELEVEN YEARS AGO: A yummy Brazilian cake: Bolo de Fuba’

TWELVE YEARS AGO:  Summer’s Tomatoes

THIRTEEN YEARS AGO: Leaving on a jet plane…