Where is 2014 going in such a big hurry? It acts as if it’s desperately searching for 2015 or something, hard to believe we are in the end of May already! Still, each month closes with the secretive deliciousness of Reveal Day in the Secret Recipe Club. For those who may not know, it is that super fun event in which bloggers pick are assigned a blog in secret, choose a recipe to cook from it, and blog about it on the exact same day (and time!). This month I went through several cycles of hyperventilation from the moment I got my assignment. Why, you may ask? Because I received the blog of our group’s moderator! Can you imagine that? It’s like having to present a seminar on the research topic of the Head of your department! Hummmm, come to think of it, I’ve done that a few times in the past couple of years. No wonder I hyperventilate so much… (inside joke, laugh if you get it).
Our moderator, Sarah, is the gorgeous hostess of the blog Fantastical Sharing of Recipes. She is the Mom of two kids, 7-year-old Matthew and 6-year-old Cambria, and also has two kittens, Bella and Muffin. That seems busy enough for me, but she talks about getting a dog to join the fun! Let’s hope she will think twice before getting a Jack Russell Terror… 😉 Apart from taking care of two young kids, she also supervises 37 grownup kids in Group D of The Secret Recipe Club. For the most part, I suppose we are well-behaved, but undoubtedly there’s a lot of responsibilities on her shoulders. I went through her site with desserts and sweets in mind, hoping to bake something to take to our graduate students. But a lot of savory options tempted me like her Atomic Hashbrowns (with a name like that, they gotta be awesome!), her Tamale Balls, Philly Cheesesteak Egg Rolls (fusion cooking, anyone?), and her Jalapeno Popper Turkey Chili. After struggling with several options for sweets, I could not decide between her Blueberry Breakfast Braid. and the Dulce de Leche Cheesecake Bars. I tossed a coin. Yes, I did. And here is what the coin told me to do:

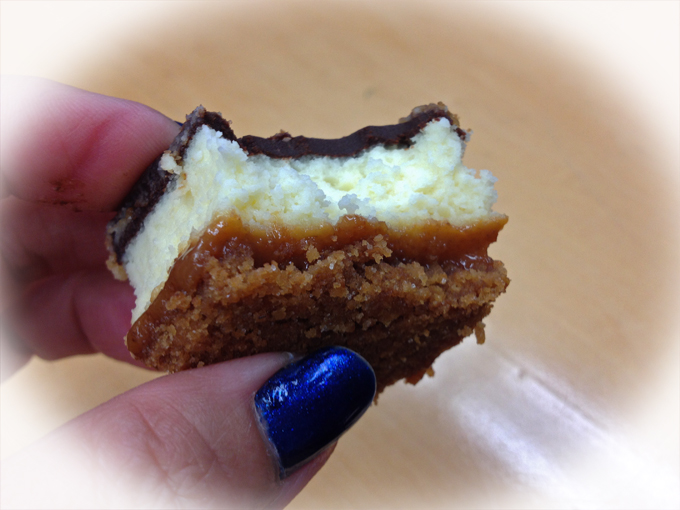
DULCE DE LECHE CHEESECAKE BARS
(from Fantastical Sharing of Recipes)
for the crust:
1 sleeve graham crackers
2 Tbsp. sugar
3 Tbsp. butter, melted
for the filling:
12 oz. dulce de leche
2 (8 oz.) package cream cheese, room temp
1/2 cup sugar
2 eggs
2 tsp. vanilla
for the glaze:
4 oz. bittersweet chocolate, chopped
4 Tbsp. butter
2 tsp. corn syrup
1 Tbsp. heavy cream
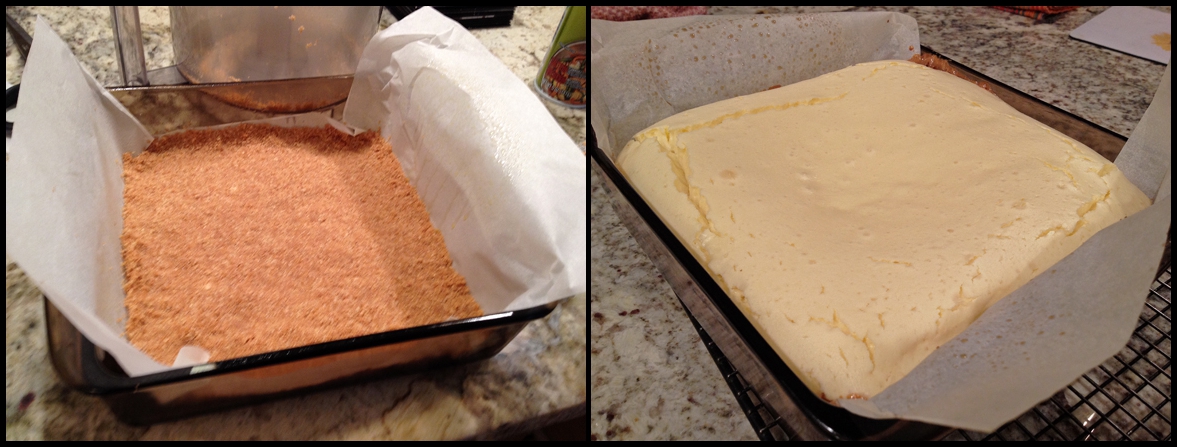
Prepare an 8-inch square pan with parchment paper and non-stick spray.
Grind crackers with sugar in a food processor. Stir in butter. Cover the bottom of the pan pressing the crumbs well with your fingers. Bake at 325* for 10 minutes and cool on a wire rack for 5 minutes. Pour dulce de leche on the crust and refrigerate.
Make the filling: beat cream cheese for 3 minutes. Add sugar and beat another 2 minutes. Add eggs and vanilla; beat just until incorporated. Spread filling on top of dulce de leche layer. Bake for 45 to 55 minutes. Cool for 2 hours.
For glaze: Heat all ingredients in a saucepan or double broiler, stirring until smooth. Cool for 10 minutes and pour over cooled filling. Chill for at least 30 minutes. Let sit at room temp for 10 minutes before cutting.
ENJOY!
to print the recipe, click here

Comments: This was my first time making a cheesecake type dessert, so I was excited to try it, but a bit worried about my inexperience. My goal was to take these bars to our lab meeting, which happens early on Thursdays. I laid out a nice schedule to make everything the evening before, taking in account that I had to meet Phil and a guest speaker for dinner at 8pm. On my way home I stopped at the store to get the ingredients, arrived home and got busy. Each step was planned to the minute, I was following along flawlessly. Flawlessly? Not so fast, Silly Sally… not so fast. When making my list for the grocery store, I did not notice the recipe called for TWO cream cheese packages. TWO. I brought home only one. Can you imagine the shiver up and down my spine? Can you picture my kitchen at that very moment? Can you, really? Yeap. Best laid plans.
Considering all my options and how fast the clock was ticking, I rushed back to the grocery store, faced the same cashier with a sheepish smile, and brought the second package of cream cheese home. Drove like a maniac to the restaurant, joined the gentlemen for dinner, and… found myself baking way past bedtime. Best laid plans. Story of my life.
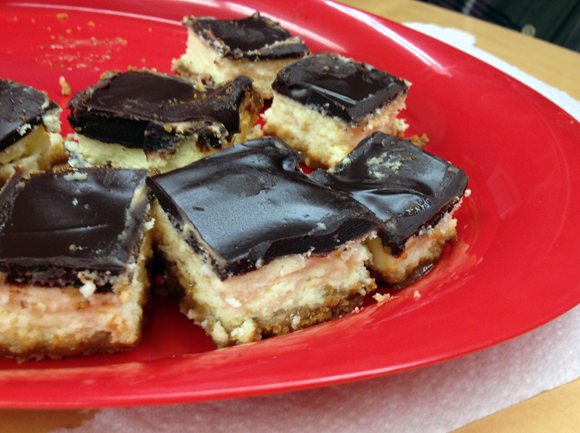
But, as usual, it all had a happy ending, although I should have remembered to bring a good knife to the lab to cut the squares. The knife available at the department was definitely not up to the challenge, and my production did not look nearly as good as that from Sarah. I think the best way to cut a cheesecake is a very sharp knife, dipping it in hot water at each cut, and cleaning the blade with a paper towel as you go. Keep that in mind if you make this decadent dessert. Decadent is a good way to define it, we are talking major caloric intake, but a little piece should satisfy even those with a very sweet tooth… I wish I had made my own dulce de leche from scratch like Sarah did, but that will have to wait for another opportunity.
Sarah, I had a blast with my assignment this month, I know it was not a secret for you, but that is part of the life of a moderator, right? I also want to take this opportunity to thank you for always sending the assignments very early, giving us more than enough time to stalk, cook, and blog. I know that everyone from our group certainly appreciates that… 😉
If you want to check the labor of love of my fellow Group D members, click on the blue entity smiling at you at the end of the post.
ONE YEAR AGO: Penne with Trapanese Pesto
TWO YEARS AGO: Superman
THREE YEARS AGO: Spring Pasta
FOUR YEARS AGO: Ice Cream Melts for Mango


