SECRET RECIPE CLUB: LEMON POPPY-SEED MUFFINS

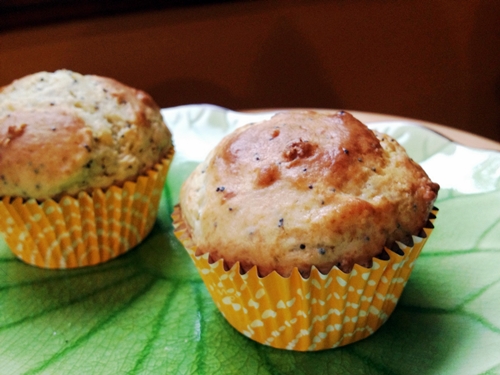
At the risk of repeating myself over and over and over, I must say the last Monday of each month makes me feel as happy as a kid in a toy store… Why? It is the day in which bloggers of my group at The Secret Recipe Club reveal which blog they were assigned to cook from, and post their recipes. This month, I could not be more pleased with my assignment. I got April’s blog, Angels Homestead. April is a very active participant of the club. You see, we have a Facebook group to discuss issues, make sure everyone is aware of what needs to be done (participation forms to be filled, upcoming Reveal Days), and April is always there with her very unique and personal touch. I was thrilled to cook from her blog! It took me just a few minutes to settle on a recipe, because right when I got the assignment I was wondering about something to bake and take to our department. Lemon poppy-seed muffins seemed perfect. And perfect they were! 😉

muffin1.
If you want to make a batch of muffins to cheer your co-workers early in the morning, here’s the way to do it:  before going to bed, measure the dry ingredients, place the flour in a large bowl, the baking powder and baking soda on small bowls next to it.  Get the two eggs ready to go, same for poppy seeds, sugar, and lemon.   Place paper liners in your muffin pan.  Measure the butter, the yogurt (or sour cream), and place both in the fridge. Marvel at your uncanny sense of organization, and go to sleep. Have pleasant dreams.

ingredients
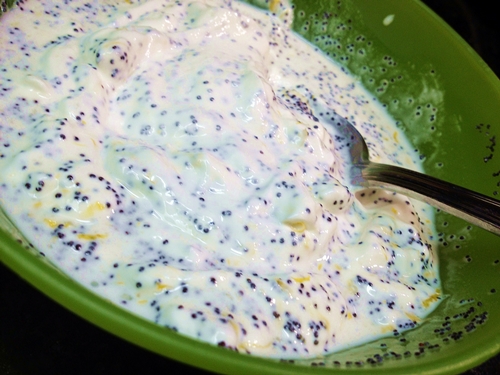
Next morning, turn the oven on.  Grab the yogurt from the fridge, zest and juice the lemon,  add the poppy seeds and mix them al together.

poppy
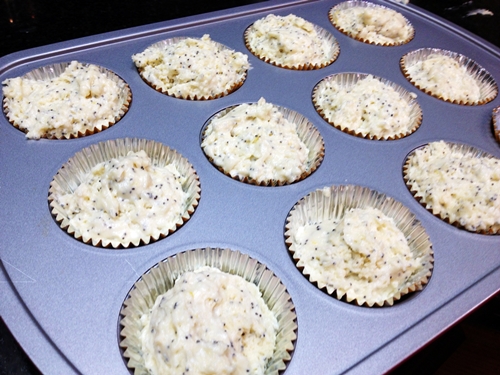
Beat the sugar with the butter and the eggs, add the poppy seeds mixture, incorporate all very well.  Add the dry ingredients and mix gently.  Add scoops of the batter to the muffin pan, trying to add the same amount to each paper liner.  If you are like me, at this stage of the day the caffeine has not kicked in yet, so your consistency won’t be stellar.  Oh, well…  Do your best.

unbaked
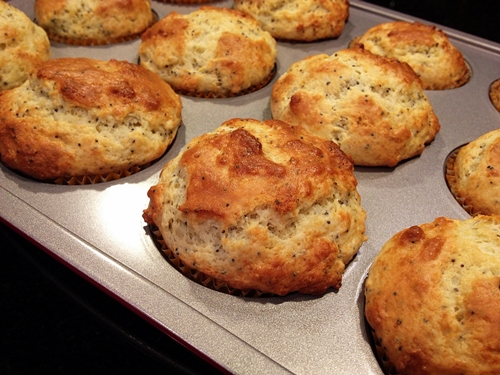
Now, all you have to do is bake those babies, and get ready to brighten up the morning of your colleagues.  If you can make that a Monday morning, even better…   😉

baked

for a printable version of the recipe, click here

For some serious fun with the productions of my fellow Secret Recipe members, click on the blue frog that is smiling at you at the bottom of the post. She is a bit cross-eyed, but still pretty adorable.

April, I hope you know how much I enjoyed getting assigned to your blog this month!  A real special treat…  😉

ONE YEAR AGO: Secret Recipe Club: Mascarpone Brownies

TWO YEARS AGO: Salmon Tacos

THREE YEARS AGO: Cinnamon Turban Bread

FOUR YEARS AGO: Summertime Gratin

GRATED TOMATO SAUCE, REVISITED

Almost three years ago I blogged on a fresh tomato sauce in which the tomatoes are grated instead of diced or processed. It is such a nice method that I feel it’s worth mentioning again for those who might be new to my site.  Something about its texture makes this sauce absolutely unique and very delicious…

served111
WHOLE-WHEAT SPAGHETTI WITH GRATED TOMATO SAUCE
(from the Bewitching Kitchen)

Whole-wheat spaghetti
4 large, ripe tomatoes or 6 medium, halved crosswise
1 tablespoon olive oil
1 tablespoon white balsamic vinegar
1 tsp dried mint leaves
2 tablespoons capers (or to taste)
salt and pepper to taste
fresh basil leaves, cut in chiffonade
Parmigiano-Reggiano for serving

Cook the pasta in a large pot of salted boiling water until al dente.

Meanwhile, in a large bowl, grate the tomatoes using a box grater with medium-large holes.  The skin of the tomato will protect your hand as it gets close to the grater.

To the grated tomatoes, add the olive oil, balsamic vinegar, mint, capers, salt and pepper.  Mix well.  Add the cooked pasta on top of the cold tomato mixture, and immediately add the basil.   Toss everything together gently, and serve right away with Parmigiano cheese.

ENJOY!

to print the recipe, click here

IMG_2292IT”S ALL ABOUT THE TEXTURE…

I make this type of pasta several times each summer, never get tired of it!  Since I learned from Louisa Shafia that dried mint should not be frowned upon, I’ve been using it a lot. In this pasta, it worked wonders together with the capers and the basil…   You can adapt this recipe in countless ways, just make sure to grate the tomatoes, it is amazing how a little change can bring so much to a simple recipe.

IMG_2299
The refreshing pasta next to a simple roasted chicken, adapted from an old favorite.

ONE YEAR AGO: A Taste of Yellow to Honor Barbara

TWO YEARS AGO: Gratin of Beefsteak Tomatoes

THREE YEARS AGO: Tour de France Final Stage: PARIS

FOUR YEARS AGO: Snickerdoodles with a Twist

PAN-GRILLED TILAPIA WITH SMOKED PAPRIKA AND AVOCADO CREAM

tilapia1
I never thought of grilling tilapia filets because they are too delicate, but pan-grilling worked so well that I can see it as my method of choice from now on.  Normally I would either pan fry them after coating with flour, or follow a lighter route, baking in the oven.  However, when the weather outside is the way I like it (mid to high 90’s yeaaaaaah!)  I rather not  turn our oven on.  The inspiration for this meal came from Cooking Light magazine, but I definitely took off in my own direction.

PAN-GRILLED TILAPIA FILETS WITH SMOKED PAPRIKA AND AVOCADO CREAM
(from the Bewitching Kitchen)

for the fish
4 tilapia filets
2 Tbs olive oil
1 tsp smoked paprika
salt and pepper

for the avocado cream
2 small avocados
1/4 cup orange juice
1/4 cup fat-free yogurt (or full fat)
1 to 2 tsp freshly grated ginger
salt and pepper
lime juice to taste

Mix the olive oil with the smoked paprika in a small bowl.  Lay the filets on parchment paper, season lightly with salt and pepper.  Brush both sides with the smoked paprika oil.   Heat a grill pan, when hot spray it lightly with oil.  Add the filets and cook 2 minutes per side or until done (they should flake easily and have nice grill marks).

For the avocado cream,  blend all ingredients except the lime juice in a small food processor or blender, until very smooth. Taste and add lime juice for a nice balance of flavor, as the orange juice tends to make it a little sweet.   If you want a more runny consistency, add a little water (or any of the juices according to your taste).  Serve cold or even chilled.

ENJOY!

to print the recipe, click here

tilapiaserved
Comments:
  This was a delicious dinner, very quick to prepare, light and absolutely perfect for the weather we are having!   I served the fish with blistered grape tomatoes. Simply heat a very small amount of olive oil in a non-stick pan, when screaming hot, add the tomatoes (whole), season with salt, pepper, and herbes de Provence.  Shake the pan around a few times, once they start to get blisters all over, they are done.   This side dish will be ready in 5 minutes, and the tomatoes can sit and wait, no need to serve them too hot. (Did you notice I just gave you three recipes in a single blog post?  Am I generous or what? ;-))

The avocado cream soothes the heat of the smoked paprika, and serving it cold was a nice move.  If you like your fish more heavily seasoned, add more smoked paprika,  some extra black pepper, or even some garlic.  We prefer to have the flavor of the fish to come through first.  The small amount of paprika was enough to give the oil a beautiful, intense red color…

tilapiaOil.
Before I leave you…  Since I’m on the subject of fish dinners, Kelly from Inspired Edibles recently blogged on a great recipe for sole filets. After seasoning the filets in a lime-chili marinade, she coated them with quinoa flakes and baked in the oven.  Click here  to read her post about it.  I pinned her version to try once the weather cools down a little.  Sounds absolutely delicious!

ONE YEAR AGO: Golden Saffron and Fennel Loaf

TWO YEARS AGO: In My Kitchen, July 2011

THREE YEARS AGO: Heavenly Homemade Fromage Blanc

FOUR YEARS AGO: A Perfect Sunday Dinner

CLASSIC SHRIMP GOBERNADOR TACOS

Another great recipe coming straight from the adorable  Marcela Valladolid, these tacos can be prepared very quickly. Plus, if you make the shrimp filling the day before, the meal will be ready in less than 15 minutes. I tried hard to find the specific origin for Gobernador Tacos, no luck. Then, a dear friend sent me a link with the whole story behind it. (Thank you, Dr. G!). These tacos are very popular in Baja California.  I can guarantee they will be equally popular in your home!  😉

closeup111
CLASSIC SHRIMP GOBERNADOR TACOS
(adapted from Marcela Valladolid)

1 tablespoon olive oil
1 small shallot, minced
2 tomatoes, seeded. chopped
1 red bell pepper, stemmed, seeded, and diced
1 pound shrimp, peeled and deveined, chopped
1 cup canned tomato puree
1 teaspoon Mexican oregano
1 bay leaf
1/2 teaspoon smoked paprika
Salt and freshly ground black pepper
8 corn tortillas
1/2 cup shredded Oaxaca or mozzarella cheese
Lime wedges and hot sauce for serving
.
In a large heavy saucepan, heat the olive oil over medium-high heat. Add the minced shallot and cook until translucent, about 3 minutes. Add the tomatoes and bell pepper and cook for 3 minutes. Add the shrimp and cook for a couple of minutes.  Stir in the tomato puree, oregano, bay leaf, and smoked paprika. Cook for another couple of minutes, remove the pan from the heat and reserve.  Adjust seasoning with salt and pepper. Remove and discard the bay leaf.
.
Heat a large heavy skillet over medium-high heat. Lay 2 tortillas, flat on the bottom of the pan, side by side. Put a small mound of cheese on 1 side of each tortilla. Wait until the cheese melts slightly,  and then add about 2 tablespoons of the shrimp mixture to each tortilla. Fold the tortillas over into half-moon shapes and cook to melt the cheese completely, another 1 to 2 minutes. Transfer to a platter and keep warm.Repeat with the remaining tortillas, cheese, and shrimp mixture. Arrange the tacos on a serving platter and serve with lime wedges and hot sauce on the side.
.
ENJOY!
to print the recipe, click here
.

sauce
The shrimp sauce, so tasty as the taco filling, is equally wonderful as a main dish.  Just add a little white rice and some guacamole to complete the meal…

served

Deliciously messy to eat, this is a great recipe for a warm summer night!  One extra tip: do not cut the shrimp too small, keep the pieces in large chunks. If you want to splurge, chunks of  lobster tails in these tacos will be absolutely awesome!  Expensive, yes, but awesome!  😉

If you like Mexican food, tune into Mexican Made Easy, it’s always fun to watch Marcela preparing classic dishes,  often with a healthier approach.  Not much else appeals to me in the FoodTV these days, and that’s a little sad.

ONE YEAR AGO: A Walk Towards the Sunset

TWO YEARS AGO: In My Kitchen

THREE YEARS AGO:  Heavenly Home-made Fromage Blanc

FOUR YEARS AGO:  A Perfect Sunday Dinner

POTLUCK FRITTATA & LAVOISIER

frittata
In our department we have monthly (or quasi-monthly) potluck lunches to celebrate the birthdays of the past month.  For our last get-together I made an oven-baked frittata. The recipe is quite adaptable, just use it as a basic method.  Change the veggies, the spices, add herbs,  have fun with it!

POTLUCK FRITTATA
(from the Bewitching Kitchen)

10 eggs
1/4 cup low-fat milk (or  full-fat, or cream)
salt and white pepper to taste
1 Tbs olive oil
sliced cremini mushrooms
sliced asparagus
sliced roasted red bell peppers
Herbes de Provence to taste
grated Parmigiano-Reggiano cheese to sprinkle on top

Start by preparing the veggies.  Heat the olive oil on a large skillet, add the mushrooms, season with salt and pepper.  Cook  on medium heat until they start to release some liquid, then add the asparagus and roasted bell pepper.  Season with herbes de Provence. Keep cooking for a few minutes until the asparagus are just starting to get tender.   If there is any liquid left in the pan, increase the heat to high for a minute or so.  Remove from the heat and add the veggies to a colander to make sure any excess liquid drains out.

Meanwhile, cover a 9 x 13 inches baking pan with parchment paper.  Add the cooked, drained veggies to the baking pan, distributing them evenly over the whole surface. Break the eggs in a large bowl, whisk vigorously, add the milk, and season lightly with salt and pepper (keep in mind the veggies are already seasoned).  Pour over the veggies, sprinkle grated Parmigiano all over.

Bake in a 350 F oven for about 40 minutes, until set and starting to get some color on top. Remove from the oven, let the pan cool for 10 minutes, then carefully remove the frittata to cool over a rack.  Cut in squares, removing the paper and arranging the squares on a platter.  Serve warm or room temperature.

ENJOY!

to print the recipe, click here

veggies

My Mom has always been the “Frittata Queen” by definition, although her frittatas were for the most part made to use up leftovers. She doesn’t cook much anymore, but years ago, when we would go visit my parents to have dinner together, my Dad  (remember the eternal joker?) used to beg us to finish all the food, otherwise he would have to face it next day in a “fritada” (the Brazilian term).  I must admit that I’ve seen my Mom include leftover pasta, Bolognese sauce and all in one of her fritadas and she would often quote Lavoisier in defense of her culinary adventures. Who am I to go against one of the greatest scientists of all times?  😉

composite

So, it’s about time that I shared with you my take on Mom’s classic. Baking works best when making a big batch with 10 eggs like this one. I’ve experimented with versions without any milk or cream, but they did not turn out very good.  Definitely not something I would serve for guests. Some fat is needed to avoid rubbery eggs. Heavy cream provides the most luscious texture, but I always opt for a lower fat version, as egg yolks are rich enough.  Porcini mushrooms, or a mixture of wild mushrooms work wonders in this type of recipe. Artichoke hearts, sun-dried tomatoes, diced ham… your imagination is the limit.   Leftover squares keep for a few days well wrapped in plastic. Heat them in the microwave for a few seconds just to break the cold temperature from the fridge. Over-heating will compromise the texture. Trust me, you don’t want to do that.

squares

“In nature nothing is created, nothing is lost,
everything changes.”

(Antoine-Laurent de Lavoisier, 1774)

ONE YEAR AGO: Home-made Corn Tortillas

TWO YEARS AGO: Whole-Wheat Spaghetti with Peanut Sauce

THREE YEARS AGO: Brigadeiros: A Brazilian Party!

FOUR YEARS AGO: Lemony Asparagus