WHEAT BERRY CARAWAY BREAD

Time running out to enter the Bewitching giveaway… click HERE to join the fun!

WheatBerryCarawayBreadMom and her kids…

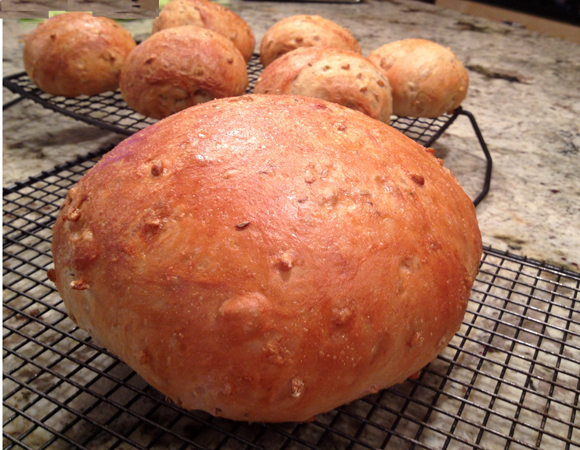
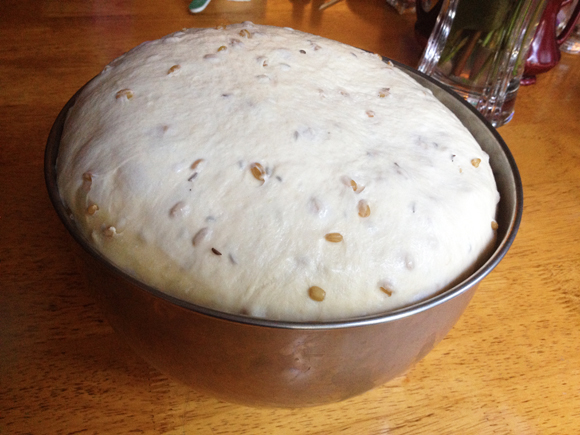
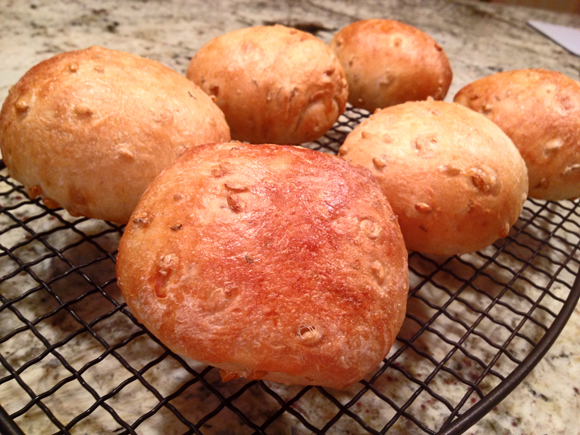
This bread was featured by the bloggers at Bread Baking Babes. I do not participate of this group event, but Ilva – from Lucullian Delights – does and when she blogged about this recipe, I made it on the following weekend, no time wasted.  The original recipe from Peter Reinhart called for wild rice and onions, but she decided to use barley and caraway.  I went with a modified version of her modified recipe, keeping the caraway but replacing the barley with wheat berries.  A soft crumb, permeated with just enough crunch with the wheat berries, and that great flavor given by caraway seeds.  You would almost think about rye bread as you savor this bread, since caraway is so often used in European rye concoctions. But it is definitely different.  A wonderful dough to work with, rose like a balloon…. what a great sight this is for a bread baker, whether or not she is a babe…   😉

risen2

WHEAT BERRY AND CARAWAY BREAD
(adapted from Ilva’s recipe)

6 cups (765 g) bread flour
2 + 1/4 teaspoons (17 g) salt
2 tablespoons (19 g) instant yeast
1 cup (170 g) cooked wheat berries
1/4 cup (56.5 g) brown sugar
1+1/2 cups (340 g) lukewarm water
1/2 cup (113 g) lukewarm buttermilk
1 Tablespoon caraway seeds
1 egg white, for egg wash (optional)
1 tablespoon water, for egg wash (optional)

The day before baking:
Combine all of the ingredients, except the egg wash, in a mixing bowl. If using a mixer, use the paddle attachment and mix on the lowest speed for 1 minute. If mixing by hand, use a large spoon and stir for 1 minute. The dough should be sticky, coarse, and shaggy. Let the dough rest for 5 minutes. Switch to the dough hook and mix on medium-low speed, or continue mixing by hand, for 4 minutes, adjusting with flour or water as needed to keep the dough ball together. The dough should be soft, supple, and slightly sticky.

Transfer the dough to a lightly floured work surface. Knead the dough for 2 to 3 minutes, adding more flour as needed to prevent sticking. The dough will still be soft and slightly sticky but will hold together to form a soft, supple ball. Place the dough in a clean, lightly oiled bowl, cover the bowl tightly with plastic wrap, and immediately refrigerate overnight or for up to 4 days.

On Baking Day:
Remove the dough from the refrigerator about 2 hours before you plan to bake. Shape the dough into one or more loaves, in any shape you like, free form or in a loaf pan (if using a 5 by 9 inch pan, use 1kg of dough). For sandwich loaves, proof the dough in greased loaf pans. For freestanding loaves and rolls, line a sheet pan with parchment paper or a silicone mat and proof the dough on the pan.

Mist the top of the dough with spray oil and cover loosely with plastic wrap. Let the dough rise at room temperature for 1.5 to 2 hours, until increased to about 1.5 times its original size. In loaf pans, the dough should dome at least 1 inch above the rim. If you’d like to make the rolls more shiny, whisk the egg white and water together, brush the tops of the rolls with the egg wash just before they’re ready to bake.

Heat the oven to 350°F and bake the loaves for 10 to 15 minutes, then rotate the pan. Total baking time is 45 to 55 minutes for loaves, and only 20 to 25 minutes for rolls. The bread is done when it has a rich golden color, the loaf sounds hollow when thumped on the bottom, and the internal temperature is above 185°F in the center.

Cool on a wire rack for at least 20 minutes for rolls or 1 hour for loaves before slicing.

ENJOY!

to print the recipe, click here
Rolls1
Comments:  This recipe makes A LOT of dough…  Peter recommended using only 2 ounces (around 57g) dough per small roll.  My rolls were definitely bigger than that.  Normally I do not weigh dough when shaping. For this recipe I more or less cut the dough in half, shaped one as a large ball, and divided the remaining dough in 6 pieces, eyeballing the process.   For hamburger-type sandwich, they were the perfect size.

shaped
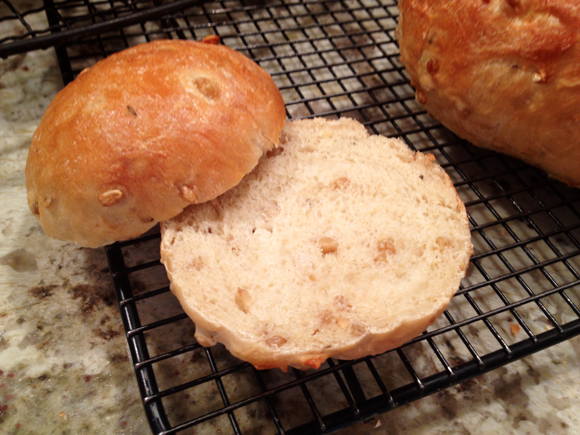
The crumb is super soft, and since I used a reasonably small amount of caraway seeds, the flavor was not overpowering.  I love caraway, but in breads I like it to be a mild presence.  This bread was perfect with our Black Bean Burgers of a recent past…
crumb
FINAL REMARK:  Remember that this bread takes TWO days to prepare.  On the first day you will mix the dough, and place it in the fridge.  Next day you resume shaping and baking.  The fact that the dough can be kept in the fridge for a few days will make it easy to have freshly baked bread on a whim.  Or almost on a whim…


I thank Ilva for the inspiration, and Susan for her Yeastspotting venue so I can share this bread with other bread baking “babes’…


ONE YEAR AGO: Mexican Focaccia 

TWO YEARS AGOSunny Kamut Salad with Roasted Lemon Vinaigrette

THREE YEARS AGO: Pane de Casa & Crostini

FOUR YEARS AGO: Down-home Dig-in Chili

FIVE YEARS AGO:  Cinnamon Rolls


THE WHEAT BERRY TRANSMOGRIFICATION

A post dedicated to “The Big Bang Theory” fans… 😉

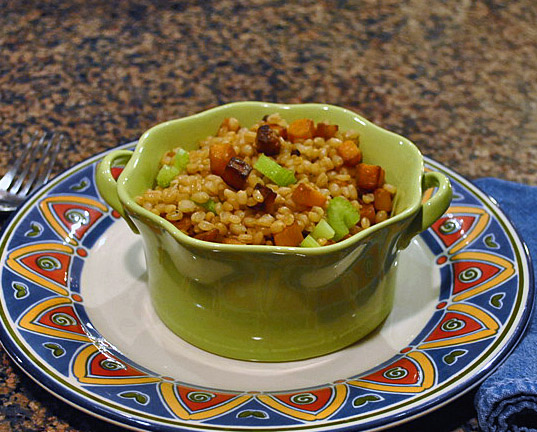
Wheat berries are an amazing ingredient. You can use them for breakfast, desserts, salads, risotto-type dishes, you can add them to soups and stews.  Since I am always searching for side dishes to incorporate in our menu, wheat berries are a great alternative to give some rest to the usual suspects: rice, pasta, and couscous.  The other day I was feeling adventurous, and decided to create my own recipe for them.  Problems started right away.  A search on my cookbooks and online sources left me surprised (and quite puzzled) at the many different methods used to cook the grain.  Some people swear you must soak them overnight. Some insist you need a pressure cooker. I threw caution to the wind, didn’t soak them, didn’t invite the pressure cooker to play, but simply cooked them in salted water as if preparing pasta.  It took a little over 1 hour to get them the way I wanted: tender but not mushy.  After that, I incorporated them with two veggies I adore, and… side dish mission accomplished!

WHEAT BERRIES WITH BUTTERNUT SQUASH AND CELERY
(from the Bewitching Kitchen)

1 cup wheat berries
1 medium butternut squash, cut in medium dice
olive oil
salt and pepper
smoked paprika
1 large celery stalk, cut in slices

Heat the oven to 420F.

Cook the wheat berries in plenty of salted water until al dente (depending on the brand, it might take from 1 to 2 hours).  When cooked to your taste, drain, and reserve.  If not using immediately, add just a little drizzle of olive oil to prevent the grains from sticking too much. Can be prepared a couple of days ahead.

While the wheat berries are cooking, place the diced butternut squash in a bowl, and drizzle olive oil just enough to lightly coat the pieces. Season the squash with salt, pepper, and smoked paprika.  Add them in a single layer over a rimmed baking dish.  Roast in the hot oven until cooked, and the edges start to brown (25 to 35 minutes).

Mix the cooked wheat berries with the roasted squash, add the raw celery, incorporate everything together gently.   Adjust seasoning, and serve.

ENJOY!

to print the recipe, click here

We both loved this recipe!  Roasted butternut squash has a special place in my heart, and now stores in our neck of the woods carry those cute little bags with the cut veggie, so I often cave and bring those home to make my life easier.

We are also quite fond of raw celery. In this recipe, it gave the needed “crunch factor” to oppose the chewiness and softness of the wheat and squash.  The squash, when roasted, tastes a little sweet, so the smoked paprika and the celery help cut through that.

We enjoyed this dish with grilled pork tenderloin, but of course it goes well with all sorts of main dishes, standing also on its own if you add a hearty salad.

Hope you try it!

ONE YEAR AGO: Curried Zucchini Soup

TWO YEARS AGO: Roasted Onion and Asiago Cheese Miche (an outstanding bread!)

Add to FacebookAdd to DiggAdd to Del.icio.usAdd to StumbleuponAdd to RedditAdd to BlinklistAdd to TwitterAdd to TechnoratiAdd to Yahoo BuzzAdd to Newsvine

MAHI-MAHI

I fall in love with words quite easily.  Mahi-mahi…. is just one of the many beautiful Hawaiian words.  When we visited Oahu I found it fascinating to  read the street names, which for the most part were quite hard for a foreigner to remember: Kamehameha, Mamalahoa, Kealakehe, Hualalai. They all seemed so…. musical!

It turns out that the Hawaiian alphabet lacks a few consonants:  C, J, Q, and X. It also makes no distinction between K and T.   When the complexity of a language decreases at one level, it often compensates on another.  The fewer consonants probably explains why so many Hawaiian words have duplicated syllables, giving the spoken language a playful component that’s quite pleasing.  But, I digress…  mahi-mahi (by the way, “mahi” means “strong”) is one of my favorite fish, at the top with striped sea bass.  It has a mild, but definitely not bland flavor, and a meaty texture that’s perfect for grilling, as this recipe (another gem I got from my friend Heather) will convince you.

GRILLED MAHI-MAHI WITH CITRUS MARINADE
(from  Heather’s kitchen)

2 filets of mahi-mahi (may substitute other firm-fleshed fish)
for the marinade:
2 T fresh lime juice
3 T rice vinegar
1 T finely chopped ginger
1 T finely chopped scallions
3 T mild vegetable oil (I used grapeseed)
1 T soy sayce
1/2 t Asian chili sauce (optional)
freshly ground black pepper to taste
Prepare a marinade by whisking all ingredients together. Marinate the fish for 30 minutes to 2 hours in the fridge.  Grill until cooked through. 

ENJOY!

to print the recipe, click here

Comments: This was one of the tastiest dinners in the past few weeks.  A fish like mahi-mahi is delicious on its own, so the less you mess with it, the better it is.  This preparation was perfect: a hint of lemon,  a little heat, and nothing else.  No elaborate toppings, crusts, or sauces.  A simple, delicious meal, as healthy as it gets.

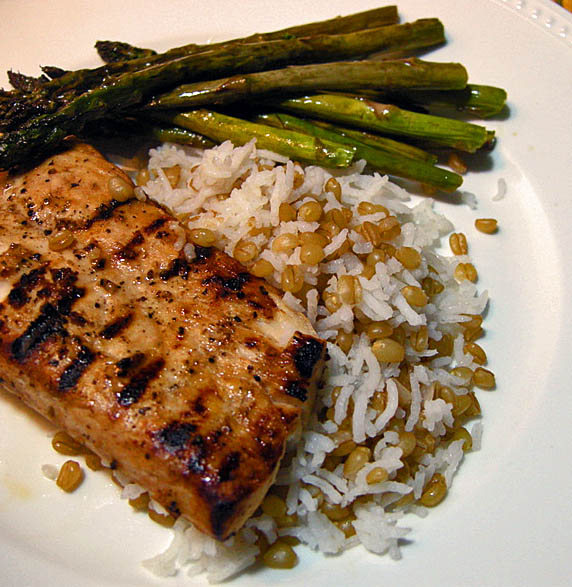
We loved it with roasted asparagus, and with a mixture of white rice and wheat berries that, all modesty aside, was a spur of the moment inspiration that had me patting myself on the back.   I spotted some white rice in the fridge and some cooked wheat berries that I was saving for a salad.   I just mixed them and warmed them in the microwave. It was an absolutely delicious combination that will be a regular production in the Bewitching Kitchen.

ONE YEAR AGO: Memories of Pasteis

Add to FacebookAdd to DiggAdd to Del.icio.usAdd to StumbleuponAdd to RedditAdd to BlinklistAdd to TwitterAdd to TechnoratiAdd to Yahoo BuzzAdd to Newsvine