VALENTINE’S DAY SWEETHEART COOKIES

Back in December, I made a batch of cookies and “decorated” them. After that experience it became clear that the road to hell is paved with Royal icing. Since it was a real roller coaster, I decided I was done with it for the rest of my existence. Having said that, I don’t know exactly why I woke up one day thinking that the combination of sugar cookies with Royal icing would be the best way to start Valentine’s week. A real sucker for punishment I am. Was it that bad? Sort of. Let’s say it had some ups and some dark and scary downs.

SWEETHEART SUGAR COOKIES WITH ROYAL ICING
(adapted from Alton Brown and Sweet Sugarbelle)

what you’ll need:
heart-shaped cookie cutter
scribe tool
piping bags
icing tips size 2 or 3
rubber bands for piping bags (2 per bag)
paper towels and water for constant clean-up
a Zen attitude
a very understanding partner in case you run out of previous item

for the cookie dough:
3 cups all-purpose flour (360 g)
3/4 teaspoon baking powder
1/4 teaspoon salt
1 cup unsalted butter, softened (225 g)
1 cup sugar (225 g)
zest of 1 lemon
1 egg, beaten
1/2 tsp vanilla paste
1 tablespoon milk

for the icing:
2 pounds confectioner’s sugar {907 grams}
5 tablespoons meringue powder {approximately 53 grams}
2 teaspoons vanilla bean extract (I used clear vanilla extract)
1/2-3/4 cups warm water

Sift together flour, baking powder, and salt. Set aside. Place butter and sugar in large bowl of electric stand mixer and beat until light in color. Add egg, lemon zest, milk and vanilla, beat to combine. Put mixer on low-speed, add flour, and mix just until the mixture starts to form a dough. Do not over mix or your cookies might be tough. Remove the dough from the mixer and finish mixing it by hand, gently.  Divide the dough in half, flatten each portion as a square or rectangle and wrap in plastic foil. Refrigerate for 1 hour minimum.

Heat oven to 350 degrees. Remove one wrapped pack of dough from refrigerator at a time, sprinkle rolling-pin with powdered sugar, and roll out dough to 3/8-inch thick. Cut into heart shapes, place on baking sheet over parchment paper, and refrigerate for 30 minutes. Bake for 10 to 12 minutes or until cookies are just beginning to turn brown around the edges, rotating cookie sheet halfway through baking time. Let sit on baking sheet for 2 minutes after removal from oven and then move to cool on a rack. Ice the cookies when completely cool, or on the following day.

Make the icing (you can make the day before and store well covered at room temperature). Stir the vanilla into half of the water and reserve. Keep the other half of the water measured and ready to go.

Using a paddle attachment gently mix the sugar and meringue powder. With the mixer on the lowest setting slowly add the water/flavoring mix to the dry ingredients. As the water is added, the icing will become thick and lumpy. Continue to add the remaining water {this may or may not be the entire amount} until the mixture reaches a thick consistency. At this point, turn the mixer to medium speed and whip 2-4 minutes until the mixture is thick and fluffy. When it forms a soft peak, it has been beaten enough. Avoid mixing further, as you don’t want to incorporate too much air in the icing. Too much air might result in bubbles forming after icing.

Adjust the consistency that you need for flooding the cookies, separate the icing in portions, add dye according to your planned decoration. Store in air-tight containers at room temperature. If needed, re-adjust the consistency before piping.

Add the different colors of icing to piping bags fitted with the appropriate icing tips. I like number 3 for the basic color used for flooding, and a number two for the details. Flood each cookie, make the edges as neat as possible with the scribe tool. Decorate with the design you like, one cookie at a time, as the base color needs do still be wet, unless you prefer to do a wet-on-dry method. In this case, the base needs to dry for several hours before proceeding with the decoration.

Dry the cookies for at least 6 hours before handling them.

ENJOY!

to print the recipe, click here

Comments: I had no issues with the cookie component, I prefer the taste of a sablé type cookie, but as far as sugar cookies go, these are very nice. They retain a little chewiness upon baking (especially if you don’t let them get too dark), and the lemon zest brightens them up considerably. Now let’s talk Royal icing. I watched online classes and youtube videos. I read cook books.

Here is my advice for those who are as inexperienced as myself and for some irrational motive decide that a naked cookie must be dressed for party.

  1. Make the icing and the cookies the day before decorating them. Not only it is better to ice cookies that are not freshly baked (I am echoing some experts here), but it will save you a lot of trouble and make decorating day easier.
  2. Keep things simple. White icing plus two or at most three colors. Trust me on this. You will need bags and icing tips for each color you want to work with. Some people can make those cute piping bags from parchment paper. I am not one of those people. Sometimes I get them right, more often than not there is drama.
  3. Prepare all materials you will need and have them ready on a neat and clean counter top. Paper towels and a bowl with water are two best friends of the rookie-decorator.
  4. Tie your hair up if you have long hair. Wear gloves if you prefer to avoid stained fingers.
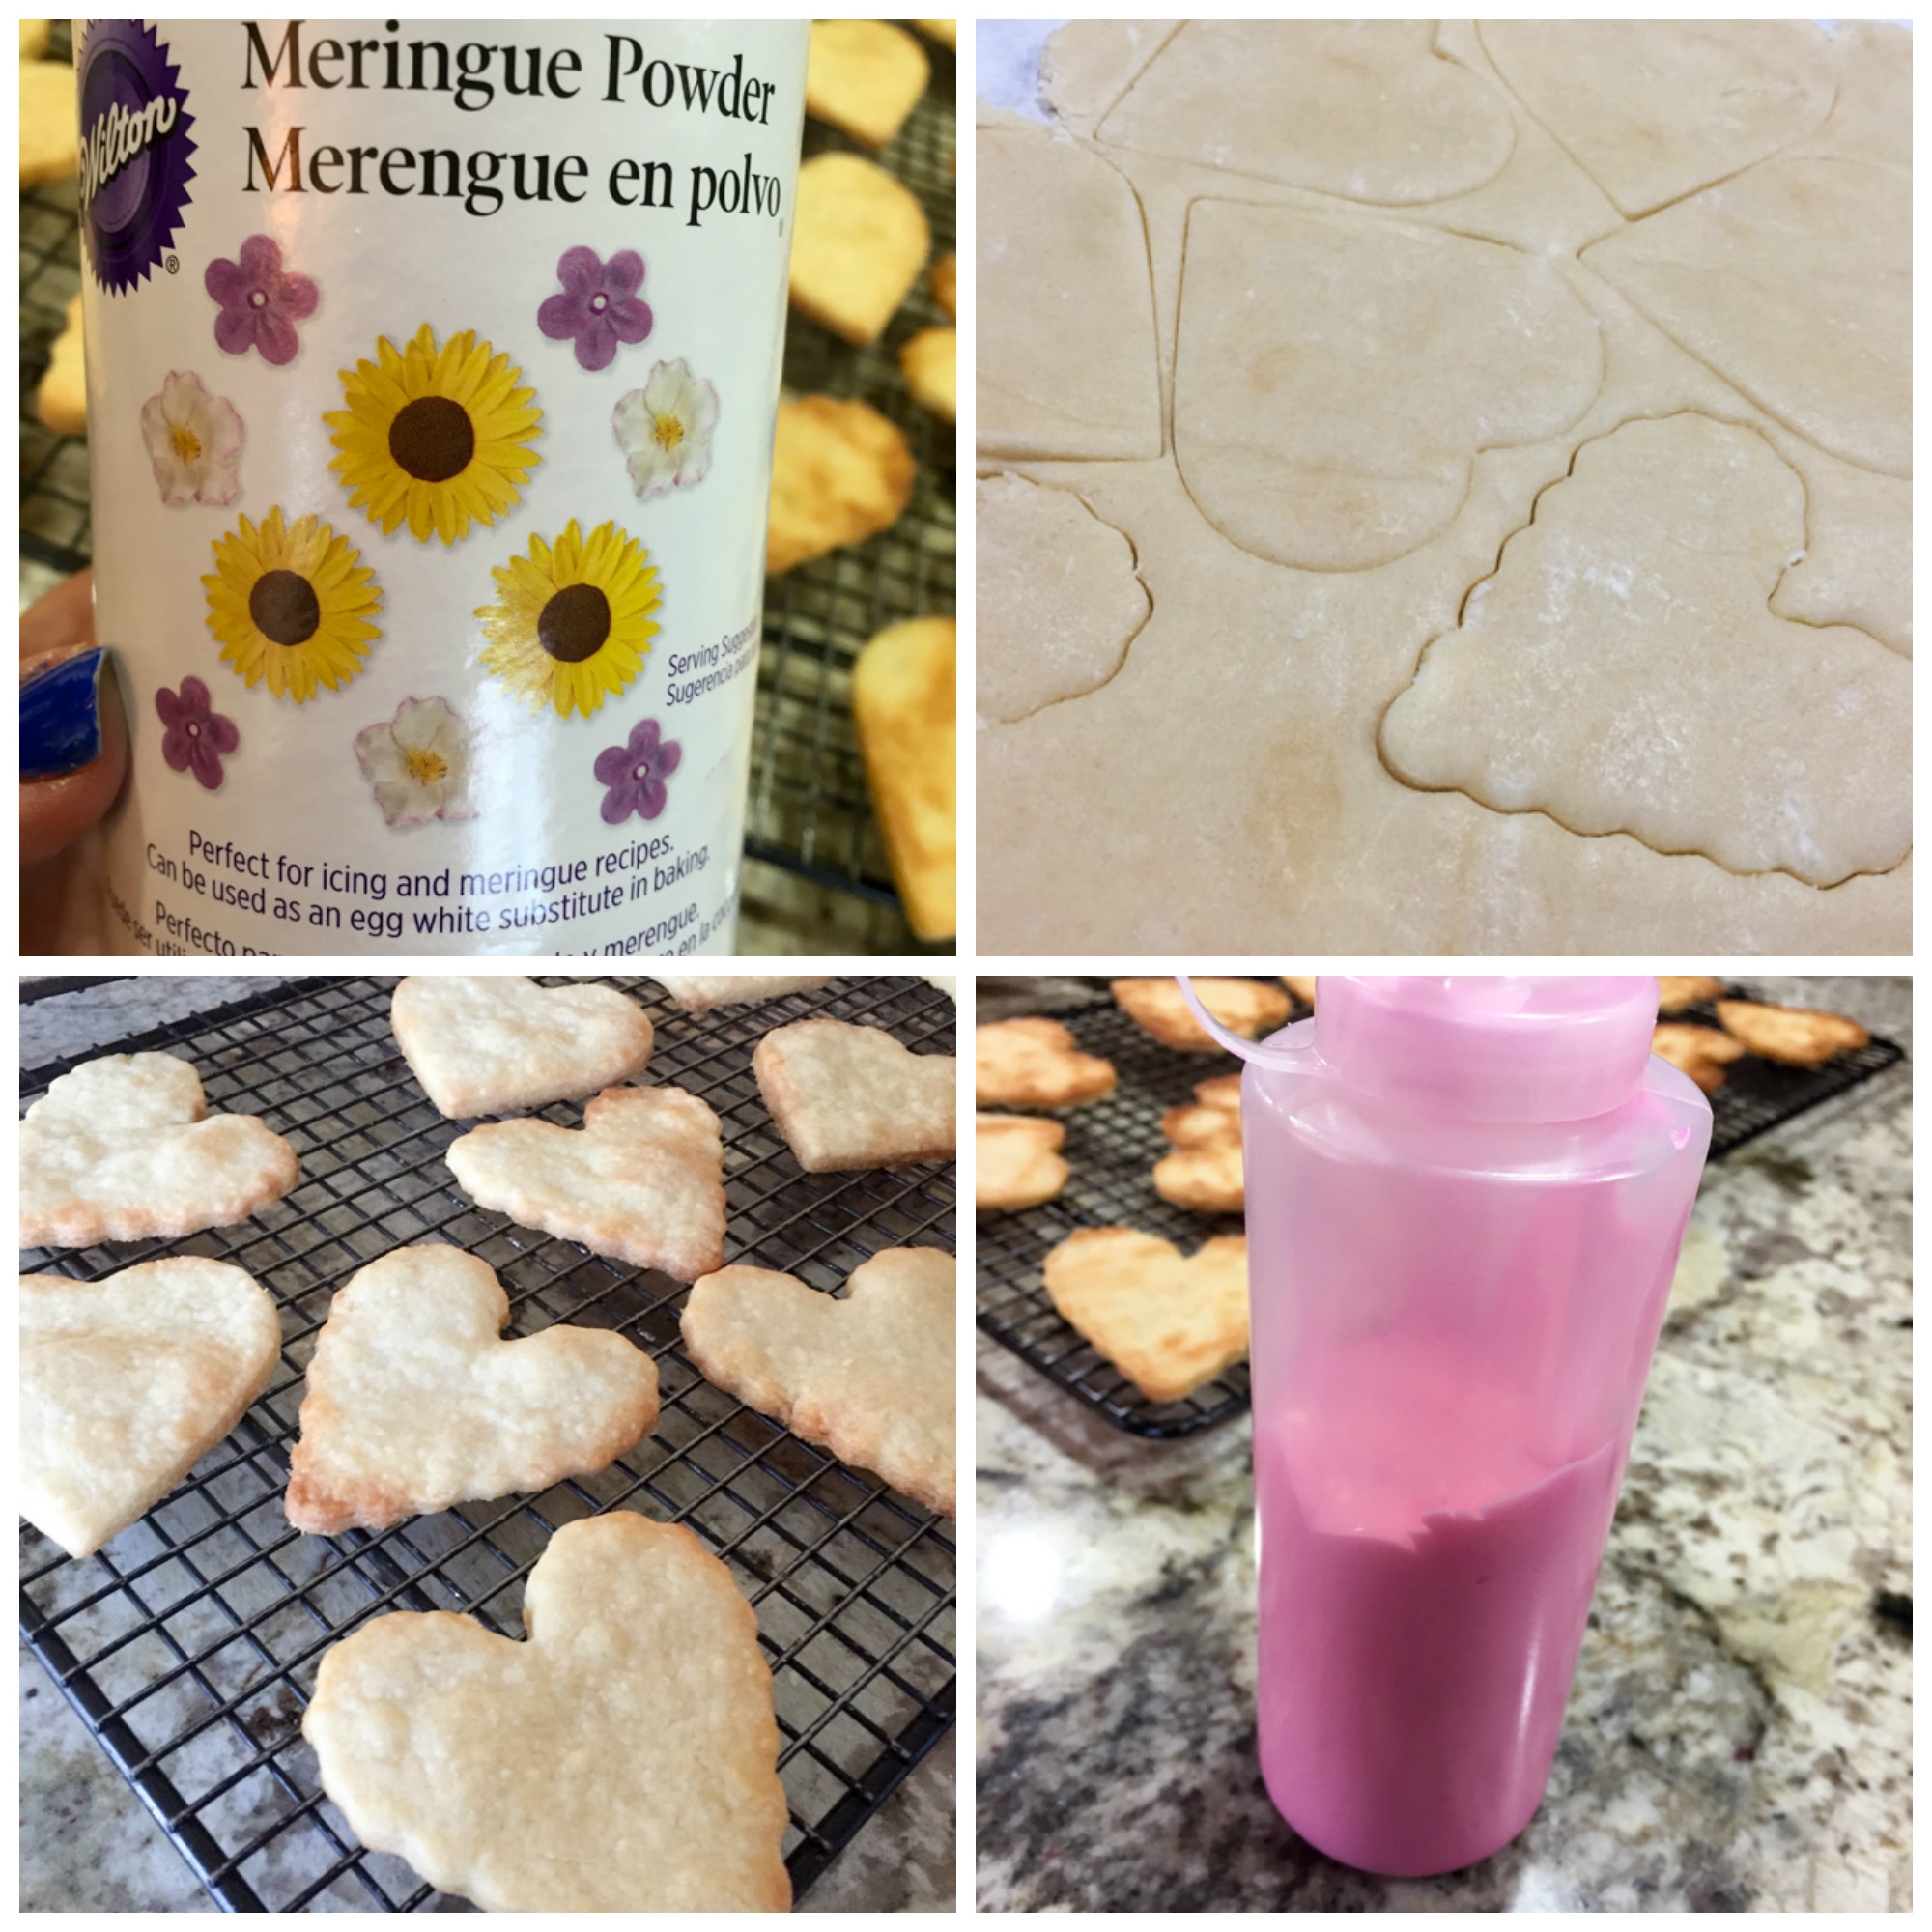
  5. Get rubber ties for your piping bags like these. They are indispensable and work better than improvised methods. Tie the bag close to the icing tip before you fill it. Tie the top after you fill it (see my composite image, middle photo in the bottom row). Remove the band closest to the tip when you are ready to ice your cookies. This simple measure prevents quite a bit of mess from happening.
  6. Have a rack ready to spread the freshly iced cookies with enough surface to accommodate them all. They take hours to fully set and should not touch each other. Be very careful not to grab them touching the icing. Often the surface looks dry but it’s still soft and fragile (don’t ask me how I know).
  7. Let your inner Rembrandt fly. Or Monet. If all fails, go Pollock. Not that there’s anything wrong with him. Obviously not.

But, the most important thing is obviously the most elusive for beginners: the consistency of the icing. Nothing is more frustrating than filling the piping bag and realizing the icing is a tad too thick. Or worse yet, too thin, which will cause the icing to roll off the cookie and tears to roll down the baker’s face. There are tricks to judge the perfect consistency. For instance you can run a spatula or small knife into the icing bowl, and in about 15 seconds it should go back to a smooth, leveled surface. I was probably off by 20 seconds on my first attempt, which led me to say a few choice words, empty the bag, thin the icing, and start all over. Sadly, it was still a bit thick, but I could not bring myself to empty the bag again. So the white icing used to flood most of the cookies was not top-notch. Getting the consistency perfect is probably something that comes with practice. Perhaps I’ll get there before 2019 is over.

I developed a huge respect for those who do this type of stuff for a living. It is really time-consuming, and I imagine the profit margin is very low. Especially if a baker uses the best ingredients and does intricate decorations, he or she will have to charge a lot more than the stuff you can by at the grocery store in those big plastic boxes. But I guess that is a problem professional bakers are forced to deal with.

Several of my cookies had small boo-boos, but some made me very happy. So happy that I created a little composite photo with them.

HAPPY VALENTINE’S DAY!

ONE YEAR AGO: Fesenjan, Fast-Food Style

TWO YEARS AGO: Lavender Macarons with White Chocolate Ganache

THREE YEARS AGO: Raspberry Chocolate Truffles

FOUR YEARS AGO: Red Velvet Cupcakes

FIVE YEARS AGO: Happy Valentine’s Day!

SIX YEARS AGO:  A Few Blogging Issues

SEVEN YEARS AGO: Dan Dan Noodles

EIGHT YEARS AGO:  Sophie Grigson’s Parmesan Cake

NINE YEARS AGO: Antibiotics and Food

THE SIREN’S SONG OF THE ROYAL ICING

Life can take sharp twists. Sometimes you’re sailing smoothly, one careless decision later and hell breaks loose. Last month I watched a youtube of a baker working on Valentine cookies with  royal icing.  Picture beautiful heart-shaped cookies, all pink, decorated with perfectly round white dots, red hearts. red lips. It was amazing, truly awe-inducing. You too can watch it here.  I showed her video to Phil, he got all excited and urged me to do it. C’mon, it’s just some sugar cookies with icing, you can do it!  I was quite insecure about it, but after intense inner deliberations, decided to go for it. Next, I laid a plan of action for the task. Make cookie dough Sunday before noon. Let dough cool in the fridge while having lunch.  Bake cookies.  Do a quick stop by the lab while cookies cool. Come back home, make the icing. Let the artistic vibes flow free. Take perfectly iced cookies to the department next morning.

All steps went according to plan up to the “come back home.”   That innocent video was indeed the perfect example of a siren’s call. A beautiful, irresistible song that you simply must follow. To your demise. Royal icing. Not. For. Sissies.

Valentine Cookies2

HEART-SHAPED SUGAR COOKIES WITH ROYAL ICING
(cookies from Mom Advice …. and icing from Karen’s Kitchen Stories)

2 1/2 cups flour
3/4 cup superfine sugar
1/4 teaspoon salt
16 tablespoons (2 sticks) unsalted butter, cut into 1/2″ pieces & softened
2 tablespoons cream cheese, softened
2 teaspoons vanilla extract

Heat the oven to 375 F.

Whisk the flour, sugar, & salt together in a large bowl. Beat the butter into the flour mixture, one piece at a time using an electric mixer on medium-low speed, then continue to beat until the mixture looks crumbly and slightly wet, 1 to 2 minutes. Beat in the cream cheese & vanilla until he dough just begins to form large clumps, about thirty seconds.

Knead the dough in the large bowl by hand a few times until it forms a large, cohesive mass. Turn the dough out onto a clean counter, divide it in half, and pat each into a disk shape. Wrap the disks tightly in plastic wrap and refrigerate until they begin to firm up, about 30 minutes.

Work with one disk at a time, roll out the dough to a 1/8″ thickness between two sheets of parchment paper.  Cut out shapes using cookie cutters and lay on two parchment-lined baking sheets, spaced about 1″ apart. Bake the cookies until light golden brown, about ten minutes, rotating the baking sheet halfway through baking.

Let the cookies cool on the baking sheet for two minutes before transferring them to a wire rack to cool completely, about thirty minutes. When completely cooled, the cookies will be ready for icing.

Make sure you are well rested. Think happy thoughts before proceeding.

ROYAL ICING

4 cups powdered sugar, sifted
2 tbsp meringue powder
5 tbsp water, plus more to thin the icing
Gel food coloring
endless amount of Zen

Call Happy Maids and set an appointment for home cleaning.

Place the powdered sugar, meringue powder, and water into a bowl of a stand mixer and mix with the paddle attachment on medium low for about 7 to 10 minutes, until the mixture looks matte. Transfer the mixture to an airtight container.

At this point, the mixture is too thick to pipe. Add more water by tablespoon to the mixture, stirring thoroughly between additions, until it is at a consistency that can be piped. Add any coloring you might be using. If you are using more than one color, divide the mixture among airtight containers before adding the color. In my case, I used some pink gel to turn the mixture pink for piping and flooding, and red gel  for the decorations.

Place the flooding icing into plastic squeeze condiment bottle. Line the outer edge of each cookie with icing, allow it to set for about one hour. One cookie at a time, squeeze some of the icing in the center and spread it with a toothpick to the edges. Dot a contrasting color onto the icing with more icing of the same consistency. Drag a toothpick through the dots to create “artsy” hearts. Let the icing dry for about 3 hours.

ENJOY!

to print the recipe, click here

Valentine Cookies3

Beware, long saga ahead…

The sugar cookies worked like a charm, I highly recommend the recipe and the method of rolling the dough in between two sheets of parchment paper.  I think I overbaked mine slightly, but other than that, no problems. Best part? Absolutely no mess in the kitchen. Considering the state of my environment once I was done decorating the cookies, it was a blessing to have to wash only once the floor, walls, countertops and a dog.

The Royal Icing. That’s when things got dicey, and they got dicey fast. After sifting the powdered sugar (boy, that thing flies through the air like nobody’s business), adding the meringue powder and the water, I turned the KA on and walked away since it would be doing its magic for several minutes. It did not take long for the machine to make odd noises, as if badly struggling to move the paddle around.  To my horror, I saw this huge white rock inside the bowl, no wonder the poor machine was having a tough time.  I turned it off  to lower the bowl, but the rock was bonded as a single happy entity with the paddle. Hyperventilating, I gave up on the hammer and instead turned the KA back on while drizzling cold water around the bowl. Much to my relief, that worked, and the rock slowly turned into a very thick paste.  It was hard to judge how much water to add for proper consistency, but at least I had averted tragedy number one.  Next, it was time to divide the icing in two batches: a bigger portion to be dyed pink, a smaller for red. I eyeballed the icing into two bowls, added pink gel, mixed very well, then tried to pour it into a squeeze bottle, only to realize that the bottle had a sadistically narrow opening. A funnel was desperately needed. We have many in the lab, none at home. Bummer. I filled the bottle with a small spoon, in a tedious and messy process. Not exactly my idea of fun, but… the afternoon was young, and I had already overcome two tragedies.

The_Mermaid_and_the_Satyr

Ferdinand Leeke, 1917-  via Wikimedia

I proceeded to dye the second batch. adding what seemed like a lot of red gel to get it right. Then I placed the Wilton tip #2 (as recommended in the youtube) inside a disposable plastic pastry bag. Opened the bag around my hand like I see the pros doing, but adding the icing to the bag was a nightmare. It simply would not slip down the bag like it does on TV. I suspect they use special effects, cheaters! At that point I was dealing with a bowl of red icing over the counter, a spoon on my right hand, and a pastry bag in precariously open situation on my left hand.  Some help would have been nice, but the man I married  had decided to go play golf the moment I grabbed the box of powdered sugar. Mind you, it was 50 F outside, with gusty winds. He told me I would need peace and quiet to ice the cookies, and it was best if he left. I married Gandhi. Can you grasp the full irony of it? The golfer was the one cheerleading me into this royal pain!

PicMonkey Collage

But Thelxiepeia was not done singing yet. The pink icing apparently got too hard and refused to flow down the squeeze bottle. Hyperventilation back in full blast, I added water to the bottle and stirred it as well as I could with a wooden chopstick.  Disaster number three averted. Flooded the first cookie with pink icing, completely forgetting Karen’s instruction to pipe a border and let it set. Grabbed the bag with the red icing. I decided to start humble and do just a few round dots. Almost nothing came out from the tip. A lot leaked from the top, and then from the spot between tip and bag, as the bag teared right in front of my eyes. I will now pause and give you a moment to imagine the scene. Christmas Red Icing pretty much all over my hands, sweater sleeves, and the vicinity of the cookie. I concluded that the number 2 tip requires an experienced pair of hands to maneuver it. I had another tip with a slightly larger opening, so all I had to do was to transfer the icing to a new bag with the larger tip. “All I had to do” sounds pretty tame in comparison to what it involved. I make another pause so that you can imagine the process as it developed in the Bewitching Kitchen. One thought briefly crossed my mind… you should be wearing gloves... but that train had long left the station.  It was a royal mess, which probably explains the choice of name for the icing. Some patissier with a sick sense of humor, no doubt. After that disaster was averted (sort of),  I was pretty much spent. Emotionally drained, with shockingly pink-red hands in a kitchen that looked like a crime scene.  I took a deep breath and started the process of icing twenty-seven sugar cookies, one by one. It is a lot harder than the video makes it seem, trust me on that. By cookie number 23 I felt I was getting the hang of it, but lost the touch at cookie 25. Such is life.

icedcookies

Just to illustrate the extent of my saga… my hands four hours later, after a few rounds of soap and hot water (sigh).

stain2

The verdict?  The cookies tasted great, and were well received by our colleagues, even if they would not win prizes in a beauty contest (the cookies, not the colleagues). I was so traumatized by the process that the idea of icing cookies again made me physically ill.  But now that a few days have gone by, I feel the need to re-visit the issue, knowing what to expect.  I won’t overbake the cookies. I will wear gloves. I will stick with squeeze bottles as Karen did, and bag the icing bags (pun intended). I will use the needle tool the way it was meant to be used (enough said on that).  And I will never ever allow a new siren song to work its magic. No doubt in my  mind, that woman is some type of a goddess. My bets are on Aphrodite.

Medusa_head_by_Gianlorenzo_Bernini_in_Musei_capitolini

I thought French macarons were tricky, but icing these cookies was like facing Medusa’s head. It’s a good thing that in the end of that evening, Dionysus came to my rescue…


ONE YEAR AGO: Blog-worthy Roasted Butternut Squash

TWO YEARS AGO: Chocolate Currant Sourdough Loaf & Roasted Beet Hummus

THREE YEARS AGO: Sesame and Flax Seed Sourdough

FOUR YEARS AGO: Spanakopita Meatballs

FIVE YEARS AGO: Saturday Morning Scones

SIX YEARS AGO: Pain de Mie au Levain