PISTACHIO SUGAR COOKIES, THE UZBEK WAY

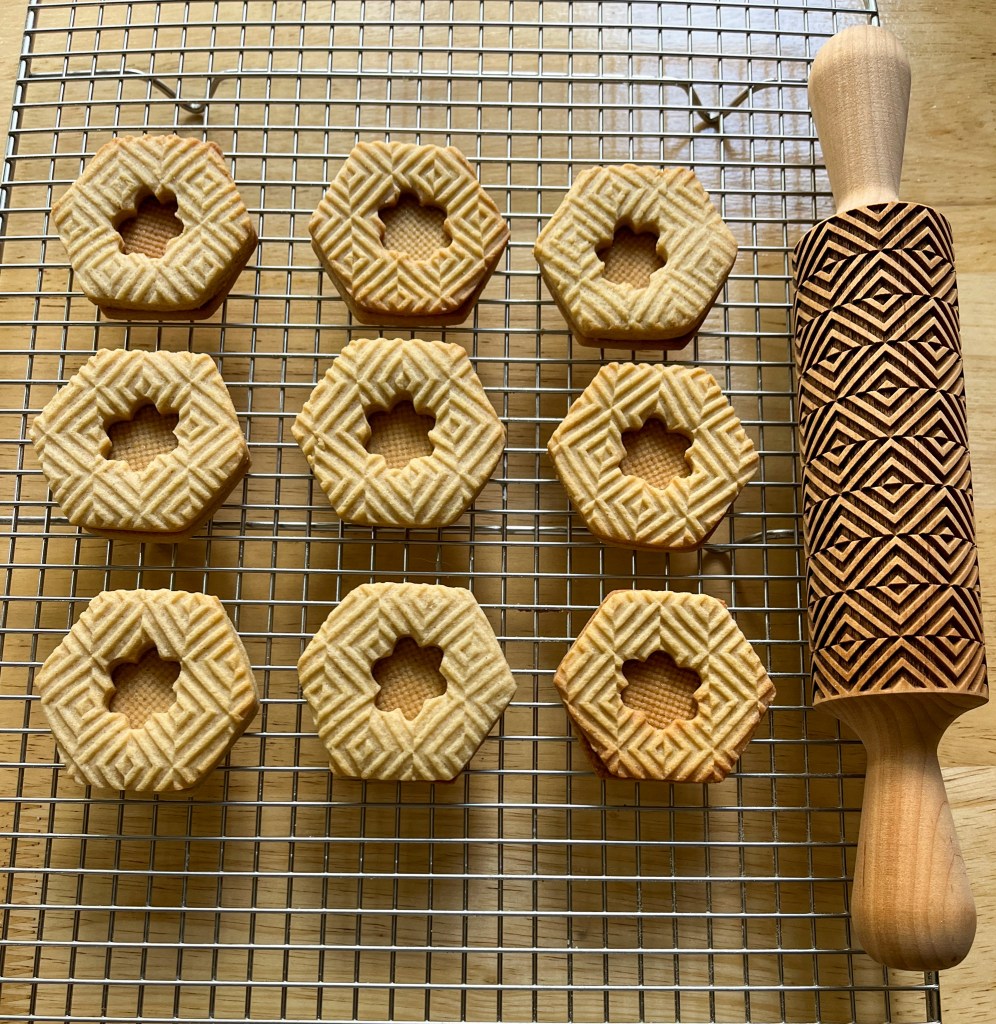
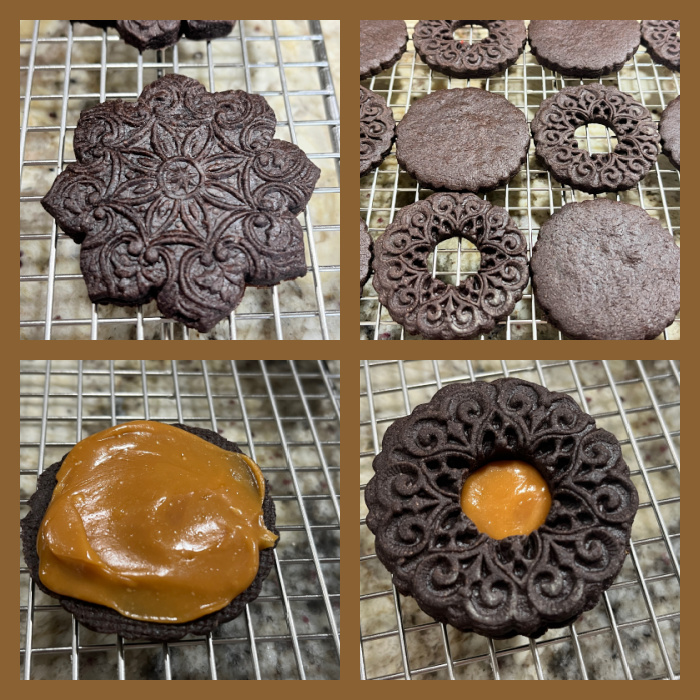
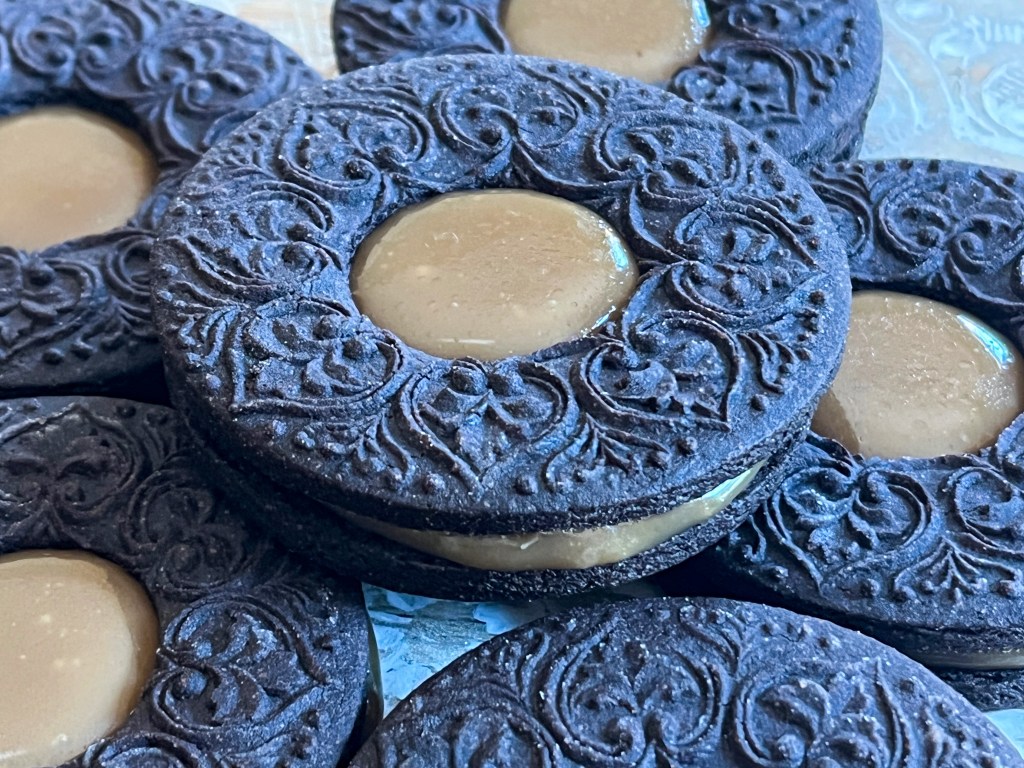
I am absolutely in love with this recipe, which I adapted from past adventures to incorporate pistachio flour to the party. It is hard for me to pick a favorite cutout sugar cookie recipe, but this is a very strong contender. Plus, it has the advantage of keeping the shape for patterns from molds, rolling pins, and…. a bread stamp! Yes, this post joins bread with cookies, by using the Uzbek stamp to create a design. I tell you, I am over the moon with these! To see the bread stamp used for its intended purpose, visit this old post of mine by clicking here.

PISTACHIO SUGAR COOKIES
(from The Bewitching Kitchen)

150 g butter, room temperature
90 g powdered sugar
1 g salt
1 egg (45 to 50g)
30 g pistachio flour
250 g all purpose-flour
1/2 tsp pistachio bakery emulsion (I used this one from LorAnn)
1/2 tsp vanilla extract

Cut the butter in small pieces, add to the bowl of a Kitchen Aid type mixer with the sugar and salt. Mix on medium-speed until creamy and light.

In a small bowl, whisk the egg with the flavor emulsions. Add to the creamed sugar in low speed, in three additions. Scrape the sides of the bowl with a spatula to make sure everything is mixing homogeneously. Once the butter and egg are mixed, add the flours. Mix on low speed until it starts to form a dough, remove from the bowl and gently knead by hand until smooth.

Form a disc and refrigerate for 30 minutes. Roll the dough, cut cookies and gently press with the Uzbek stamp tool dipped in flour to prevent it to stick to the dough. Depending on how soft your dough is, you might need to brush a little flour on top before pressing the design.

Freeze the cut and stamped cookies for 10 to 15 minutes before baking at 325F until it starts to get dark on the edges. Fifteen to twenty minutes, depending on your oven. Remove to a cooling rack and paint once the cookies are at room temperature.

ENJOY!

to print the recipe, click here

Comments: Take a look at that speckled dough! The pistachio flour adds wonderful taste and texture to the cookies. Please give it a try. Cookies will be great even baked without any adornment. Of course, if you sandwich them with some lemon buttercream or a pistachio ganache, I won’t hold any of it against you.

For more ideas on how to paint them, and details on the Uzbek stamp, please visit my cookie blog with a click here.

ONE YEAR AGO: Carrots and Zucchini Stir-Fry with Peanut Sauce

TWO YEARS AGO: Cookie Therapy, Anyone?

THREE YEARS AGO: The Quasi-Vegan Quiche

FOUR YEARS AGO: Not Quite Moqueca

FIVE YEARS AGO: Roasted Butternut Squash with Cashew Nuts

SIX YEARS AGO: Mississippi Roast and the Open Mind

SEVEN YEARS AGO: Walnut-Raisin Bran Muffins

EIGHT YEARS AGO: A Star is Born!

NINE YEARS AGO: Chestnut Flour Sourdough Bread

TEN YEARS AGO: Kinpira Gobo and Japanese Home Cooking

ELEVEN YEARS AGO: Walnut Sourdough

TWELVE YEARS AGO: Thai Chicken Curry

THIRTEEN YEARS AGO: Zen and the art of risotto

WOULD YOU LIKE A COOKIE OR A BROWNIE?

HAVE BOTH!

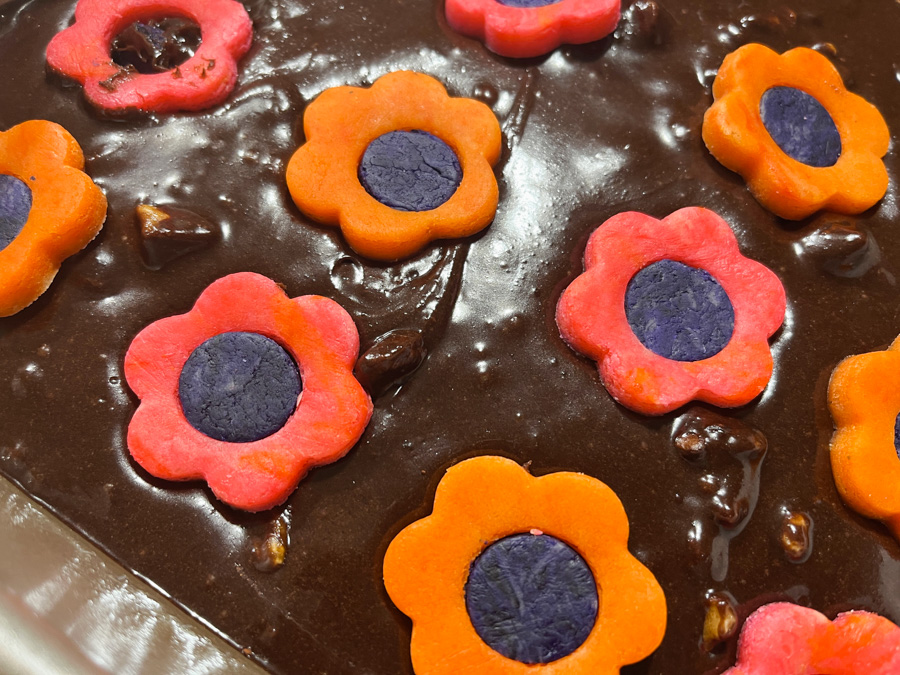
I cannot take credit for the idea, it was something Marlyn posted on her youtube channel, and I thought it was brilliant! She took the concept of colored cookie dough one step further, and used it to top brownies, baking them together. Works like a charm, and the possibilities are endless…

for Marlyn’s version, click here

You can use any brownie recipe you like, mine included walnuts. For the cookies, I made flowers with dough of different colors, and with marbled pieces too.

You then need to place them (FROZEN) over the raw brownie batter. Marlyn placed shapes all over in random spots, and that works too, you just cut through the design once serving the brownie. I decided to space the flowers so that each would end up centered on every piece.

After that, bake as you normally would. The cookies and the brownies have similar baking times, and the brownie batter protects the cookie if you need to bake longer. But for me it was a total of 25 minutes. Let the brownie completely cool, and then slice it in pieces.

This was a huge success when I took to the department to share with our colleagues on a Monday morning. Nothing like starting the week correctly!


I am dreaming of baking a set of blondies with chocolate cookie shapes on top. Once baked, you can even add details with a little Royal icing, like I showed yesterday on my cookie blog (see last picture of this post).

ONE YEAR AGO: Sourdough Fun, Three Ways

TWO YEARS AGO: Spooky Bakes, a Farewell

THREE YEARS AGO: Fall-Inspired Baking

FOUR YEARS AGO: On a Halloween Roll

FIVE YEARS AGO: Pumpkin Macarons

SIX YEARS AGO: Zucchini, Lemon & Walnut Cake

SEVEN YEARS AGO: Paleo Energy Bars

EIGHT YEARS AGO: Pecan-Crusted Chicken with Honey Mustard Dressing

NINE YEARS AGO: Mozzarella Stuffed Turkey Burgers

TEN YEARS AGO:  Cashew Chicken Lettuce Wraps

ELEVEN YEARS AGO: Clay-pot Pork Roast

TWELVE YEARS AGO: Panmarino

THIRTEEN YEARS AGO: A Classic Roast Chicken

THE NEVER AGAIN FOLDER

Some adventures in the kitchen can be catastrophic. My lowest of the low was a certain Vegan Soufflee made in 2019 that was by far the worst thing I’ve ever made and maybe the worst I’ve ever tasted. Then there are things that ended up quite tasty but the process was so convoluted that… all I could think was “never, never again.” I share two examples today. You can actually use your own recipes to come up with them, they are both very simple. A brownie cake and sugar cookie dough, in two colors.

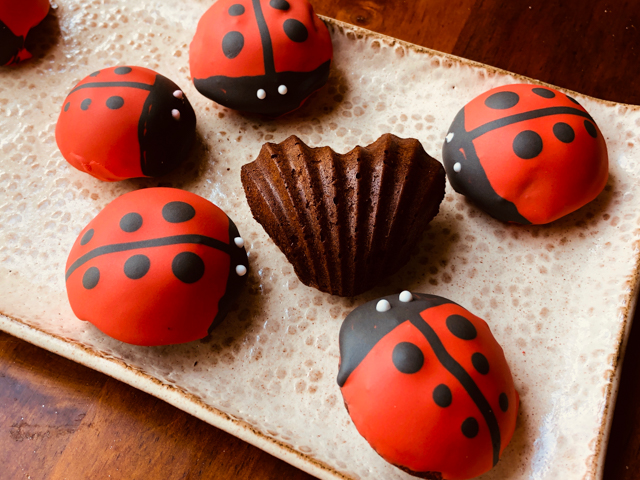
LADY BUG BROWNIE BITES

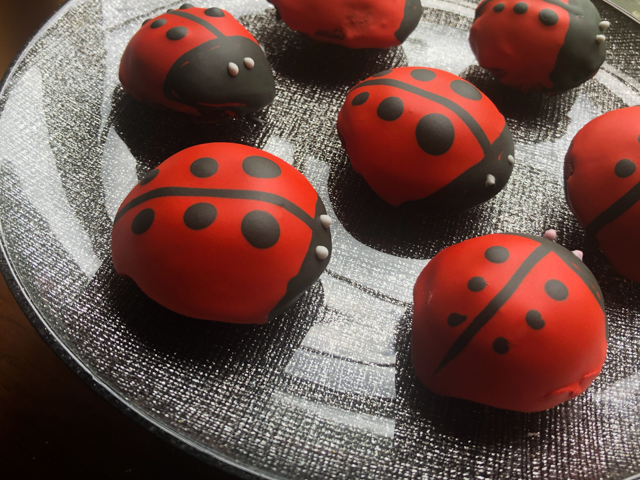
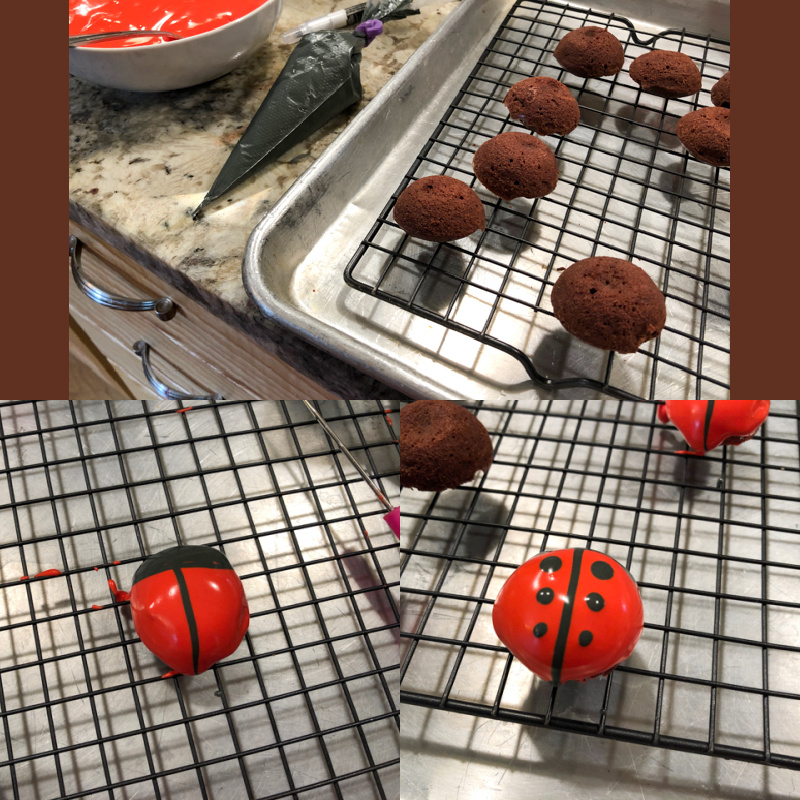
This one took me by surprise, after all I like to think I’m quite comfortable around Royal icing. And after baking the brownie bites in your favorite silicone half-dome mold, you are half way there. But, not so fast, my dear… not so fast. Getting the red icing to smoothly coat the surface, all the way down, is VERY messy and requires colorful language. Then you need to add the details in black while the red is still wet. Finally the white eyes are added later, when the base is set and any Zen you had is far gone.

They did look awfully cute, but I tell you, NEVER AGAIN!

Moving on…

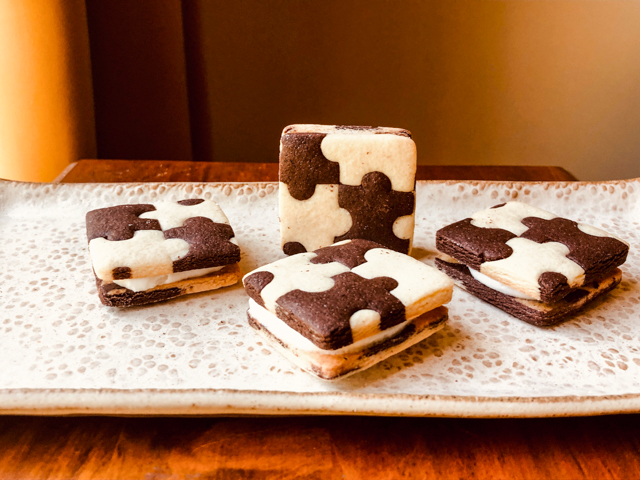
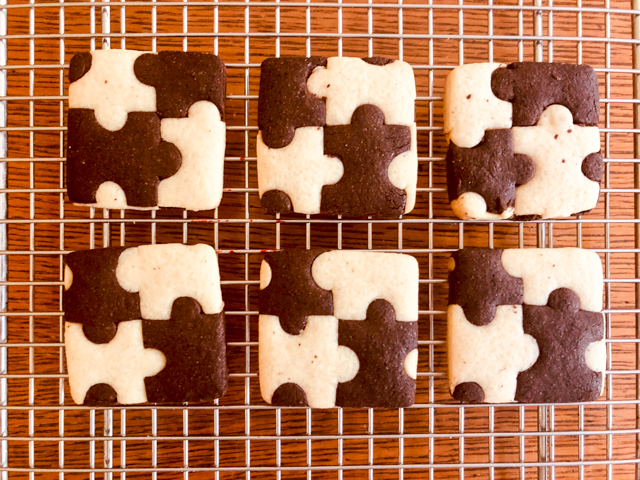
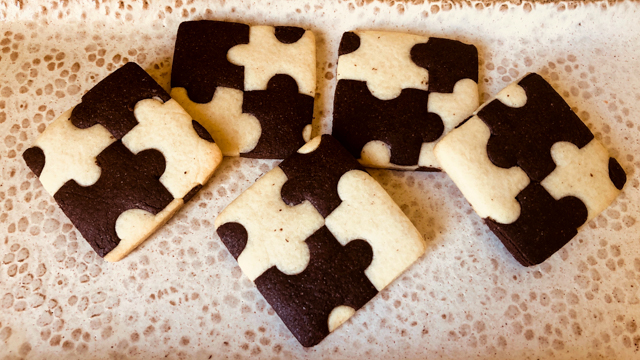
JIGSAW BLACK AND WHITE COOKIES

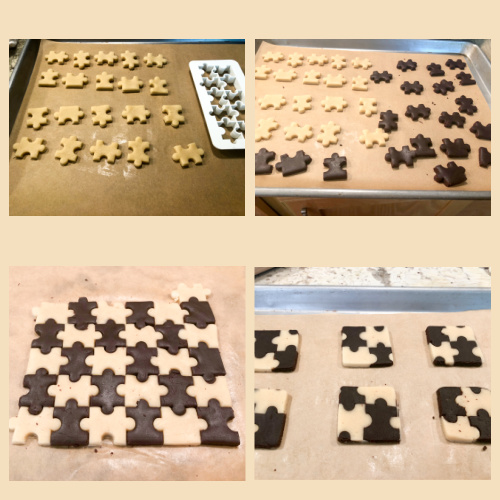
For these cute looking cookies, all you need is the right cutter, and I recommend this one. I actually saw someone on IG making a pastry shell using this technique and immediately adapted it for cookies. It seemed so straightforward.

Roll out both doughs less than 1/4 inch thick (I was going to do sandwich cookies because I like to maximize suffering, so I wanted them thin). Cut with the mold, separate the pieces and assemble them together. Cut them in square shapes to bake.

I know they look pretty nice and appealing, but it was time-consuming, a lot of work to come up with just a few cookies. Also, you are left with some trimmings that to use you must mash together for a marble effect, no way to re-roll and get more jigsaw patterns going.

To be honest, I really like the Jigsaw Cookies and might do them again, maybe a Red Velvet and White when Valentine’s comes up. But I need some time to forget the hassle and tell myself “I don’t remember it being that bad.”

ONE YEAR AGO: Chai-Butterfly Macarons

TWO YEARS AGO: Roasted Cauliflower Salad over Hummus

THREE YEARS AGO: Sous-vide Egg Bites

FOUR YEARS AGO: Paul Hollywood, The Weekend Baker

FIVE YEARS AGO: Texas Sheet Cake

SIX YEARS AGO: In My Kitchen, September 2015

SEVEN YEARS AGO: Sour Cherry Sorbet: A Labor of Love

EIGHT YEARS AGO: In My Kitchen – September 2013

NINE YEARS AGO: Raspberry Sorbet at Summer’s End

TEN YEARS AGO: When three is better than two  (four years with Buck!)

ELEVEN YEARS AGO: Grating Tomatoes (and loving it!)

TWELVE YEARS AGO: A Peachy Salad for a Sunny Day

COOKIE THERAPY, ANYONE?

Four top-notch cookie decorators. Two from the US, one from Canada, one from Spain. Marlyn and Amy get together virtually on Tuesdays for Cookie Therapy (I am undergoing treatment). On Fridays, Marlyn, Haniela and Amber join efforts in their Cookie Lunch Break (videos available here). Both virtual events showcase cookie decorating techniques live, as they chat, share tips, and answer eventual questions from those watching. It starts at noon where I live, so it is now a nice routine for me, I have my lunch and cookie therapy at the same time. Today I share two examples of goodies that were recently showcased by Marlyn and Amy in their Tuesday series. They have in common the use of wafer paper flowers. Needless to say, I fell in love with the technique…

HONEY SUGAR COOKIES WITH WAFER PAPER FLOWERS
(from the Bewitching Kitchen, decoration following Amy’s tutorial)

1 cup butter (226g), cut in pieces, cold
200g sugar 
zest of 1/2 lemon
2 eggs
1 tsp honey extract (Olive Nation)
1/2 tsp vanilla extract
420 g all-purpose flour
60 g cornstarch
1/2 tsp salt
1/4 tsp baking powder

Mix the flour, cornstarch, salt and baking powder and reserve. 

Cream sugar, butter and lemon zest in the bowl of a Kitchen Aid for a couple of minutes until the sugar is incorporated well and does not feel gritty. Add the eggs, honey emulsion and vanilla extratc slowly and mix until incorporated, but don’t over-mix. 

Add the flour mixture slowly, mixing in low-speed. If needed, add a little more flour, up to 1/4 cup. Once the dough comes together, stop, and form three discs. You should have three discs with about 330g each. Dough can be rolled out immediately or placed in the fridge to roll out later. It also freezes extremely well. 

Cut in shapes, freeze the cut-outs for 10 minutes, then bake in a 350F oven for about 13 minutes. Ice and decorate as desired. 

For my favorite Royal Icing recipe, visit Tanya’s blog with a click here.

ENJOY!

to print the recipe, click here

Comments: The hexagonal cookie tutorial with detailed explanation on making the flowers, starts at 41 min this video. Wafer paper sheets are available from the seller of all things, amazon.com. To make the flowers and leaves, you’ll need mini puncher cutters, (several other kinds available like this) or a considerable amount of patience to cut the shapes by hand. The wafer paper is white, so you have two options to color it: before or after cutting the shapes. I strongly advise that you spray paint or brush color on the sheet, let it dry and then cut the shapes, because they are very delicate and harder to paint after cutting. When you cut them, they will be flat. To give a tri-dimensional look, you can gently wrap them around the tip of a small plastic bottle (eye-drop bottles will work great), or what Amy suggests, using the tip of an air-brush dye bottle like these. Both methods work like a charm, just be gentle. Even if the center rips a little bit, when you add the centers it will hide the boo-boo. As to the centers, they can be dry Royal icing transfers, or you can just pipe a little blob of icing when you glue the flowers on the cookie’s surface. The great thing about these decorations, is that they last a long time, so you can make a little treasure chest with flowers, leaves, and save them for a cookie (or cupcake) emergency.

CHOCOLATE TWIG COOKIES

I find these cookies absolutely adorable! I cannot share the exact recipe I used, as it is available exclusively for Marlyn’s supporters through her Patreon site. You can certainly use your favorite chocolate cookie recipe, as long as it does not have leavening agent. It is also a good idea to pick a recipe that calls for some brown sugar, so that the dough will be more flexible and smooth.

Detailed method for shaping and decorating can be found here starting at 32 min and 30 seconds. Her flowers are logs above mine, with added details that I felt were beyond my skill level. She performs magic with the air-brush! They end up looking exactly like cherry blossoms, but I am still pretty thrilled with my little babies.

The secret to get the bark look, is brushing the cookies with Americolor Ash right before baking. This step is optional but I believe it adds a lot of charm.

As you might notice, I re-use parchment paper. The twigs were baked right after the hexagonal cookies from Amy’s tutorial, as well as some stick cookies, you can still see their ghost images in there…

After baking, you’ll need green Royal icing in stiff consistency to pipe leaves and glue the flowers over the surface.

Another way to use the wafer paper is sticking them on the surface of a freshly baked cookie, the residual heat will make the decoration stick and lay flat on it.

Now, I should also mention that the decorations look very nice, but not everyone will enjoy the mouthfeel of the wafer paper. So tell your guests or whoever will be enjoying the cookies that they can just peel off the decorations if they prefer. You can also minimize the amount of wafer paper by coupling the flower with Royal icing leaves.

I hope you’ll consider joining Cookie Therapy on Tuesdays, or Friday Cookie Lunch Break, at 1PM EST. They are always coming up with interesting things that will open your horizons to cookie making and decorating. I promise you will love it!

Watch it at 13:00hs EST (or anytime later) via youtube here..

ONE YEAR AGO: The Quasi-Vegan Quiche

TWO YEARS AGO: Not Quite Moqueca

THREE YEARS AGO: Roasted Butternut Squash with Cashew Nuts

FOUR YEARS AGO: Mississippi Roast and the Open Mind

FIVE YEARS AGO: Walnut-Raisin Bran Muffins

SIX YEARS AGO: A Star is Born!

SEVEN YEARS AGO: Chestnut Flour Sourdough Bread

EIGHT YEARS AGO: Kinpira Gobo and Japanese Home Cooking

NINE YEARS AGO: Walnut Sourdough

TEN YEARS AGO: Thai Chicken Curry

ELEVEN YEARS AGO: Zen and the art of risotto