Mid-July, and here I am to share with you a recipe we enjoyed on the first week of January. No particular reason for dragging my feet for so long, it was a memorable dinner, probably the juiciest lamb we’ve had at home. It was prepared sous-vide, but of course you can use any method you are comfortable with. The thing is, rack of lamb is such a special cut, I always get a bit nervous when I have to prepare it. It must be medium-rare, or you’ll have a disaster on your plate. Of course, meat thermometers are there to help us out, but the option of using sous-vide takes the stress completely out of it. I love that. For the same dinner, I made Potatoes Anna, but that is still a work in progress. Read on…

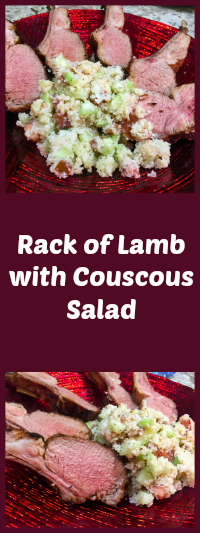
RACK OF LAMB SOUS-VIDE WITH COUSCOUS SALAD
(from the Bewitching Kitchen, adapted from several sources)
for the meat:
1 rack of lamb
1 teaspoon oregano (I used Mexican)
1 teaspoons smoked paprika
1 teaspoon ground coriander
Salt and pepper
for the salad:
2 cups cooked couscous
1 cucumber, diced
2 large Roma tomatoes, diced
dried mint to taste (use fresh when available)
1/4 cup olive oil
2 tablespoons lemon juice
salt and pepper to taste
to glaze:
3 tablespoons honey
1 tablespoon lemon juice
Heat the water bath to 130 ° F.
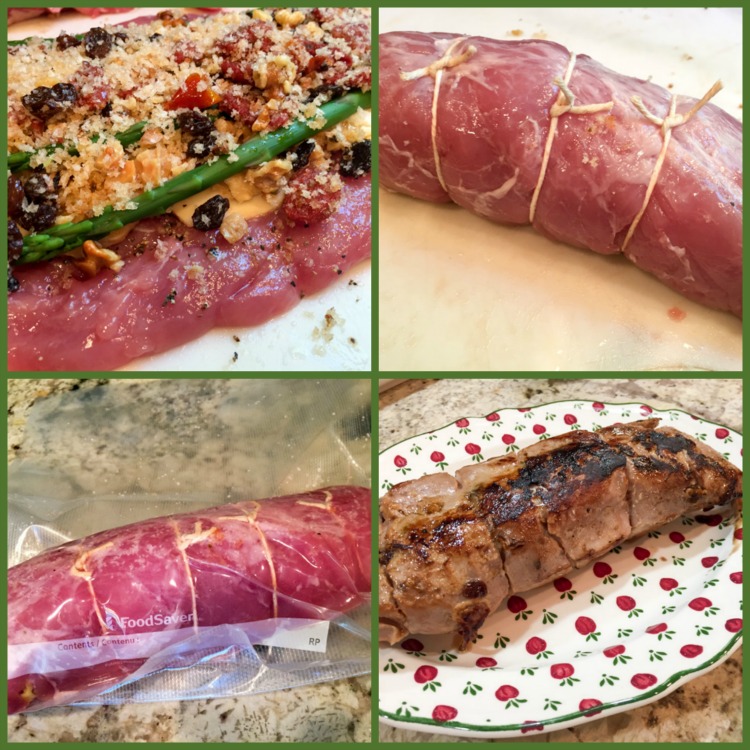
Season the lamb lightly with salt and pepper all over. Mix the oregano, paprika and coriander in a small bowl. Rub the mixture over the meat, place it in a sous-vide type bag and seal it. Submerge in the heated water-bath and cook for 4 hours.
For the salad, heat the olive oil on a small pan, just to raise its temperature, no need to have it smoking. Remove from heat, add the dried mint, and let it cool to room temperature. Whisk the lemon juice. Mix the cooked couscous, cucumber, and tomatoes in a bowl. Add the prepared dressing. If using fresh mint, simply add it to the olive oil and lemon juice, no need to warm the oil up. Season with salt and pepper, taste and adjust seasoning.
When the lamb is almost ready to leave the water-bath, make a glaze mixing the honey with lemon juice. Remove the lamb from the bag, brush some of the glaze all over and sear the surface either on a very hot skillet, or on a hot grill. You can also run it under the broiler, watching it carefully. Slice the lamb in individual ribs, and serve with the cool couscous salad.
ENJOY!
to print the recipe, click here

Comments: This was superb! You can double the recipe, cook two racks of lamb and invite a couple of special friends over. But in this particular dinner, it was just the two of us. And three pups absolutely mesmerized by the smell wafting through the kitchen. Now, to the Potatoes Anna, one of my favorite ways to enjoy potatoes, a bit of an indulgence, of course. Potatoes and butter in proportions to make those two little entities show up, one on each side of your head. The evil one tells you not to worry about a thing, life is short. The other one asks if you noticed how much butter went into that innocent looking platter of food… Tell them both to leave you alone, enjoy the meal and be a bit more austere for a couple of days. There. You’ve got this!
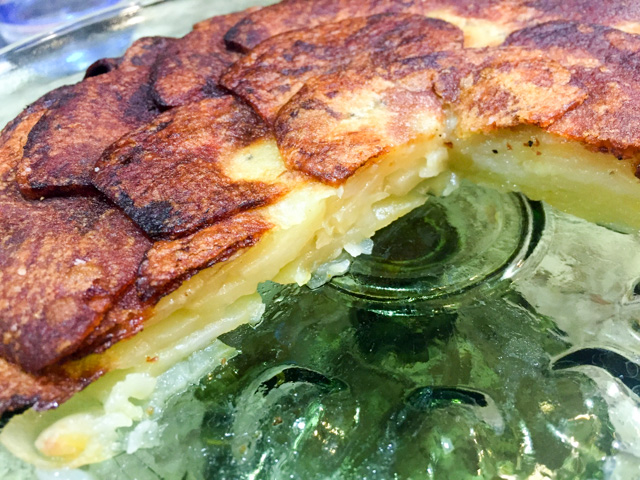
But, I digress. I told you the Potatoes Anna are a work in progress, and you might be wondering why. Here it is…

A bit too brown, I think. I used the method by America’s Test Kitchen, but I think it calls for too long on top of the stove. Maybe the flame in our stove is stronger than the one they used. That could explain, it’s hard to believe they would have made a mistake. Next time I intend to cut the time a bit shorter or use one of the weaker flames on the back of our Supernova. At any rate, the inside was very creamy, perfectly cooked.
Once I re-visit and optimize this recipe, I will be ready to share with you!
ONE YEAR AGO: Focaccia with Grapes, Roquefort and Truffled Honey
TWO YEARS AGO: Moroccan Carrot Dip over Cucumber Slices
THREE YEARS AGO: White Chocolate Macadamia Nut Cookies
FOUR YEARS AGO: Cilantro-Jalapeno “Hummus”
EIGHT YEARS AGO: Shrimp Moqueca