BLOODY CUPCAKES FOR A SPOOKY HALLOWEEN

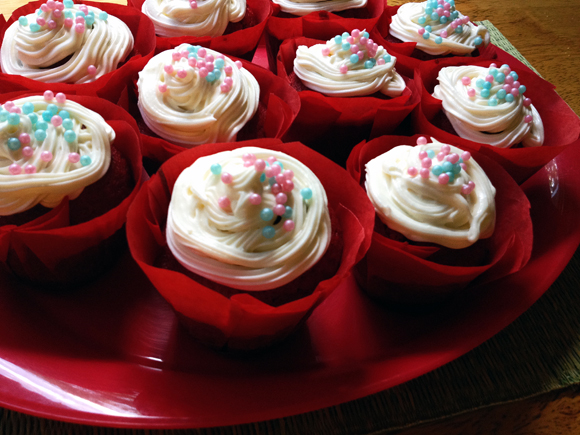
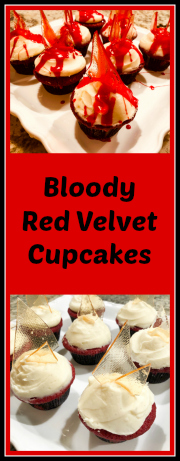
Red Velvet cake and Halloween is a match made in heaven. Heaven and Halloween? What have I done here? Oh, well. To make them even better, stab each cupcake with “broken glass” and make them “bleed!”

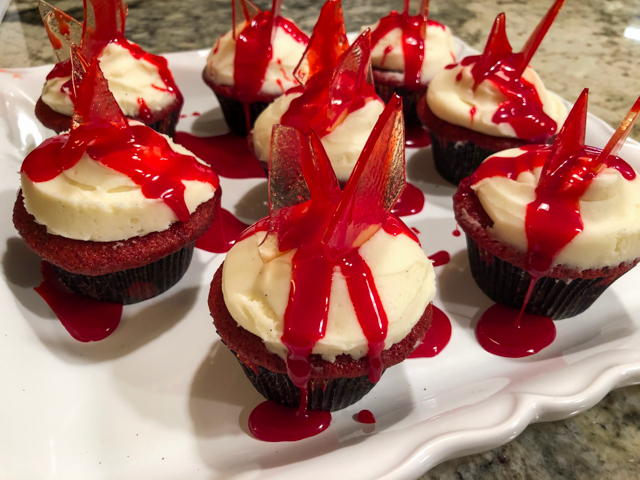
BLOODY RED VELVET CUPCAKES
(decoration from Recipes by Carina)

for the cupcakes:
160g all-purpose flour
3/4 tsp baking soda
pinch of salt
85 g (6 tablespoons) butter, softened
150g granulated sugar
1 egg
2 T cocoa powder (I used natural)
1/2 cup buttermilk
1 tsp white vinegar
1 tsp vanilla paste
1 tablespoon red food dye

for the frosting:
170 g unsalted butter, softened
500 g cream cheese, cut in pieces, at room temperature
260 g powdered sugar
1 tsp vanilla paste

for the broken glass decoration:
200g sugar
2 Tbsp water
2 tsp corn syrup
1 tsp lemon juice

for the fake blood:
½ cup light corn syrup
1 Tbsp cornstarch
2 Tbsp water
1-4 tsp red food gel
drops of blue food gel

Heat oven to 350 F. Sift flour, baking soda and salt in a bowl. Reserve. Cream softened butter with sugar using a KitchenAid type mixer with paddle attachment.

Meanwhile, in a small bowl whisk the buttermilk, vinegar, egg, and red food color. When the butter and sugar are well mixed and the mixture is pale, add the egg, mix briefly and add the cocoa powder. Once the mixture more or less smooth, add the flour in three additions, and the liquids in two, beginning and ending with the dry ingredients. Mix well. Add the  batter to regular size cupcake pans, lined with paper.  Bake for 20 minutes or until a toothpick inserted in the center comes out clean. Cool completely before frosting.

Make the frosting. Put the softened butter in the bowl of a KitchenAid type mixer with the paddle attachment and mix until smooth.  Add the pieces of softened cream cheese to the mixing bowl, a small amount at a time. When all cream cheese is added and combined, beat for about 1 minute then add the powdered sugar in three portions, adding the vanilla after the last third portion.

Beat for 2 to 3 minutes more, but do not over-mix or the mixture can become loose.

Make the decorations. In a saucepan measure out the sugar, corn syrup, lemon juice and water. Place the saucepan over medium-high heat. Boil for 3-5 minutes until the sugar starts to change colour or until it reaches 300F.

Pour the melted sugar out onto a baking sheet lined with Silpat.  Leave to cool for 10 minutes before transferring to the fridge for a few hours to harden.  Break shards when ready to decorate the cupcakes.

Make the fake blood. In a bowl mix together the syrup and cornstarch until combined. If needed, add water to reach proper consistency. Add the food gel, small amount at a time until you have a deep dark red shade. Spoon the blood over the cupcakes.

ENJOY!

to print the recipe, click here

Comments: Once these cupcakes were done, I thought that another cute way to present the same idea would be a red velvet jelly roll type cake, with little blobs of cream cheese frosting on top and the glass shards properly stabbed here and there. And blood. A lot of it. Obviously.

Have a great Halloween celebration, whatever scary thing is on your menu.  I leave you with a shot from 2013, when we went to a party with the graduate students from our department. Halloween was Aritri’s favorite holiday and this week I cannot take her out of my mind.


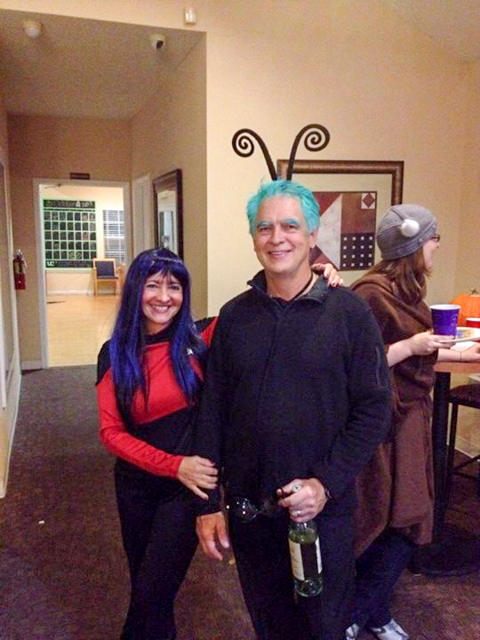
Star Trek Captain finds Handsome Alien and brings him all the way to her planet where they’ve lived happily ever after…

ONE YEAR AGO: Lamb Meatballs, Slow-Cooker Version

TWO YEARS AGO: Elaine’s Sourdough Boule

THREE YEARS AGO: Zucchini, Lemon and Walnut Cake

FOUR YEARS AGO: Paleo Energy Bars

FIVE YEARS AGO: Pecan-Crusted Chicken with Honey Mustard Dressing

SIX YEARS AGO: Mozzarella Stuffed Turkey Burgers

SEVEN YEARS AGO:  Cashew Chicken Lettuce Wraps

EIGHT YEARS AGO: Clay-pot Pork Roast

NINE YEARS AGO: Panmarino

TEN YEARS AGO: A Classic Roast Chicken

RED VELVET CUPCAKES

If you are not completely overwhelmed by the influx of sweets, chocolates,  strawberries, and heart-shaped things in the blogosphere, you could be now, because I am adding one more shockingly red item to the 26.2 mile-long list. But, how could I resist joining this party, when I baked a batch of these:

RedVelvetCupcakes1
Aren’t you absolutely amazed?  Aren’t they cute? Did you notice the icing? Can you believe “I” made them? So many questions, I know… but you have to be amazed. Because I certainly am. Granted, this baking adventure was not drama-free.

RED VELVET CUPCAKES WITH CREAM CHEESE FROSTING
(from Kristine’s Kitchen)

**recipe makes 24 cupcakes, I halved all amounts for a batch of 12**

for the cupcakes:
2 ½ cups cake flour
1 ½ cups sugar
1 tbsp. cocoa powder
1 tsp. baking soda
1 tsp. salt
2 eggs
1 ¼ cups vegetable oil
1 cup buttermilk
2 tbsp. (1 ounce) red food coloring
1 tsp. vanilla extract
1 tsp. distilled white vinegar

for the cream cheese frosting:
8 oz. cream cheese (straight from refrigerator do not soften)
5 tbsp. unsalted butter, at room temperature
3 – 3 ½ cups powdered sugar, sifted
2 tsp. vanilla extract

Heat oven to 350 degrees F. Line cupcake tins with paper liners and set aside.

In a large bowl, whisk together cake flour, sugar, cocoa powder, baking soda, and salt until well combined. In the bowl of a stand mixer fitted with the paddle attachment, combine eggs, oil, buttermilk, red food coloring, vanilla, and vinegar. Mix on medium speed until well combined. Add the dry ingredients to the mixer and beat first on low-speed and then on medium speed until smooth, about 2 minutes.

Divide batter evenly between cupcake liners, filling each a little over halfway full. Bake, rotating pans halfway through, until a tester inserted in the center of a cupcake comes out clean, 16-18 minutes. Let cupcakes cool in pans for 5 minutes and then remove to a wire rack to cool completely before frosting.

To make the frosting: Beat together the cream cheese and butter with an electric mixer on medium-high speed until fluffy, about 3 minutes. Add 3 cups powdered sugar and mix on low-speed until incorporated, and then medium-high speed until frosting reaches desired consistency, about 3 more minutes. For a stiffer icing, add more powdered sugar. Beat in the vanilla extract. Pipe frosting onto cooled cupcakes as desired. Store frosted cupcakes in the refrigerator.

ENJOY!

to print the recipe, click here

baked

The stunning paper linings were a gift from our friend Cindy. I decided to trim their tops after baking to make it easier to frost the cakes. I know my limitations.

iced
Everything was going on well, until it was time to frost the cakes. I was set on doing a good job on these, so I bought myself a pastry bag. Not a fancy one, but a disposable, single use plastic type. I filled the bag with the cream cheese frosting,  took a deep breath, and went to work.  All went smoothly for the first two babies, then all of a sudden, I squeezed and squeezed, and nothing came out of the pastry bag’s tip.  I told myself – you are a P90Xer, you can certainly squeeze harder than that! – and that’s when I felt a moist, cold, sticky feeling on my wrist, the consequence of frosting that had found its way up instead of down, and not satisfied to reach midway through my arm, was now splashing on the floor.

Not sure if you ever had to deal with this type of situation, but there’s only one word to describe it: messy.  Very messy.  The bag gets slippery, the frosting refuses to compact down, and the Jack Russell gets overly agitated from the sudden intake of sugar. Chaos in the Bewitching Kitchen. Still, only one little cake was lost in that battle, due to jerky movements on my part and the merciless Law of Gravity.

These cupcakes were moist, tender, and the frosting complemented them quite well. The only problem was the decoration added on top. It turns out that those sugar pearls were rock hard.  I thought they would more or less melt in the mouth, but… not the case. More the dental filling destroyer kind. I will use a different type of sprinkle next time.  Because obviously there will be a next time. And when that next time arrives, I intend to do as pros do, and twist the top of the pastry bag. It’s all in the details, my friends.  🙂

BuckBoy

HAPPY VALENTINE’S DAY!

ONE YEAR AGO: Happy Valentine’s Day!

TWO YEARS AGO:  A Few Blogging Issues

THREE YEARS AGO: Dan Dan Noodles

FOUR YEARS AGO:  Sophie Grigson’s Parmesan Cake

FIVE YEARS AGO: Antibiotics and Food