CHEESY LOW-CARB ZUCCHINI TARTS

After a week of fun and over-indulging a bit in Colorado, it was time to get back into a more attentive approach to cooking for a few days. For my body, nothing works better than controlling carbs. I respond quite well to it, and don’t find it that hard to do. Whenever I feel like reducing carbs, I think of Kalyn’s blog, her site is a great source of wonderful recipes. I had this one saved in my Pinterest board for a while, and  even got the exact same pan she used. It was too cute to resist. And I must tell you, it works great, very sturdy, I can see it will be around my kitchen for many many years, and maybe it will find its way into Greenlee’s home one day. If you don’t know, Greenlee is my 2 and a half-year old grand-daughter. Yeap, that’s how sturdy this pan seems. But back to the recipe. If you like omelettes and frittatas, this one is for you. And, of course, you don’t need to splurge and get the pan, use a large muffin tin, or you might even pour it into a pie dish, I suspect you can fill two regular size pans, although not too deeply. You might have to adjust the baking time a little. It is easy to judge when it’s done – just a little jiggly in the center, and getting a nice golden brown look on the surface.

CRUSTLESS LOW-CARB ZUCCHINI TARTS
(slightly modified from Kalyn’s Kitchen)

4 oz. feta cheese, crumbled and softened
3 small zucchini, julienned or cut with spiral cutter
1 tablespoon olive oil
1/2 tsp. Herbes de Provence
1/4 teaspoon Aleppo pepper (or red pepper flakes)
salt and fresh-ground black pepper to taste
1/4 cup coconut milk (or heavy cream)
8 eggs, well beaten
6 T coarsely grated sharp white cheddar
1/4 cup sliced green onions, plus more for garnish if desired

Heat the oven to 375F/190C. Crumble 4 oz. of feta cheese into a large glass measuring cup or a bowl and let it come to room temperature.  Heat olive oil in a non-stick frying pan, add the zucchini, sprinkle with Herbes de Provence, Aleppo pepper, a little salt and black pepper to taste.  Cook the zucchini a few minutes over medium-high heat, just until it’s barely starting to soften.

Spray the tart pan with olive oil  and divide the cooked zucchini among the tart wells. Top with a generous tablespoon of coarsely grated sharp cheddar and a pinch of green onions. Then use a fork to stir the now-softened goat cheese and add the coconut milk (or heavy cream) and whisk well.  Beat eggs in another bowl and add to the goat cheese/milk mixture a little at a time, stirring until fully blended.

Fill each tart well with the feta-cheese and egg mixture, being careful not to fill too full.  Bake about 30 minutes, or until tarts are firm and lightly browned. Serve hot.

ENJOY!

to print the recipe, click here

Comments: I am quite fond of frittatas and omelettes, but sometimes they can taste too eggy. I know, what kind of a statement is that?  But, there is such a thing as “too eggy,” at least for my taste buds. I find that using coconut milk mellows down quite nicely that flavor, making it more subtle, and the texture quite creamy. Heavy whipping cream does a similar job, but in my personal experience, coconut milk is the winner. The recipe makes six tarts, which means after Phil and I enjoyed two on a Sunday lunch, I still had four left. I kept them in the fridge for four days, wrapped individually in Saran wrap, and they were still excellent on the last day, warmed up for 60 seconds – exactly – in the microwave. I bet they freeze well too.

It is so nice to be able to have lunch at home, these tarts go well with just about anything.  Kalyn conceived them as breakfast items, but since I don’t normally have breakfast, they turn into a perfect lunch item.  Of course, the possibilities are endless as far as what other goodies to add… sun-dried tomatoes, Kalamata olives, maybe some prosciutto or diced ham. Just add whatever you like to the sautéed zucchini and proceed with the recipe.

Kalyn, thanks so much for your constant inspiration, and for “twisting my arm” (virtually at least) to get this great tart pan. Very nice addition to the Bewitching Kitchen

ONE YEAR AGO: Blogging Hiatus

TWO YEARS AGO: Apricots, Three Ways

THREE YEARS AGO: Up Close and Personal with Kale

FOUR YEARS AGOBlack Berry Cherry Sorbet

FIVE YEARS AGO: Asparagus Pesto

SIX YEARS AGO: Chocolate and Chestnut Terrine

SEVEN YEARS AGO: Under the spell of lemongrass

EIGHT YEARS AGO: Greens + Grapefruit + Shrimp = Great Salad!

SaveSave

SaveSave

Save

Save

SaveSave

SaveSave

SaveSave

SaveSave

SaveSave

SaveSave

SaveSave

SaveSave

MIMI’S STICKY CHICKEN, A CALL FROM MY PAST

Paleo-friendly, low-carb & delicious!

Many years ago I used to visit a cooking forum that is long gone. One recipe was a big hit with many of the members: Mimi’s Sticky Chicken. I admit the name is not very sexy, but once you’d read the many stellar reviews, you’d be inclined to disregard the sticky issue and give it a try. Over the years, that exact recipe has been published in websites everywhere, credit not always given to the author. So, without further ado, here you have the original link. I tried to find out Mimi’s whereabouts, but my search skills returned nothing.  As you can see in the link, she created this recipe in the early 80’s, and asked for full credit whenever someone talked about it. It’s only fair.  I used to make it quite often when I was dating Phil and during the early years of our marriage, as the kids absolutely loved it. For some reason, I forgot all about it. It’s been definitely more than a decade since I last had it on our table. But to compensate, I made it twice in the last month. HA!

MIMI’S STICKY CHICKEN
(modified from the original version found here)

2 teaspoons salt
1 teaspoon paprika
1/2 teaspoon cayenne pepper
1/2 teaspoon onion powder
1/2 teaspoon thyme
1/2 teaspoon black pepper
1/4 teaspoon garlic powder
1 whole roasting chicken, about 3 pounds
1 shallot, cut in half
1 lemon, cut in quarters

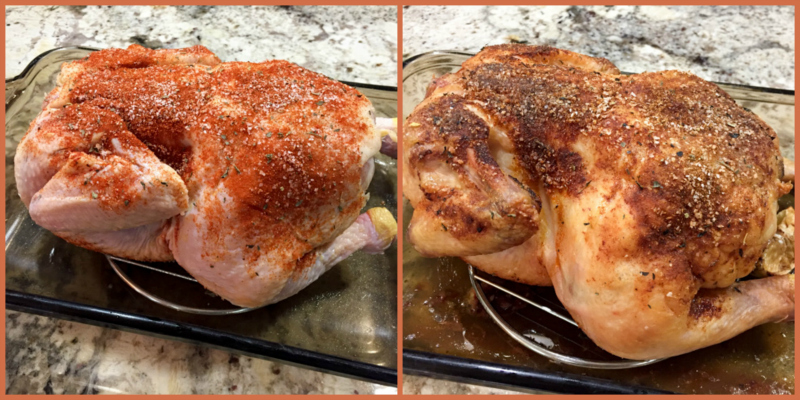
Combine all spices  in a small bowl. Dry chicken very well, rub the spice mixture over skin and sprinkle a little inside the cavity.  Place in a bag or in a bowl, covered with plastic wrap, and refrigerate overnight.

Heat the oven to 250F. It is not a typo. It is a very low oven.  When ready to roast, stuff the cavity of the chicken with the shallots and lemon. Place it breast side down in a roasting pan (I like to use a small rack to keep it elevated, spraying the rack with olive oil to prevent the skin from sticking to it).

Cook for about 5 hours, or until the internal temperature reaches 155 F. Baste occasionally after the first two hours, with the liquid that starts to accumulate in the roasting pan.

If you like to crisp up the skin, carve the chicken in pieces and place under the broiler briefly. It will falling apart, so handle it gently.

ENJOY!

to print the recipe, click here

Comments: Amazing how something we loved so much could end up neglected for years. Two things I’d like to bring up: first, if you don’t have time to refrigerate the bird overnight with the spice mixture, don’t worry, just go ahead with it right away. Second, if you are not around to baste the chicken, it won’t be a serious drawback. When ready to serve, baste a little with the roasting liquid, and go for that brief encounter with the broiler. On your first time making this recipe,  it would be nice to check the temperature and see if after 4 hours the meat is already approaching 155F. If it is, don’t leave it all the way to the five-hour mark. Once you get to know how your oven behaves, you can trust the timing a bit more. Make sure to always roast a chicken of similar size.

As I mentioned before, once the meat is cooked, it will be falling apart. Note in the picture below how the bone broke through the skin.


I also like to squeeze the roasted lemon all over the chicken right before serving, and sometimes will grab a fresh one to make sure to get that extra bite of acidity that goes so well with it.


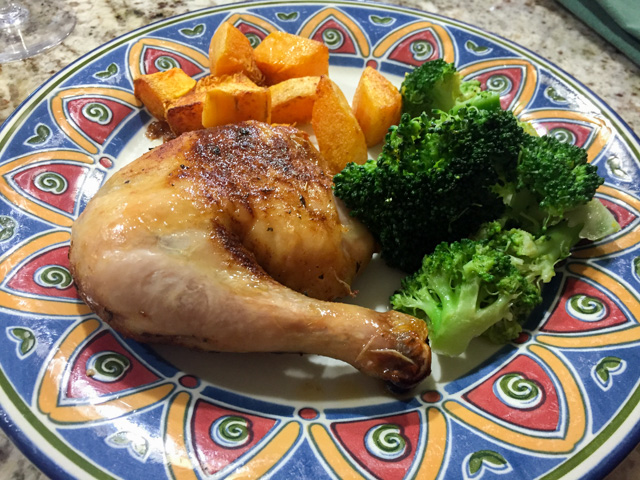
Dinner is served: Mimi’s Sticky Chicken,
Pan-Steamed Broccoli, and Roasted Butternut Squash… 


Add to FacebookAdd to DiggAdd to Del.icio.usAdd to StumbleuponAdd to RedditAdd to BlinklistAdd to TwitterAdd to TechnoratiAdd to Yahoo BuzzAdd to Newsvine

ONE YEAR AGO: Perfect Soy-Grilled Steak

TWO YEARS AGO: The Devil’s Bread

THREE YEARS AGO: Heart of Palm Salad Skewers

FOUR YEARS AGO: Potluck Frittata and Lavoisier

FIVE YEARS AGO: Home-made Corn Tortillas

SIX YEARS AGO: Whole-Wheat Spaghetti with Peanut Sauce

SEVEN YEARS AGO: Brigadeiros: A Brazilian Party!

EIGHT YEARS AGO: Lemony Asparagus


ZUCCHINI FRITTATA WITH ROASTED TOMATOES AND GOAT CHEESE

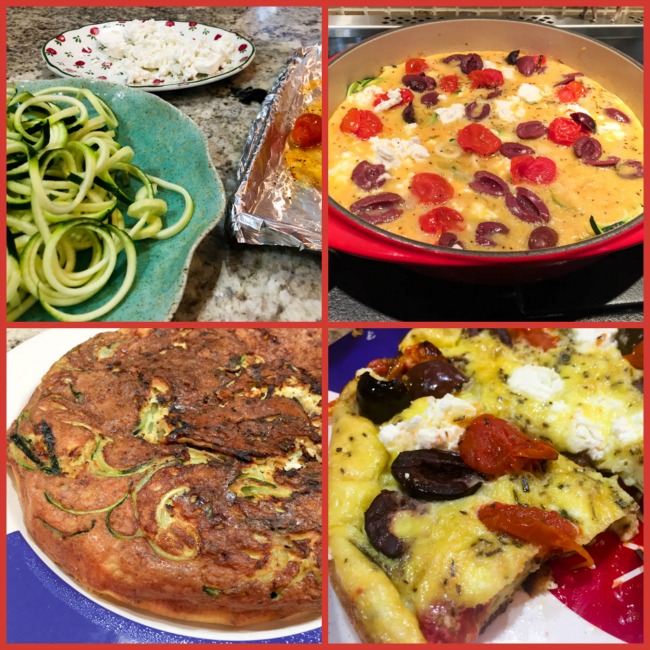
Sometimes inspiration for a meal comes from unexpected sources. My friend Denise sent me a message with a photo of her dinner and four simple words: you must make this. She got it in a publication from her grocery store in England, showcasing their seasonal fresh ingredients. It joined zucchini with roast tomatoes and goat cheese, and looked great.  I ask you, what’s not to love? To make things even more interesting,  the zucchini receives the spiralizer treatment, although you could obviously do a coarse shred or a fine slicing. Don’t let the lack of a spiral cutter stop you. I used my Tarte Tatin pan, which sits patiently in the pantry waiting for the opportunity to shine. It is simply perfect for this type of recipe, so if you own one, open your horizons beyond the classic French dessert.

ZUCCHINI, ROASTED TOMATOES AND GOAT CHEESE FRITTATA
(adapted from Lakeland, UK)

12 cherry tomatoes
1 tbsp olive oil
15g butter
1 medium shallot, sliced
1 large zucchini, spiralized (use green or yellow, depending on availability)
5 eggs
2 tbsp heavy cream
1 tsp herbes de Provence
Salt & freshly ground black pepper
125g goat cheese, crumbled
kalamata olives, pitted and halved, to taste

Heat the oven to 400 F (200 C).  Place the cherry tomatoes on a small roasting tray and drizzle over the olive oil. Cook for 10 minutes and set aside.

Meanwhile, melt the butter in a round, non-stick 8-inch pan that can go in the oven,  brushing it over the entire base and up the sides to prevent the frittata from sticking. Cook the sliced shallot over a medium heat until softened. Add the spiralized courgette and cook for 2-3 minutes, until slightly softened.

Whisk the eggs in a Pyrex cup, add the herbs the Provence and season with salt and pepper. Add the eggs to the pan with the crumbled cheese, and top with the roasted tomatoes and black kalamata olives.

Cook over a low heat for 10-15 minutes, until the frittata is beginning to set, but the top is still a little runny. Finish off under a hot oven until the top of the frittata acquires a golden color. Leave in the pan for 1-2 minutes before turning out onto a plate and cutting into wedges.

ENJOY!

to print the recipe, click here

Comments: This goes for our regular rotation, for sure! I think I slightly overcooked the bottom of the frittata this time, but it did not compromise the flavor at all. From the original, I had three modifications. Used herbes de Provence instead of rosemary (a texture thing for me), added a little heavy cream to the egg mixture, and included kalamata olives as topping.  Because, as you might have heard years ago, I am a kalamata-cheerleader. We had a couple of very tiny slices as leftovers, and they were still quite amazing after a brief heating in our small electric oven, just to kill the cold from the fridge.

A very simple and flavorful dish, that you can modify to suit your taste with different veggies, herbs, and maybe adding some coconut milk instead of heavy cream. Yes, that could work quite well…

Add to FacebookAdd to DiggAdd to Del.icio.usAdd to StumbleuponAdd to RedditAdd to BlinklistAdd to TwitterAdd to TechnoratiAdd to Yahoo BuzzAdd to Newsvine

ONE YEAR AGO: Playing with Pectinase

TWO YEARS AGO: Poached White Asparagus with Lemon and Pistachios

THREE YEARS AGO: Dan Lepard’s Saffron Bloomer

FOUR YEARS AGO: Fesenjan & The New Persian Kitchen

FIVE YEARS AGO: Quinoa Salad with Roasted Beets

SIX YEARS AGO: Pasta Puttanesca

SEVEN YEARS AGO: Miche Point-a-Calliere


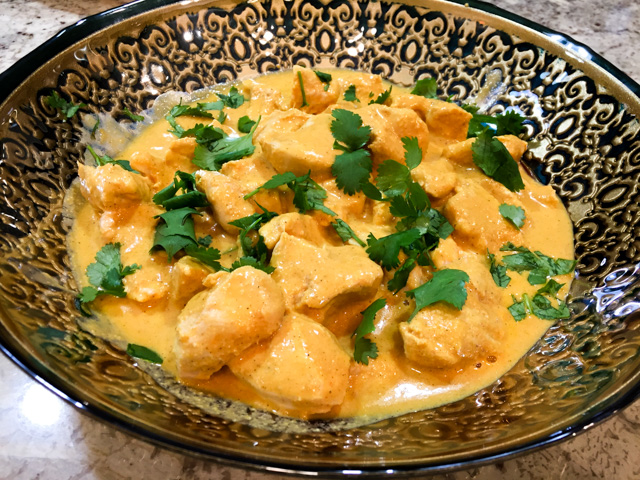
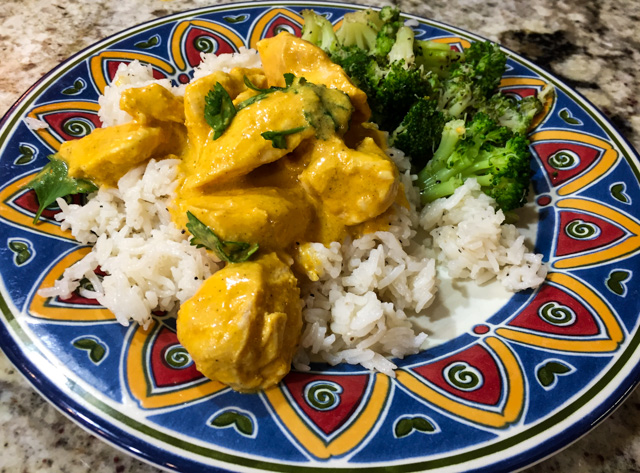
CHICKEN KORMA-ISH

Chicken Korma is a classic Indian recipe, but due to the considerable amount of liberties I took with this classic, I must be upfront about it in the title, to avoid the Food Police coming after me.  For starters, I cooked it sous-vide. I know, what was I thinking?  But I tell you, the perfect texture is worth it. Perhaps you are familiar with the concept of velveting meat before stir-frying? It is widely used in Chinese cooking and does wonders for chicken breast, pork tenderloin, or shrimp, typical types of protein that will often dry up when submitted to the intense heat of the wok. Chicken Korma is not a stir-fry, but the improvement in texture offered by the gentle cooking in the water-bath made me think of velveting. To add insult to injury, I omitted several spices that make Korma a Korma. There you go. Rebel. My middle name. Inspiration came from this recipe at Anova Culinary, a great source for sous-vide cooking.

chicken-korma

SOUS-VIDE CHICKEN KORMA
(inspired by Anova Culinary)

2 tablespoons canola oil
1 shallot, cut into small dice
2 tablespoons tomato paste
1 tablespoon kosher salt
1 tablespoon minced fresh ginger
1 tablespoon garam masala
1 tablespoon Madras curry powder
1 teaspoon ground cinnamon
1 teaspoon ground turmeric
1 teaspoon freshly ground black pepper
1/3 cup heavy cream
1/3 cup Greek yogurt
1/3 cup cashews
2 tablespoons lemon juice
1 tablespoon honey
1 1/2 pounds boneless skinless chicken breasts, cut into 1/2-inch pieces
Fresh cilantro, for serving

Set the sous-vide to 150°F (65°C).

Heat the oil in a large non-stick skillet over medium heat. When the oil is shimmering, add the shallot and cook, stirring frequently, until softened and lightly browned, about 5 minutes. Add the tomato paste, salt, ginger, garam masala, curry powder, cinnamon, turmeric and pepper. Continue to cook, stirring constantly, until aromatic, about 2 minutes. Remove from the heat and let cool for 5 minutes.

Transfer the mixture to a food processor or blender. Add the cream, yogurt, cashews, lemon juice, and honey. Process until smooth, about 1 minute. Combine the pureed sauce with the chicken in a large zipper lock bag. Seal the bag using the water immersion technique and place in the water bath. Set the timer for 2 hours to 3 hours.

When the timer goes off, remove the bag from the water bath. Transfer the entire contents of the bag to a serving bowl and garnish with cilantro.

ENJOY!

to print the recipe, click here

served

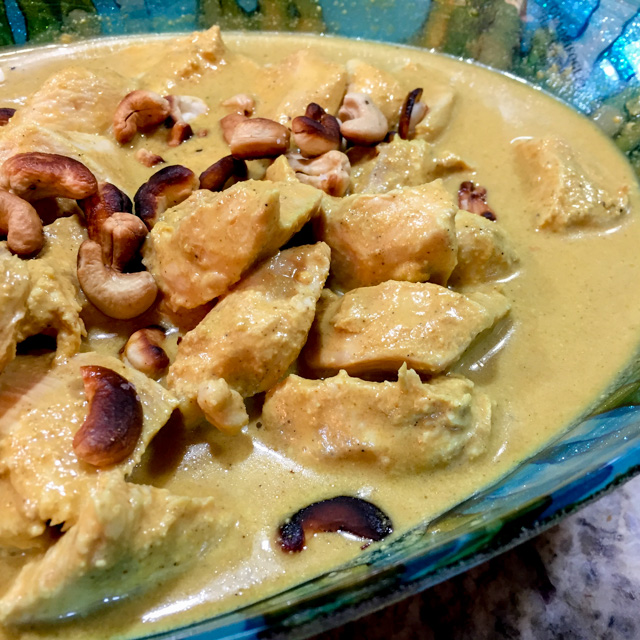
Comments: We adored this recipe. Period. If you look at the original, you’ll notice I substantially reduced the amount of heavy cream. It was plenty rich this way already, and it had enough sauce in the bag to form a luscious sauce. Of course, if you prefer the extra richness given by more cream, go for it.  I also used fewer spices.  On my second time around, instead of cilantro I sautéed a few cashews until golden brown and sprinkled all over when bringing it to the table. Phil liked the second version even better, I cannot decide.  One thing is certain; this will go in our regular rotation of recipes. If you don’t have sous-vide, simply use a regular pan, saute the chicken pieces (you could velvet them before for better texture), then add the ingredients for the sauce and simmer very gently until cooked through.  Yogurt has a tendency to separate, something that might be a bit more likely cooking on the stove top. Indeed, that is another benefit of sous-vide, with such a gentle heat, the yogurt mellows down gently, without putting up a fight and curdling right in front of your eyes…

secondSecond time around… double cashews, ground in the sauce,
and sautéed for serving…


chicken-korma-from-bewitching-kitchen

Add to FacebookAdd to DiggAdd to Del.icio.usAdd to StumbleuponAdd to RedditAdd to BlinklistAdd to TwitterAdd to TechnoratiAdd to Yahoo BuzzAdd to Newsvine

ONE YEAR AGO: Sunday Gravy with Braciole

TWO YEARS AGO: In My Kitchen, February 2015

THREE YEARS AGO: Avocado and Orange Salad with Charred Jalapeno Dressing

FOUR YEARS AGO: Green Olive, Walnuts and Pomegranate Salad

FIVE YEARS AGO: Romanian Flatbreads

SIX YEARS AGO: Ziti with Artichokes and Meyer Lemon Sauce

SEVEN YEARS AGO: Blasted Broccoli, Stove-top version

SOUP SATURDAY: A NEW BLOG EVENT!

16114833_10211890414716031_5142216880039446529_nAs those who follow my site might remember, a blog event I participated for years – The Secret Recipe Club – recently came to an end. Some of the participants took matters into their own hands and came up with fun ideas to keep us connected and sharing recipes on a regular basis. With this post, I offer my first contribution to Soup Saturday, as launched by Wendy, from A Day In the Life on the Farm. We are all sharing recipes for healthy soups so if you’d like some serious inspiration, make sure to click on the link party at the end of this post. I loved the idea because if there’s one thing I should make more often, it’s soup. Any reason to make it more often sounds great to me.

To start things on a nice note, I will share not one but two recipes, both were a huge hit with us. I honestly don’t know which one would be my favorite. Phil leaned towards the second.  I wish I had made them on the same day to pour them in a bowl side by side,  making an Yin Yang kind of hybrid soup. I’ve seen that done before, it looks very stylish. Take a look at this version, for instance.

These are very low in carbs, especially the first one. The second involves some carrots (three for the whole batch), so it is slightly more fulfilling. Both are Paleo-friendly, in case you are interested…

asparagus-soup-2

ASPARAGUS SOUP WITH ADVIEH
(from the Bewitching Kitchen)

1 bunch of asparagus, tough ends removed (about 1 pound)
1 leek, white part only, minced
1 tablespoon coconut oil (or olive oil)
1 cup baby spinach leaves, well packed
salt and pepper
1/2 to 1 teaspoon advieh (or a mild curry mix)
2 + 1/2 cups water
1/2 cup coconut milk
fresh lemon juice to taste

Heat the coconut oil in a large saucepan. Add the leeks and saute until translucent. Cut the asparagus, in 1-inch pieces, add to the pan and saute gently for a few minutes, until it starts to get some color. Season with salt and pepper. Add the advieh, is using, saute briefly stirring constantly, until the spice mix releases its aroma.

Add the water, close the pan, and simmer gently until the asparagus is fully tender, about 20 minutes. Transfer mixture to a blender (preferably high power), add the spinach leaves, and blend. The spinach will “cook” in the residual heat of the soup. Return soup to pan, add the coconut milk, simmer until heated through. Squirt a little lemon juice right before serving. Adjust seasoning, and…

ENJOY!

to print the recipe, click here

Comments: Advieh is a mixture of spices that varies a lot depending on the region, but usually contains turmeric, cinnamon, cloves, cardamom, ginger and dried rose petals. I got mine not too long ago, and decided to give it a try. Good move by Sally. It turned out subtle, not at all as if you are swallowing perfume… I would define it as a floral curry. Quite unique, very flavorful. I find the idea of eating something with rose petals quite enticing…  don’t you?

carrotcaulisoup

LEMONY CAULIFLOWER & CARROT SOUP
(adapted from a recipe from Melissa Clark)

1 teaspoon ground coriander
2 tablespoons extra-virgin olive oil
1 shallot, diced
3 medium carrots, peeled and cut into 1/2-inch pieces
5 to 6 cups of water
1 teaspoons kosher salt, more as needed
1 tablespoon white miso
1 small head of cauliflower or 1/2 large one,
zest of 1 lemon
2 tablespoons lemon juice, more to taste

Rice the cauliflower in a food processor and reserve (you can also use the florets, in this case add them together with the carrots). Heat the oil in a large saucepan, add the shallots and saute until translucent. Add coriander and a little salt, saute until fragrant.  Add carrots, saute briefly, add 5 cups of water  and the miso, stirring well until it dissolves. Simmer for 15 minutes, add the riced cauliflower and cook everything together for 5 more minutes (riced cauliflower cooks fast).

Remove the soup from the heat. Using an immersion blender, purée the soup until smooth, or transfer to a blender. Return the soup to the pan, over very low heat add the lemon zest and juice. Adjust seasoning, and serve.

ENJOY!

to print the recipe, click here

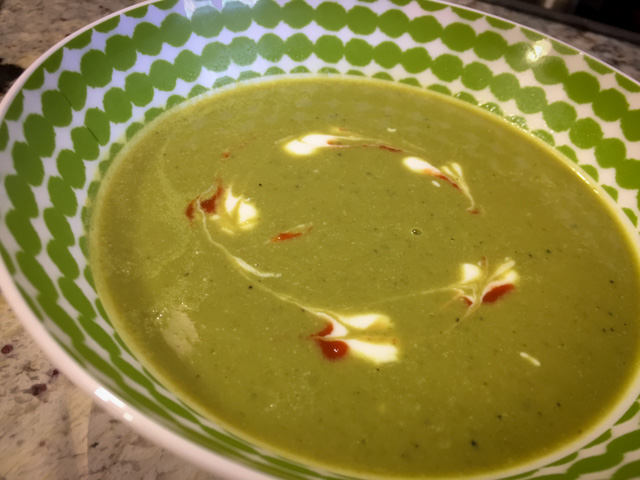
Comments: The original recipe from Melissa Clark has a higher proportion of carrots and uses more miso, which in my opinion overpowered the flavor of the veggies. I liked my revised version a lot more. You can barely detect the miso, but it adds a nice exotic flavor to it.  This soup was my lunch three days in a row, and if there was more, I would have it on day 4 again. Nothing better in a chilly day, I can tell you that.  I topped it with black sesame seeds, and a swirl of yogurt and Sriracha. That really took the soup to a higher level, I love to vary the amount of Sriracha at each spoonful, testing my limits. Of course, if you prefer a more tamed version, omit the hot sauce, but the yogurt is perfect with it.


low-carb-soups-from-bewitching-kitchen

ONE YEAR AGO: Salmon Rillettes

TWO YEARS AGO: Linzer Cookies

THREE YEARS AGO: Baked Ricotta