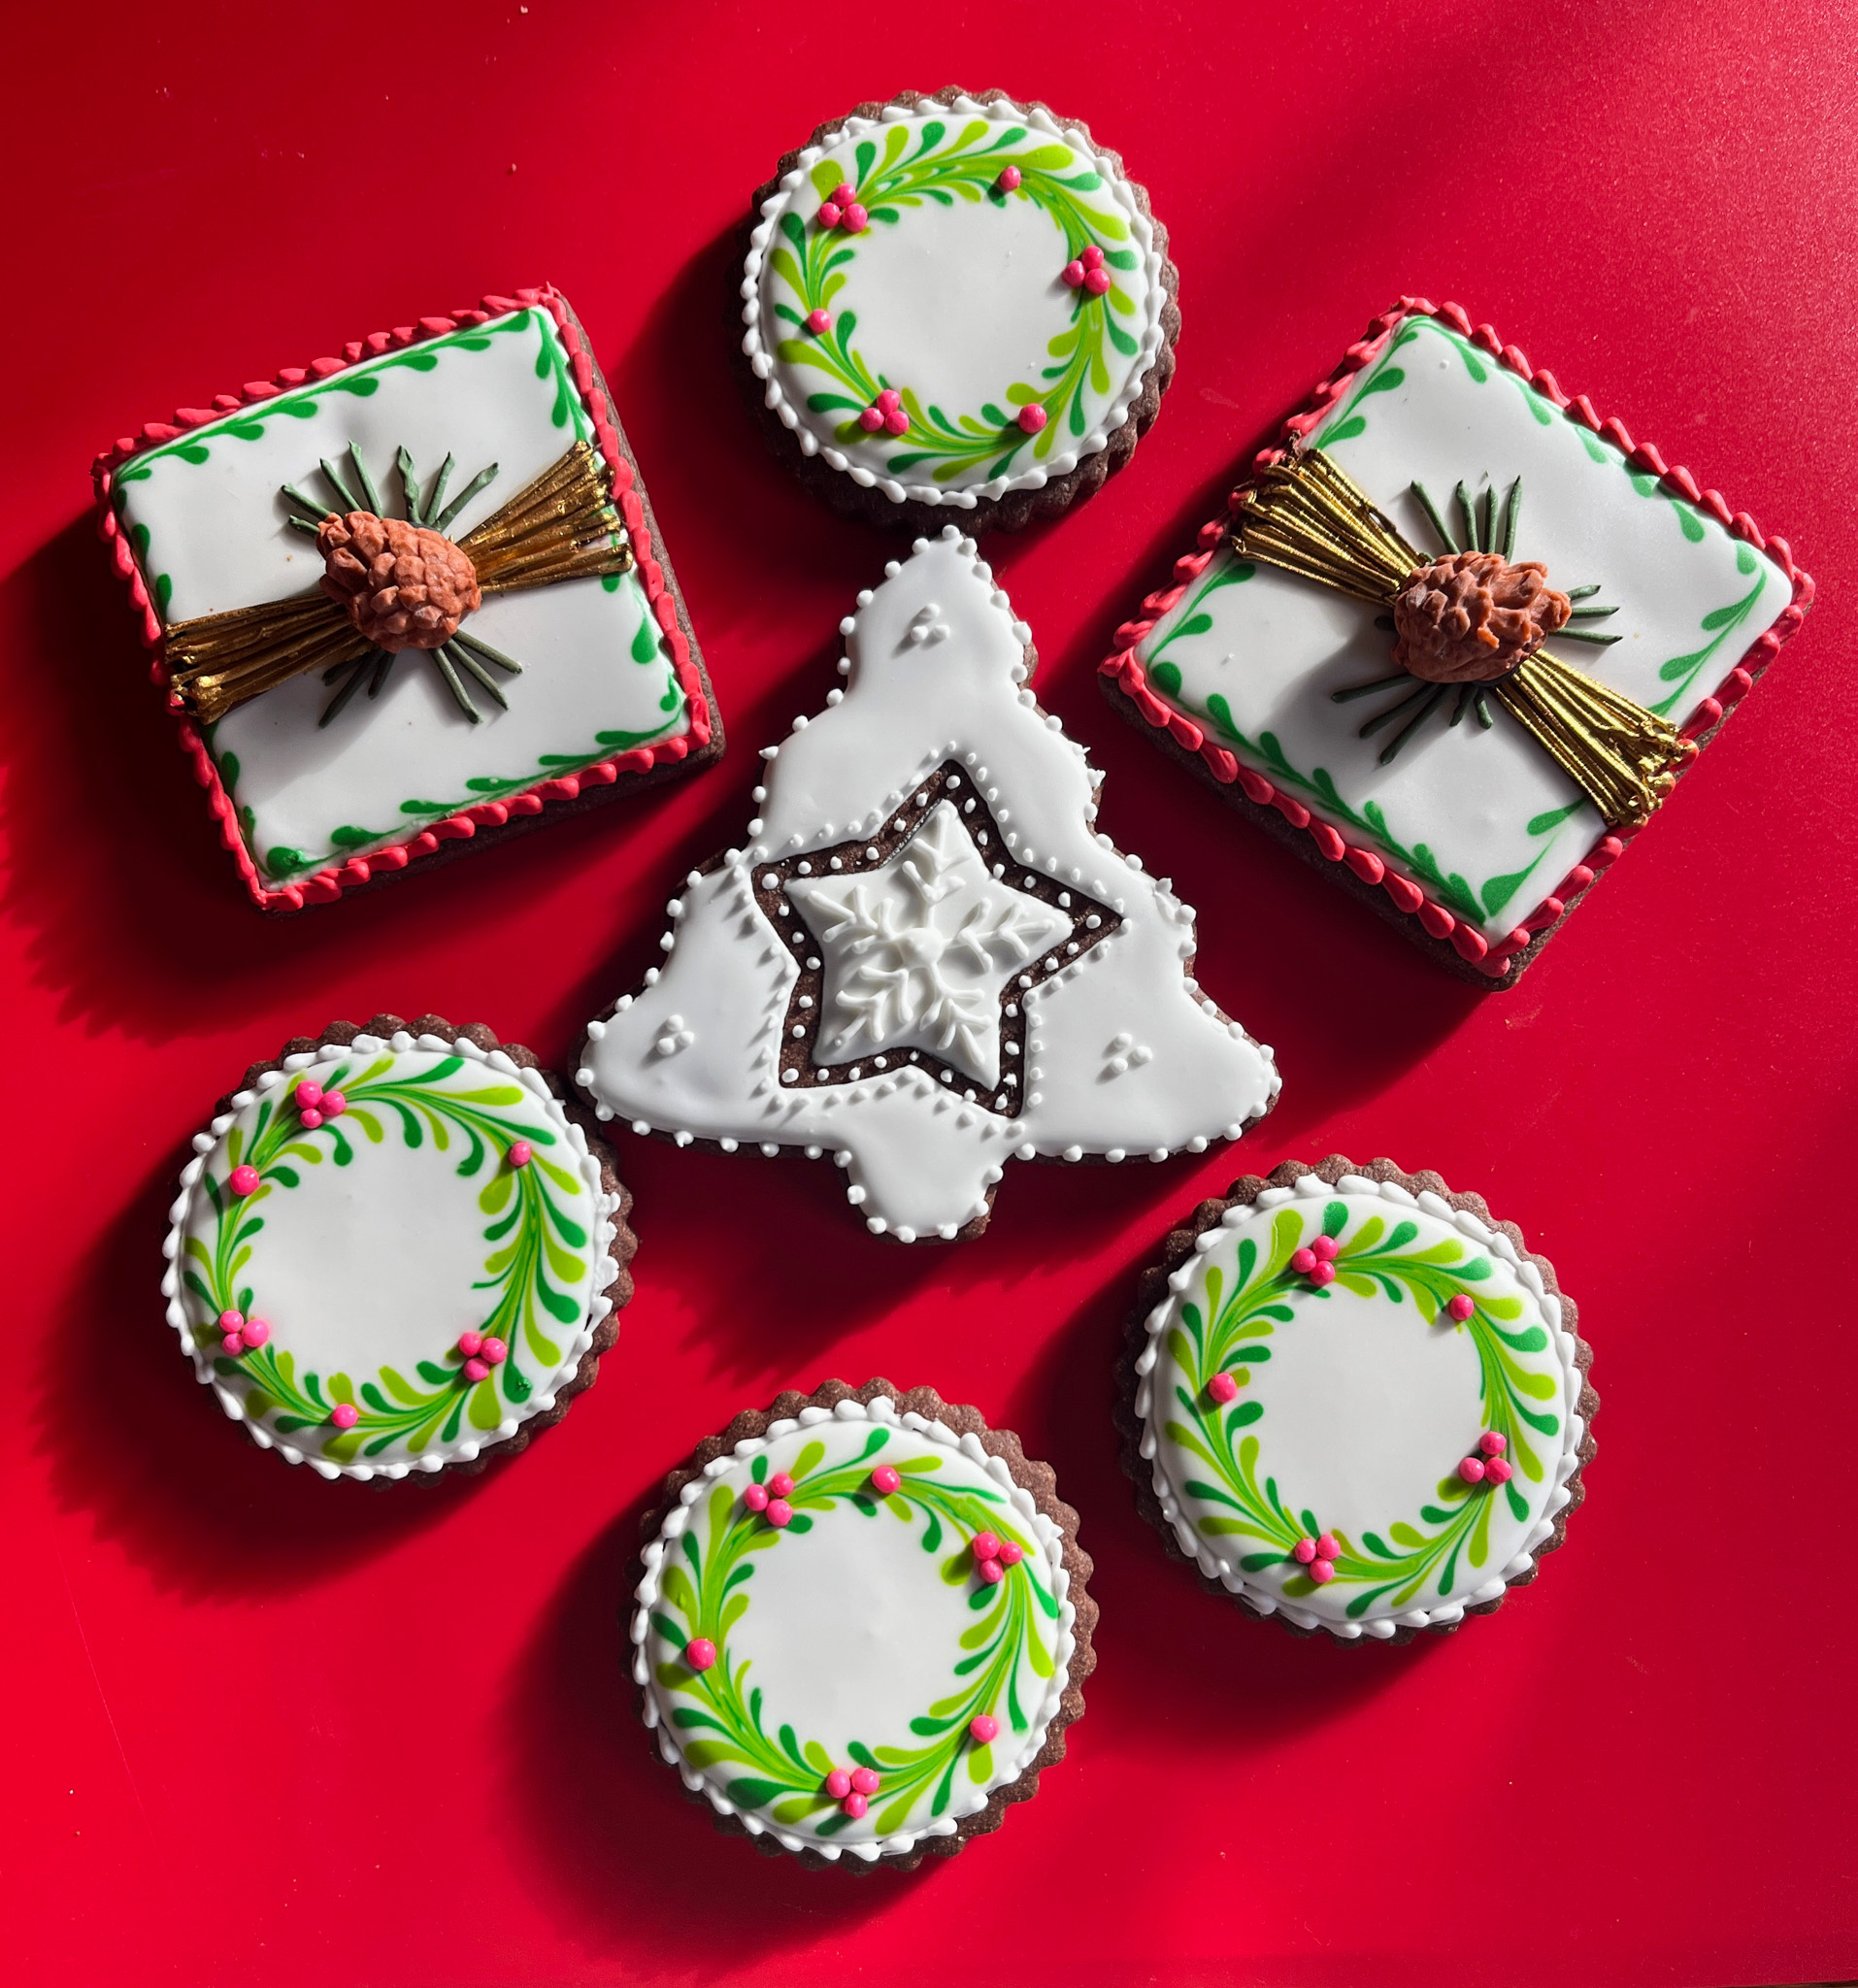
First post of a series of three on Sugar Cookie Decorating
One of the greatest benefits of being part of The Great American Baking Show was getting to know 11 baking addicts with no interest in treating their condition. A year later, we still exchange constant messages that often go beyond what is cooking in our ovens. Each of us has areas in baking we feel reasonably confident about, and areas we feel the need to improve. Tanya is amazing at gingerbread sculptures (insert a discreet tear here), and cookie decorating in general. Recently she made a series of video tutorials and by watching them and working with her favorite Royal icing recipe, I believe I improved my skills a bit. I still have issues with some techniques – those tricky beaded borders come to mind – but I will keep practicing. This is the time of the year that screams for sugar cookies and fun decorations, so visit Tanya’s site and join the spirit!
APPLE CIDER SUGAR COOKIES
(slightly modified from Global Bakes by Tanya)
226 grams unsalted butter, at room temperature
160 grams granulated sugar
1 large egg, at room temperature
1 Tablespoon vanilla extract
2 Tablespoons milk, any kind
375 grams all-purpose flour
42 grams (2 packets) Apple Cider Mix
3/4 teaspoon baking powder
1/2 teaspoon salt
In the bowl of a stand mixer, beat the butter and sugar on medium speed until smooth and creamy. Beat in the egg, vanilla, and milk until well blended.
Combine the flour, apple cider mix powder, baking powder, and salt in a medium bowl. Gradually add to the butter mixture on low speed until combined. Divide the dough in half and wrap in plastic wrap. Chill for 1 hour or for up to 3 days. The dough freezes well also.
Heat the oven to 350F. Roll one piece of dough at a time between two pieces of parchment paper (I did 4mm thickness). Cut dough with floured cookie cutters. Place 1-inch apart on silpat or parchment-lined baking sheets. Freeze for 10 minutes.
Bake until edges begin to brown, 10 to 12 minutes. Cool 2 minutes. Remove to wire rack to cool completely.
ROYAL ICING
(from Global Bakes by Tanya)
900 grams (2 pounds) powdered sugar
156 grams pasteurized egg whites
1/4 teaspoon cream of tartar
1 Tablespoon light corn syrup
Gel colors of your choice
In the bowl of a stand mixer, add the powdered sugar and cream of tartar and whisk together to combine. Add the egg whites and corn syrup and stir gently with a rubber spatula until the powdered sugar is moistened.
Put the bowl on the stand mixer and, using the paddle attachment, whisk for 1 to 2 minutes until smooth and bright white in color.
At this point, you can use the icing to assemble a gingerbread house. To outline shapes for flooding, put about 1 cup of the royal icing in a small bowl and add about ½ teaspoon water. Add another ½ teaspoon if needed to allow smooth piping. Stir until smooth.
To flood cookies inside the dried outline, put about 1 cup of the royal icing in a small bowl and add about 1 teaspoon of water. Add another ½ teaspoon water to allow smooth spreading. Stir until smooth and combined.
Add gel colors as needed for your planned decorations.
ENJOY!
to print the recipe, click here
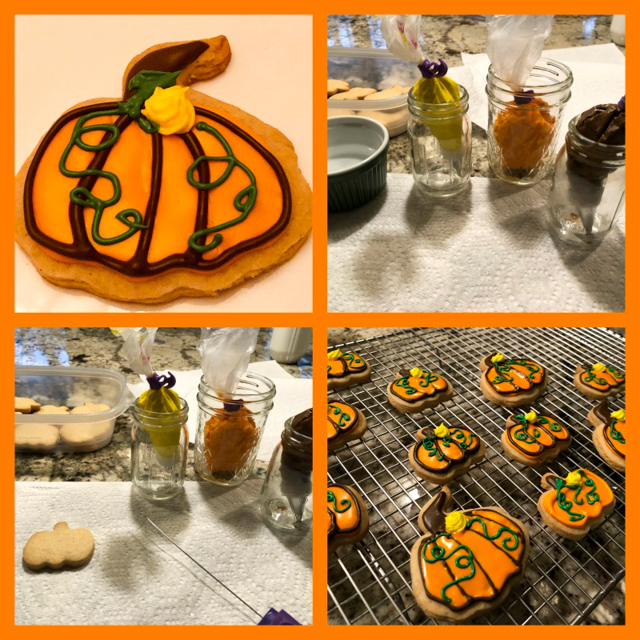
Comments: This was the first time I managed to work with different consistencies of Royal icing and get them to behave the way I hoped. Tanya shares quite a few tips to judge the consistency and adjust it, so I highly recommend you to watch her videos, particularly the ones that she made for a Bake Along session last month.
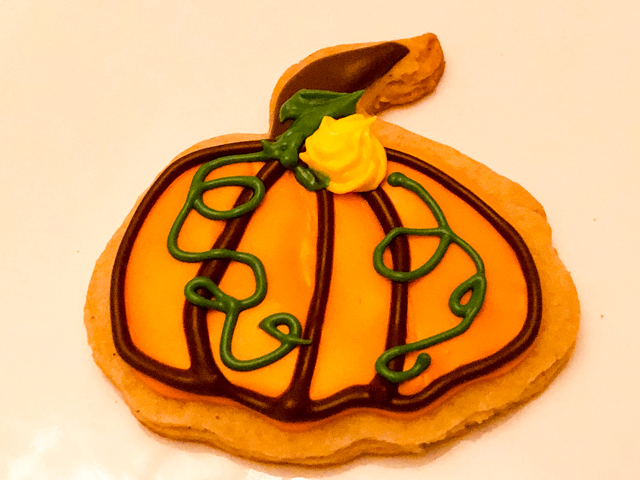
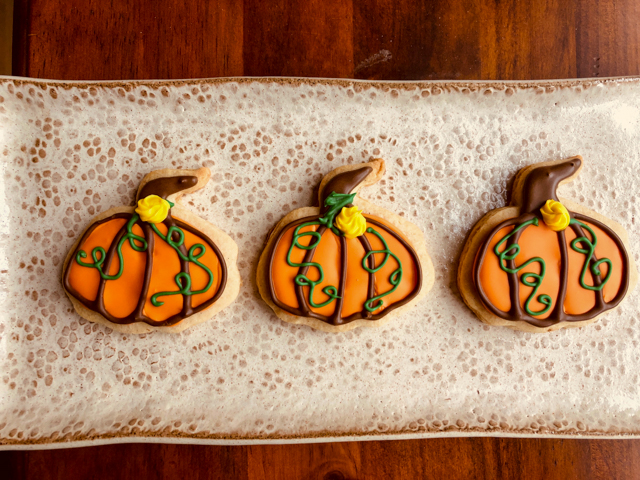
For this pumpkin, the yellow had a stiff consistency so that a rosette piped with a little open star tip would retain the ridges well. The green and brown were just a tad softer, and the orange more fluid (what is usually described as flooding consistency). The segments of the pumpkin are flooded independently so that they don’t join together. So for the example above, there are 4 sections, and just like Tanya demonstrates in her video, the idea is to flood area #1 and #3, wait about 10 minutes and flood regions #2 and #4. Ten minutes more and you will be ready to add the brown and a little later the final details in green and yellow.
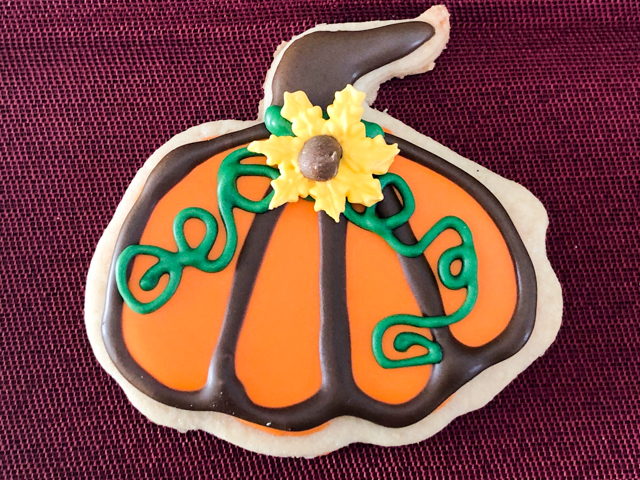
You can also make rosettes and let them fully dry, adding them to the cookie with a little drop of royal icing as glue. These rosettes had been made months ago (remember this post?) and I just brought them to play.
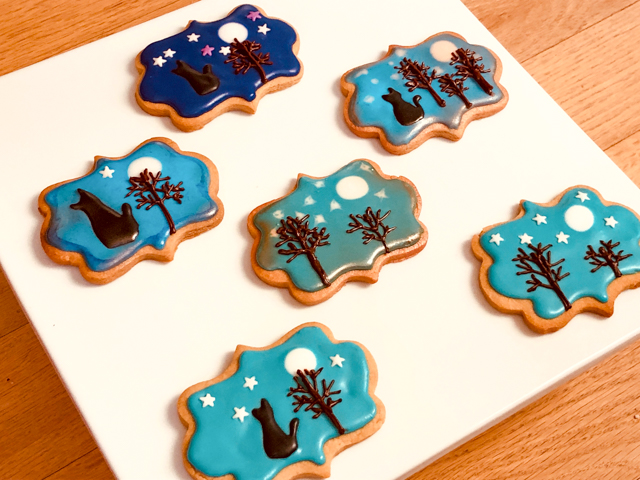
In her Bake Along tutorial, Tanya taught a pretty cool alternative style for a pumpkin cookie, and I loved her idea. Start with a white pumpkin, and go with piping dots for the details. How cute is that?
Once again, segments are piped independently (#1 and 3 first, #2 and #4 last) and once that sets a bit, the brown stem and the colorful dots are added.
If you watch Tanya in action and see her finalized cookies, you’ll see I need a lot more practice, but… baby steps are still steps, right?
That’s all for now. Tomorrow I will share two other techniques I learned from Tanya, so stay tuned!
ONE YEAR AGO: Cherry-Chipotle Chicken Thighs
TWO YEARS AGO: White Chocolate Mini-Mousse with Sugared Cranberries
THREE YEARS AGO: You Say Ebelskiver, I say Falafel
FOUR YEARS AGO: Happy Thanksgiving!
FIVE YEARS AGO: Two Takes on Raspberries
SIX YEARS AGO: Spice Cake with Blackberry Puree & The Global Pastry Review
SEVEN YEARS AGO: Own Your Kitchen with Cappuccino Panna Cotta
EIGHT YEARS AGO: Chicken Parmigiana, the Thriller
NINE YEARS AGO: Wild Mushroom Risotto
TEN YEARS AGO: Tartine Bread: Basic Country Loaf
ELEVEN YEARS AGO: Pugliese Bread