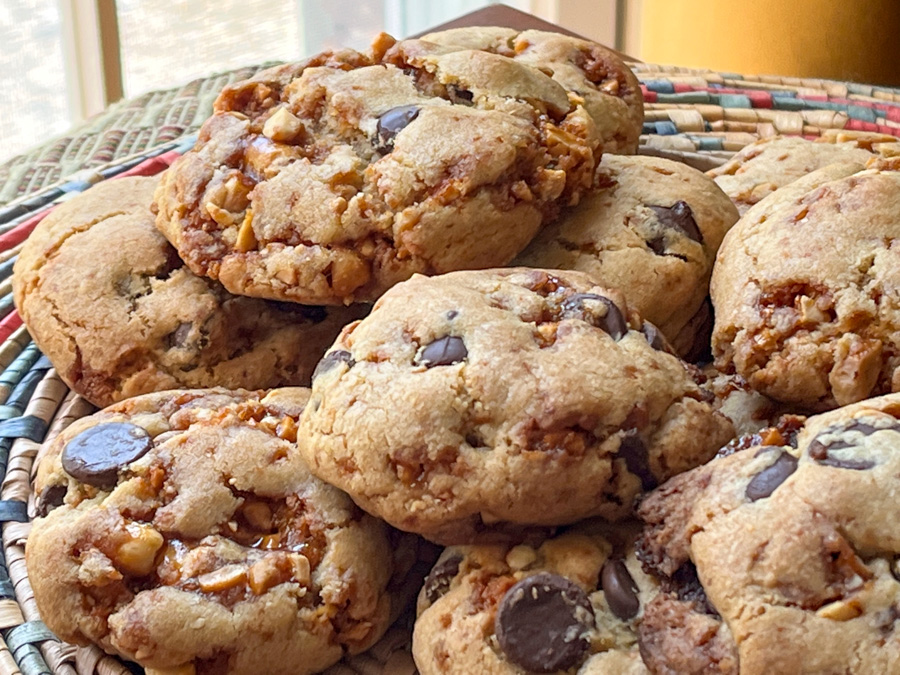
MY VERY FIRST VIDEO TUTORIALS

Recently I was asked to demonstrate how to make the Uzbek cookies that I blogged about last month (read about it here). Because the pattern can be easily lost during baking, I’ve been trying it with different cookie recipes and the one I shared in that post is one of my favorites. I used it for these video tutorials.

.

Here is the first video, with special thanks to Prince Freckles of Tatarrax, for his guest appearance.

.

The second video shows how I paint the cookies, using Sugarprism.

I made the cookies using pistachio flour, but you can substitute almond or pecan flour, and flavor it with any extract of your choice. Once you add all the ingredients, you might have to add a little more flour (like I mentioned in the video) because depending on the size of your egg and the moisture of your flours, the dough might require a little extra.

I hope you find the tutorials useful. I need to learn my way better, paying more attention to centering the image and also avoid banging the holder of the cell phone with my arm. But I had a lot of fun making the videos and might do others in the future…

Let me know what you think!

BAKING THROUGH THE BLOGOSPHERE

Once again I share with you bakes that I’ve made over the past couple of months, following recipes from blogs I love…
(links to recipes below each individual picture)

TROPICAL SHORTBREAD COOKIES
from Pastries Like a Pro

(recipe available here)

These are shortbread type cookies with macadamia nuts and coconut, absolutely delicious! I made the chocolate glaze in two different ways, one simply dipping like Helen suggests, and the second way adding some texture. To do so, I laid a piece of textured paper on the chocolate while still wet as shown below. It is hard to get it smooth to the very edge of the chocolate, but I still liked the effect.

.

RAMASAN PIDESI
from Caroline’s Easy Baking Lessons

(recipe available here)

This is a great soft bread, ready in 2 hours! Uses instant yeast, and depending on the size of your pizza pan, you can have enough for 2 full round breads or go with a large round and the leftover used for a different shape of your liking. I opted for a 4-stranded braided loaf.

The crumb is spectacular, Phil now wants this bread on a regular basis… His favorite is the flat shape.

.

BOUCHONS AU CHOCOLAT
from Karen’s Kitchen Stories

(recipe available here)

These were made famous by Thomas Keller, and they use a specific mold to make the right shape, like a cork. I’ve had the mold for years, unfortunately it does not seem to be available any longer, but you can use a muffin tin. I used the exact recipe blogged by Karen, which is a variation from the original. Absolutely delicious, but you must adore a strong chocolate taste, this is not a sweet, kid-friendly concoction. It will be showing up again in our kitchen, for sure!

.

HOSTESS MINI-CAKES
(from Baker’s Anonymous)

(recipe available here)

Helen was a tent-baker with me during the Great American Baking Show and she is now a professional baker, with a super busy life! She keeps her blog with great recipes, and this one got the most enthusiastic reviews from our departmental colleagues. A must-make! It was a great opportunity to put to use my little cupcake corer thingie

.

RED TART CHERRY PIE BARS
from Bakes by Brown Sugar

Another tent-baker friend, Cheryl, from a season before mine, these are absolutely spectacular! She uses canned tart cherries, which I had never even bought before, not knowing if they would be good. Well, they work wonders in this preparation, and you will not be disappointed at all. Easy, sharp, sweet and tart at the same time. Make them!

>

CHOCOLATE CHIP COOKIES WITH PEANUT BRITTLE
(from David Leibovitz)

(recipe available here)

Have you ever made peanut brittle? If not, you absolutely need to correct this handicap. The only problem is stop sampling the brittle so you have enough for the cookies. You’ve been warned. The cookies are amazing, with the regular flavor of a chocolate chip, but the added intensity of the caramelized peanuts.

I hope this series got you inspired to bake some sweetness!

ONE YEAR AGO: Oriental Style Sesame Slaw

TWO YEARS AGO: Revelation Veggie-or-Not Egg-Roll Bowl

THREE YEARS AGO: Covid Update and Stayin’ Alive

FOUR YEARS AGO: A Brazilian Hummingbird

FIVE YEARS AGO: A Cookbook Review

SIX YEARS AGO: Air-Fried Carrots, Two Ways

SEVEN YEARS AGO: Sweet Potato Crust Quiche

EIGHT YEARS AGO: Chicken Thighs with Artichokes and Capers

NINE YEARS AGO: Pea Pancakes with Herbed Yogurt

TEN YEARS AGO: Mushroom Stroganoff

ELEVEN YEARS AGO: Tomato Sourdough

TWELVE YEARS AGO: Gamberetti con rucola e pomodori

THIRTEEN YEARS AGO: Flirting with Orzo

MY COOKIE BLOG TURNS TWO!

Two-hundred and twenty one posts, and so many cookies have been shared in the past two years!

Stop by to join the party with a click here

HAPPY EASTER!

All cookies from my baby-blog, perhaps a toddler, as it will turn 2 years old soon!

Click here to visit For the Love of Cookies

CHOCOLATE PEANUT BUTTER MACARONS

If you follow my cookie blog, maybe you’ve read a recent post in which I played with Chocolate Royal icing? I used fat-free cocoa powder (click here to get some) and they worked extremely well not only in icing but as I show today, to make cocoa-flavored macaron shells.


CHOCOLATE PEANUT BUTTER MACARONS
(adapted from this post)

For the shells:
200g Icing/powdered sugar
115 g ground almonds/almond meal
7g fat-free cocoa powder
115 g egg whites at room temperature (approx. 4 eggs)
1/8 tsp of cream of tartar (optional)
100 g granulated sugar
¼ tsp vanilla paste or extract
1 drop brown food gel
1 drop red food gel

Line 3 heavy baking sheets with parchment/baking paper or Silpat mats. Layer the powdered/icing sugar, ground almonds/almond meal, and cocoa powder in a food processor. Pulse until the mixture looks like fine meal, about 12 pulses. Pass through a sieve and transfer to a small bowl or to a sheet of parchment/baking paper. Set aside.

Place the egg whites and cream of tartar in the bowl of a stand mixer fitted with the whisk attachment. Make sure that the bowl and the whisk are impeccably clean. Starting on medium speed, whip the whites with the cream of tartar until they look like light foam. The whites should not appear liquid. The foam will be light and should not have any structure.

Slowly rain in the granulated sugar in five additions, trying to aim the stream between the whisk and the side of the bowl. Turn the speed up to high. Continue to whip the meringue until it is soft and shiny. It should look like marshmallow creme (marshmallow fluff). Add the vanilla. Whip the egg whites until the mixture begins to dull and the lines of the whisk are visible on the surface of the meringue. Add the drops of food color and continue whisking. Check the peak. It should be firm. Transfer the whites to a medium bowl.

Fold in the ground almond/almond meal mixture in two increments. Paint the mixture halfway up the side of the bowl, using the flat side of a spatula. Scrape the mixture down to the center of the bowl. Repeat two or three times, then check to see if the mixture slides slowly down the side of the bowl. Put the mixture in a piping bag fitted with your choice of piping tip (round, ¼ or ½ inch in diameter or 6 – 12 mm). If you don’t have a macaron mat, draw circles on baking/parchment paper about 2inches/5cm in diameter & turn the paper over before placing on the baking sheets. Pipe shells, I like to count numbers in my head and use the same count for each shell so they end up similar in size.

I pipe inside the circles to about 1 ¾ inches/4.5cm but you can go to 1 ½ inches (3.8cm) & the macarons will spread & fill the circle while drying.

Slam each sheet hard four to six times on the counter/worktop. Let the unbaked macarons dry until they look dull but not overly dry. Drying time depends on humidity. In a dry climate, the macarons can dry in 15 to 20 minutes; in a humid climate, it can take 35 to 40 minutes.

While the macarons are drying, heat the oven to 300 F (150 C/130C Fan oven/Gas Mark 2). Bake one sheet at a time on the middle rack. Check in 11 minutes. If the tops slide or move (independently of the ‘feet’ when you gently twist the top), then bake for 2 to 3 more minutes. Check one or two. If they move when gently touched, put them back in the oven for 1 to 2 more minutes until they don’t move when touched. Let the macaroons cool for 10 minutes before removing from the pan. The macarons should release without sticking.

Assemble the macarons: find two macarons similar in size and add a good amount of filling to the bottom of one of them. Place the other on top and squeeze gently to take the filling all the way to the edge. Store in the fridge for 24 hours for perfect texture.

PEANUT BUTTER BUTTERCREAM

65g smooth peanut butter (Jiffy is fine)
50g cream cheese, room temperature
30g butter, room temperature
250g powdered sugar
milk or heavy cream to adjust consistency, if needed

Place the peanut butter, cream cheese, and butter in the bowl of an electric mixer. Cream until light, about 2 minutes. Add the powdered sugar and whisk on low-speed. Once the powdered sugar is incorporated, increase the speed to medium-high and whisk until very creamy. Adjust the consistency if needed with powdered sugar or milk. Place in a piping bag fitted with your choice of tip, and use to fill macaron shells.

Optional decoration: drizzle of Chocolate Royal icing or melted chocolate plus sprinkles of your choice.

ENJOY!

to print the recipe, click here

Comments: In the past, more often than not I would get wavy shells when adding cocoa powder to the macaron batter. I was very pleasantly surprised by how smooth these turned out. And with a nice chocolate flavor. I did add a touch of brown and a touch of red because the amount of cocoa I added was not enough to darken the shells the way I wanted.

I thought it would be fun to couple the Chocolate Royal icing made with fat-free cocoa powder with the macarons made with the same product. I had some leftover from cookie decorating, so I just added a swirl, the a golden sequin type sprinkle, and while the icing was still soft, a dusting with gold.


The peanut butter filling was perfect for my taste. Using cream cheese cuts a little bit the sweetest, and the natural saltiness of the peanut butter takes it into a salted caramel territory I love. I highly recommend this recipe.

ONE YEAR AGO: Torta di Zucchini, a flash-back

TWO YEARS AGO: Woodland Creatures Cookies

THREE YEARS AGO: Incredibly Simple… Crunchy Asparagus

FOUR YEARS AGO: A Sourdough Quartet

FIVE YEARS AGO: When bad things happen to good people

SIX YEARS AGO: Sweet Potato “Hummus”

SEVEN YEARS AGO: Cauliflower Crust Pizza

EIGHT YEARS AGO: Silky Rutabaga Puree

NINE YEARS AGO: Bon Bon Chicken: Light and Spectacular

TEN YEARS AGO: Red Wine Sourdough Bread with Cranberries

ELEVE YEARS AGO: Award-Winning Sourdough Baguettes

TWELVE YEARS AGO: Country Rye (Tartine)

THIRTEEN YEARS AGO: Penne a la Vechia Bettola