
Come again?
🙂
The best translation for this Brazilian recipe would be “Blender Pie.” First, let’s learn how to say it like a native. Repeat after me, three times:
.
Easy, right? I knew you could do it.

I have a sister in Brazil who is 16 years older than me. By the time I got into my teens she was already married, throwing parties, and pretty involved into cooking. One of the things she used to make was this blender pie, but her favorite filling was tuna with green peas, black olives and tomatoes. Being the mega picky girl I was, I never touched that kind, preferring instead more friendly (and austere) versions with ham and cheese, at most a touch of oregano. The basic process is always the same, a thick batter is made in the blender, half of it gets poured into a baking dish, the filling of choice scattered on top, and the rest of the batter spread all over. It is comfort food by default, or as we say in Portuguese, por definição. I won’t sugar coat the pill, it is a bit heavy. Accept it and move on. As an appetizer a couple of small squares will be enough for each guest. If you’d like to serve it as dinner with a salad on the side this full recipe feeds six hungry people.

TORTA DE LIQUIDIFICADOR
(BLENDER PIE)
(from the Bewitching Kitchen)
for the “dough”
1 cup oil (I used canola)
2 cups milk (full-fat)
3 eggs
2 cups all-purpose flour
1/4 cup shredded Parmigiano cheese
1 teaspoon baking powder
1/2 teaspoon salt
for the filling
caramelized onions
sautéed mushrooms
shredded mozzarella cheese
diced tomatoes
(or any other filling you like to use)
Heat the oven to 375 F. Lightly grease or spray with oil a baking dish (9 x 13 or slightly smaller is fine).
Make the dough: add to a powerful blender all the ingredients, and blend for 5 minutes until completely smooth. Stop the blender and clean its sides a couple of times during the process.
Pour half of the batter in the prepared dish, add all ingredients for the filling on top, pour the rest of the batter, spreading gently with an offset spatula to enclose all the filling.
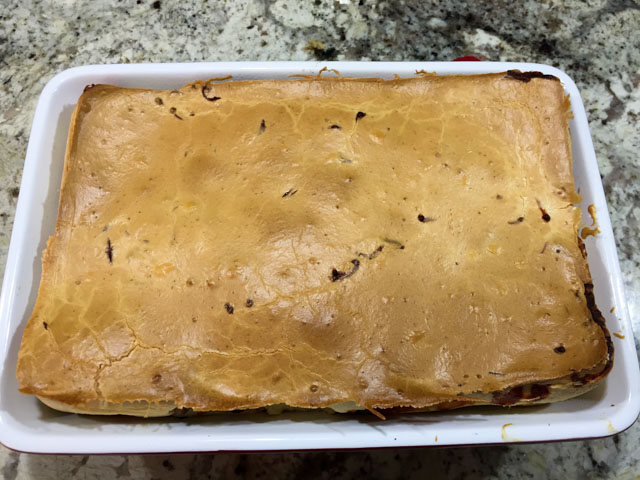
Bake for 45 minutes or until all puffed up and golden on top. Let it cool until just warm before cutting in slices. It can be prepared a couple of days in advance, to re-heat use a low oven, microwave is not recommended.
ENJOY!
to print the recipe, click here

The beauty of this recipe is its versatility. You can pretty much use any filling you imagine: shredded barbecued chicken, ground beef with taco seasonings, roasted veggies, maybe some grilled shrimp, all doable. One popular version in Brazil uses corn and peas, green and yellow like the colors of the country. I do think cheese is pretty much mandatory in any kind of blender pie. If using shrimp or roasted veggies I suppose a bit of crumbled feta would be a nice option. No need to measure anything, just cover the extension of the baking dish with a hearty amount of filling.
I made this particular version for a reception we hosted. Keep in mind that in the span of two weeks we hosted three receptions for faculty and one pizza-party for our whole lab. After the pizza party we had some toppings leftover, so this Brazilian concoction of my past was a perfect choice to use it all up. But to make it more special, I prepared a batch of caramelized onions, following this recipe from my friend Elaine. She used a clever method that allows caramelization to be an almost hands-free process, by making them in a low oven. I added a smidgen of balsamic vinegar to the onions, together with salt, pepper and olive oil.
Here they are, in a before and after shot…


I intended to add black olives to the filling too, but found the bowl with pitted Kalamata staring at me right after shutting down the oven door. Not the first time I pull this type of trick on myself, I believe it won’t be the last. Black olives would have been wonderful… (sigh)
The little pie squares are irresistibly gooey due to all the cheese…

So there you have it, a Brazilian concoction from my teenage years finally featured in the Bewitching Kitchen. I hope I made my sister proud!
ONE YEAR AGO: Lamb Meatballs with Toasted Orzo
TWO YEARS AGO: Dulce de Leche Cheesecake Bars
THREE YEARS AGO: Penne with Trapanese Pesto
FOUR YEARS AGO: Superman
FIVE YEARS AGO: Spring Pasta
SIX YEARS AGO: Ice Cream Melts for Mango


