CHOCOLATE-COVERED OREOS STRIKE AGAIN

My last round up was back in February (check them out clicking here), so it is time to share the designs I’ve made since the last post. Without further ado, here they are…

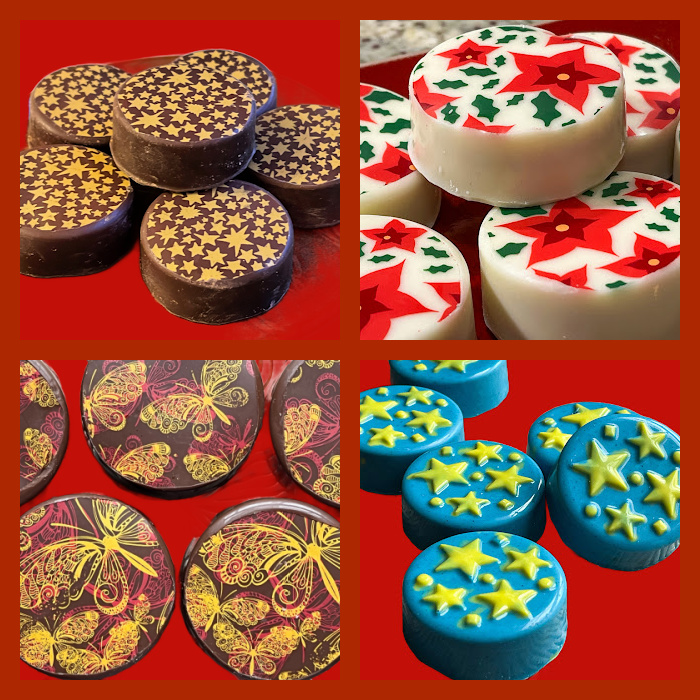
One of my favorite ways to decorate is adding discs of chocolate decorated with transfer sheets. It is quite convenient because normally I have some leftover melted chocolate after filing the molds, so I use that to spread a thin layer over the transfer sheet, let it set in the fridge and then cut circles. Those last forever at room temperature, so normally I make them and save them to use the following week.

FLOWERS ON WHITE

FLOWERS ON PINK

STRIPES ON TURQUOISE
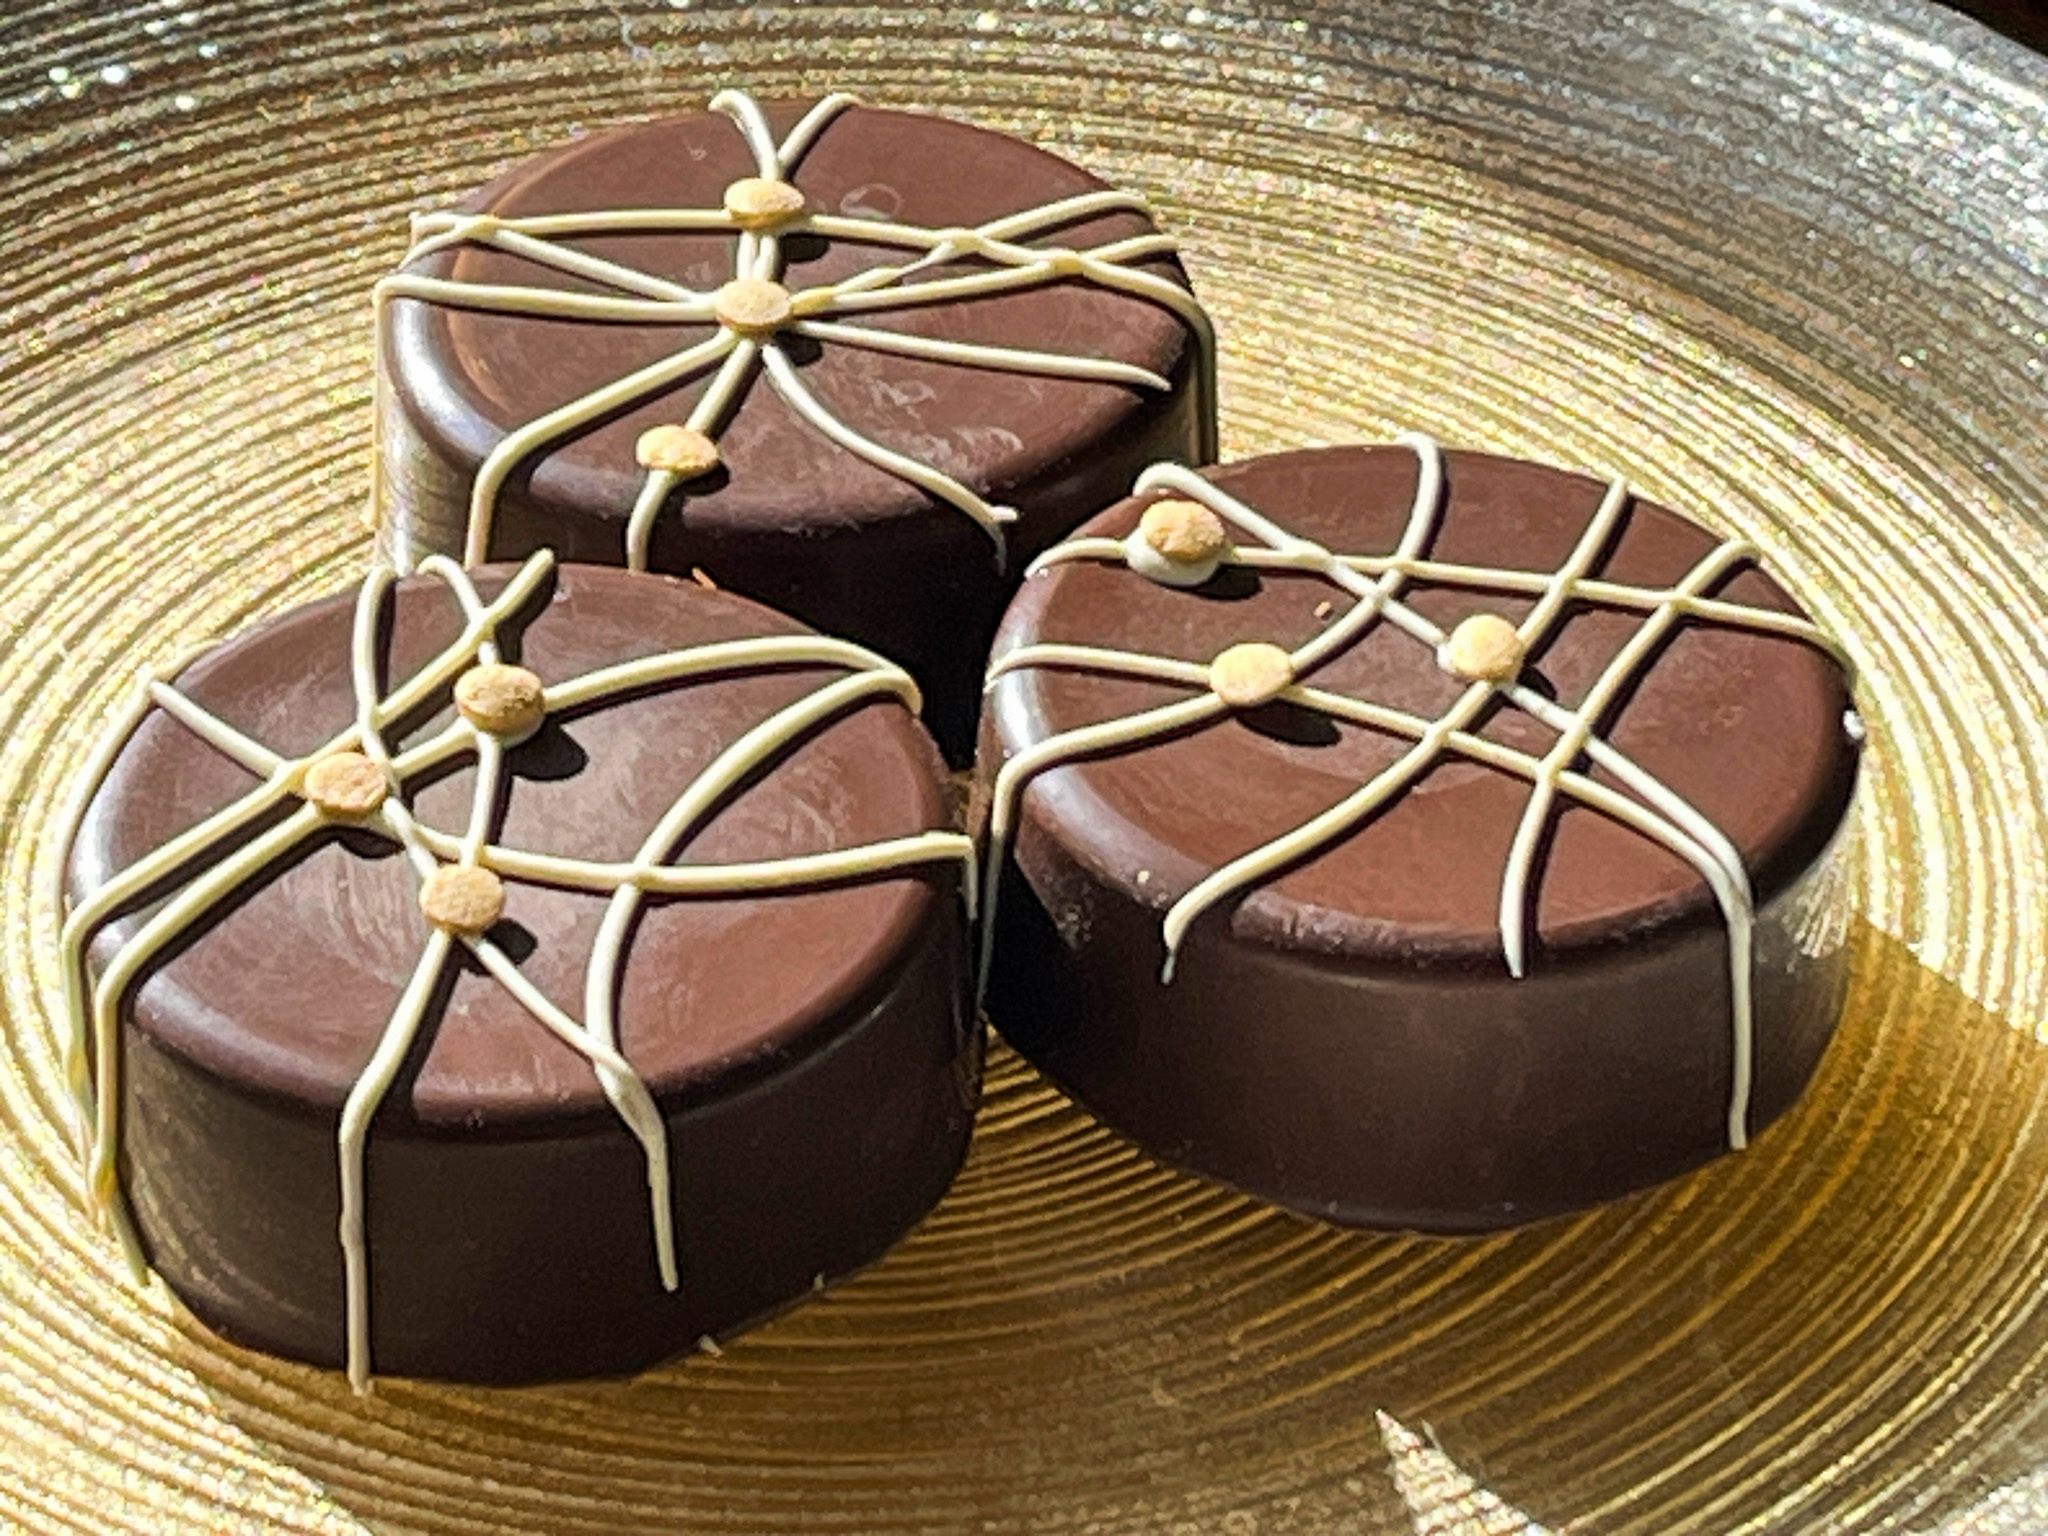
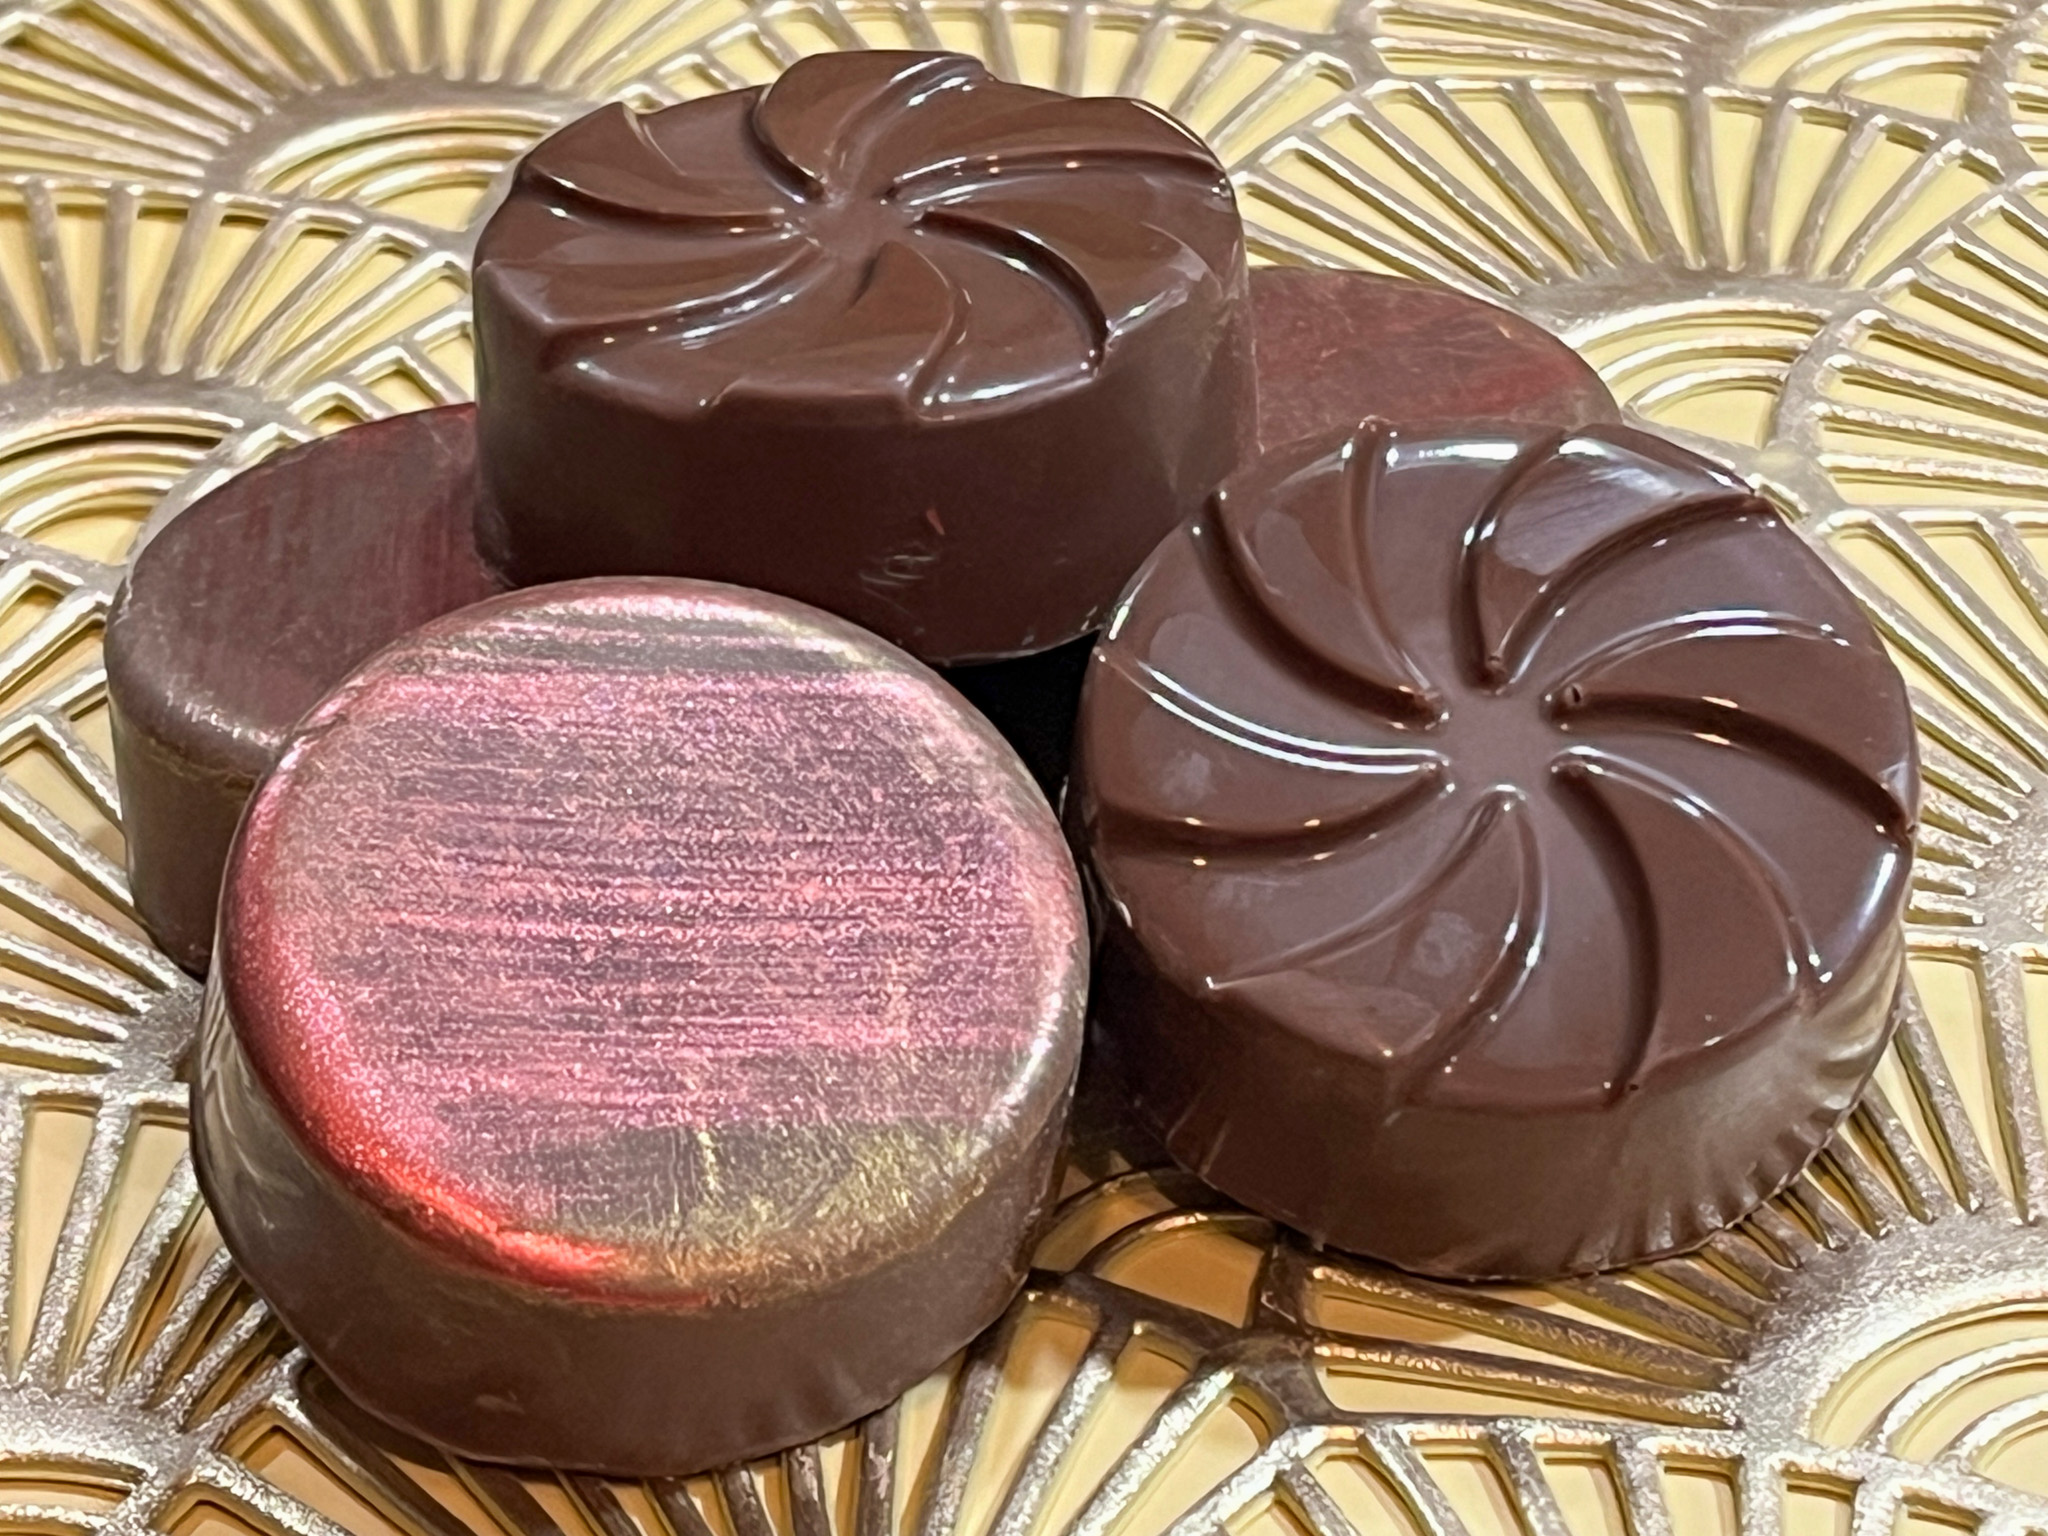
SWIRLS ON BROWN

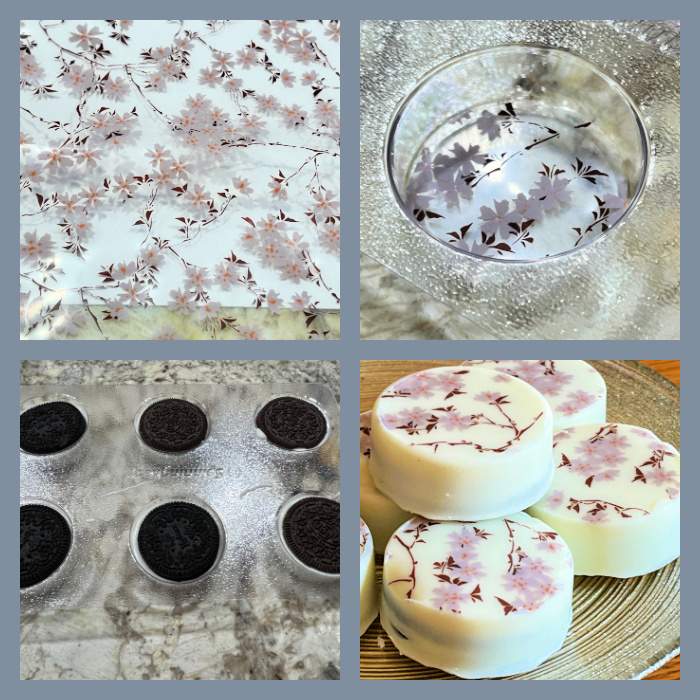
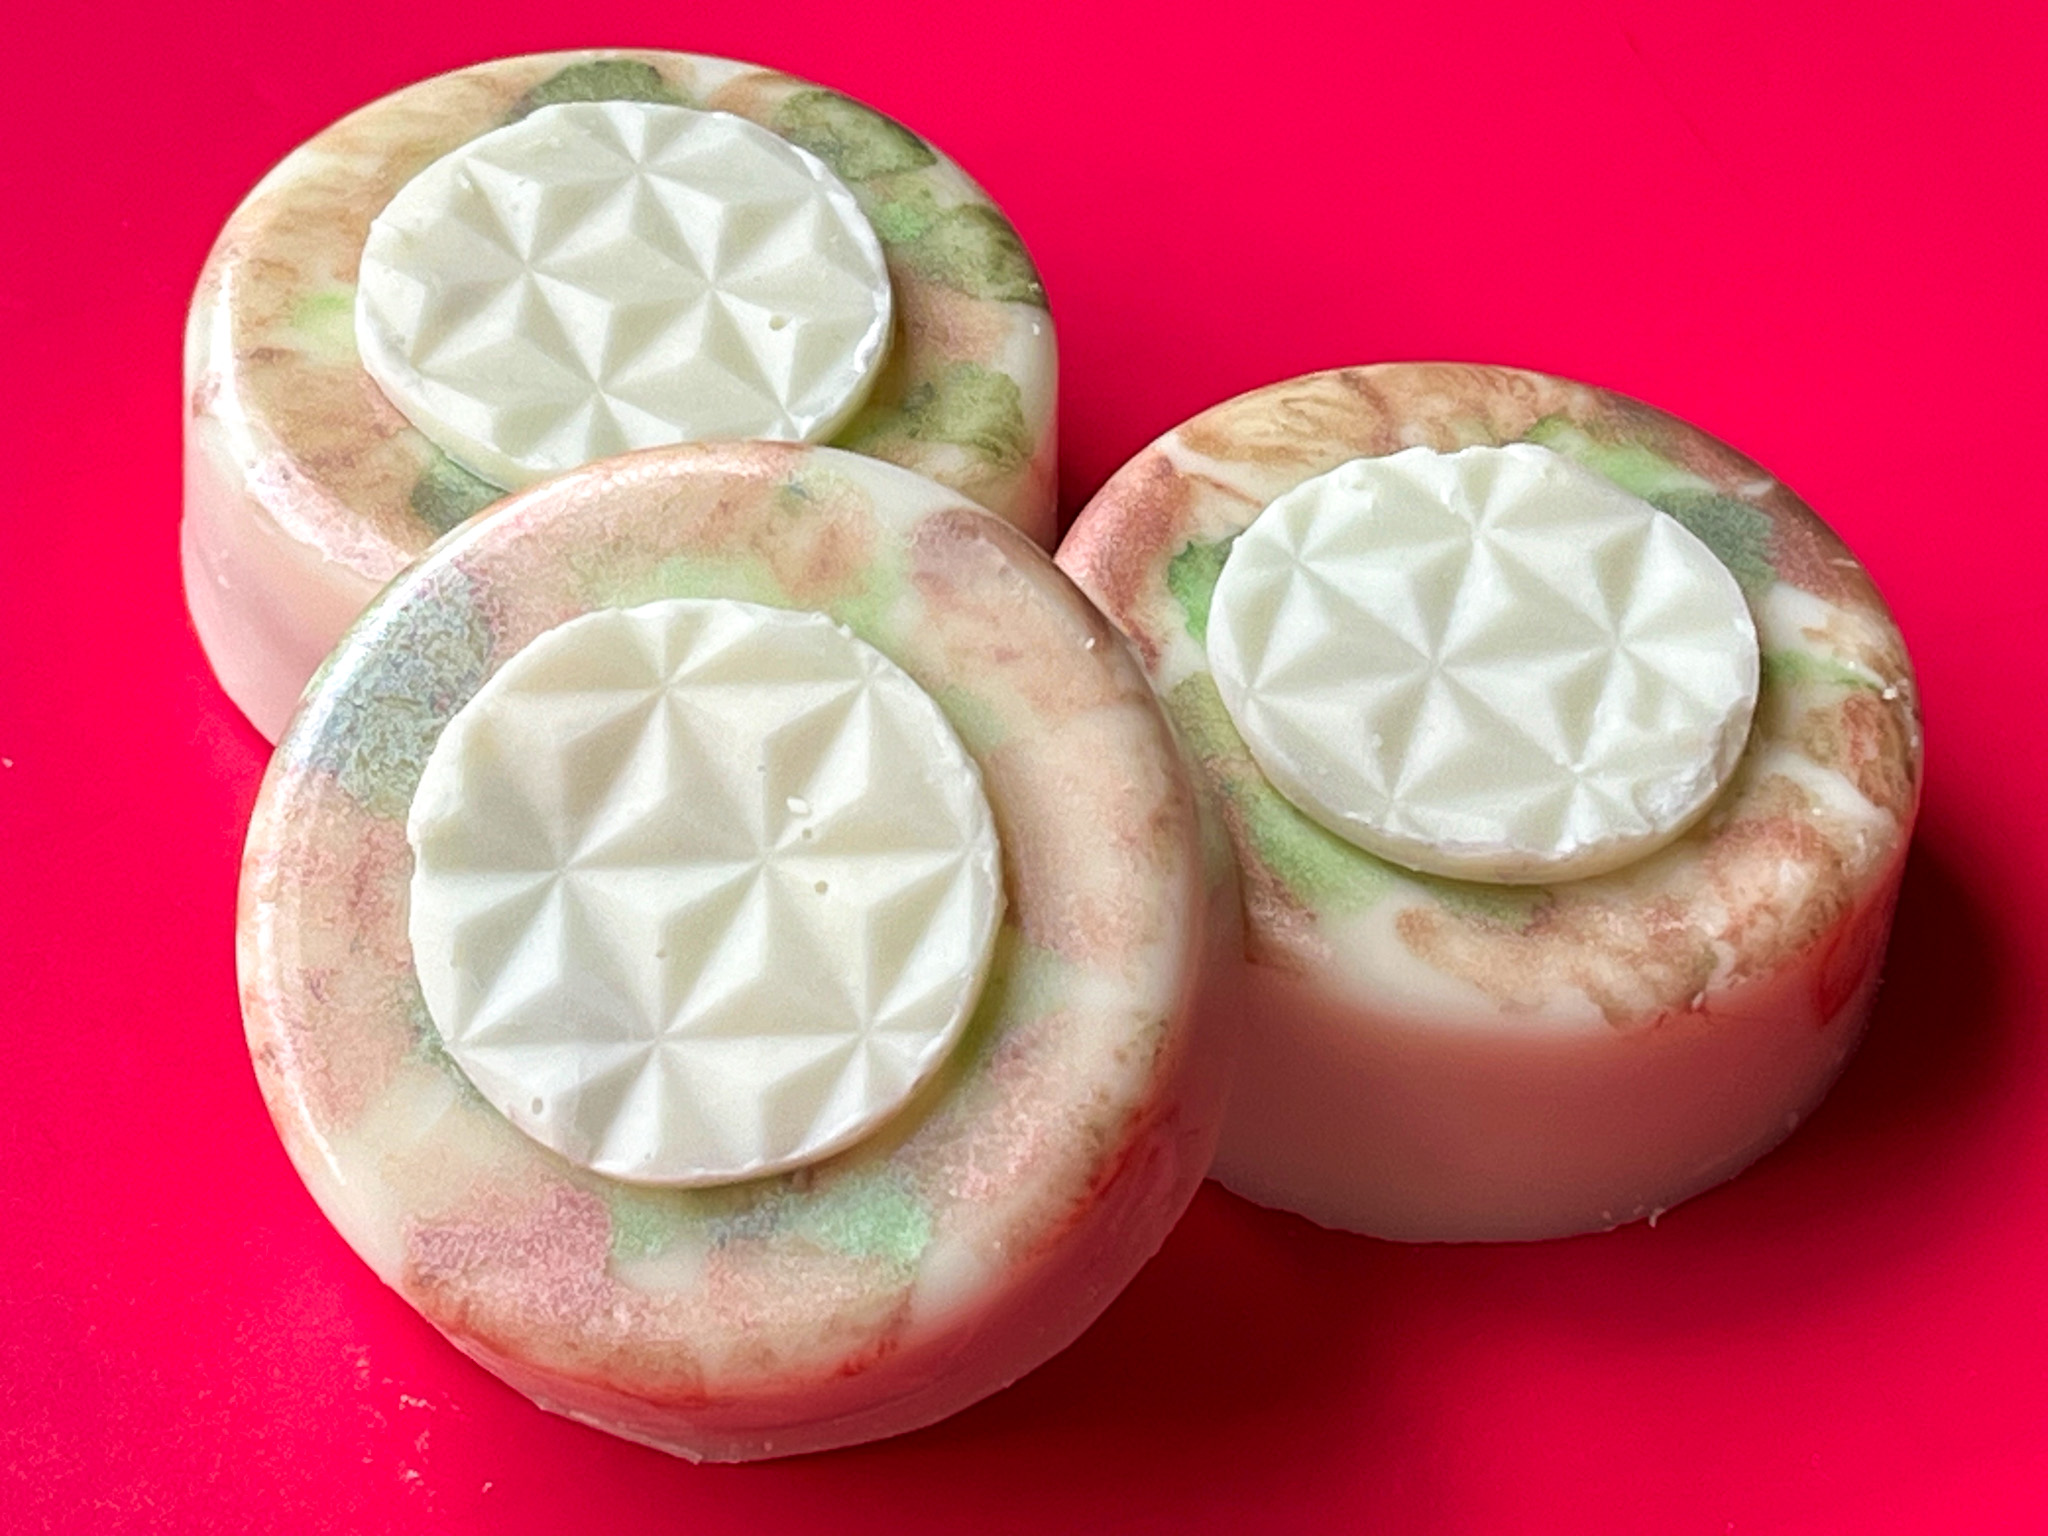
This series had a new technique, I used textured parchment paper to spread the chocolate and after setting, cut circles. I need more practice, it was hard to avoid bubbles, but I got a few to work ok. The background used the tie-dye technique I shared in my previous post about Oreos (link in first paragraph).

TEXTURED CIRCLES ON TIE-DYE BACKGROUND

Moving on, some designs relied on Royal Icing…

GOLD BRUSH EMBROIDERY

MINIMALIST BLACK ON WHITE

LITTLE FONDANT FLOWER

As I always say, making Chocolate-Covered Oreos can be addictive. I am always thinking about the next batch, as I try to make them every single week… I hope you enjoyed this series, and stay tuned for more soon!

ONE YEAR AGO: Sesame-Miso Yakitori

TWO YEARS AGO: Marinated Chickpeas with Slow-Roasted Red Peppers

THREE YEARS AGO: Mini-Pullman Sourdough Bread

FOUR YEARS AGO: Gibassier

FIVE YEARS AGO: Sundried Tomato Twist Bread

SIX YEAR AGO: And now for something completely different….

SEVEN YEARS AGO: Parsnip, Coconut, and Lemongrass Soup

EIGHT YEARS AGO: In My Kitchen, October 2016

NINE YEARS AGO: Paleo Moussaka

TEN YEARS AGO: In My Kitchen, October 2014

ELEVEN YEARS AGO: In My Kitchen, October 2013

TWELVE YEARS AGO: Crimson and Cream Turkey Chili

THIRTEEN YEARS AGO: Taking a break from the nano-kitchen

FOURTEEN YEARS AGO: Chocolate Chip Cookies

OREOS DRESSED FOR THE HOLIDAY SEASON

Yes, the Bewitching Kitchen is in full festive mode! Today the Oreo cookie, brought home from a humble shelf in the grocery store, gets dressed up for major party time… Several ideas for you, but I will start with maybe my favorite, as it gives me a chance to talk about a new product I recently tried.


All my Oreos are made the same way, with compound chocolate (Wilton melting wafers, or other brands available at the grocery store or online). I also have very good luck with Almond Bark, which tends to dry super shiny. If you have issues melting the compound chocolate smoothly, just add a teaspoon or two of oil (refined coconut works great and has no coconut taste). Pour some in the Oreo mold, add the cookie, and cover with melted chocolate. But the possibilities to decorate are endless. For the red ones, I started dividing the white chocolate in two, leaving one portion white and one portion dyed with red fat-soluble color. I poured the two colors in a measuring cup and did not mix them completely, to try to get a marbled effect.

Once the chocolate set, I used this new trick, that turns any gel color into a fat-soluble product, so that all the big collection of gel dyes you own can be used to color chocolate. Isn’t that cool? It is a product by Americolor called FLO-COAT. You can find it here. Just a small amount, maybe 1/4 tsp and a couple of drops of your gel color, mix well and add to the melted chocolate. 

That is how I made the green used for the details, then added sprinkles.

For those I used dark chocolate to make the molds, then drizzled white chocolate with a piping bag, and glued small gold confetti sprinkles on some of the intersecting lines. 

The metallic effect was luster power mixed with vodka, applied with a fan brush…

Finally, a few more designs relying on chocolate transfer sheets. You just cut circles, add to the bottom of the mold and pour the melted chocolate. Remember to peel off the plastic once you un-mold them!

There you have it, many ideas to make the Oreo cookie shine! Keep in mind that you can use golden oreos (lemon flavor), or red velvet to make the cookie complement better the surrounding shell. Have fun with it!

ONE YEAR AGO: Peppermint Wreath Macarons

TWO YEARSAGO: Cornish Hens with Yogurt-Mace Marinade

THREE YEARS AGO: Cookies for the Holidays – Gingerbread

FOUR YEARS AGO: Incredibly Simple Times Four

FIVE YEARS AGO: White Chocolate and Raspberry Mousse Cake

SIX YEAR AGO: Panettone Time!

SEVEN YEARS AGO: Pistachio Creme Brulee

EIGHT YEARS AGO: Fast and Furious Bison Chili

NINE YEARS AGO: In My Kitchen, December 2014

TEN YEARS AGO: Braised Fennel with Saffron and Tomato

ELEVEN YEARS AGO: Revenge of the Two Derelicts

TWELVE YEARS AGO: Grilling Ribbons

THIRTEEN YEARS AGO: Peppery Cashew Crunch

FOURTEEN YEARS AGO: Baked Shrimp and Feta Pasta

CHOCOLATE-COVERED OREOS

I am slightly obsessed with these. So. Many. Possibilities. I will have to disappoint the purists, though. I do not use high-quality chocolate to make them, I go with compound chocolate. Go ahead, twist your nose, but I have to be mindful of my baking budget. Feel free to splurge and temper chocolate if you prefer.


To make them you will need the appropriate molds. Go to online sources such as amazon or etsy and search for molds for chocolate covered Oreos. I will share links to the specific ones I used, but there are countless possibilities out there. Then, you need your choice of dark or white compound chocolate (about 250g for a mold of 6 cookies). A touch of coconut oil, maybe 1 teaspoon. And the items to decorate: oil-soluble food dye, luster powder, or chocolate transfer sheets.

.

VERSION #1

CHERRY BLOSSOMS ON WHITE CHOCOLATE

Mold used can be found here. To decorate this set, I used chocolate transfer sheets that I bought a couple of years ago (!!!!). Simply cut them to fit the bottom of the mold, making sure the transfer motif is up, so it will be in contact with the warm chocolate. Pour the melted white chocolate and pour about halfway up. Place an Oreo cookie inside, and add chocolate to cover. Tap a little bit to force air bubbles up, smooth the top (which will be the bottom of the enrobed cookie), and refrigerate for 30 minutes. You can also freeze for about 10 minutes. They should come out very easily.

.

.

VERSION #2

DARK CHOCOLATE ON FLOWER MOLD

Mold used for this set can be found here. Same method as the previous one, except that the gold decoration was achieved by painting the bottom of the mold with luster powder (as a powder, no vodka needed). A little bit goes a long way, next time I will use less. They also look nice left plain.

.

VERSION #3

WHITE CHOCOLATE WITH PINK AND GOLD

For the molds, follow this and this link. A small portion of melted chocolate-coconut oil was dyed with fat-soluble red dye (a very small amount, to get a pink tone), and used to paint the bottom of the mold. Then the rest of the melted chocolate was poured normally on top, cookie added, and topped to close with more chocolate. Details with gold were painted after unfolding. The White poinsettias were dusted with dry gold powder, the heart was painted with gold + vodka.

Since there is not need to temper chocolate, these are incredibly easy and quick to make. You can make a batch of 6 or 12 in 45 minutes, including cooling time. They would be a ton of fun to make with kids too, so consider that option for a fun weekend…

.

ONE YEAR AGO: Pan-Steamed Broccoli with Miso Vinaigrette

TWO YEARS AGO: Cookies and Rubber Stamps

THREE YEARS AGO: Macarons for all Seasons and Reasons

FOUR YEARS AGO: Lentils and Radicchio? Yes, please!

FIVE YEAR AGO: Tres Leches Cake

SIX YEARS AGO: The Joys of Grating Squash

SEVEN YEARS AGO: Auberge-Pecan Walnut Bread

EIGHT YEARS AGO: Gluten-free and Vegan Raspberry Bars

NINE YEARS AGO: Lasserre, a French Classic

TEN YEARS AGO: Sourdough Bread with Walnuts and Dates

ELEVEN YEARS AGO: Braised Brisket with Bourbon-Apricot Glaze

TWELVE YEARS AGO: The Real Vodka Sauce

THIRTEEN YEARS AGO: Pork Tenderloin and Blue Cheese