HERB GRILLED CHICKEN THIGHS

After more than 6 years in the blogosphere, I often ask myself which types of recipes are “blog-worthy?” If you get a T-bone steak, season it with salt and slap in on the grill, is it worth writing a post about? Well, maybe it is if you come up with a twist on how to cook it to perfection, but… that would be a stretch. I prefer to share recipes that have some element of surprise in the ingredients and/or method of cooking. This one is a good example. Simple grilled chicken thighs, but involving a vinegar-based marinade that is also used in the initial stage of cooking before the meat hits the grill. The original recipe, known as Cornell Chicken, has been around for a while. You can read about its interesting development here. I noticed this variation in a cooking forum after many members raved about it. I made it twice in two weeks, trying to perfect it to our liking, which in the case of chicken thighs means a yin-yang kind of deal: meat falling off the bone plus crispy skin. I haven’t arrived there yet, but the recipe is great even in its original form. After all, what is perfection to me might not be the same for you. Give this recipe a try, it’s totally worth it. Unless of course, you are a vegetarian. In this case, skip this post. I will have something to please you soon enough…

😉

Herb Grilled Chicken

HERB GRILLED CHICKEN THIGHS
(adapted from  The Creekside Cook)

½ cup fresh, whole sage leaves
¼ cup fresh rosemary leaves
⅛ cup fresh oregano leaves
⅛ cup fresh thyme leaves
½ cup olive oil
1 cup of cider vinegar
1 egg
1 + ½ tablespoons kosher salt
ground black pepper to taste
8 to 10 chicken thighs

Strip any stems from all of the herbs, and chop them well – they should equal about a half cup total when they are all chopped. Whisk together the olive oil, vinegar, egg, salt and pepper. The egg is to keep the mixture emulsified, and though it is often left out of the original recipe, it works better with it. Whisk in the chopped herbs.

Trim the excess skin and fat from the chicken thighs, and pat dry with paper towels. Put the chicken in a large ziplock bag with the marinade.  A couple of times a day, flip the bag over and move everything around a little to make sure all the thighs are getting marinated.

After 24 – 48 hours, take the chicken out of the fridge. Arrange the thighs in a large saute pan or dutch oven – it is best if they can all lay flat, but if you don’t have a big enough pan for that, get it as close as you can. Pour over the marinade, and set the burner at medium. Watch carefully, and when it starts to boil, turn it down to barely simmering. After 10 minutes, turn each piece carefully, and cook another 10 minutes. Remove from the heat.

Get your grill heated up, and be sure to oil the grates. Once the grill is well heated, place the chicken, skin side down, on the grates. You may have some flare up because the oil is going to drip down some, but a spray bottle of water kept handy will take care of those. Don’t turn the chicken until you can pick it up off the gates without tearing the skin – when it is ready to turn, it will come up easily. This will take around 8 to 10 minutes, depending on your grill. Brush the marinade over the upper side a couple of times during cooking. Turn and grill the second side for another 5 to 8 minutes. If you like, check the internal temperature, which should be about 165 F. Let it rest around 5 minutes before serving.

ENJOY!

to print the recipe, click here

composite

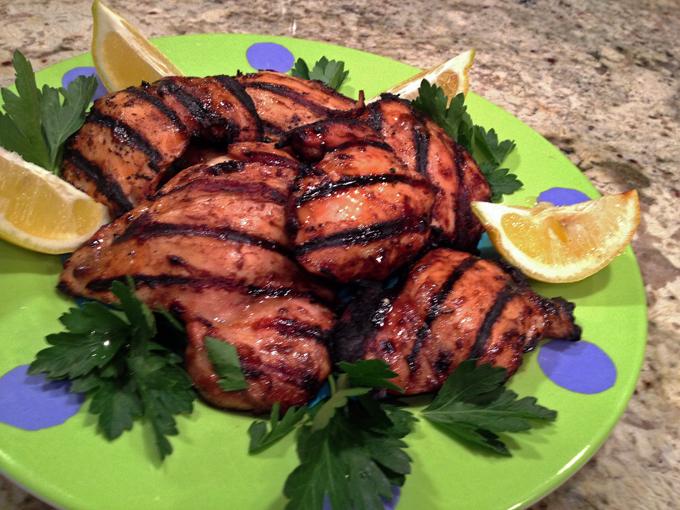
Comments: I made the recipe the first time exactly as written. The flavor was great, and the crispy skin just the way we like it. The apple cider vinegar is the key ingredient, acting as a tenderizer but also imparting subtle acidity. I heard from people who made this recipe several times that leaving in the marinade for 48 is a good idea, but do not go longer than that. I loved the copper color of the skin as it crisped up on the grill…

Grilling

Plated
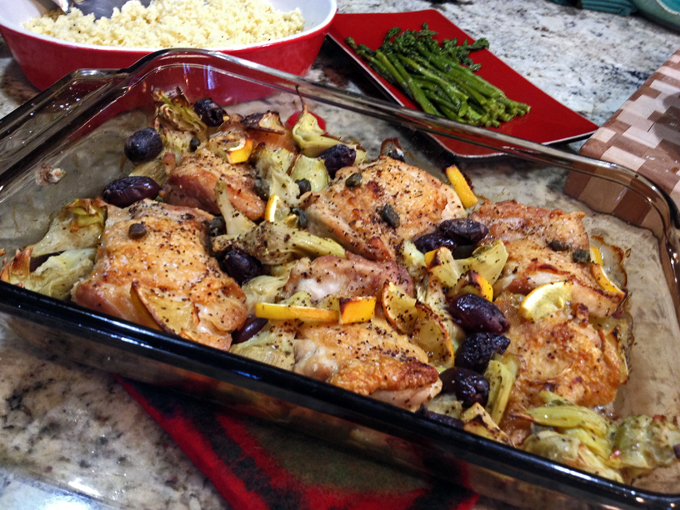
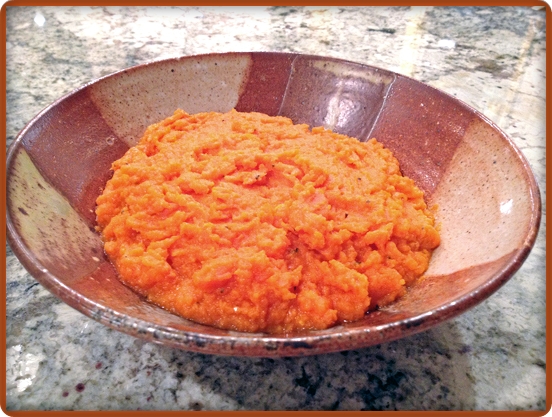
Dinner is served!  Grilled chicken thighs, cauliflower mash, and a fresh salad…
Grab a fork, and dig in! 

As I  mentioned in the beginning of the post, I wanted to get a slightly more tender texture in the meat. So, the second time around I opted to sous-vide the meat in the marinade using water displacement instead of a vacuum-seal, and cooked it as described in this previous post. It all seemed to be going great, but disaster hit:  I was careless while grilling the pieces skin side down, and…. the thighs were charred to death. Black. Burned skin.  I was able to save some pieces for our dinner, but let’s say the looks were definitely not blog-worthy…  Oh, well. Lesson learned. Here’s the plan: repeat this recipe one more time using my favorite method, which is low and slow, then blasting it on a hot oven, or as I intend to do it, on the hot grill. Watching over it as a hawk. A hawk, I tell you!


Red Tailed HawkReady to grill?
(image from this source)

ONE YEAR AGO: Star-Shaped Chocolate Brioche Bread

TWO YEARS AGO: Blueberry-Banana Bread 

THREE YEARS AGO: Into the Light Again

FOUR YEARS AGO: Five Grain Sourdough Bread

FIVE YEARS AGO: The Nano-Kitchen

SIX YEARS AGO: Kaiser Rolls

CHICKEN THIGHS WITH ARTICHOKES AND CAPERS

If you are into Paleo recipes, make this dish!  If you are not into Paleo recipes, make this dish!  Yes, I am a bit bossy today, as a husband and a few graduate students might have noticed. But it’s all with good intentions, as I know what is good for them, for you, and maybe even for myself.  The inspiration for this recipe was found in one of my Kindle cookbooks, Make it Paleo II, by Hayley Mason and Bill Staley. They also have a food blog, Primal Palate, with great recipes and youtube videos. I always read the good and the bad reviews of a cookbook before buying it, and one of the reviewers at amazon.com said that this recipe alone was worth getting the book. I made it twice, once exactly as written, but in this post I am sharing my take on it, modified not only in flavor but also in the method itself. In their version, it is all made in a single skillet, but I did not want to turn on the big oven, so after browning the meat I transferred the pieces to a baking dish that fits in our Breville.

SkilletChickenThighs

CHICKEN THIGHS WITH ARTICHOKES AND CAPERS
(adapted from Make it Paleo II)

6 skin-on chicken thighs, boneless
Sea salt to taste
1 tsp dried oregano
1/2 tsp za’tar
1/2 tsp freshly ground black pepper
1 (6-oz) jar artichoke hearts, drained and sliced
1/2 cup Kalamata olives, pitted and drained
2 Tbsp capers
1 lemon, sliced into rounds and quartered

Heat the oven to 425°F. Heat a skillet or cast iron pan over medium heat. Pat the chicken thighs dry with a paper towel, removing as much moisture as possible. Season the skin with salt and place them skin side down in the hot skillet. Flip the thighs once they develop a nice brown sear on the skin, which should naturally make them easily release from the pan. Cook the chicken skin side up for 1 minute, then transfer to a baking dish, skin side up.  Season evenly with the oregano, za’tar, and  more black pepper to taste. Add the artichoke hearts, olives, capers, and lemon slices to the skillet. Place the skillet in the oven and roast for 30 to 35 minutes, until the chicken is fully cooked.

ENJOY!

to print the recipe, click here

Comments:  If you never de-boned a chicken thigh yourself, take a deep breath and try it, because it’s a nice skill to acquire in the kitchen. I don’t know what type of chicken meat your grocery store carries, but where we live I can find bone-in, skin-on chicken thighs, and boneless, skinless.  The former I use for roasting all the time, but the skinless I reserve for either braises, stir-fries, or grilling (usually after a nice marinade with yogurt or some citric concoction).  You absolutely need boneless pieces with the skin on for this recipe, so if you cannot find it, roll your sleeves up and get working.  It was a bit of a struggle, but I got better and better as I did it.  I watched some videos on youtube to help me with the technique, but most videos available show professional chefs who handle the knife as if they were born with one in their hands.  Amazing to watch, but when trying to mimic them, my shortcomings became quite evident. I say take your time, put some soothing music on, and practice. By the way, if you don’t have za’tar, don’t worry. But get some, will you?  I must say it’s one of my favorite spice mixtures at the moment. Love it.

Phil is so addicted to my default recipe for chicken thighs, that at first he was disappointed by the different preparation. But, it took him only one bite to say that I should revisit this recipe whenever I feel like it. Two thumbs up!  So there you have it, make this dish because I said so, and Sally knows what’s best for everyone. HA!

😉

ONE YEAR AGO: Pea Pancakes with Herbed Yogurt

TWO YEARS AGO: Mushroom Stroganoff

THREE YEARS AGO: Tomato Sourdough

FOUR YEARS AGO: Gamberetti con rucola e pomodori

FIVE YEARS AGO: Flirting with Orzo

COOKING SOUS-VIDE: TWO TAKES ON CHICKEN THIGHS

I am still having fun and getting more and more comfortable with my Anova sous-vide gadget. Many recipes tried, some will go un-blogged due to photos that did not turn out well. A lobster tail, for instance, was quite spectacular cooked sous-vide, but the pictures did the recipe no justice whatsoever.  I shall re-visit that in the future to share the method in the Bewitching.  But here I am today to show you two ways to deal with chicken thighs. The first preparation uses boneless and skinless pieces, a departure from the classic Chicken Cacciatore that I found on this site, great source for sous-vide cooking tips and recipes. Before I share my recipes, I invite you to take a look at this recent post  from my friend Maureen, at The Orgasmic Chef.  Beautiful caramelized onions, without having to stand by the stove baby-sitting them.  She got her sous-vide toy not too long ago, so I guess we are both newbies at this. Sous-vide sisters!

chicken-cacciatore11


CHICKEN CACCIATORE
(slightly adapted from SVKitchen)
 .
3 tablespoons olive oil
1 large shallot, finely chopped
1 garlic clove, thinly sliced
1 can (28.2-ounce) cherry tomatoes  (or regular canned tomatoes, coarsely chopped)
¼ cup chopped fresh basil leaves, plus extra for final garnish
4 tablespoons mascarpone
Salt and pepper to taste (about ½ teaspoon each)
6 boneless, skinless chicken thighs
 .
Preheat the water bath to 152°F (67°C).
 .
Heat the olive oil in a sauté pan over medium heat and add the shallot and garlic. Cook until soft and translucent, about 8 to 10 minutes, being careful not to brown. Remove the pan from the heat and add the tomatoes, stirring to combine. Gently stir in the basil and the mascarpone. Season to taste with salt and pepper. Set aside to cool slightly.
 .
When the sauce has cooled, place about a third in a 1-gallon zip-lock bag. Add 3 of the chicken thighs. Add another third of the sauce, the other 3 thighs, and then the remaining sauce. Seal using the water displacement method.
 .
Cook for 2 to 4 hours.
.
If serving immediately, transfer the chicken and sauce to a oven-proof dish or ramekin large enough to easily hold all the ingredients. Heat a broiler to high. Place the casserole under the broiler for a couple of minutes, watching closely, just to brown the sauce.
.
ENJOY!

to print the recipe, click here

served1

Dinner is served! Chicken sous-vide, spaghetti squash, and roasted asparagus…

And now, for a second method, in which the chicken thighs are cooked with skin and bone-in. As the sous-vide will cook the meat perfectly but leave you with mushy skin, all recipes include a final step to crisp the skin up. If you search the net, you’ll certainly stumble on a recipe by Michael Voltaggio that is described by many as “the best chicken thigh ever”. I tried it, I really did, and the mess it made on my stove left me on the verge of tears.  Plus, the whole house smelled like fried chicken for weeks.  Ok,  for 18 hours. Chicken thighs were not going to meet the Anova gadget for as long as I was in charge of cooking.  But, certain ordeals tend to be forgotten as time goes by.  Since I really liked the texture of the meat, I decided to give it another try, using a very hot oven for the final step of crisping up the skin.  Worked like a charm!  The inspiration came from this cookbook by Jason Logsdon, which I own in its Kindle version, but I modified the recipe quite a bit, so I feel ok about sharing it with you. In his version, he crisps the skin on a cast iron pan, evidently, I didn’t.

Neat-freak + Drama-Queen = Cast-Iron-Repudiation

RoastedTomatoSalsa

CHICKEN THIGHS WITH ROASTED TOMATO SALSA
(inspired by Sous-Vide Help for the Busy Cook)

for the chicken:
6 chicken thighs, bone-in
salt and pepper to taste
New Mexico chile powder
1 lemon, juiced

for the tomato salsa:
7 Roma tomatoes, very ripe
2 tablespoons olive oil
salt and pepper to taste
dried thyme, about 1 teaspoon
2 tablespoons apple cider vinegar
2 tablespoons brown sugar

Prepare the roasted tomatoes in advance, they will keep for several days. Cut the tomatoes in half, mix them with the olive oil, season with salt and pepper, and roast in a 325 F oven for 2 hours. Transfer to a bowl and refrigerate.

Set your Anova or other sous-vide apparatus at 148 F. Remove excess skin and fat from the chicken thighs. Season with salt and pepper, sprinkle chile powder, and squeeze a little lemon juice over the flesh. Place inside plastic bags and vacuum-seal, three pieces of chicken per bag. Place in the water-bath and cook for a minimum of 2 hours. I like to cook chicken thighs for 5 to 6 hours.

Turn your oven to 450 F.  Remove the chicken pieces from the bags, pat dry.  Place in a baking dish and roast until the skin is brown and crispy to your liking. You can also run them under the broiler for a few minutes if you prefer.  As the chicken roasts, transfer the previously prepared tomatoes to a skillet, cook for a couple of minutes,  add the vinegar, brown sugar, and adjust the seasoning.  Mash the tomatoes lightly with a potato masher or a fork if you like it chunky.  You can also transfer to a blender or food processor, if so inclined.  I prefer my salsa to be on the chunky side.

Serve the crisped up chicken pieces with the salsa alongside.

ENJOY!

to print the recipe, click here

Crisped

Comments:  So as I promised, here you have two completely different takes on the same type of meat using the Anova sous-vide. If you want to enjoy a saucy, stew-type meal, go for boneless chicken thighs, cooking them in liquid from the beginning. Obviously, in this case you’ll need to use the water displacement method, as vacuum won’t be feasible.  If crispy skin is more what you are looking forward to, season the pieces with dry rubs, and use your oven in the end. The meat will be perfectly tender, very moist, and the skin super crispy.

platedDinner is served!  Chicken sous-vide, cauliflower-spinach puree, and a salad…

I highly recommend Jason Logsdon’s book “Sous-Vide Help for the Busy Cook”.  The recipes are all geared for people who work all day and want to maximize the use of sous-vide to get a nice meal at dinner time.  The main advantage of this cooking method is the flexibility of timing: if you are late to arrive home from work, no problem, two or three more hours at the target temperature will not affect your dish.  Seafood is a bit more delicate and you should probably save that for weekends or weeknights in which you have a couple of hours to devote to dinner preparation.

compositetomatoes
I cannot resist including this photo of my oven-roasted tomatoes, they were absolutely delicious, with intense flavor, but not the unpleasant texture I find in most commercially available sun-dried tomatoes.   In Jason’s recipe, he uses a quicker method to deal with the tomatoes, so if you are at all interested, stop by amazon.com and click away!   😉

ONE YEAR AGO: Miso Soup: A Japanese Classic

TWO YEARS AGO: On my desk

THREE YEARS AGO: A must-make veggie puree

FOUR YEARS AGO: Vegetarian Lasagna

FIVE YEARS AGO:  Brazilian Pão de Queijo

GRILLED CHICKEN WITH TAMARIND AND COCONUT GLAZE

For most people, there is such thing as a grilling season, and it’s starting right about now.  For us, the grill is going all year-long, no matter the temperature outside. We never stop. Of course, it is a lot nicer to be out  moving stuff around the grill wearing shorts and a t-shirt instead of a down jacket. Let me rephrase that: it’s a lot nicer to do anything wearing shorts and a t-shirt.

This is the perfect recipe for those busy days.  Boneless chicken thighs stay the whole day in the fridge, marinating in coconut milk, tamarind, and a few selected spices.  When you get home, bring the chicken to room temperature as you heat your grill and get your side dishes going.  The meat will be moist, tender, with the right amount of heat.  You will love this!

ChickenCoconutTamarind2

GRILLED CHICKEN WITH TAMARIND AND COCONUT GLAZE
(slightly modified from One Perfect Bite)

1/2 cup coconut milk (or yogurt)
1 tablespoons tamarind paste
1 clove garlic, minced
1/2 tablespoon kosher salt
1/2 tablespoon garam masala (or ground cumin)
1/8 teaspoon cayenne
6 boneless, skinless chicken thighs
1 lemon, cut in wedges
Sprigs of fresh cilantro for serving (optional)

In a large bowl, combine coconut milk, tamarind paste, garlic, salt, garam masala and cayenne. Add chicken and turn to coat well with marinade. Cover and refrigerate for 4 to 8 hours.

Remove chicken from  marinade, and grill for 8 to 10 minutes per side. You could also brown chicken in a skillet on stove, place on a baking sheet and finish cooking in a 375 degree oven for 20 minutes.

Garnish with lemon wedges and cilantro.

ENJOY!

to print the recipe, click

composite2

The classic substitution suggested for tamarind paste is lime juice, as the main purpose of the tamarind is to bring acidity into the equation. Of course, it’s acceptable, but the paste is one of those ingredients that once you start using, you will get more and more fond of.   Just like miso, it keeps forever.  You can use it in drinks, in desserts, in all sorts of recipes. Not sold yet? Let me share a few delicious options:

Tamarind-Glazed Honey Shrimp, from A_Boleyn

Chickpeas and Chana Dal Cooked Together in a Mint Sauce, from Eats Well with Others

Thai Red Curry with Pork Belly, from Rachel Cooks Thai

Creamy Peanut Chutney, from Love Food Eat

Prawn Sambal, from Sea Salt with Food

Indian-Spiced Pulled Pork with Tamarind Barbecue Sauce, from Angela’s Food Love

Tamarind Date Cake, from Dan Lepard

Tamarind and Fresh Ginger Cake with Lime Glazing, from Anh’s Food Blog

Mozambique Chicken, from The Perfect Pantry

Tamarind Rice (Puli Sadham), from Chitra’s Food Book

Agua de Tamarindo, from A_Boleyn

+++++++++++++++++++++++++++++++++++++++++++++++++++++++

ONE YEAR AGO: Chicken-Apricot Skewers

TWO YEARS AGO:  Asparagus Quiche

THREE YEARS AGO: Two-stage Pea and Prosciutto Risotto

FOUR YEARS AGO: Mellow Bakers: Corn Bread

POMEGRANATE CHICKEN THIGHS & CARROT MASH

chickencarrot
I am feeling quite generous these days, so you’ll get two recipes in a single post. It turns out they went so well together, that it would be sad to separate them.  The source of inspiration for the chicken was a blog I found not too long ago, and started following right away: The View from Great Island, hosted by Sue. Her photography is beautiful, and I’d be happy sitting at her dinner table anytime! The mashed carrot was in  the latest issue of Fine Cooking magazine  as an option for Thanksgiving side dish. Roasted asparagus rounded our meal quite nicely.

Pomegranate Chicken ThighsPOMEGRANATE AND LIME CHICKEN THIGHS
(adapted from The View from the Great Island)

for the chicken
1 cup Greek yogurt
1/2 cup pomegranate juice
1 tsp salt
4 bone-in skin-on chicken thighs
for the glaze
1/4 cup pomegranate molasses
juice of 1 lime
2 Tbsp agave nectar
1 Tbsp Dijon mustard

To marinate the chicken, put the yogurt, pomegranate juice, salt, and chicken in a large zip lock bag. Massage everything until well combined. Put in the fridge to marinate for at least 2 hours or overnight.

Set the oven to 300 F.  Remove the chicken from the marinade, place the pieces skin side down on a large baking dish, and cover with aluminum foil.  Bake for 45 minutes to 1 hour at this low temperature.  Remove the foil, if there is a lot of liquid accumulated in the dish remove most of it and discard.  Turn the pieces skin side up, cover with foil again and bake for another 20 minutes.  At this point, prepare the glaze by combining all ingredients together.   If too thin, gently warm it on a small saucepan to thicken it a little.  Watch it carefully because it can burn due to all the sugar.

Remove the aluminum foil from the baking dish, increase oven temperature to 425 F.  Bake for 15 minutes, once the skin starts to get some color brush the glaze all over the chicken thighs and bake for 10 more minutes or until very dark.  You can also broil the pieces at this point, but pay attention to prevent it from burning.  Serve with lime wedges.

ENJOY!

to print the recipe, click here

Carrot Mash1

    CARROT MASH WITH ORANGE AND MINT
    (adapted from Fine Cooking magazine)

    2 lb. carrots, peeled and cut into 1-inch pieces
    salt
    1 oz. (2 Tbs.) unsalted butter, cut into 2 pieces
    2 Tbs. almond milk, unsweetened
    2 Tbs. extra-virgin olive oil
    1 tsp dried mint
    1 tsp finely grated orange zest
    Put the carrots in a large saucepan with enough cool water to cover by at least 1 inch. Add 1 tsp. salt and bring to a boil. Turn the heat down and cook at a gentle boil until the carrots can be easily pierced with a fork, about 25 minutes.

    Drain well in a colander, letting the steam rise for a few minutes. Meanwhile, heat the butter, almond milk, oil, mint, orange zest, and  1/2 tsp salt in the saucepan over low heat until the butter melts.

    Purée the carrots in a food processor until smooth and then add them to the pan, stirring well to combine.

    Adjust seasoning and serve.

    ENJOY!

    to print the recipe, click here

    Comments: My main modification of the chicken recipe was to adapt it to my favorite method of cooking chicken thighs: low and slow followed by high and fast.  I like the way the meat gets super tender and the skin super crisp.  You should stop by Sue’s blog and check her version too.  She actually made the glaze from pomegranate juice, reducing it with sugar. Since I had a bottle of pomegranate molasses, I followed a slightly different path.  The full idea is to have a reasonably thick glaze to coat the chicken.

    orangezest

    The carrot mash: my only tweak was to use almond milk instead of heavy cream.  I love almond milk and use it every chance I get.  A lot more orange zest went into the recipe then called for, because the music playing got me carried away with the Microplane. Such a cool gadget!  Phil thought it was slightly too orange-y and not enough carrot-y, but when we had leftovers next day that flavor had mellowed down considerably.  As to a side dish for Thanksgiving, I was a bit shocked by how little puree 2 pounds of carrots produced… If you will be feeding an army of people, be ready to peel a ton of carrots and scale this recipe up by a factor of 3 or 4.  😉  Still, a delicious option, bright color, bright flavor, it will shine on your Thanksgiving table next to that big bird.

    ONE  YEAR AGO: The Many Faces of Kale

    TWO YEARS AGO:  Short and Sweet

    THREE YEARS AGO: Ciabatta, a Classic Italian Bread

    FOUR YEARS AGO: Magical Lamb Stew