BLACK OLIVE TAPENADE AND DEVILED EGGS

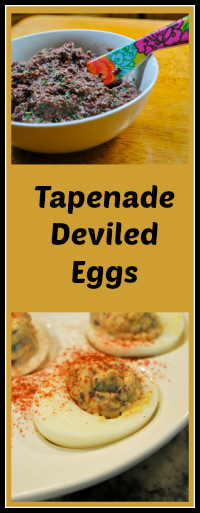
Tapenade-flavored deviled eggs! A great departure from the classic, this was a recent blog post by my dear friend Karen. We love deviled eggs so I was quite excited when she shared her version that included a hefty dose of black olive lusciousness to make them even more special. At first I thought we had one of those convenient ready-made jars from Trader Joe’s sitting in our pantry, but of course, the moment I had a very important use for it, they were nowhere to be found. I had to take matters into my own food processor. You know what? Home-made is infinitely better. There’s a fresh taste to it, plus I could customize it adding a bit of orange zest. Total winner!

BLACK OLIVE TAPENADE
(adapted from many sources)

1 + 1/2 cups pitted black olives
1 teaspoon anchovy paste
2 tablespoons capers, rinsed
juice of half a lemon (taste and add more, if you like)
chopped fresh parsley to taste
olive oil to desired consistency
salt and pepper
orange zest

Add all ingredients to the bowl of a food processor, except olive oil, salt, pepper, and orange zest. Process until smooth. With the motor running, drizzle olive oil until it gets to the consistency you prefer, I added a bit less than 1/4 cup.  Season with salt, pepper, and add orange zest at the very end.

BLACK OLIVE TAPENADE DEVILED EGGS
(slightly modified from Karen’s Kitchen Stories)

6 hard-boiled eggs
1/4 cup full-fat yogurt
1/2  tsp Dijon mustard
1/8 teaspoon cayenne pepper
1 heaping tablespoon (or more to taste)  olive tapenade
salt and freshly ground black pepper to taste
Paprika for garnish

Peel and slice the eggs in half, lengthwise. Place the yolks into a bowl and mash with a fork. 

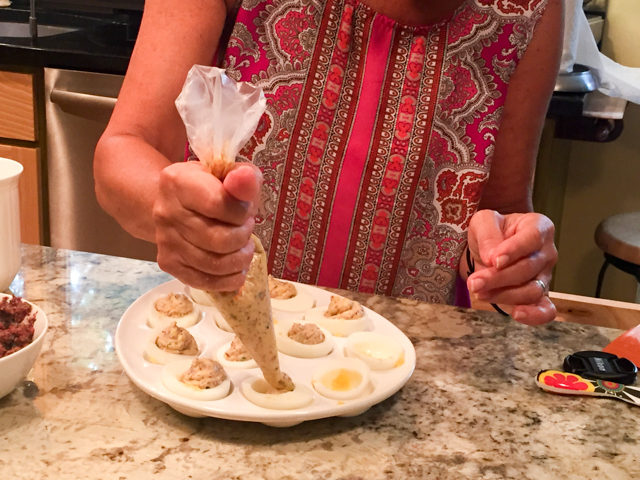
Add the yogurt, mustard, and cayenne pepper, and mix until smooth. Add the tapenade and salt and pepper and stir until thoroughly combined. Place the yolk mixture into a piping bag and pipe into the egg white cavities. Sprinkle with paprika and chill until ready to serve. You should chill too, it’s an easy recipe, perfect for entertaining.

ENJOY!

to print the recipes, click here
Comments: Confession time. I gave you the recipes with more or less precise measurements, but I did not use a single measuring cup or spoon to make them. Because I’ve been baking so much, I get pretty tired of measuring and weighing items. When it comes to a savory recipe, I want freedom. So I pretty much eye-balled everything. And used my taste buds to judge if I needed more capers, more lemon, more parsley. I advise you to do the same, it is quite liberating (wink, wink). Yes, no two attempts will be exactly the same, but isn’t that part of the charm of cooking? Now, of course baking is another story, your goal is to reach that perfect mousse emulsion, the cake with correct structure and moisture, the macarons with the perfect mixing of almond to meringue. Precision rules.

These turned out delicious! I made a batch on a Saturday morning while The Man was playing golf and the plan was to surprise him with the platter ready and waiting. But he finished the game early, and arrived while I was piping the filling. So there you go, you got to see a picture of the process.

I like to use yogurt instead of mayo, as mayonnaise does not enter our home, but you should go the more authentic route if you prefer.

Karen, thanks for constantly inspiring me, as you know I have a huge list of recipes to try from your site, but I jumped on this one like Buck jumps on a snake in the backyard. Sorry for the image, but it’s accurate.
ONE YEAR AGO: Blueberry Crumble Coffee Cake

TWO YEARS AGO: Fresh Strawberry Yogurt Bundt Cake

THREE YEAR AGO: Quinoa Salad with Red Grapes and Avocado

FOUR YEARS AGO: Strawberry Coffee Cake

FIVE YEARS AGO: Lemon-Poppy Seed Muffins

SIX YEARS AGO: Mascarpone Brownies

SEVEN YEARS AGO: Salmon Tacos

EIGHT YEARS AGOCinnamon Turban Bread

NINE YEARS AGO: Summertime Gratin

SaveSave

SaveSave

SaveSave

SaveSave

SaveSave

SaveSave

SaveSave

SaveSave

SaveSave

RASPBERRY PUFFS

This recipe can be super simple if you buy puff pastry at the store, or quite a bit more involved if you make it yourself. I don’t want to sound snobbish – although probably it will be the case – but homemade will be a lot better. It is hard to get as many flaky layers from a store-bought puff pastry, and the version made at home definitely feels lighter. But particularly during the summer, I see nothing wrong with opening that package and going at it with your rolling-pin. Working with all that butter, performing the foldings, is quite tricky when the weather is warm and humid. Once the pastry is done, the preparation of these raspberry squares is very simple and the end result… oh so very cute! I made my own puff pastry and a link to the recipe is included below. But for simplicity (it’s a very long recipe), I am sharing a simplified version using store-bought.

RASPBERRY PUFFS
(from the Bewitching Kitchen)

1 package of puff pastry, defrosted
to make your own, follow this link
fresh raspberries and blackberries (5 per pastry square)
8-ounce block cream cheese
¼ cup granulated sugar
½ teaspoon vanilla extract

Heat the oven to 400F.

In a medium bowl, mix cream cheese, sugar, and vanilla until smooth.

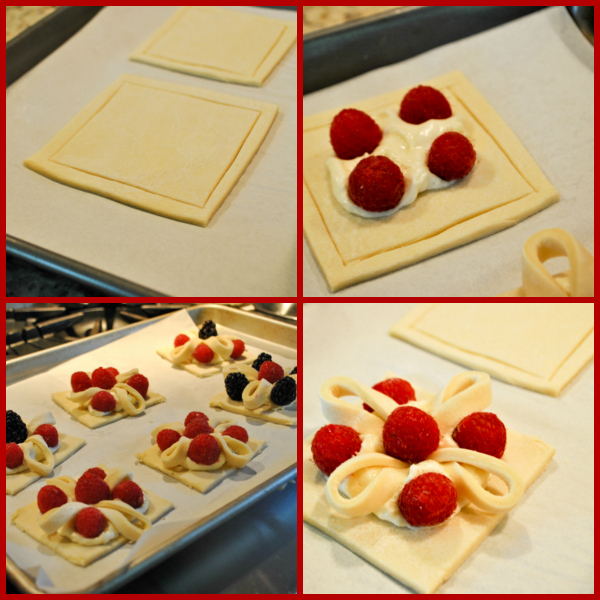
Roll the puff pastry and cut into 3 to 3.5 inch squares. Using the packaged pastry, one sheet will be enough to make 4 squares. Leaving a thin border, make cuts along the edges of the square. Use either a small rolling pastry cutter or a very sharp knife, so that you don’t squish the layers of the puff pastry. Place a tablespoon of the cream cheese filling in the middle of the square, then top with 4 raspberries. Take one of the edge flaps and fold it towards the center, looping over the raspberry. Repeat with the other flaps. Place a raspberry in the center, on top of where all the flaps overlap. Repeat with the remaining pastry squares.

Bake for 20 minutes or until pastry is golden brown and puffed. Serve with a sprinkle of powdered sugar, if so desired.

ENJOY!

to print the recipe, click here

Comments:  If you like, you can brush the top of the loops with a little egg wash for extra shine, but I did not do that this time. Blueberries could be fun to use too, although they tend to bleed a lot more during baking. Don’t  be afraid to bake them until the pastry is very dark, because the filling tends to make the pastry a big soggy. In retrospect, I think I should have baked mine longer. But, as I like to say often, there’s always next time… live and learn…

They do have similarity with a Danish pastry, and go perfectly with a nice steamy cappuccino. One of these babies will be more than enough to satisfy any cravings for sweetness. They are fun to make and delicious to savor…  I hope you give them a try, with homemade puff or not.

ONE YEAR AGO: Vietnamese-ish Chicken

TWO YEARS AGO: Rutabagas Anna

THREE YEARS AGO: The Ultimate Raspberry Sorbet

FOUR YEARS AGO: Crispy Cornmeal Sweet Potato Fries

FIVE YEARS AGO: Pan-grilled Tilapia with Smoked Paprika & Avocado Cream

SIX YEARS AGO: Golden Saffron and Fennel Loaf

SEVEN YEARS AGO: In My Kitchen, July 2011

EIGHT YEARS AGO: Heavenly Homemade Fromage Blanc

NINE YEARS AGOA Perfect Sunday Dinner

SaveSave

SaveSave

SaveSave

SaveSave

SaveSave

SaveSave

SaveSave

SAVORY OATMEAL WITH BACON AND CHEDDAR AND A COOKBOOK REVIEW

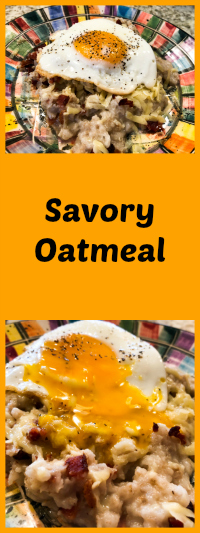
This is a long overdue post. I made this recipe last month, but have been meaning to write about this cookbook ever since I bought it, back in October. Seven long months ago. Shocking.  Oatmeal is definitely something associated with breakfast, and served on the sweet side. With milk, brown sugar, cream, maybe some stewed apples or bananas. In her book Adventures in Slow-Cooking, Sarah di Gregorio shares a version for savory oatmeal and raves about it. I had to try it. It was really tasty, and she gave me permission to share the recipe with you… So, without further ado…

SAVORY OATMEAL WITH BACON, SCALLIONS, AND CHEDDAR
(published with permission from Sarah Di Gregorio)

1 cup uncooked steel-cut oats
Kosher salt
½ pound thick-cut bacon
5 scallions, trimmed, light green and white parts thinly sliced
8 ounces sharp cheddar, grated (about 2 heaping cups)
Freshly ground black pepper
Fried or poached eggs, for topping (1 per person)

Generously butter a 5- to 7-quart slow cooker. Add the oats, 4 cups water, and I teaspoon salt. Cook until the oatmeal is thick and tender: on LOW for 4 hours or on LOW for 2 hours followed by WARM for 6 to 7 hours.

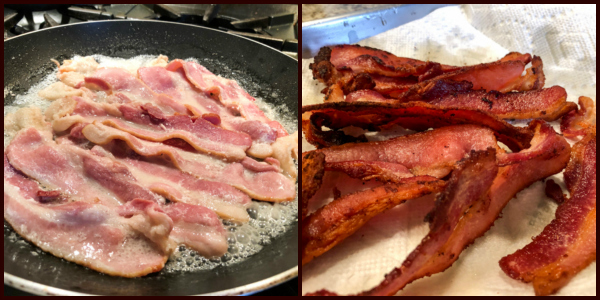
Put the bacon into a cold large skillet and bring the heat to medium. Cook, flipping a couple of times, until the bacon has rendered a lot of its fat and is deeply browned and crisp, about 10 minutes. Drain on paper towels, then coarsely chop. You can do this right before serving the oatmeal or the day before, in which case store the crisped bacon in an airtight container in the refrigerator and bring it to room temperature before using.

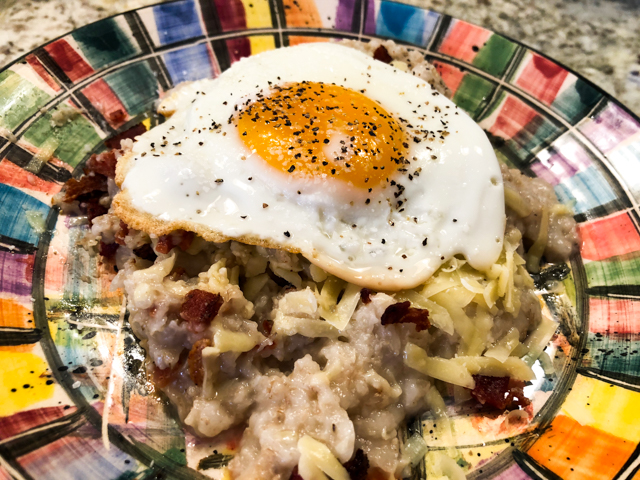
When the oatmeal is done, stir in the bacon, white and light green scallion slices, and about three-quarters of the cheese (about 6 ounces). Taste for seasoning and add more salt if necessary and a few grinds of pepper. Serve in bowls topped with the remaining cheese, the dark green sliced scallions, and eggs, if you like.

ENJOY!

to print the recipe, click here

Comments: I’ve always been intrigued by the use of oatmeal in savory dishes. I am not an oatmeal fan in traditional breakfast preparations, but decided to open my mind and give it a try. I don’t normally eat breakfast and found that this meal was perfect at lunch time. Kept me full until dinner, and was full of flavor.  I also made a vegetarian version using sautéed mushrooms instead of bacon. Worked great too, I made sure to brown them well and added a touch of soy sauce at the end. Delicious! In Sarah’s words:

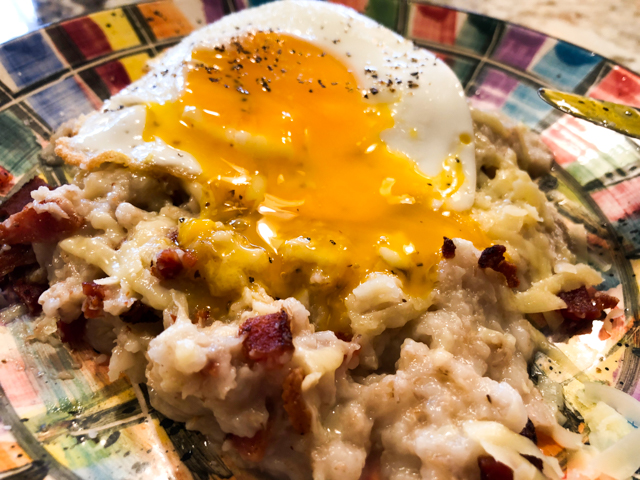
Speaking of the egg: I know most people are tired of the image of egg yolk flooding whatever is served underneath, but forgive me… this was too good to skip…

OVERVIEW OF ADVENTURES IN SLOW-COOKING

by Sarah di Gregorio

First, let me share with you the review I wrote for it at amazon.com

I fell in love with this book at first page. I don’t have much patience for long introductions and considered just skipping that part to dive into recipes. Well, I could not stop reading. Sarah is a talented writer and definitely knows how to use the slow-cooker the way it is intended to be used. No dump and run approach. This is slow-cooking for gourmet cooks, those who will not accept anything with the “crock pot texture.” I bought this book even though there was only ONE review about it. Took a big risk, right? Well, I am so glad I did. I own more than 500 cookbooks, and this might very well be my favorite for slow-cooking. Awesome. Just awesome. Buy it and you will not be disappointed. Now, if you are part of the team of dump it and forget it, this book is NOT for you. This is not a criticism to you, just a warning that you might not like it that much….

That pretty much explains why I had to review it here, I think that anyone who owns a crock pot will benefit from this book. I have a file in my computer (way out of date) called “The Best from Each.” In that file I list recipes from my Kindle cookbooks that appeal to me. Sarah’s cookbook broke the record for the largest proportion of recipes that made into that folder. From 120 recipes, 35 made the cut. That’s almost one-third of them. Pretty impressive.  Here is a cut-and-paste job from my computer:

Classic Chicken Stock (wings)

Winter Tomato Sauce (Marcella Hazan)

Lentils, beans, chickpeas method

Grains, farro, barley, black rice etc method

Smoky Chipotle Ketchup (interesting)

Crisp Chicken Wings with Szechuan Caramel

Chawan Mushi (interesting savory custard)

Pistachios, Coconut, and Cardamon Granola

Savory Oatmeal with Bacon, Scallions and Cheddar

Crustless Quiche with Smoked Salmon

Summer Tomato, Basil and Burrata Grain Bowl

Roasted Red Pepper, Caper, Walnut and Tahini Grain Bowl

Creamy Barley with Corn and Green Chile-Lime Salsa

Farro Puttanesca

Shakshuka with Feta and Olives

Caramelized Cherry Tomatoes

Stuffed Meatballs in Lots of Sauce

Spiced Lamb Meatballs in Harissa Tomato Sauce

Smoky Barbecued Brisket

Chipotle Almond Braised Beef Tacos
(Quick Pickled Onions) – to go with it, very nice method

Orange, Olive and Fennel Chicken Tagine
(Turmeric Yogurt) – to go with it

Miso-Butter Roast Chicken and Potatoes

Buttery Duck Confit 

Harissa Pork Chili with Toppings Galore

Sticky Gochujang Pork

Za’tar Roast Chicken

Sticky Toffee Pudding with Maple Caramel

Coconut Banana Cake with Brown Butter Caramel Sauce

Matcha-White Chocolate Pots de Crème

Vietnamese Coffee Pots de Crème

Cannoli Cheesecake with Biscotti Crust

Dark Chocolate Cheesecake with Earl Grey Cream

Cardamon-Molasses Apple Upside-Down Cake

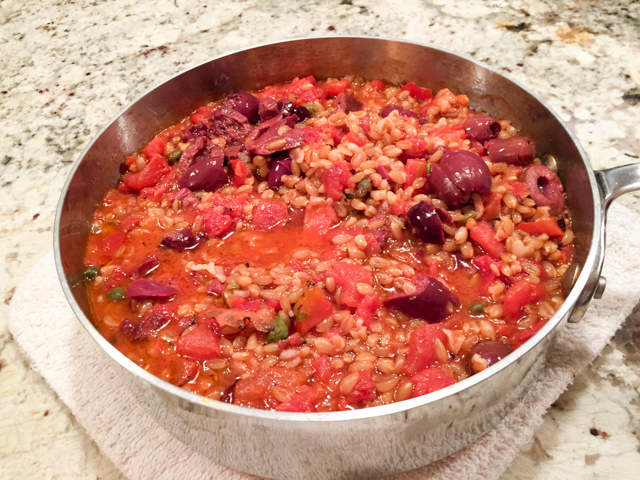
TEASER RECIPE:  from the list, I made the Farro Puttanesca. To die for! Farro cooked in the crock pot has perfect texture, this preparation was luscious, perfect by itself or as a side dish for roast chicken, grilled salmon, steak, pretty much anything you’d like. A very creative way to serve farro. Made a lot, but froze well too…


Sarah, thank you and your editors for allowing me
to publish one of your recipes.


ONE YEAR AGO: Air-Fried Carrots, Two Ways (most popular post on my blog!)

TWO YEARS AGO: Five Minutes in L.I.T (a tour of our laboratory!)

THREE YEARS AGO: Chicken Thighs with Artichokes and Capers

FOUR YEARS AGO: Pea Pancakes with Herbed Yogurt

FIVE YEARS AGO: Mushroom Stroganoff

SIX YEARS AGO: Tomato Sourdough

SEVEN YEARS AGO: Gamberetti con rucola e pomodori

EIGHT YEARS AGO: Flirting with Orzo


SaveSave

SaveSave

SaveSave

SaveSave

SaveSave

SaveSave

SaveSave

SaveSave

SaveSave

SaveSave

SaveSave

SaveSave

SaveSave

SaveSave

SaveSave

SaveSave

MINI-FRITTATAS WITH BROCCOLI AND CHEESE

Another great recipe from Kalyn, who knows her way around a low-carb way of life. If you feel like taking a step back from the excesses of Thanksgiving, this is a very nice option for breakfast, brunch, or a light lunch.  I used my beloved tart pan, but  you can  make it in muffin tins, or even go for a single, larger pie type pan, increasing baking time a little bit.

MINI-FRITTATAS WITH BROCCOLI AND CHEESE
(slightly modified from Kalyn’s Kitchen)

2 1/2 cups broccoli flowerets (cut into small, bite-sized pieces)
1 cup grated cheddar cheese
6 T coarsely grated Parmesan cheese
8 eggs
1 cup cottage cheese
1 tsp. thyme
1/2 tsp oregano
salt and fresh-ground black pepper to taste

 Heat oven to 375F/190C.   Spray tart pan or muffin cups with non-stick spray.
.
Place the broccoli pieces into a bowl, cover with cling wrap, and microwave on high for about 1-2 minutes, or until broccoli just starts to cook. Divide broccoli among the tart wells. Put a generous pinch of cheddar cheese on top of the broccoli, then add coarsely grated Parmesan on top of the cheddar.
 .
Put the cottage cheese into a fine-mesh colander, rinse with cold water, and let drain. Break eggs into a glass measuring cup with a pour spout, and beat with a fork until egg yolks and whites are combined. Add drained cottage cheese, thyme, oregano, salt and pepper. Stir to combine. Pour egg mixture over broccoli and cheese, dividing the eggs evenly among the tart wells.  Stir gently with the fork so ingredients are evenly distributed.
 .
Bake for about 30 minutes, or until eggs are firm and frittatas are starting to get slightly browned on top. Frittatas can be kept in the fridge for several days and microwaved to reheat.  Don’t microwave for more than about a minute or the eggs will get rubbery.
.
ENJOY!

to print the recipe, click here


.
Comments: I absolutely love this type of recipe that I can  make in the weekend and then enjoy for lunch the following week. I prefer to warm them up in my little electric oven, because it gives much better texture than the microwave, but if you follow Kalyn’s advice and keep the microwave time short, it will still prevent the dreadful rubbery-egg-syndrome.
 .
Cottage cheese was – for me – an acquired taste. When I first moved to the US, I did not like it at all.  But for one reason or another I kept trying it and started to enjoy its unique texture and mild taste. Nowadays I can even eat it straight from a spoon, as long as it is crowned with a little shower of salt and coarsely ground black pepper. A little za’atar would not hurt either.  In this preparation, it offers a perfect creamy texture to the frittata.
 .
I love to pair these babies with some juicy tomatoes, but the time for that is unfortunately over…. Must wait for Spring, which obviously cannot come quickly enough for me (sigh).
.
.
.
.


FOUR YEARS AGO:
Cappuccino Panna Cotta

FIVE YEARS AGO: Chicken Parmigiana, the Thriller

SIX YEARS AGO: Wild Mushroom Risotto

SEVEN YEARS AGO: Tartine Bread:  Basic Country Loaf 

EIGHT YEARS AGO:  Pugliese Bread

SaveSave

SaveSave

SaveSaveSaveSave

SaveSave

SaveSave

SaveSave

SaveSave

SaveSave

IMPOSSIBLY CUTE BACON & EGG CUPS

Should I be embarrassed to blog about a “recipe” that is essentially two ingredients plus seasoning? Potentially, yes. But in reality I am not, because this non-recipe has a nice little unexpected twist to it: the bacon was pre-cooked sous-vide. WAIT!  Don’t run away, you can make it if you don’t have the Anova gadget sitting in your kitchen drawer. But I must say bacon cooked sous-vide and stored in the fridge waiting to shine in any recipe is a very nice item for the busy cook. Or any cook, actually, because this method gets quite a bit of the greasy “feel” of bacon out of the equation, and the texture will be superb.

bacon-egg-cups2

BACON AND EGG CUPS
(from the Bewitching Kitchen)

several slices of bacon, preferably cooked sous-vide
large eggs
salt
Aleppo pepper (or pepper of your choice)

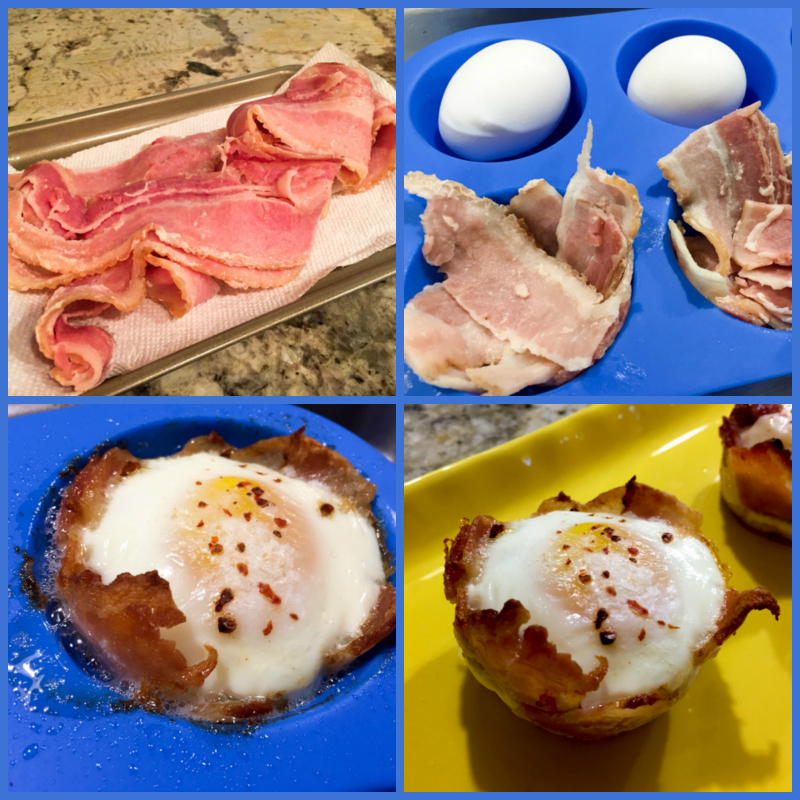
If cooking the bacon sous-vide, place the slices in a bag and submerge in the water-bath set to 147 F (64 C) overnight. I left mine 12 hours, but you can do it longer if more convenient.  At the end of the cooking time, a lot of fat will have accumulated inside the bag. You can save it if you like to cook with it, or discard it.  Place the cooked slices of bacon over paper towels to dry them well. Store them in the fridge until ready to use. If not using sous-vide, cook the bacon on a skillet, but do not allow it to get too brown or crispy.  Drain them well in paper towels before assembling the cups.

Heat the oven to 375 F (175 C).

Cover the bottom of a muffin baking tin with bacon, making sure to come up all the way to the top. Gently break an egg and place it inside. Season with salt and pepper.  Bake according to your preference. I like the egg yolks to be runny, so 10 to 15 minutes maximum will be enough.  If you like your eggs fully cooked, go for 20 minutes, but pay close attention, you don’t want to over-dry the egg.

Remove to a serving dish, and dig in!

ENJOY!

to print the recipe, click here

Comments: I made this recipe for the first time in July, and since then we’ve been cooking bacon sous-vide on a regular basis. To me, it takes bacon to a whole new level, cutting some of the harshness I find overpowering. If you get your pan screaming hot, you can get by simply searing one side of the bacon slice, as the whole thing is already perfectly cooked to start with. But, even if you crisp up both sides, the texture will be perfect.

compositebacon1

These little cups are perfect for breakfast, or a light lunch.  Having the bacon waiting in the fridge makes this preparation a breeze. All you need to do is warm up your oven (we use the Breville that heats up super fast), grab the muffin tin, and you are less than 20 minutes away from a nice meal.   I also made those using prosciutto and ham.  Both work very well, but the sous-vide bacon is my favorite. Keep also in mind that if you’d like a vegetarian version, cooked spaghetti squash strands can be a nice receptacle for the egg. I intend to blog about that sometime. The secret is to  be assertive in the seasoning, otherwise it can be a bit bland.

compositebacon2

For those interested, this is low-carb, Paleo-friendly, Whole30-friendly, but above all, it’s very very tasty!

impossibly-cute-bacon-and-egg-cups-from-bewitching-kitchen

Add to FacebookAdd to DiggAdd to Del.icio.usAdd to StumbleuponAdd to RedditAdd to BlinklistAdd to TwitterAdd to TechnoratiAdd to Yahoo BuzzAdd to Newsvine


ONE YEAR AGO: Pulling Under Pressure

TWO YEARS AGO: Cooking Sous-vide: Two takes on Chicken Thighs

THREE YEARS AGO: Miso Soup: A Japanese Classic

FOUR YEARS AGO: On my desk

FIVE YEARS AGO: A must-make veggie puree

SIX YEARS AGO: Vegetarian Lasagna

SEVEN YEARS AGO:  Brazilian Pão de Queijo