COD COCONUT CURRY

You can use any mild fish for this, or even go with shrimp, but in that case make sure they are as large as you can find. I started from the Brazilian moqueca concept but used Red Curry paste as the main spice. Delicious, and super simple to prepare. I highly recommend you give it a try.


COD COCONUT CURRY
(from The Bewitching Kitchen)

3 large filets of cod
2 tablespoons grapeseed oil
1 shallot, minced
2 celery ribs, finely diced
2 tsp fresh ginger, grated
salt and pepper to taste
1 tablespoon red curry paste (I used this one)
1 can coconut milk
plenty of fresh cilantro, minced
juice of half a lemon
1/3 cup coconut flakes, unsweetened

Start by toasting the coconut, placing the flakes on a non-stick skillet and toasting over medium-heat, watching the pan very very closely, it goes from toasted to burned in a second. Transfer to a bowl and reserve.

Heat the oil in a large pan and sauté the shallots and celery until soft and fragrant. Add the ginger, the red curry paste, season with salt and pepper, and sautéed briefly, then add the coconut milk. Gently simmer for 5 minutes in very low heat. Add the pieces of fish, season again with salt, cover the pan and simmer super gently until the fish is cooked through, 5 to 8 minutes more. Add the cilantro and lemon juice right before serving, and sprinkle with toasted coconut, adding more on your plate if you like.

ENJOY!

to print the recipe, click here

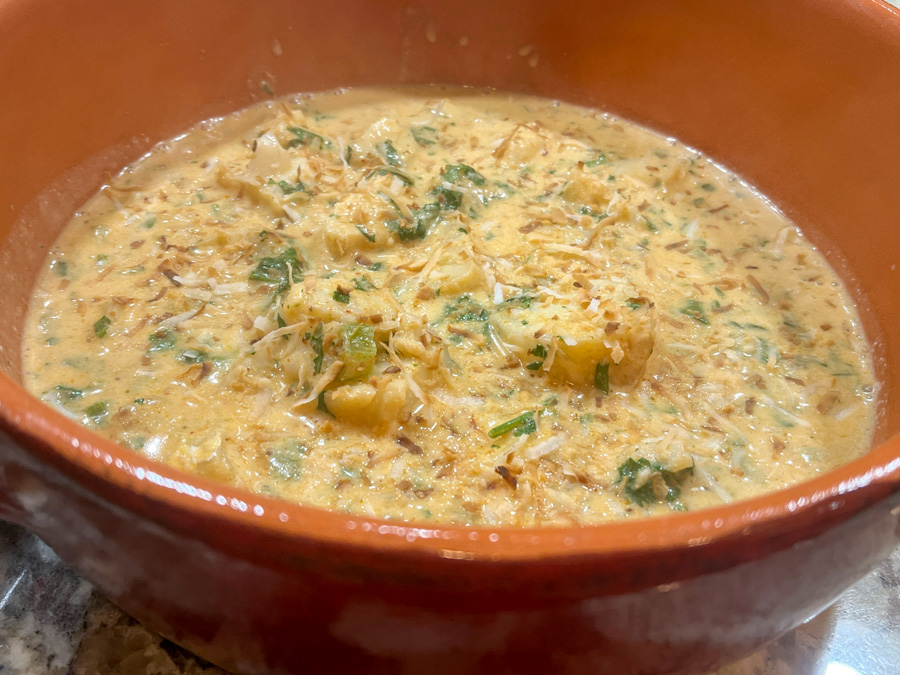
Comments: From start to finish, this will take less than 30 minutes, but it tastes so complex, it is hard to believe it is ready so fast. The best way to enjoy it is over rice (I made brown rice this time), but I had some spaghetti squash in the fridge and that’s the way I had mine. Totally non-traditional, I admit. But it worked great.

As to the red curry paste, you could add more if you like it really spicy, but for us one tablespoon was plenty. I suppose it will also vary with the brand you use, the one I listed is very potent.

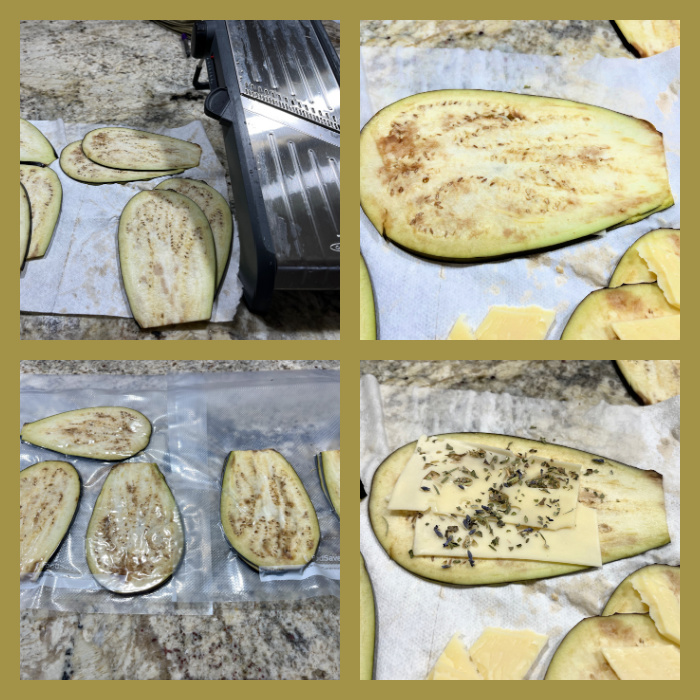
ONE YEAR AGO: The Best Ever Eggplant Parmigiana

TWO YEARS AGO: Roasted Butternut Squash and Grapes with Maple Pomegranate Glaze

THREE YEARS AGO: A Really Big Announcement

FOUR YEARS AGO: Stir-Fried Chicken in Sesame-Orange Sauce

FIVE YEARS AGO: Monday Blues

SIX YEARS AGO: A New Way to Roast Veggies

SEVEN YEARS AGO: Two Takes on Raspberries

EIGHT YEARS AGO: Spice Cake with Blackberry Puree

NINE YEARS AGO: Own Your Kitchen with Cappuccino Panna Cotta

TEN YEARS AGO: Chicken Parmigiana, the Thriller

ELEVEN YEARS AGO: Wild Mushroom Risotto

TWELVE YEARS AGO: Tartine Bread:  Basic Country Loaf 

THIRTEEN YEARS AGO:  Pugliese Bread

BISON A LA MODE DE BOURGOGNE

Living in Kansas we have access to excellent bison meat, in fact not too long ago the husband went to a farm near our town and brought home several packages of bison meat, some for stew, some ground. This is my adaptation of a French classic, some components will be missing to accommodate our food sensitivities. As usual, brown food is so tricky to get nice pictures, so trust me when I say this is delicious, perfect comfort food for the weather we are experiencing.

BISON A LA MODE DE BOURGOGNE
(from the Bewitching Kitchen)

5 strips of thick bacon, cut in large pieces
several tablespoons olive oil
2 pounds bison stew meat, cut in pieces
salt and pepper to taste
4 large carrots, peeled, cut in 1/4 inch slices
2 shallots, diced
1 can diced tomatoes, drained (14.5 oz)
1 bouquet garni, made with parsley, thyme and bay leaves
1 bottle red wine
2 cups cremini mushrooms, quartered
1 tablespoon butter
fresh parsley, minced

Sauce the bacon without any added fat, until golden brown and starting to get crispy. Remove pieces to a paper towel to drain excess fat. Take one tablespoon of bacon fat, add to a Dutch oven and add a little more olive oil. Season the bison meat with salt and pepper, and sautée in batches until it starts to get brown. Remove to a bowl, and add the bacon pieces to the bowl.

If needed, add more oil to the pan and sauté the carrots and shallots for 5 minutes or so. Add the tomatoes, the wine, and the bouquet garni. Deglaze the pan with a wooden spoon, then place the meat and bacon back. Season with a little more salt, cover the pan, and place in a 325 F oven for 3 hours. Check after 2 hours to make sure it is not getting too dry. If there is very little liquid, add water. Meat should be super tender at the end of cooking.

About 10 minutes before serving, saute the mushrooms in butter, seasoning with salt and pepper. Add the mushrooms to the bison stew, add fresh parsley and serve. Adjust seasoning if needed.

ENJOY!

to print the recipe, click here


Comments: Bison is a fantastic type of meat, very flavorful but not excessively fatty. A little bit of bacon, is not only traditional, but needed when using such a lean meat, it does pump up the flavor. The amount of liquid might seem excessive (full bottle of wine!) but in fact I had to add quite a bit more water after 2 hours. If you are in our team, that is – heading to real cold weather – consider making a big batch. Comfort food at its best!

ONE YEAR AGO: Masala Mashed Potatoes

TWO YEARS AGO: Lessons from Tanya: Sugar Cookie Silhouettes

THREE YEARS AGO: Cherry-Chipotle Chicken Thighs

FOUR YEARS AGO: White Chocolate Mini-Mousse with Sugared Cranberries

FIVE YEARS AGO: You Say Ebelskiver, I say Falafel

SIX YEARS AGO: Happy Thanksgiving!

SEVEN YEARS AGO: Two Takes on Raspberries

EIGHT YEARS AGO: Spice Cake with Blackberry Puree & The Global Pastry Review

NINE YEARS AGO: Own Your Kitchen with Cappuccino Panna Cotta

TEN YEARS AGO: Chicken Parmigiana, the Thriller

ELEVEN YEARS AGO: Wild Mushroom Risotto

TWELVE YEARS AGO: Tartine Bread:  Basic Country Loaf 

THIRTEEN YEARS AGO:  Pugliese Bread

VANILLA MINI-CAKES WITH HONEY PEARS

The cake batter for these cupcakes is very simple to make, the only other step needed is preparing the pear topping, but if you want to make your life real easy, you can do that the day before and keep it in the fridge. They don’t need anything but a light shower with powdered sugar.


VANILLA MINI-CAKES WITH HONEY PEARS
(adapted from several sources)

for the pear topping:
2 tablespoons (1/4 stick) butter
4 Anjou pears, peeled, cored, cut in small cubes
1/3 cup (65g) golden brown sugar
2 tablespoons honey


for the cakes:
3/4 cup (185g) unsalted butter, room temperature
1 cup (200g) sugar
4 large (200g) eggs
1 teaspoon vanilla extract
1 + 1/3 cups (160g) all purpose flour
1 teaspoon baking powder
1/2 teaspoon salt

powdered sugar


Melt butter in a large non-stick skillet, add the pears and sauté for 5 minutes, until tender. Add brown sugar and honey, cook until pears are evenly coated, about a minute or so. Transfer to a small bowl, cover and put in the fridge until needed.

Heat oven to 350°F. Coat 8 mini-cake pans with non-stick spray. Beat butter and sugar until smooth. Add eggs, one at a time, beating constantly. Add the vanilla. Which the flour, baking powder and salt in a bowl, and sift that mixture into the butter/egg, mixing gently until combined.


Divide the batter among cups, filling a little more than half-full. Spoon 1 to 2 tablespoons of the pear mixture on top of the batter. Bake until a toothpick inserted in the center comes out mostly clean, about 25 minutes. Let rest 15 minutes before un-molding. Right before serving, add a little powdered sugar on top with a sieve.

ENJOY!

to print the recipe, click here

Comments: For the cakes, I used one of my favorite pans, which I bought a long time ago on eBay. I have not been able to find a source to get it in the US, but you can see it here. It is the same pan I’ve used for mini Victoria cakes (flash back post here). It bakes like a dream, and since the bottom is loose, you can push the cakes out easily. I love the look of the mini-cakes, they get perfectly straight edges. If you don’t have a similar pan, use a regular cupcake pan. Maybe the number and size of your cakes will be different but it will work.

The same approach will work with other fruits, and I also think pineapple could be wonderful, so that’s an idea for future adventures…

ONE YEAR AGO: Buttermilk Roast Chicken

TWO YEARS AGO: Cauliflower and Sweet Potatoes in Yogurt-Curry Sauce

THREE YEARS AGO: Panettone, Wild-Yeast Version

FOUR YEARS AGO: Turkey Chili Under Pressure

FIVE YEARS AGO: Tiramisu Macarons

SIX YEARS AGO: Cider Mini-Cheesecakes with Caramel Sauce

SEVEN YEARS AGO: Rustic Ciabatta and Mini-Meatloaves

EIGHT YEARS AGO: Green Rice

NINE YEARS AGO: Potato-Crusted Italian Mini-Quiches

TEN YEARS AGO: Beetroot Sourdough for the Holidays

ELEVEN YEARS AGO: Cod Filet with Mustard Tarragon Crust

TWELVE YEARS AGO: Soba Noodles: Light and Healthy

THIRTEEN YEARS AGO: Potato-Rosemary Bread

COMPRESSED EGGPLANT & GRUYERE SLICES

This recipe blew my little mind… You need two special gadgets to make it, a mandolin-type slicer and a vacuum sealer. My slicer is an OXO, easier to work and adjust than the original French model. Super thin slices of eggplant with a little cheese in the middle get compressed and later roasted at high temperature. It is eggplant like I’ve never had before.

COMPRESSED EGGPLANT & GRUYERE SLICES
(from the Bewitching Kitchen, inspired by Chef Tony Botella)

1 large eggplant, sliced very thin (3mm maximum) with a mandolin
Gruyere cheese cut in thin slices
Herbes de Provence to taste
salt to taste
1 tablespoon olive oil
balsamic vinegar to taste
1/4 cup sliced almonds, toasted

Lay one eggplant slice on a flat surface, place a slice of cheese in the center, sprinkle with Herbes the Provence. Place another eggplant slice on top, carefully slide into a vacuum-sealable bag. Once all the little sandwiches are done, seal the bag. Place in the fridge for at least one hour, but you can leave it for a couple of days.

Fifteen minutes before dinner, remove them from the bag and place on a silicone mat, gently brush with olive oil gently on both sides, season with salt. Roast at 425F for 12 minutes, until golden. A little cheese might escape to the side, nothing wrong with that, the silicone mat makes it easier to lift.

Cut each slice in half, place in a serving dish, drizzle with balsamic and sprinkle almonds on top.

ENJOY!

to print the recipe click here

Comments: The key to this recipe is slicing the eggplant very thin. I doubt you will be able to do it by hand, so a mandolin is a must. I think different types of cheese could be fun to try, for instance a cheese with Habanero to heat things up. But it must be a reasonably sturdy cheese to avoid excessive melting. Gruyere was perfect.

I normally don’t care for the eggplant skin, but in this preparation it did not hurt anything. I will be making this again soon. It would be great as a little special appetizer at a dinner party, with a nice sourdough bread to go with it. Or as a first course on a meal. A fun new technique to play with!

ONE YEAR AGO: Charcoal-Painted Spelt Sourdough

TWO YEARS AGO: Lime-Ganache Bonbons

THREE YEARS AGO: The Dobos Torte

FOUR YEARS AGO: Coffee-Caramel Entremet Cake

FIVE YEARS AGO: Fennel Soup with Almond-Mint Topping

SIX YEARS AGO: Eataly

SEVEN YEARS AGO: Spaghetti Squash Perfection

EIGHT YEARS AGO: Skinny Eggplant Parmigiana

NINE YEARS AGO: Supernova Meets Wok

TEN YEARS AGO500 Posts and The Best Thing I ever made

ELEVEN YEARS AGO: Back in Los Angeles

TWELVE YEARS AGO: White House Macaroni and Cheese

THIRTEEN YEARS AGO: Korean-Style Pork with Asian Slaw

VEGAN CASHEW BUTTER BONBONS

These are absolutely luscious and not that hard to make as – believe it or not – you won’t have to temper chocolate to make them. The silicone mold is also optional, you can use mini-muffin tins, although I am not sure how easy or tricky it might be to get the bonbons out.


VEGAN CASHEW BUTTER BONBONS
(inspired by Vegan Treats)

115g cacao butter
3 tablespoons cocoa powder
3 tablespoons maple syrup
3 tablespoons creamy cashew butter
gold luster powder to decorate (optional)

If using gold luster powder, brush the inside of the molds with it. Reserve.

Melt the cocoa butter in the microwave using very low power. As soon as it melts, stop heating it. Stir the cocoa powder and maple syrup. Pour the mixture in the molds filling it halfway. Place the mold in the fridge for about 15 minutes to set.

Remove from the fridge, spoon a small amount of cashew butter in the center of each cavity, then pour the remaining chocolate on top to cover completely the cashew butter. Place in the fridge for at least 30 minutes before un-molding the bonbons. For added safety, I like to place the mold in the freezer for 5 minutes.

Store in the fridge for about 10 days. They stay well at room temperature for at least a couple of hours.

ENJOY!

to print the recipe, click here

Comments: This is really super easy and the results go beyond the effort by a long shot. I do not have a link for the mold which I’ve had for a long time, but many different shapes and sizes will work, just do a search online. They will stay good in the fridge for a long time, but won’t melt at room temperature, I actually left them sitting over a counter for a couple of days and nothing bad happened. The best option if you make them is to store them in the fridge and bring them to room temperature for one hour or so before indulging.

ONE YEAR AGO: Turkey-Bison Jalapeño Chili

TWO YEARS AGO: Chocolate Bonbons with Mango-Ganache Filling

THREE YEARS AGO:  Giant Cookie Meets Mousse

FOUR YEAR AGO: The Brazilian Battenberg

FIVE YEARS AGO: Salzburg Sourdough

SIX YEARS AGO: If I had One Hour

SEVEN YEARS AGO: Apple Cinnamon Oatmeal Cake

EIGHT YEARS AGO: Sourdough Rye Bread with Flaxseeds and Oats

NINE YEARS AGO: Apricot-Raspberry Sorbet: A farewell to Summer

TEN YEARS AGO: Marcela’s Salpicon

ELEVEN YEARS AGO: Pork Kebabs

TWELVE YEARS AGO: Fondant au Chocolat

TWELVE YEARS AGOGot Spinach? Have a salad!