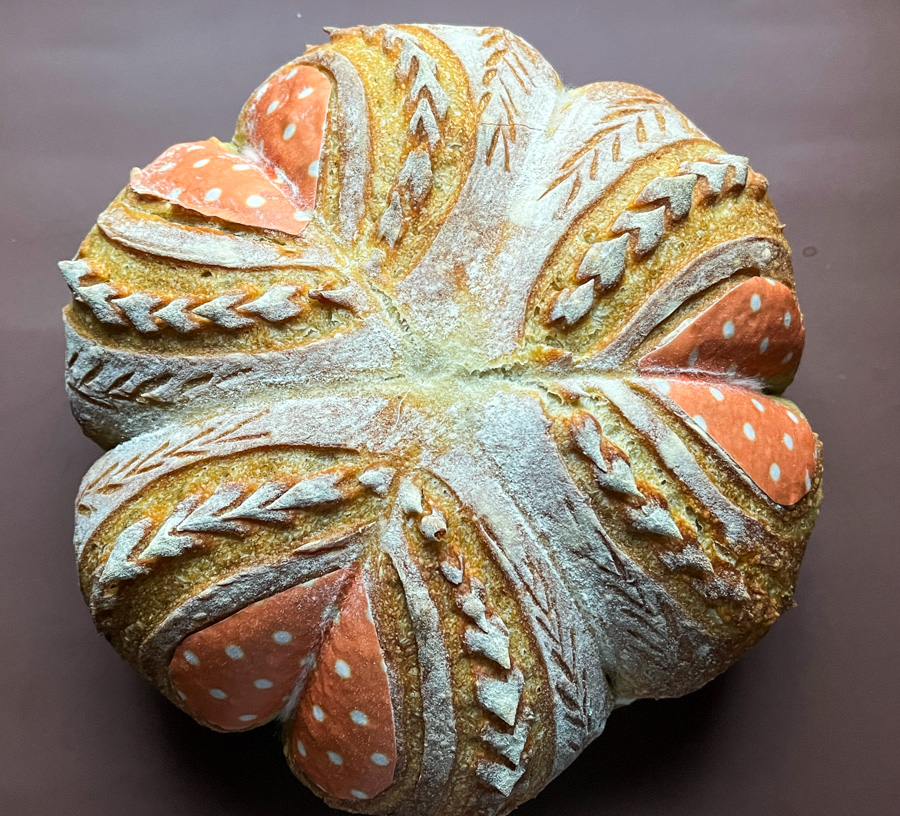
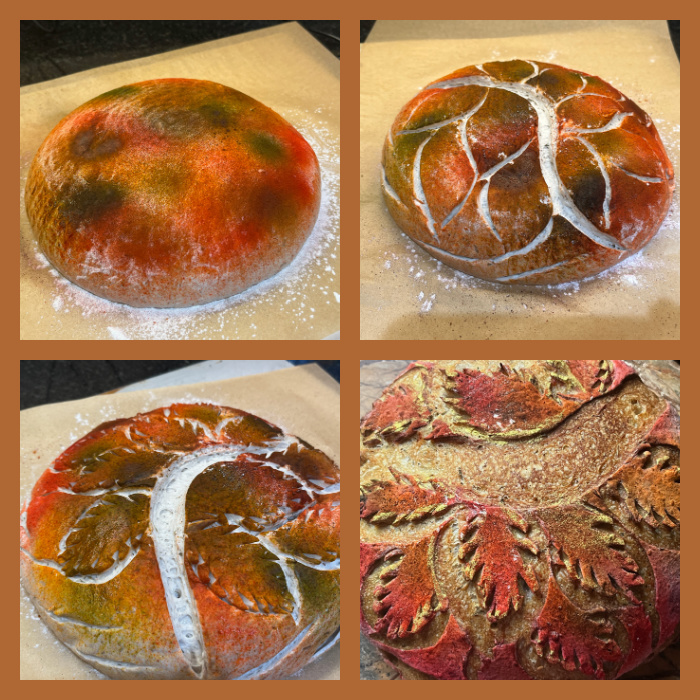
Once again I played with wafer paper to decorate sourdough bread, but this time I coupled it with a few strings to generate a cute shape, often used to turn the bread into pumpkin shape, but I opted for a more romantic outcome… Nothing personal against pumpkins, I do love them and honored them in the past (click here).
Start by cutting wafer paper in small heart shapes…. You will need three, and three long strings that you should rub very lightly with oil to facilitate removing later.
Place the strings equally spaced over the proofed dough, flip the dough over parchment paper, and tie the strings on the top, trying to hit the center as closely as possible. Gently insert the paper, coat the surface with flour and score the bread in any design you like. I used the Sonic blade and small scissors, as I often do.
Bake as you normally do, I keep the lid for 30 minutes and remove it for a final 15 minutes, all at 450F. Remove the strings, and allow the bread to cool completely before slicing.
You can use different patterns for the small hearts, or cut plain wafer paper and paint it yourself.
It is really amazing how well the colors in the wafer paper stay pretty much unchanged with baking, much better than air-brushed or gel colors. I hope you give this technique a try and have as much fun with it as I am having…
Talk about a classic cookie, loved in more than 100 countries, born as Hydrox in 1908, sold in many flavors, some do not exist anymore (Lemon Meringue, anyone?). More than 40 billion Oreos are made every year, so why not make 20 or so in your own kitchen? Here is how.
FOR THE COOKIES 1 cup (225g) unsalted butter, softened 1 cup (200g)white sugar 2 teaspoons salt 2 large eggs 2 cups (250g) all-purpose flour 1 heaping cup (140g) dark cocoa powder ½ teaspoon baking soda
CREAM FILLING ½ cup (113g) butter, softened 2 cups (240g) powdered sugar 1 teaspoon vanilla
Using a Kitchen Aid type mixer with a paddle attachment, cream together butter and sugar until light and fluffy. Beat in eggs until fully incorporated. In a bow, whisk together the flour, cocoa powder, and baking soda. Add the dry ingredients to the wet ingredients, and mix together until combined.
Turn the dough out onto your surface and push together into a flat square. Wrap the dough in plastic wrap and refrigerate for 1 hour.
Heat oven to 325˚F. Remove the dough from the fridge, roll out and if desired, use a patterned rolling pin or other embossing gadgets to create a pattern. Cut the cookie rounds and freeze for 10 minutes before baking for about 15 minutes.
To make the filling, combine butter, powdered sugar, and vanilla in a medium mixing bowl. Beat together until light and fluffy. Assemble the cookies by spreading a generous scoop of the icing onto one of the cookies and sandwiching it with another.
Comments: These are definitely for intense chocolate lovers, as the black cocoa pushes the chocolate flavor to higher levels. They are of course, totally fine made plain, but I cannot help dressing them up a bit with the pattern on top.
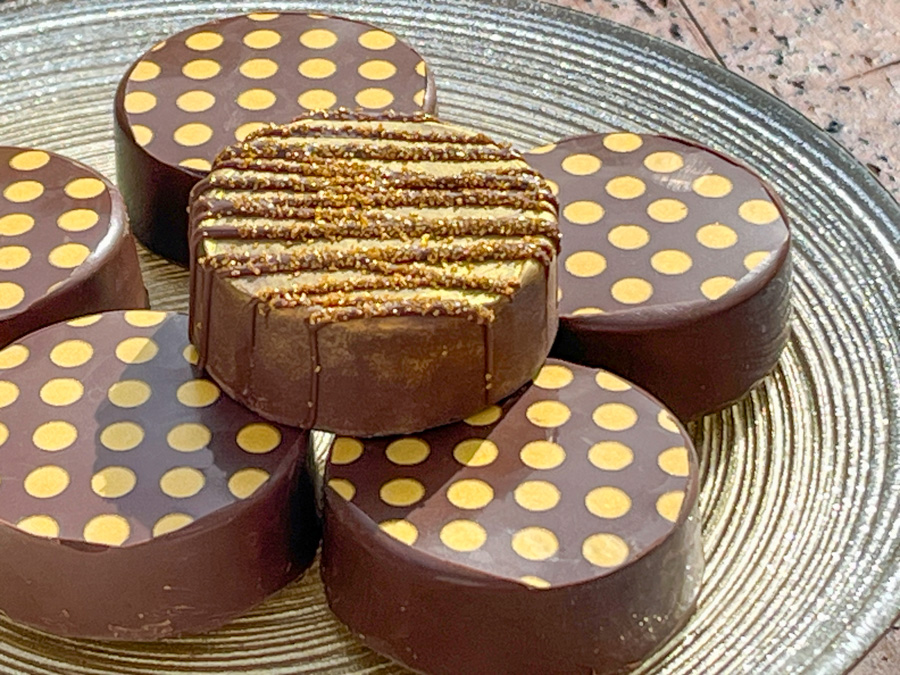
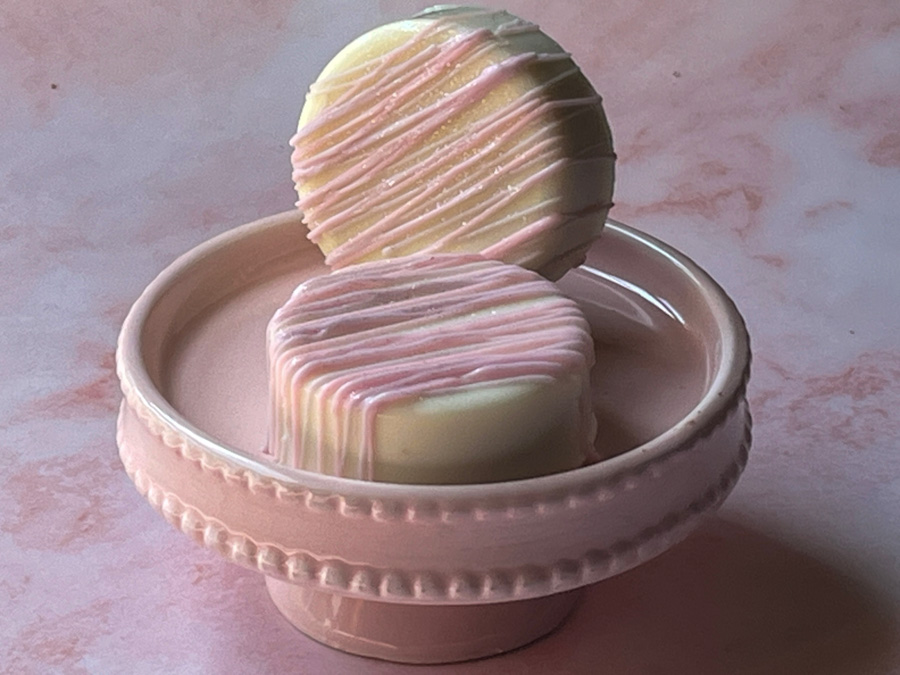
And now, let me take you through a little Chocolate-Covered Oreo Adventure! You need to get the appropriate molds, either plain or with designs and go to work. When using plain molds, I like to add chocolate transfer sheets to make them more visually appealing.
TRANSFER SHEETS DARK AND GOLD
TRANSFER SHEETS MISCELLANEOUS
The thing with transfer sheets is that unfortunately you get what you pay for. It is possible to find quite affordable options on amazon, etsy, but if you pay a little more you will be much happier with the results. Less flaking, sharper images. One great brand (the one I used for the ones below) is called LUCKS but apparently they are not in business anymore, it broke my heart. I had those golden dot sheets for years, and wanted to get some more.
You can dress up Oreos using molds that generate a pattern. I sometimes dye a small portion of compound chocolate and paint areas of the mold before pouring the contrasting color. You need to let the painted area fully set before pouring the warm chocolate on top.
REACH FOR THE STARS
For the stars, I dyed some chocolate with yellow ad also brushed the inside of the mold with gold. Next time I will go for more contrast.
WORSHIP THE SUNFLOWER
One of my favorites, the sunflower mold, you just need to be careful painting the center so that the edges stay sharp.
BAKE WITH YOUR HEART
Making chocolate-covered Oreos is a weekly event for me, as it turns out they are THE most popular item with the homeless meals. That and a certainbanana bread that I shared not too long ago. I hope you enjoyed this post, and consider playing with Oreos also.
In My Kitchen posts are hosted by Sherry, from Sherry’s Pickings. Please visit her site to see whateverybody else is sharing this month. I join four times each year, on the first day of January, April, July and October. If you are a food blogger, considering taking part of this fun event. It is chance to share those little things you bought or received as gifts and that make your life in the kitchen easier.
In our kitchen…
Unfortunately, there is no “before” picture, but this table was in horrible shape, as we used it during pandemic times to clean all our grocery stuff with 10 to 20% bleach, so it got all stained and scratched. The husband sanded it and finished with Benjamin Moore Stays Clear and it is now looking absolutely great!
In our kitchen….
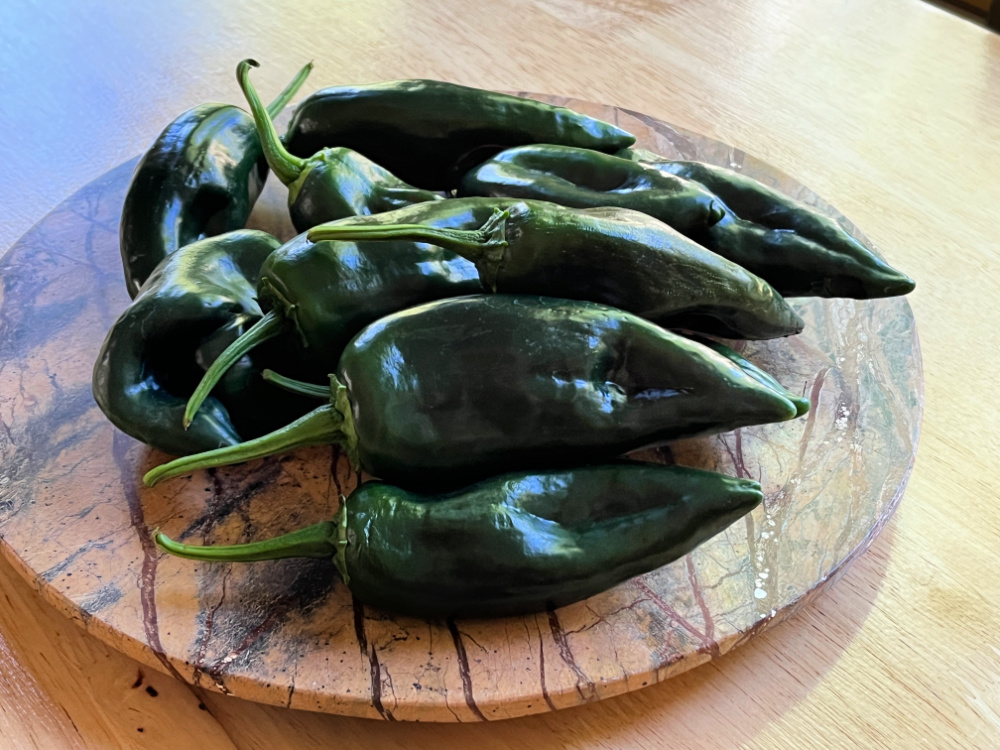
Still thanks to the hard work of the husband, the final harvest (or almost final) of poblano peppers. We do have about 10 more to be brought back inside in the next few days.
In our kitchen…
Let’s hope this is the final version of an olive oil container, after yours truly broke yet another ceramic one that had been featured only 3 months ago. You cannot break stainless steel. And this one works great, it does not pour too much, it does not pour too little. Available here.
In our kitchen…
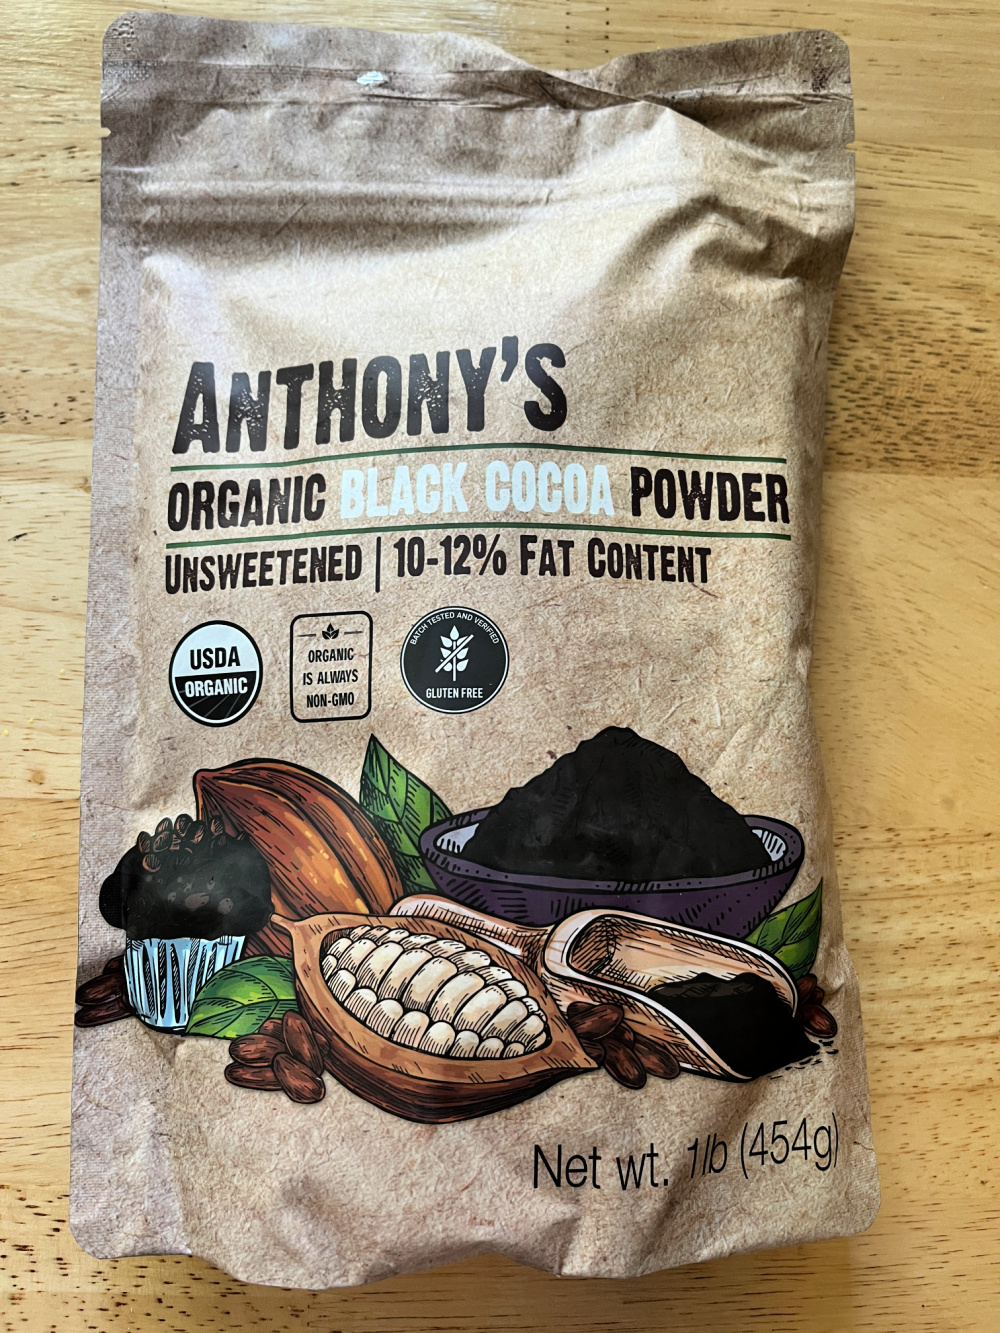
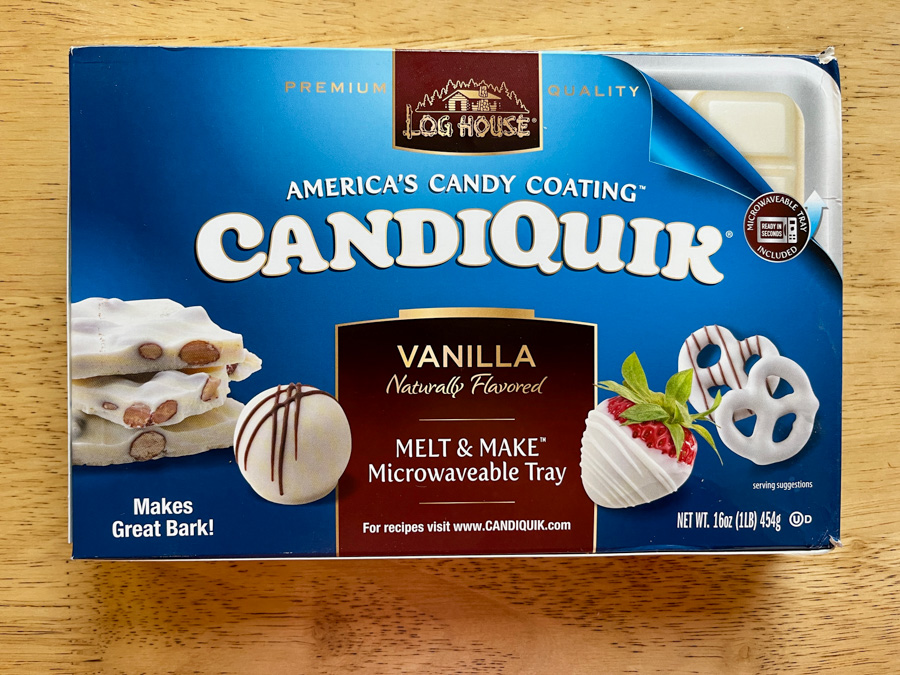
My favorite black cocoa to make chocolate cutout cookies, or Oreos. Intense, dark, perfect. Available here, if you cannot find where you live.
In our kitchen….
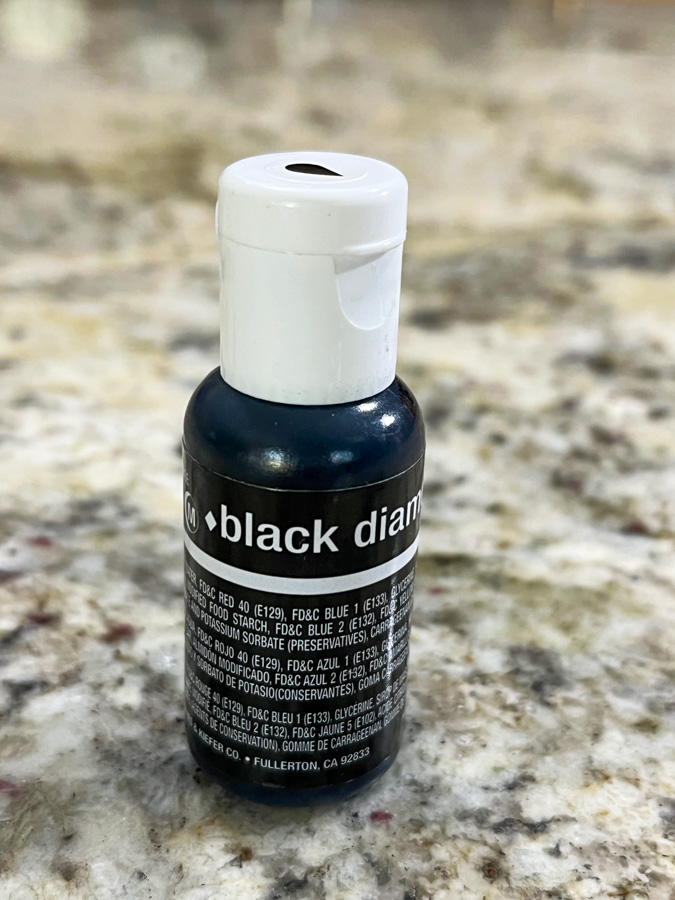
If you decorate cookies or even cupcakes, you know how hard it is to make a nice black color. Recently someone in a cookie decorating site recommended this black color and it is indeed a game changer. No more mixing black hours or a day in advance, no more emptying the bottle of dye into your icing… This is fantastic, I highly recommend it. Black Diamond from Chefmaster.
In our kitchen…
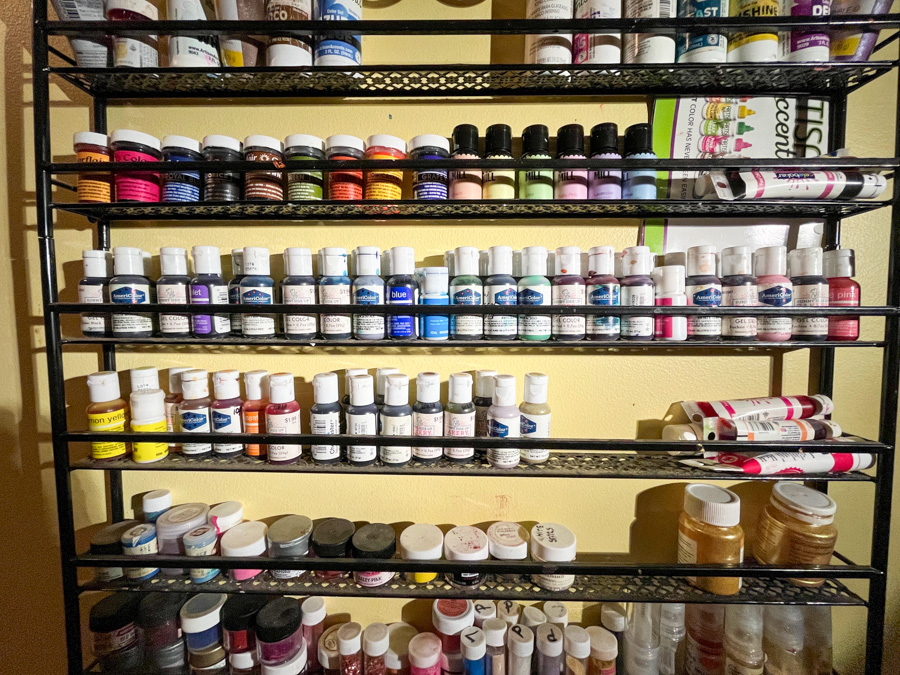
Speaking of gel colors… this is the way I organize my “small” collection. First and second rows are organized by brand, as those bottles have different shape. Below that they get organized by color following the rainbow… The bottom two rows are for luster powders and dusts. I’ve had this shelf since 2018, it is not available in amazon anymore, but it is originally to store nail polish.
In our kitchen…..
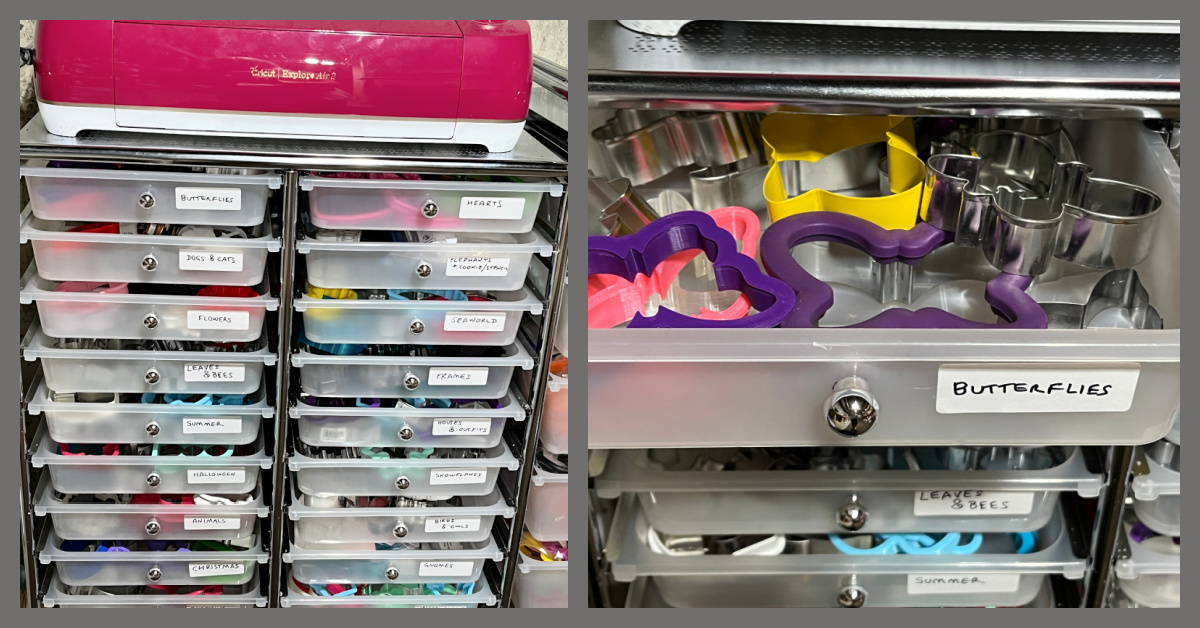
Still in the subject of organization, the way I store cookie cutters. These shelves are easy to assemble, sturdy enough (particularly considering they are not expensive), and do a very good job. Many styles available, you can check the store at amazon with a click here.
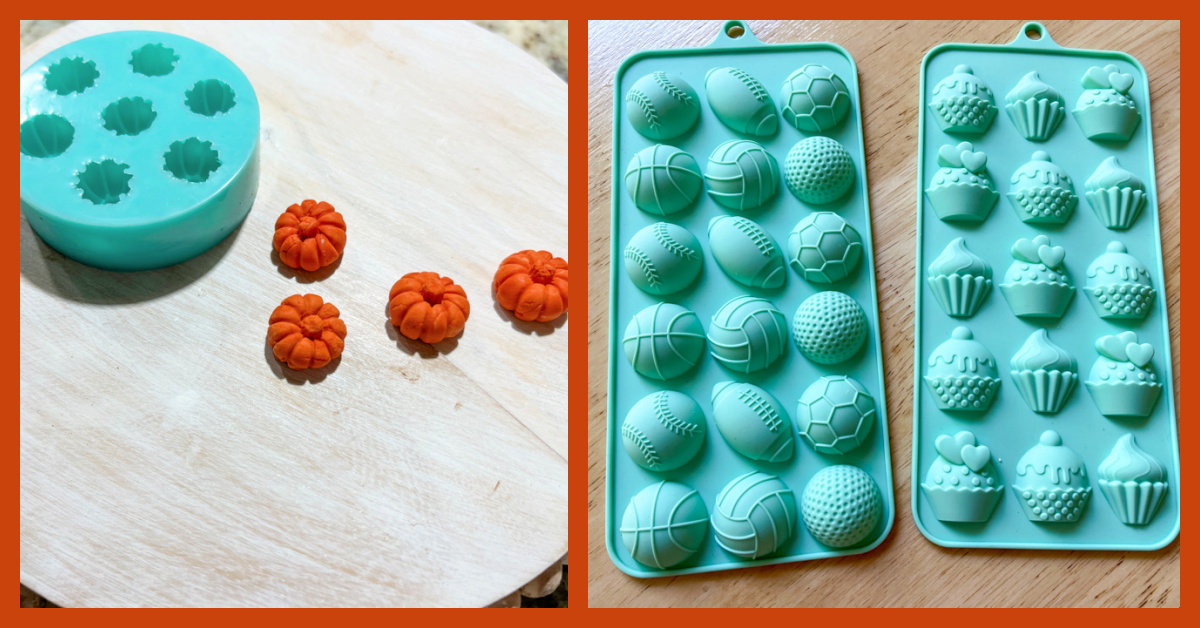
In our kitchen….
Some new silicone molds for fondant, small pumpkins and larger ones that might even work for baking a little cookie, need to experiment a bit to make sure.
In our kitchen….
I make chocolate-covered Oreos very often to include in my donation box of Fridays. I am always trying new brand of compound chocolate for that and this one is really nice, make a shinny coating and has pleasant vanilla flavor, no aftertaste. Available (sometimes) on amazon, click here.
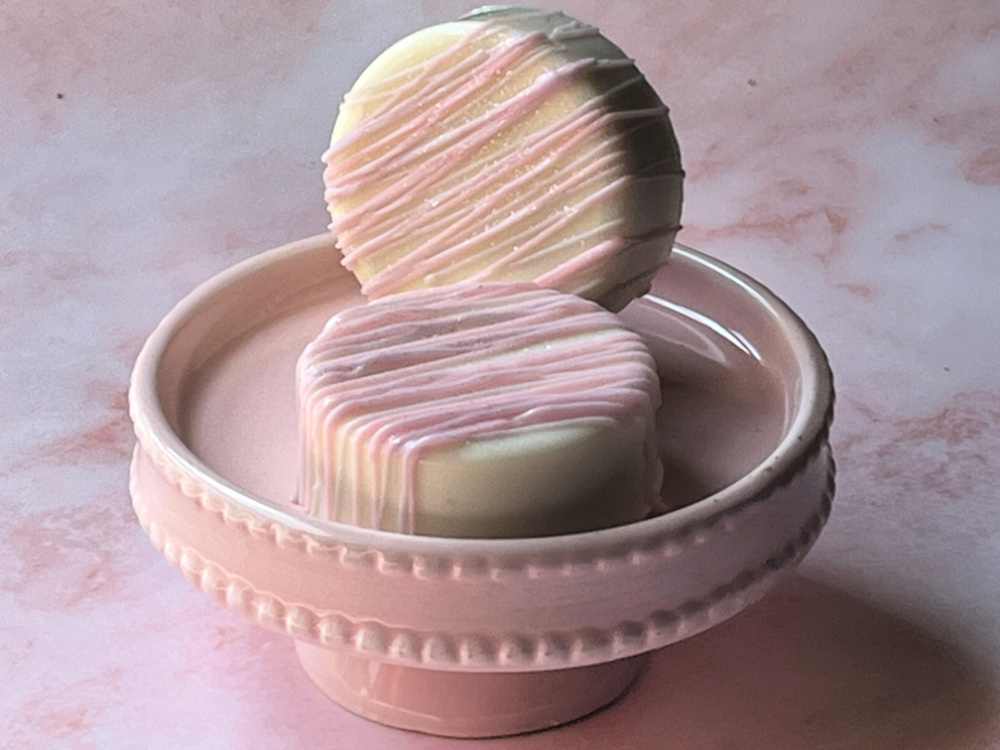
In our kitchen…
White Oreos covered with that compound chocolate, part of it dyed with food gel color for the drizzle.
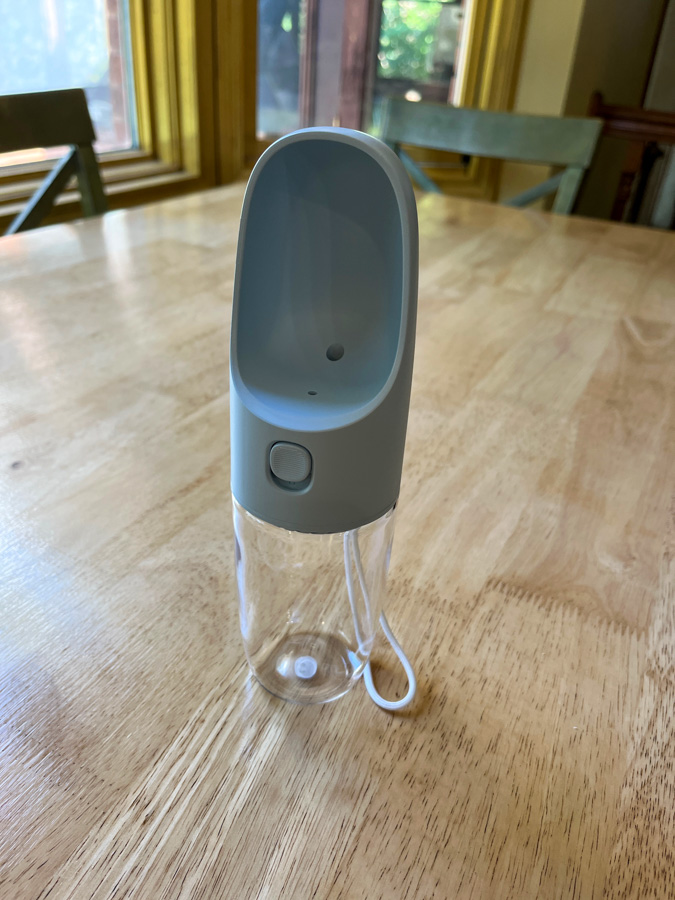
In our kitchen…
This is something we bought to take with us in walks with the pups. It is great, you press the button and water flows into the small cup that they can lick as if from a small bowl. Several sizes available (click here).
Speaking of dogs, here they are to bark their piece….
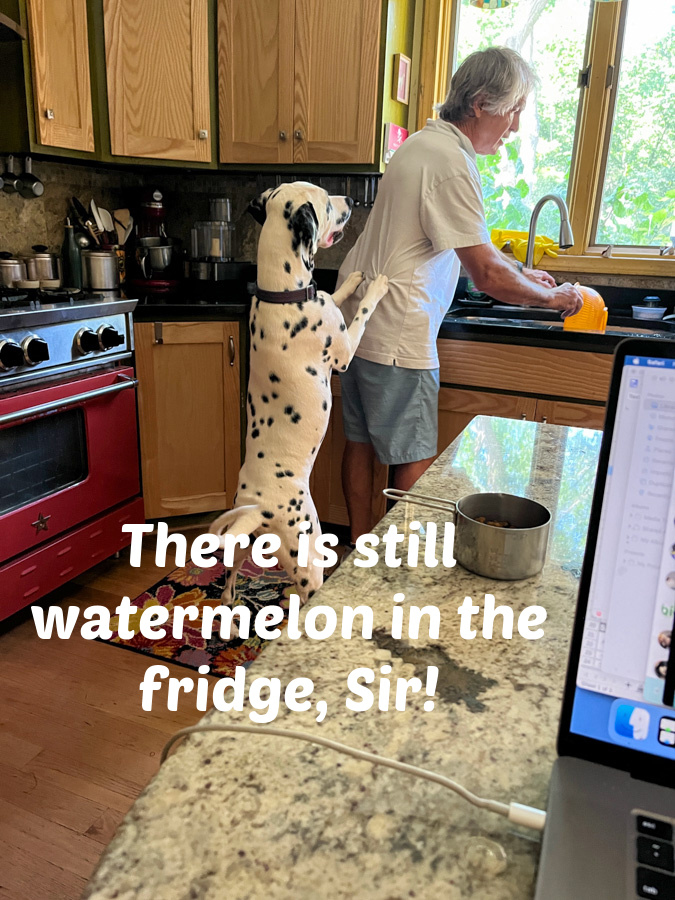
First, the shocking news! Star is going to be a big, very big girl… She turned only 6 months last week, and we learned that at this age, Dalmatians are at 60% of their final size. We are clearly doomed. She is already very strong, and has turned our house upside down, in many adorable ways…. Please send help, we might need it.
Below, a very rare scenario that needed to be documented so we could all believe our eyes…. Oscar barely tolerates the pups around him, but apparently a pair of soft pillows over a comfy couch can make miracles.
The Gang of Three has enjoyed a very nice Summer, all things considered, but truth be told, the “K-word” floated around once.
Yes, they had to endure a few days in the Dog Prison, where they had access to a lot of grass, playmates, and even a pool, that none of them showed any interest on. Oh, well, such is life… Of course, their good life in the Kingdom of Tatarrax was soon resumed, we cannot stay too long away from them…
Prince is now fully golf-trained: sits while Phil hits his balls, waits for him to putt, and runs to the cart at the end of each hole… Star needs a lot more work before she can be trusted to be a caddy, but we are making progress…
Prince is turning out to be a pup of refined taste..
And when it is all over and dishes are under way….
Oscar clearly believes the Whippersnappers lack class and dignity….
Particularly in light of his little sister’s sleeping etiquette….
His brother’s odd habits…
Or, come to think of it, his non-Royal eating etiquette…
Or the She-Devil’s approach…
No, Osky stands clearly higher above it all…
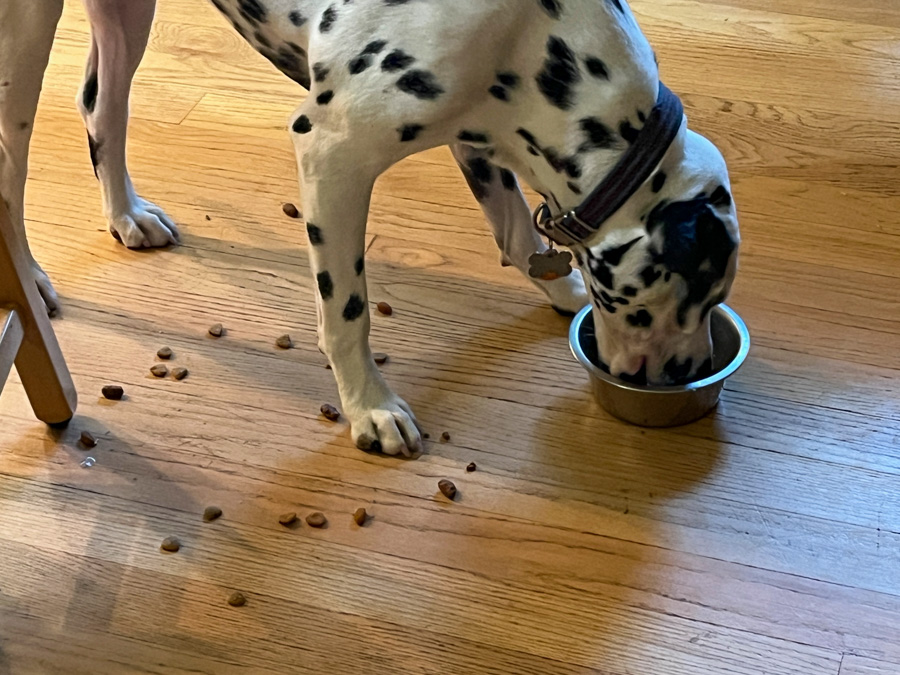
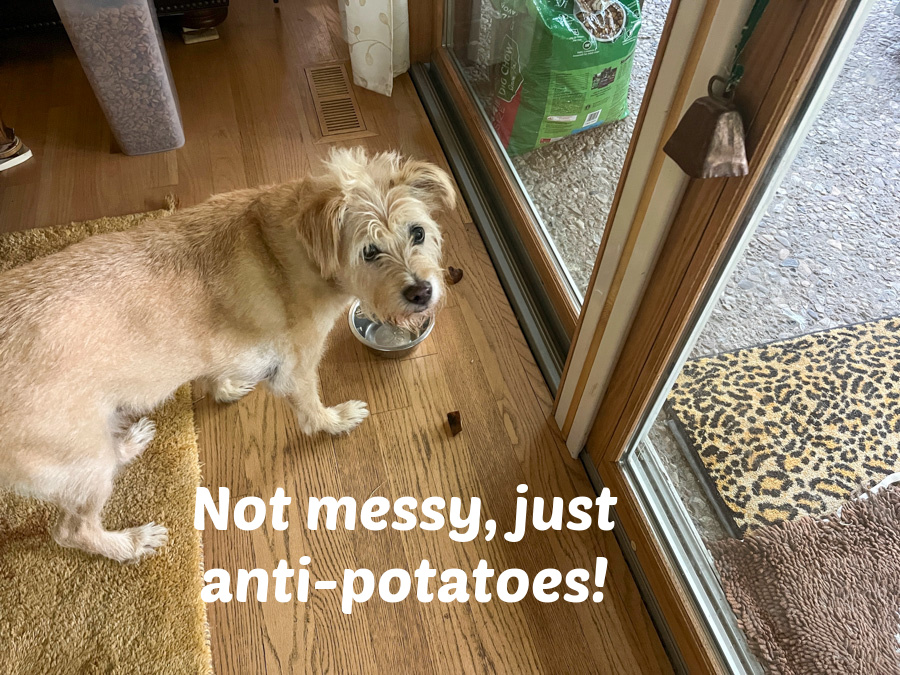
Not so fast, buddy! Sorry to burst your bubble, but you can be quite messy too!
AM I STILL YOUR NUMBER ONE?
THERE IS PLENTO OF LOVE TO GO AROUND THE KINGDOM, OSKY BOY! NO WORRIES THERE…
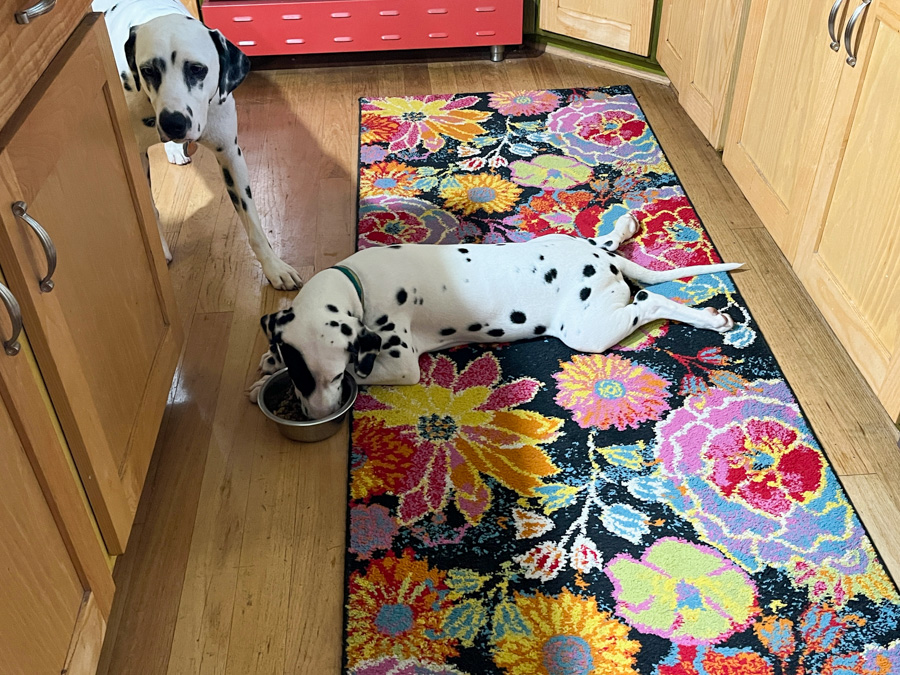
But, if we really want to talk about love, we have a couple of experts…
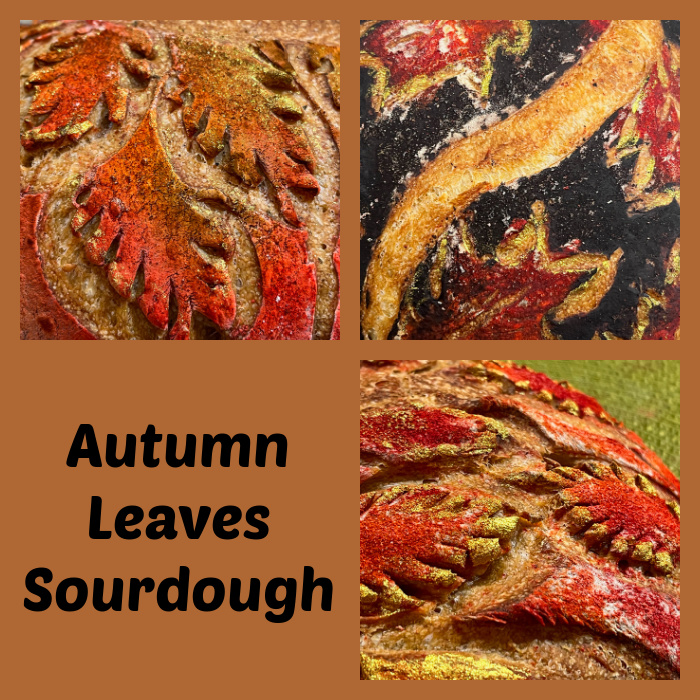
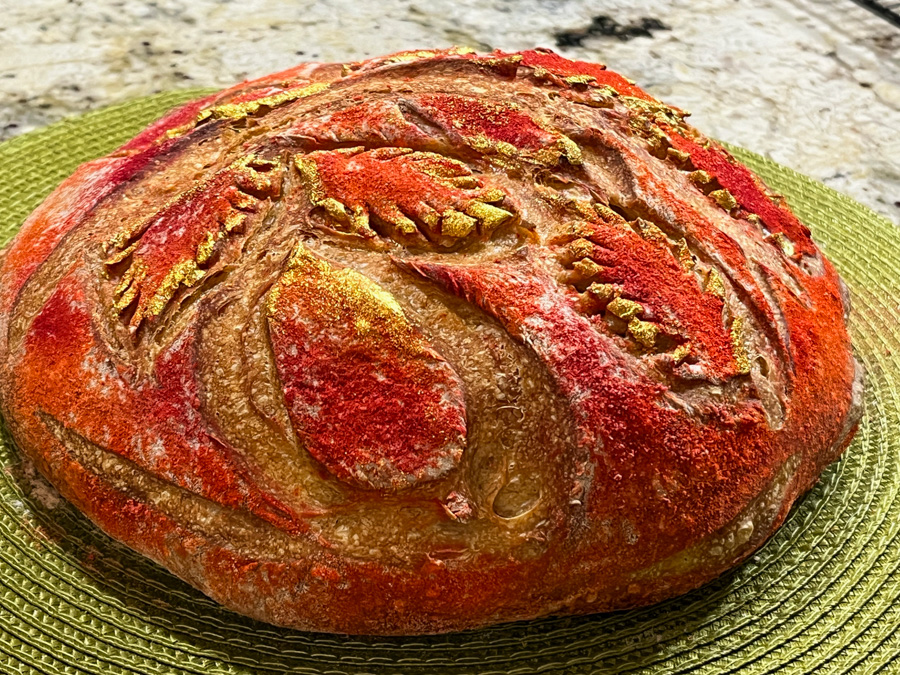
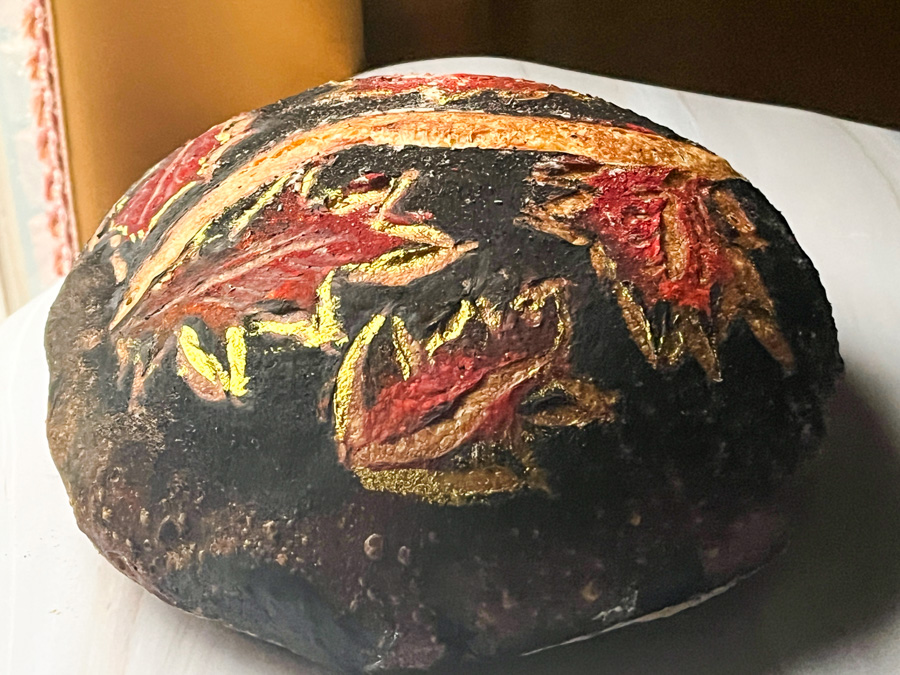
Fall is here, and to celebrate one beautiful season with sourdough bread, I tried a new technique, coupling air-brushing with leaf shapes. You can use any recipe you like, these were flavored with either Za’atar, Smoked Paprika, or Herbes de Provence.
AUTUMN LEAVES SOURDOUGH VERSION #1
I started air-brushing a mixture of three colors, red, orange and green…
However, the green was totally lost during baking, so in my second attempt I skipped that color and went with red, orange and yellow instead….
AUTUMN LEAVES SOURDOUGH VERSION #2
I also got a little more assertive with the gold painting of the edges, which happens after baking.
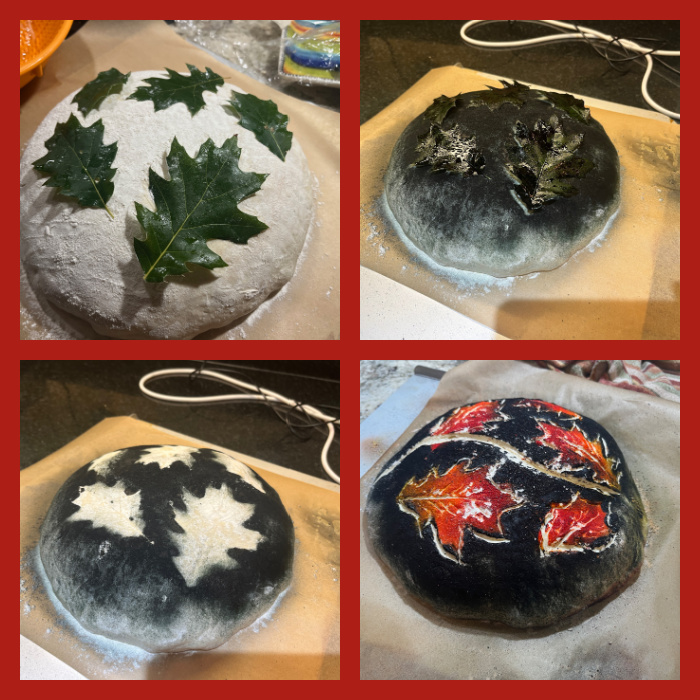
For my last version, I changed things around and used real leaves to mask parts of the dough. Spray-painted black all over, then came back with the air-brush to highlight the leaves with red and yellow.
AUTUMN LEAVES SOURDOUGH VERSION #3
It is by far the most dramatic, and what I like about air-brushing is that contrary to charcoal or cocoa powder, the black color won’t run on your fingers as you touch the bread to slice it.
Stay tuned for more adventures with air-brushing and bread, so many possibilities! A lot of inspiration available on Instagram and Pinterest, it is hard to decide what to try next…
This is a sous-vide preparation, but you can change to regular cooking in any way you like to make pork tenderloin. The recipe was adapted from Melissa Clark, via The New York Times (click here for original post). I usually increase the cooking temperature because we dislike pork that is still pink in the center, no matter what the “experts” say. If you prefer it less done, set your sous-vide to 135F to 140F.
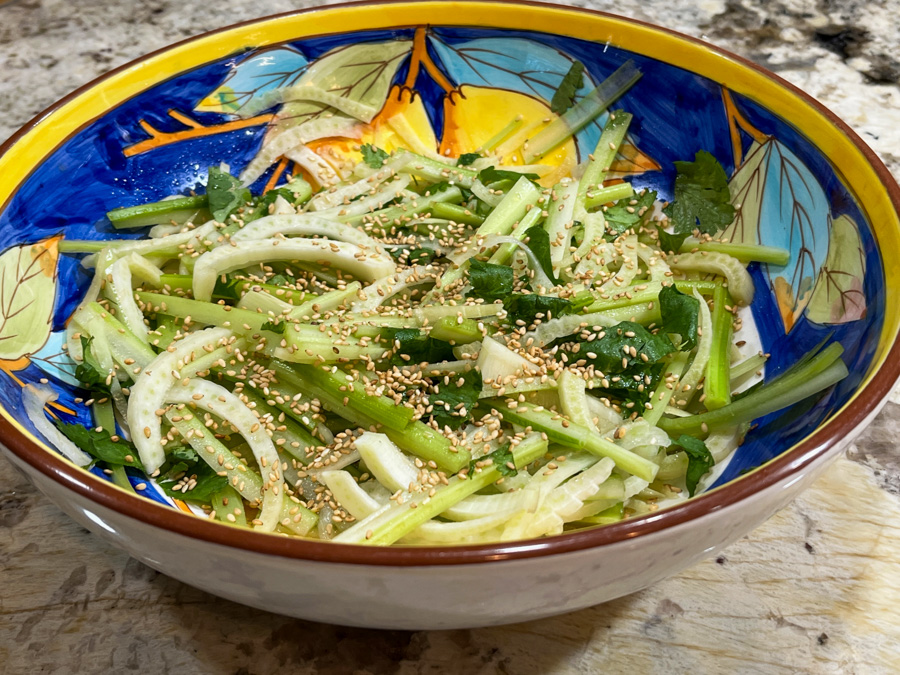
SOUS-VIDE PEANUT-GINGER PORK WITH CELERY SLAW (adapted from The New York Times)
for the pork: 3 tablespoons smooth peanut butter 2 tablespoons sesame oil 2 tablespoons soy sauce 2 tablespoons fresh lime juice 1 tablespoon finely grated ginger 2 teaspoons dark brown sugar 2 teaspoons Sriracha or chile-garlic paste 1½ teaspoons fish sauce 2 (1-pound) pork tenderloins, trimmed Extra-virgin olive oil, as needed
for the celery slaw: 2 teaspoons toasted sesame oil 2 teaspoons rice vinegar ½ teaspoon freshly ground black pepper ¼ teaspoon fine sea salt 2 small celery stalks, cut crosswise into thirds, then very thinly sliced lengthwise 1 cup thinly sliced fennel bulb fresh cilantro leaves Chopped roasted peanuts, for garnish sesame seeds for garnish
Fill a pot with water, add the sous-vide machine and set the temperature to 150 degrees.
Meanwhile, prepare the sauce: In a small bowl, whisk together peanut butter, sesame oil, soy sauce, lime juice, ginger, sugar, Sriracha, and fish sauce. Place pork in a sous-vide bag, then pour sauce all over meat. Lower bag into heated water, weighing the bag down if necessary, and cook pork for 3 hours. Heat broiler and place a rack 4 inches from heating element. Remove pork from sous-vide bag and transfer to a rimmed baking sheet. Pour remaining cooking liquid into a small saucepan. Bring sauce to a simmer over high and let cook until slightly thickened, about 2 minutes. Cover to keep warm, and set aside.
Drizzle pork with olive oil and broil until charred in spots, 2 to 3 minutes. Transfer to a cutting board and let rest, 5 minutes.
Make the celery salad: In a large bowl, whisk together sesame oil, rice vinegar, pepper and salt. Toss with celery, fennel and cilantro. Taste and add more salt, sesame oil and rice vinegar if needed. To serve, slice pork and drizzle with sauce. Top with celery salad, and peanuts. Garnish with cilantro leaves, and sesame seeds if you like.
Comments: The sauce is absolutely delicious, I am quite fond of peanut butter in savory preparations, in this particular case it goes well with the ginger and all other flavors. The way the recipe was published it called for 135F for 2 hours, but there is no way that would work for us. Do what you think is best. Whatever method you go for, make sure to incorporate the sauce reduction in the end and drizzle it over the meat. It takes the dish to a whole higher level. The slaw was good in terms of flavor, but the texture of the celery was a bit harsh, so next time I might just do the “microwave blanch”, in which I cook the veggie with a tiny bit of moisture (often just a damp paper towel will do) for 10 seconds or so. It is enough to just kill the raw texture. Plus, since it will be slightly warm it will incorporate the dressing even better. I don’t mind the raw fennel at all, so I would not “blanch” it.