CAIPIRINHAS 101

THE WORLD CUP IS FINALLY HERE!

The World’s Most Adorable Dog….
printed with permission from Life of Jalo

I grew up watching all the games, and I still remember well when Brazil won (for the third time) in 1970, with a team that joined the one and only Pele’,  Rivelino, Tostao and Gerson, to name four of my favorites.  Most people in Brazil have their own routine  to watch the games and the whole country pretty much freezes when Brazil plays. Our family gathered at my parents’ home,  with my Mom sitting in her favorite chair, always wearing the same robe. It turns out that she wore it in the final game of 1970, when Brazil beat Italy in a nail-biter to capture the World Cup.   That outfit became, and remains to this day the “World Cup robe.”   It was carefully washed and stored away, only to appear every 4th year after that 1970 game.

Since I left the country watching the games hasn’t been the same, but  to bring the right spirit to the festivities I like to make “caipirinhas“, Brazil’s national drink.  It’s a blast of refreshing lime with “pinga” – a sugar cane distillate  not too hard to find in the US.
caipirinha1

CAIPIRINHA
(the authentic way, prepared one drink at a time)

1 thick-bottomed glass
1 large lime
1 Tbs granulated sugar
ice cubes (enough to fill the glass)
pinga (aka cachaca, aguardente de cana)

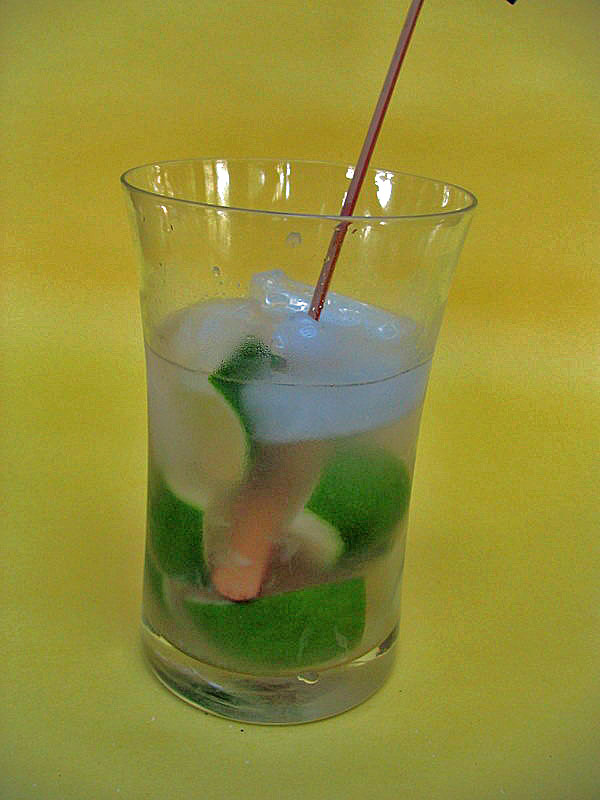
Wash the limes, cut both ends. Quarter the lime lengthwise, removing the central white pith which is bitter. Cut each quarter in half crosswise and place the lime pieces in the glass.

Add the granulated sugar, and working with a wooden pestle , crush the limes with the sugar.  Crushing the fruit with a wooden pestle is essential to the authenticity of this drink, but such tools are hard to find in the States.  If you don’t have one, maybe the handle of a heavy wooden spoon will suffice.   Once you’ve crushed the limes fill the glass with ice cubes or crushed ice. Pour pinga to the top, mix with a spoon and serve.

ENJOY!

pingas222


Comments: There are many types of pinga around.  Some are clear, some are aged,  turning yellow or  light brown.   Those are smoother, with less bite, and besides in capirinhas they may also be enjoyed by sipping.   In the US, the chances are that you will only find clear pinga, among which the most popular brands are “Ypioca”, “51”, and “Pitu”.

Recently in Food and Wine magazine the well-respected chef Daniel Bouloud shared his take on caipirinhas, and served them in wine glasses. My jaw dropped in disbelief when I saw the photos of this crime!  Mr. Boloud would certainly not approve of Champagne served in a teacup, and drinking  caipirinhas from wine glasses is just as bad.  So please, stick to these basic rules: prepare them in a large, strong glass, one drink at a time  using granulated sugar (no simple syrup, no agave nectar, no mint).

Brazilian-approved variations: You can use vodka in place of pinga, for a drink called “caipiroska“.  They’re delicious too, and probably a little easier next day ;-).   Some of my friends have been trying to convince me that “kiwi caipirinhas” are as good as the real thing, but I am a purist and I haven’t made them.  They do sound tasty, plus you get to eat the kiwi at the end.  Go lighter on the sugar if using kiwis, though.     And let me know if you try it, I might just relax my standards and go for it.  😉

Finally,  a few sound files to help you with Brazilian words…

Caipirinha click here  

Pinga… Cachaça… 

Add to FacebookAdd to DiggAdd to Del.icio.usAdd to StumbleuponAdd to RedditAdd to BlinklistAdd to TwitterAdd to TechnoratiAdd to Yahoo BuzzAdd to Newsvine

WATERMELON-INDUCED DAZE

I guess a picture can be worth a thousand words… 😉

Add to FacebookAdd to DiggAdd to Del.icio.usAdd to StumbleuponAdd to RedditAdd to BlinklistAdd to TwitterAdd to TechnoratiAdd to Yahoo BuzzAdd to Newsvine

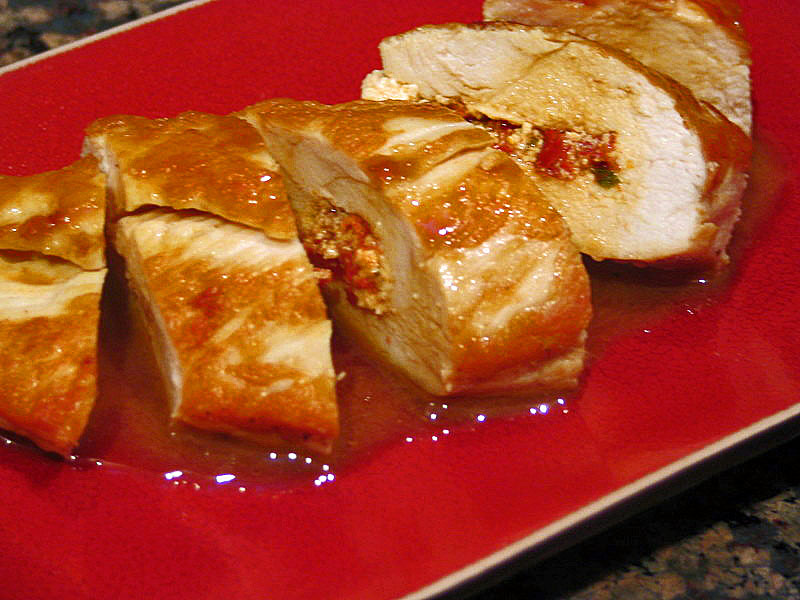
GOAT CHEESE-STUFFED CHICKEN BREASTS

Chicken breasts are often part of our week-night menu, so I’m constantly searching for new ways to prepare them. I adapted this recipe from Cooking New American, a compilation of Fine Cooking recipes that never seems to leave my kitchen.  Dinner was ready in less than 30 minutes, with an aura of sophistication and great flavors.  Not a bad to ending for a very frantic Wednesday…

CHICKEN BREASTS STUFFED WITH GOAT CHEESE AND SUNDRIED TOMATOES
(adapted from Fine Cooking)

3 oz. fresh goat cheese
1 Tbs. milk
1 clove garlic, minced
pinch of red pepper flakes
1 Tbs. chopped sundried tomatoes
fresh oregano leaves (or herbs of your choice), minced
Salt and freshly ground black pepper
4 boneless, skinless chicken breast halves

2 Tbs. olive oil
1/2 cup dry white wine

In a small bowl, mash the goat cheese and milk together until smooth. Mix in the garlic, red pepper flakes, sundried tomatoes, and the oregano.  Season the mixture with salt and pepper.

On the thickest side of each breast, cut a long pocket. Using your fingers, stuff the goat cheese mixture inside,  closing by pressing the flesh together.  If you want, close with a toothpick.

In a large frying pan, heat the oil over medium-high heat.  Cook the chicken on one side until golden brown, 5 to 6 min. Turn the breasts over, season with salt and pepper, and set a small lid on top of them (use a lid that is too small to cover the whole pan, but large enough to enclose the meat).  Continue to sauté until the chicken is cooked through, 8 to 10 more minutes.

Transfer the chicken to a warm serving plate. De-glaze the pan with the wine, scraping up any sticky bits until the liquid reduces to a glossy syrup. Drizzle the reduction over the chicken and serve.

ENJOY!

to print the recipe, click here

Comments: Joanne Weir, the author of the original recipe, says that “this recipe is fun to play with.”   She definitely has a point:  just keep the basic method of thinning the goat cheese with a little milk, then flavor this mixture in any way that you desire.   The presence of the filling, and the fact that the meat cooks under a lid for most of the time, prevents the delicate chicken from drying out.

Sometimes I browse forums in which single guys and girls with little cooking experience ask advice on what to prepare  for that special someone coming over for dinner.   This recipe is a perfect choice: simple, elegant, and light. A little pasta, a green salad, not much else is needed. Of course, wine, candles, and good music… 😉

Add to FacebookAdd to DiggAdd to Del.icio.usAdd to StumbleuponAdd to RedditAdd to BlinklistAdd to TwitterAdd to TechnoratiAdd to Yahoo BuzzAdd to Newsvine

receita em portugues na pagina seguinte…..
Continue reading →

MELLOW BAKERS: VERMONT SOURDOUGH

This bread was my choice to begin the  month of June in the Mellow Bakers group project.  It’s also one of our favorite breads, that I bake several times per month.  Hamelman’s book has three variations for this recipe,  all  delicious and easy to make, as long as you are not sourdough-starter-phobic.    😉  One of the great things about this group project is its only rule:  be mellow.   At first, I was wondering  should we bake all  three variations plus the two other breads this month?   But Paul, the wise originator of the group,  reminded me that when in doubt, ask yourself “what’s the mellow thing to do?”     So, I picked one, the Vermont Sourdough with Increased Whole Grain, which is similar to a bread I’ve  already described here.      No matter how many times I make one of Hamelman’s Vermont sourdoughs,  whenever I open the oven and see the loaf, I feel like a teenager whose first boyfriend just rang  the front doorbell…

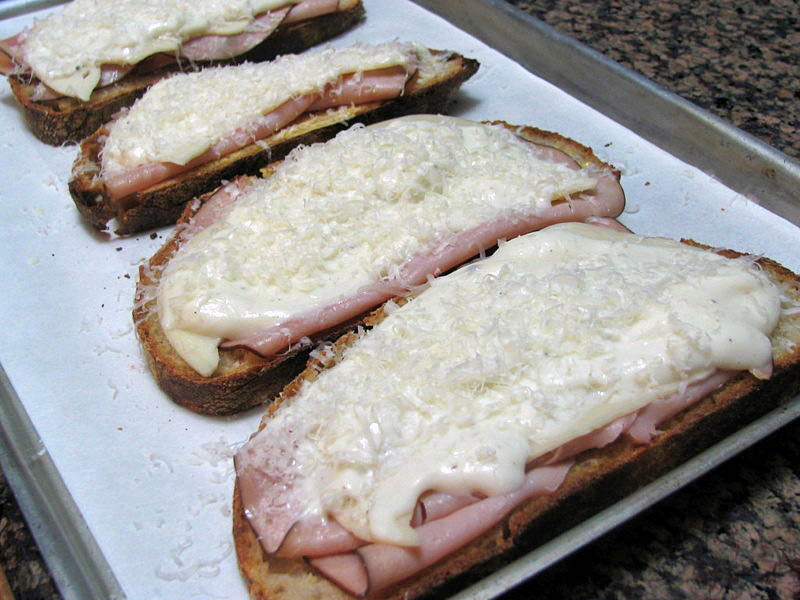
This type of bread is absolutely perfect for a Croque Monsieur….

But, complying with the mellow aspect of this post,  no photos were taken after the croque monsieur was ready…   we were too busy enjoying them and thinking about our times in Paris… Good memories!   I promise to post about my favorite Croque Monsieur & Croque Madame recipe in the near future, consider this just a teaser…

Check my friends’ take on Hamelman’s sourdough by following these links:

Oggi…..

Kuchelatein….

Paul…

Joanna’s blog...

Steve’s blog…

Anne Marie’s blog…

and Cathy’s site….

Add to FacebookAdd to DiggAdd to Del.icio.usAdd to StumbleuponAdd to RedditAdd to BlinklistAdd to TwitterAdd to TechnoratiAdd to Yahoo BuzzAdd to Newsvine

7-6-5 GRILLED PORK TENDERLOIN

Note added Feb 22nd, 2021: If you own a Weber type grill, it might get a lot hotter than other brands, and this method won’t work for you, unless you are able to control the heat down to 500F-550F. My friend Gary recommends a surface thermometer in case you’d like to monitor the temperature of your grill, and find hot spots.

The Boeing 777 is my favorite airplane, but the number to keep in mind when grilling pork tenderloin is 765, referring to the time it takes to grill it (7 + 6 + 5  minutes).   The original recipe was from an issue of Fine Cooking magazine (June 2002)  published as a general method to grill pork tenderloin, that’s adaptable to many different flavor profiles.  I’ve been making it ever since.

7-6-5- GRILLED PORK TENDERLOIN
(very loosely adapted from Pam Anderson)

2 pork tenderloins
1/4 cup olive oil
juice of 1/2 lemon
1 tsp aleppo pepper
salt

For the glaze:

1/2 cup orange marmalade
2 Tbs white wine vinegar
a little water
salt and pepper

Mix the olive oil, lemon juice, and aleppo pepper, rub all over the meat and let it stand in the fridge overnight or several hours.

Prepare the glaze by melting all ingredients in a small sauce pan. You want a reasonably thick consistency, so adjust the amount of water accordingly. Let it cool (you can prepare the glaze the day before).

Prepare a hot grill. Remove the meat from the marinade, brush it all over with the glaze, and season with salt. Place the meat on the grill, close the lid and grill for 7 minutes. Turn the pork tenderloin over, close the lid again, and grill for 6 minutes.  Don’t open the lid, just turn off the heat and keep the meat inside for 5 minutes. The internal temperature should be 145F to 150F. If not, close the lid and leave the meat for a few more minutes.  Remove the meat to a serving platter and let it rest for 5 minutes before slicing.

You can prepare the same recipe on a charcoal grill, just place the coals to one side, and when it’s time to turn the heat off, simply move the meat to the opposite side of the grill, with no coals underneath.

ENJOY!

to print the recipe, click here

Comments: The published recipe suggested brining the meat first, then brushing it with the glaze of your choice. I opted for a lemony marinade instead.  Pam Anderson offered three options on the glaze,  all using frozen fruit juice concentrate as the starting point.  We usually don’t stock those in the freezer, so I went with melted orange marmalade instead, adding a little vinegar to cut any excessive sweetness.   During grilling the sugar will impart a deep copper color to the meat, something that we all associate with great taste… and it had that for sure!   I served the meat over plain white rice, without any sauce, but with crisp-tender green beans and almonds, one of our favorite side dishes. Leftovers are great for sandwiches, fajitas, or simply re-heated in the microwave.  Give this recipe a try, and it might become one of your favorite weeknight options!