I blinked twice, and three months have passed since the last virtual tour of our kitchen. This tradition started many years ago with Celia and is now hosted by Sherry, from Sherry’s Pickings. I haven’t stopped writing these posts since my first time (that was July 2011), although I do not participate every month. I prefer to let things accumulate a bit, so there’s more to talk about.
Starting with gifts…
We were in Brazil a couple of weeks ago, and my niece Raquel, Baker Extraordinaire, opened her many boxes of baking items and twisted my arm really hard so that I would bring a few goodies with me.
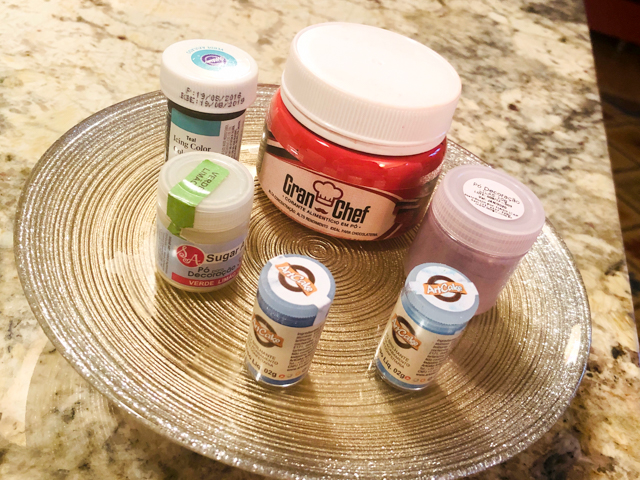
These are food dyes, colors I did not have, except for the red. But it turns out red is one tricky color, most brands require you to dump a ton of dye to get some hint of real red. Raquel really liked this brand and since she had two bottles… I did not feel too guilty bringing one with me.

Isn’t this the cutest thing you’ve ever seen? I thought so. Raquel has all sorts of mini silicone molds, from the time she was decorating cakes professionally. She insisted I should grab a bunch of them, but I decided to act with moderation and brought only this little owl. Now I need to design some dessert to feature it in all its cute glory. Oh, the struggles I face!

Most people who know me are aware that I adore elephants. Raquel always gifts me with little elephants (since bringing a live one in the plane would be awkward, and the pups might object to a new sibling). The pen holder is a few years old, but the two next to it just arrived. Inside each, lives a small additional elephant, so they are like tokens of good luck, representing new beginnings, renovation. Thank you, Quel!
From Phil…

Many years ago we were in California at a Farmer’s market, and a friend insisted we should get a bottle of their special white balsamic vinegar. It is truly delicious, but the last drop was consumed a while ago. I had no idea those could be ordered online, but my beloved husband surprised me not with one but three bottles of their vinegar: white, passion fruit, and dark. We consume a lot of balsamic vinegar, by the way.
A gift shared on my previous IMK post from our friend Cindy is now paired with a pitcher we’ve had for a while. I love how they look together, and how they make roses shine…

In our kitchen….
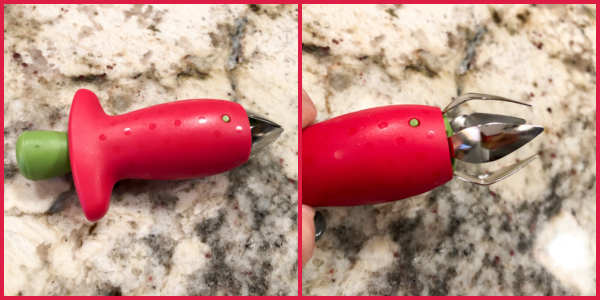
I don’t care for single-use gadgets at all. So why am I featuring exactly that? Because this strawberry huller is absolutely awesome and I hate doing the job with a paring knife. Life is too short for that. You press the green part in, it opens the sharp (but not too sharp) blades on the opposite end. Place that on the top of the strawberry, twist, and amaze yourself at the perfectly hulled strawberry you can call your own.
In our kitchen….

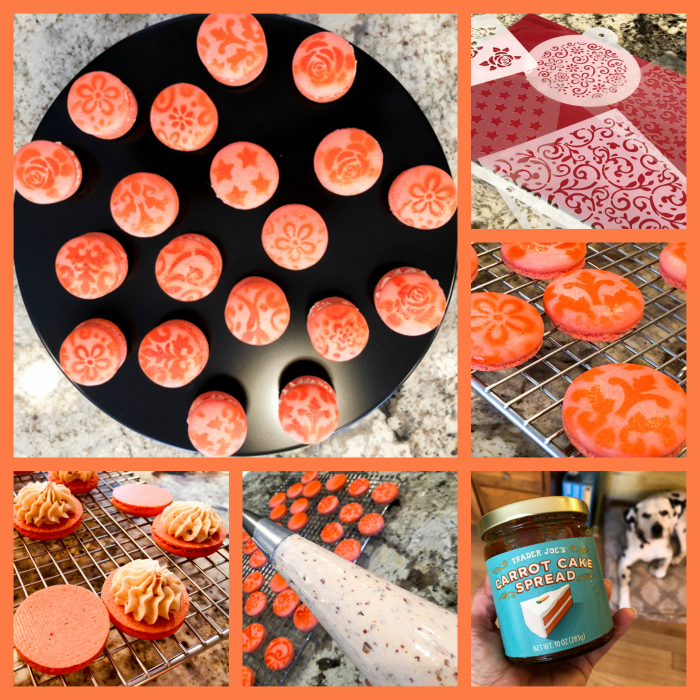
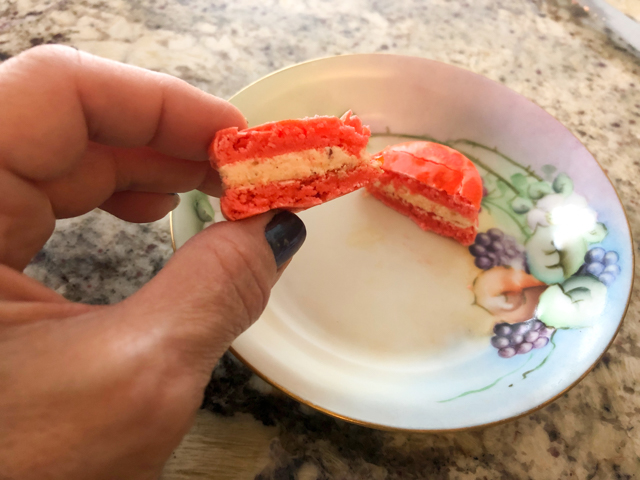
Another type of product I normally don’t fall for. These are flavored icing sugars. I read about them in a macaron-baking forum, every baker who’s used them raves about them. So many kinds available, it’s not even funny. I placed an order for two, and already tried the Cherry Bakewell on… you guessed it: macarons. Stay tuned. Very nice, subtle flavor, not artificial at all. Lemon Drizzle will be tried very soon. I ordered mine from this site.
In our kitchen….
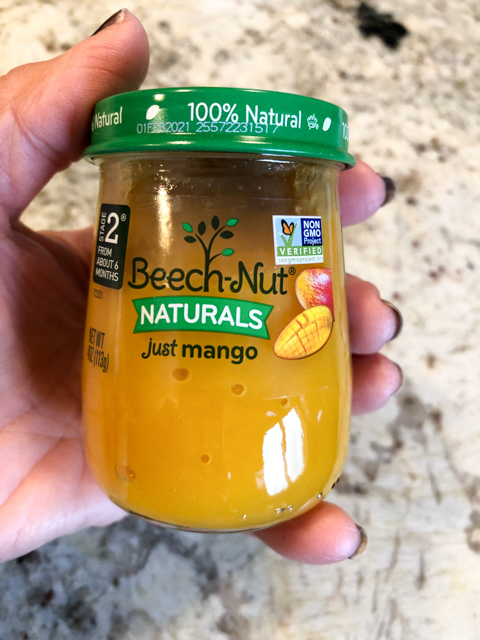
Fruit puree made for babies. I said to myself, why not try this? Some brands have added sugar, some mix different fruits in the same bottle (and that could be also quite appropriate, depending on your cooking plans). This one is pure mango and it tastes quite bright and fresh, not “cooked” and bland. I used it to make jellied inserts for a mousse cake, but I bet it would work well as a base for macaron fillings, buttercream, all sorts of concoctions that ask for fruit puree. I don’t know why I did not think about this sooner. If you only need a small amount of puree for a recipe, consider a walk throughout the baby food aisle of your grocery store.
In our kitchen….
 Freeze-dried lychee… I’ve been using freeze-dried fruit a lot lately in all sorts of desserts, and lychee seemed so wild and exciting. Reviews of this particular product were excellent, so I am now the proud owner of a little bag. Macarons are always a possibility, but who knows what the future holds for this baby?
In our kitchen….
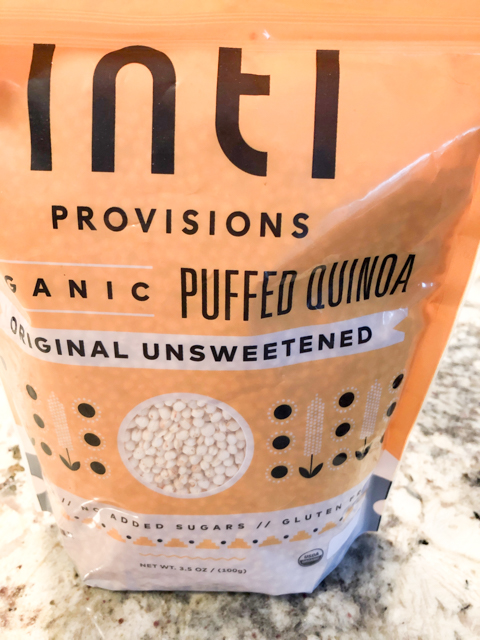
Puffed Quinoa. I had to order it through amazon, as I had never even heard about it until a French food blogger came up with it to add crunch to a cake layer. I cannot wait to try it. Apparently the best way to use it is to toast it first in the oven, then incorporate in whatever preparation you want: melted chocolate, praline, or even just sprinkle over a layer of pastry cream. You can also just enjoy it with a bit of yogurt and fruit in the morning.
In our kitchen….

The microwave can be pretty hard on regular dishes, so we got a set of microwave-safe bowls and plates. The plates are small, perfect to heat leftovers for our lunch. The bowls are nice to melt chocolate, they don’t retain as much heat as Pyrex type bowls do. I love their pastel tones.
In our kitchen….

Yes, I am fully aware one can “easily” make preserved lemons, but I found this beauty at Marshalls and could not resist bringing it home. In case I have a preserved-lemon-emergency, I will be ready for it.
In our kitchen….

Yuzu Salt. Another Japanese ingredient that stole my heart. This stuff is incredibly tasty. I used it to season one of our favorite salads, that mixes avocado, roasted carrots and almonds. Check the blog if you missed it with a click here. I make it often, and from now on, it will always be seasoned with this magical little powder. Also amazing to season a simple carrot soup.
In our kitchen….
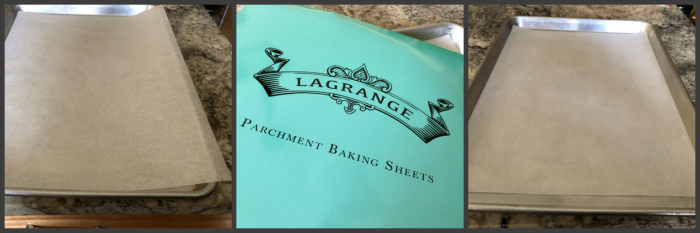
Parchment paper. I have a pet peeve to share. I love the quality of King Arthur’s parchment, but it always irritates me that their half-sheet size does not fit nicely into a half-sheet pan (see first photo of composite above). Why, oh why would they manufacture them this way? I sometimes buy other brands, and even though they fit perfectly, their quality is not that good. I notice it particularly when baking sourdough bread, they might stick to the bottom of the bread in ways that King Arthur’s type never does. Not too long ago someone was raving about this brand, Lagrange. I caved. And I am so glad I did. It fits (see last photo of composite), and it performs as well or better than KA. If you like to order some, amazon is your friend. Or your necessary evil, depending on how you feel about it.
In our kitchen….
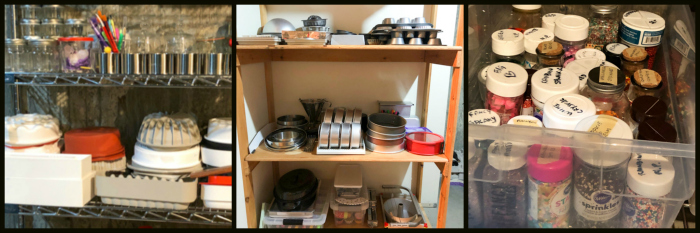
I should actually say in our basement… I finally organized all my baking gadgets, and even made a full inventory of everything. Silicone baking stuff, baking pans, and my Sprinkle Emergency Box, all living happily together.
In our kitchen….
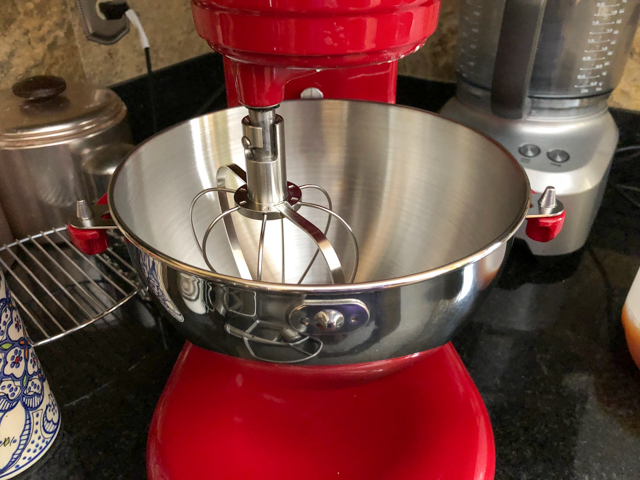
This is a mini-bowl for the Kitchen Aid, and I consider it one of the best acquisitions ever. Some recipes call for a very small amount of “stuff”, for instance egg whites for meringue. It is a problem to make that work in a regular size bowl, so I normally would start it by hand to get some volume, then let the Kitchen Aid do its job. Now, I simply grab Minnie and let her shine, while I perform a quick version of the Happy Dance.
In our kitchen….

Have you heard of Tonka beans? In Brazil they are known as “cumaru.” Think about a very floral vanilla bean, with touches of black walnuts, or so it seemed to Phil and I. In patisserie, it is use to flavor creams and mousses. Absolutely wonderful. Amazon sells it for an arm, a leg, and an eye (with 20/20 vision). Since we were going to be in Brazil, my sister and niece helped me out and I could buy this huge bottle and bring with me. BogeyQT™ was particularly mesmerized by its fragrance.
Note added after publication: tonka beans have been banned in the US since 1954 due to its blood-thinning properties. However, the substance associated with it, is present in minute amounts in the beans, and interestingly enough other foods also contain the substance (carrots, for instance). It is all a matter of dose, as usual. The amount of benzopyrone present in tonka beans is never going to be harmful, it is used as a flavoring agent. You can read more about it here. Quoting from the article: For a fully grown adult to reach a toxic threshold, they would need to consume about 2400 plates of tonka bean flavoured desserts, in which case liver damage would probably not be their major concern.
Wait, wait! What’s all this commotion all of a sudden?

I see you included The Dalmatian in your very wordy In My Kitchen post….
Care to explain that?

Go ahead, make your case. We are all ears and very quiet tails…

Bogey, they think we’re playing favorites, but we know that’s not true!
or… is it?

Nah, those are isolated incidents.
Let’s prove the point by starting this pup-party with your brothers…

We are Bad-Asses! We patrol our backyard like nobody’s business! No bunny rabbit will hop around, no toad, no snake, no turkey, no possum, no skunk, no cable guy will step on our premises without paying a huge price for it. We are Armageddon on Four Legs.

Patrolling the backyard is hard work, and it comes with dreadful consequences at times…

Usually it’s Osky Boy who gets covered in burrs, but recently Buck decided he would pull the same trick, maybe in an attempt to get some very special grooming attention… He does take the cleaning of burrs with a lot more bravery than his brother.

Bravery? Since when a little pulling of burrs means bravery? LOOK AT ME! Come for a ride in the car, they said. It will be fun, they said. The fun I got was a poke with a needle (they called it a vaccine) and I did not care for it at all. AT ALL.

Do I hear we are next in line for this vaccine thing?

I am not listening. And I ain’t going anywhere. They can’t make me.

You can worry yourselves to death now. The torturer said that I am free of that fun for 21 doggie years! That’s pure bliss…
But, thankfully, pups live in the moment, and it seems to me BogeyQT™ and Buck are not very bothered by what will come in a month or so.

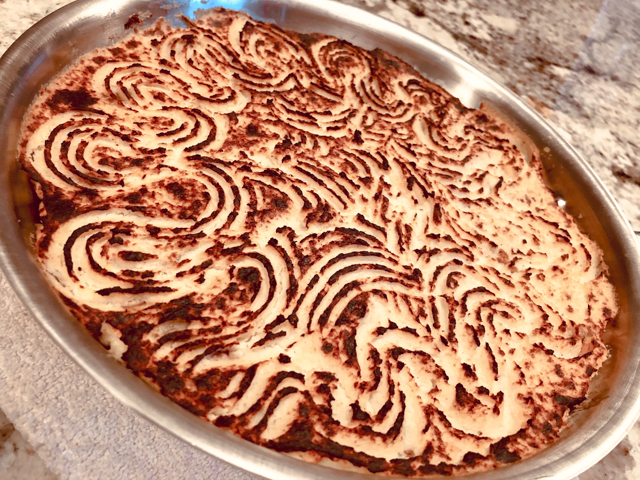
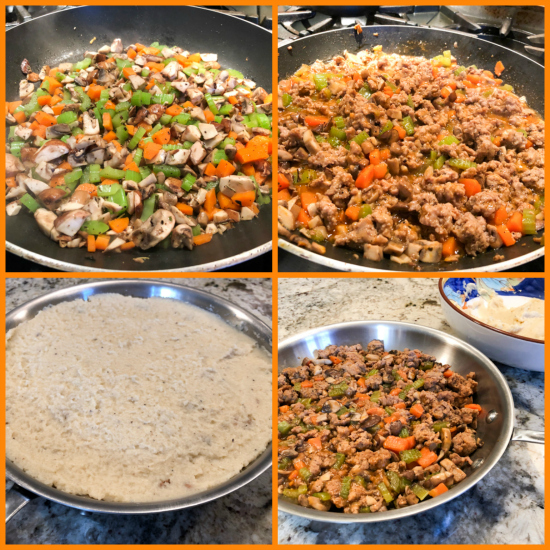
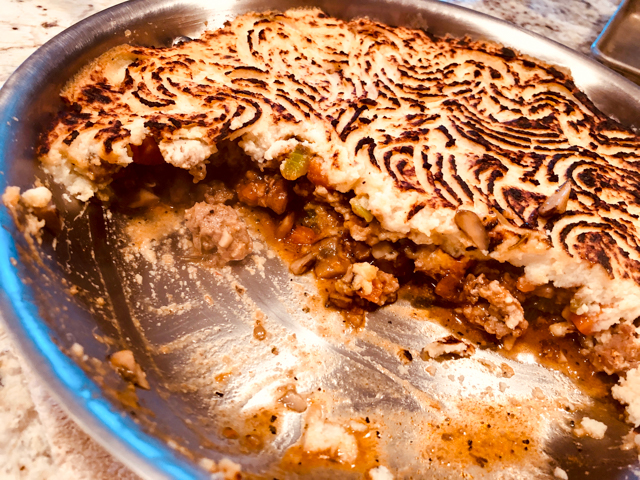
After all, there’s enough excitement in their life… There’s a lot of baking….

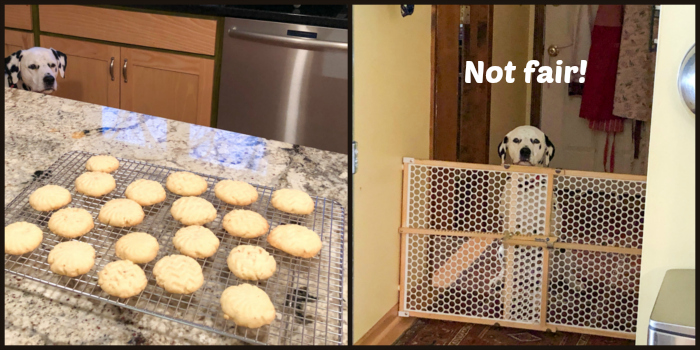
Constant stalking of the kitchen island….

as well as some stalking of a different kind…

Then, there’s a lot of work to be done too…
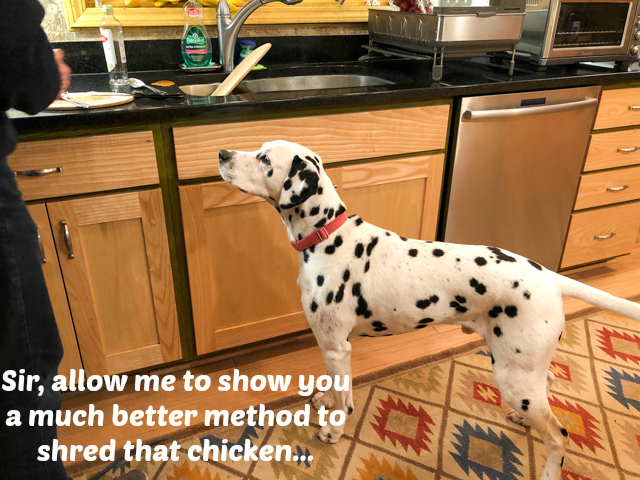
Sometimes, when we really need to cook in peace…. the big boy must be kept at a safe distance. Those long legs are a constant threat to anything sitting on countertops.
That’s all for now, folks! We hope you enjoyed the Spring version of In My Kitchen, we’ll be back with another tour in a few months… Til then, keep calm, and bake on!

ONE YEAR AGO: In My Kitchen, April 2018
TWO YEARS AGO: First Monday Favorite
THREE YEARS AGO: In My Kitchen, April 2016
FOUR YEARS AGO: Spring has Sprung with Suzanne Goin
FIVE YEARS AGO: Chai Brownies
SIX YEARS AGO: Pomegranate-Molasses Glazed Carrots
SEVEN YEARS AGO: Braised Brisket with Bourbon-Peach Glaze
EIGHT YEARS AGO: The Real Vodka Sauce
NINE YEARS AGO: Spring Rolls on a Spring Day