STRAWBERRY MINI-CAKES FOR BAKE PINK PROJECT

October is Breast Cancer Awareness Month, and I am joining Chef Colette Christian in her Bake Pink Project. I don’t know how many dear friends and acquaintances of mine have been affected by breast (and other) cancers, but far too many.  In fact, one in eight women will be diagnosed in their lifetime, with early detection being KEY to survival. In other words, get screened annually, and talk to all your friends to make sure they do the same.

I’ve never met Chef Colette in person. But I know for a fact she is one of the nicest human beings around. I will talk more about it in a few months, for reasons that will become clear by then. For now, let me just say she is a fantastic online instructor who is responsible for me finally conquering macarons a few years ago (check her 6 classes at Bluprint, all pretty amazing). Once I got addicted to baking macarons, my horizons were opened to other kinds of patisserie. In many ways, I think Colette is the person who helped me go from cake-o-phobe to passionate baker.  She is winning her own battle with breast cancer, and I am absolutely thrilled to join her BAKE PINK project. Today I share a recipe for a cake I recently enjoyed at Ottolenghi’s cafe in London.  It is pink, it is delicious, and quite simple to put together.
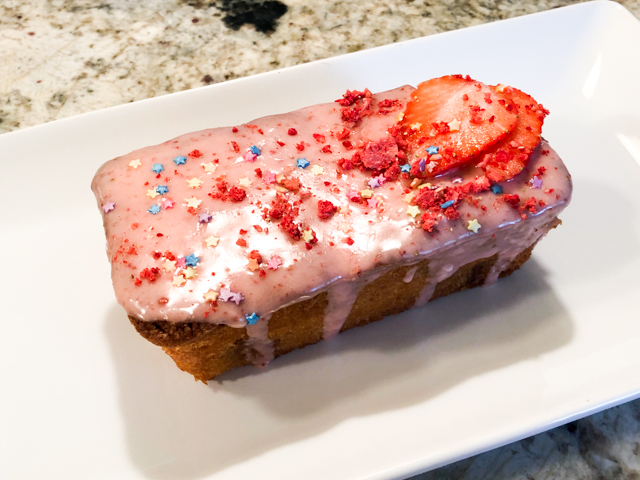
STRAWBERRY-VANILLA MINI-CAKES
(slightly modified from Ottolenghi’s Sweet)

recipe also available online here

for the cake:
250 g unsalted butter, at room temperature
250 g granulated sugar
1 tsp vanilla paste
4 large free-range eggs, lightly beaten
120 g flour
1 tsp baking powder
1/4 tsp salt
140 g almond flour
15 oz fresh strawberries, hulled cut in half
1 T olive oil
2 T maple syrup
1/2 tsp balsamic vinegar

for the strawberry icing:
55 g fresh strawberries, hulled and roughly chopped
300 g icing sugar
1 T light corn syrup
1/8 tsp vanilla paste

to decorate:
whole strawberries
freeze-dried strawberries
sprinkles

Heat the oven to 400°F.

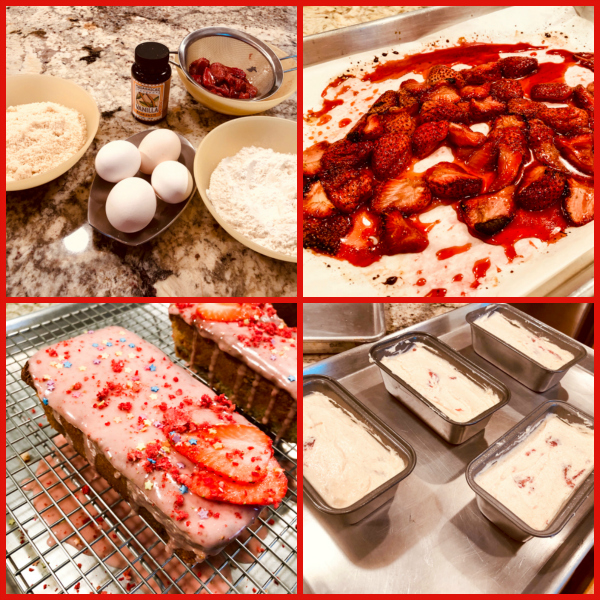
Start by making the roasted strawberries, preferably many hours in advance, or the day before.  Mix the strawberries with olive oil, maple syrup and balsamic vinegar in a small bowl, add to a parchment-lined baking sheet and roast until the edges start to get dark and the liquid gets thick. Do not let the strawberries burn or get too dry.  Reserve. Dice before using in the recipe. If there is excessive liquid, drain it.

Prepare four mini-loaf pans by coating them with butter and flour or using a baking spray.

Make the cake batter. Place the butter, sugar, and vanilla paste in the bowl of an electric mixer with the paddle attachment in place. Beat on medium speed until light, then add the eggs, a little at a time. Continue to beat until fully combined. Sift the flour and salt into a bowl, then stir in the almond flour. Turn the speed of the mixer to medium-low, then add the dry ingredients in three batches and finally fold in the diced roasted strawberries.

Spoon the mixture into the prepared pans.  Bake for about 25 minutes, or until a skewer inserted into the middle of one of the cakes comes out clean. Remove from the oven and allow to sit for about 20 minutes before removing the cakes from the pans.  Transfer to a wire rack to cool completely.

To make the strawberry icing, place all the icing ingredients in a food processor and process together until smooth. Drizzle the tops of the upside-down cakes with the icing, allowing it to drip down the sides. Garnish and serve.

ENJOY!

to print the recipe, click here
Comments: While in London, I really wanted to stop by Ottolenghi’s place, but since my schedule was quite tight, I was worried it would not happen. So one afternoon I was all by myself and realized I barely had the time to catch the tube and get to the cafe before closing time. When I got there, I could not sit down for an early dinner because they were just getting ready to call it a day, so I was a bit frantic trying to decide what to get. From the corner of my eye I saw some cute mini-loaf cakes, and that’s what I bought. My plan was to travel back to the hotel and have it as my dinner. But it could not hurt to take a test-bite as I walked back to the metro station, right?  Right. Problem is, I could not stop eating it. Moist, sweet, but also tangy with the strawberry taste. It was so so good… The sweetest walk ever through Notting Hill.
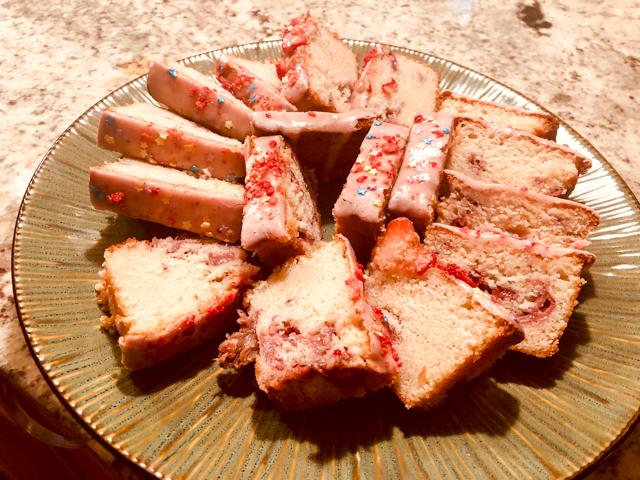
Of course, it is often problematic to try to match the great things we stumble upon like that. But I have to say, the ones I baked at home were pretty close to that level of goodness. I opted to roast the strawberries because at this time of the year they are not at their peak, and also because roasting will always intensify the flavor, so why not? It is just a small additional step that I think pays off big time here.

Chef Colette, thank you for Baking Pink, and for all the help and advice you’ve given me this past few months.  You are a sweet and bright person…

And for all my readers and fellow bloggers, let’s do all we can to raise awareness about breast cancer, it is a serious killer that can be tamed by early detection.

ONE YEAR AGO: Bourbon-Glazed Pork Tenderloin with Pea Pesto

TWO YEARS AGO: Chocolate Chip Cookies from Naturally Sweet

THREE YEARS AGO: Little Bites of Paradise

FOUR YEARS AGO: Maple-Glazed Pumpkin Bread

FIVE YEARS AGO: In My Kitchen, October 2014

SIX YEARS AGO: Grilled Steelhead Trout

SEVEN YEARS AGO: Brown Butter Tomato Salad

EIGHT YEARS AGO:  Spelt and Cornmeal Rolls

NINE YEARS AGO: Roasted Potato and Olive Focaccia

TEN YEARS AGO: Multigrain Bread Extraordinaire


IN MY KITCHEN (AND BEYOND): OCTOBER 2019


It is time to invite you all for a walk around our kitchen. In My Kitchen posts started many years ago with Celia and is now hosted by Sherry, from  Sherry’s Pickings.  In this version, we will go beyond the kitchen because we were away on a professional trip for the whole month of August, so I will include a few bits and pieces from our stay in London.

Starting with gifts…

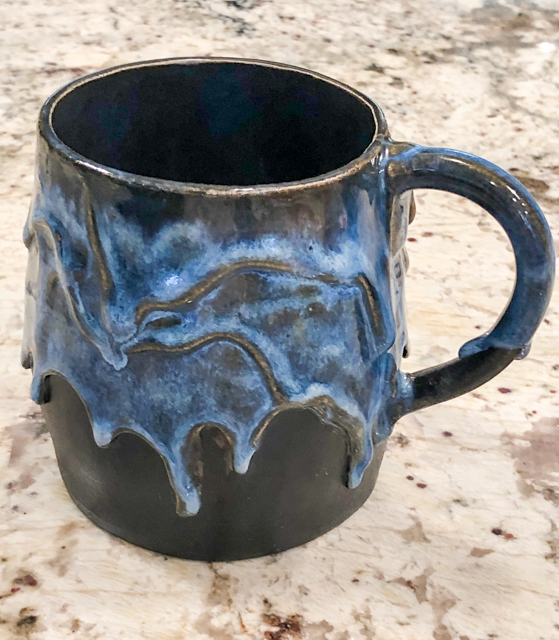
While in London, we had the opportunity to meet a dear virtual friend of many years – Elaine – The Sourdough Queen. She had us over for lunch and we sat for hours chatting. Had amazing vegetarian spreads and of course the best sourdough loaves a person can wish for. Fresh from her oven. Knowing how much I love tea cups, she gave me this gorgeous cup, handmade by a pottery artist from the region.  I adore it! Thank you, Elaine!


From our dear friend Sarah who lives just a couple of miles away from us, these cute fabric wrappers that you can place under bowls and plates to go into the microwave. No more burning hands on hot bowls, plus they help retain the heat. She made those herself… how cool is that?

In our kitchen…

I’ve been using this for years, then the other day Phil asked me if I ever shared this tip on the blog because it works so well.  It turns out I did not. So here I am, late rather than never, to tell you that a pastry cutter works WONDERS to make guacamole. If you do it, you will never look back. You are welcome…

In our kitchen…

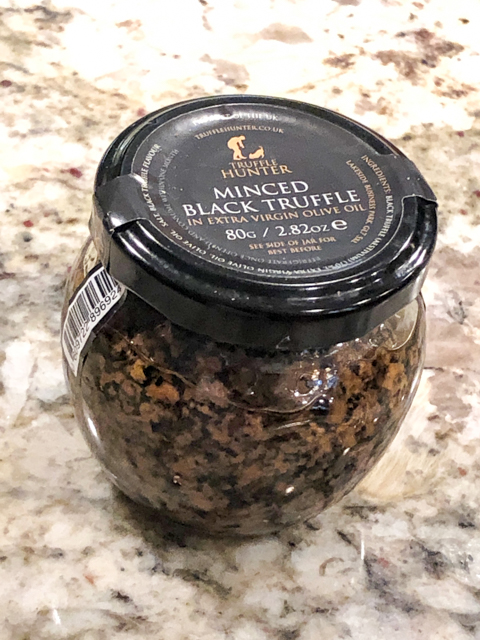
Great find by my beloved. Minced black truffles. Potent, very potent. A little bit goes a long way. We love to add it to regular mushrooms when sauteing them for a side dish, or make a little olive oil concoction to add to grilled steak.  I used some in little mushroom appetizers featured not too long ago.

In our kitchen…

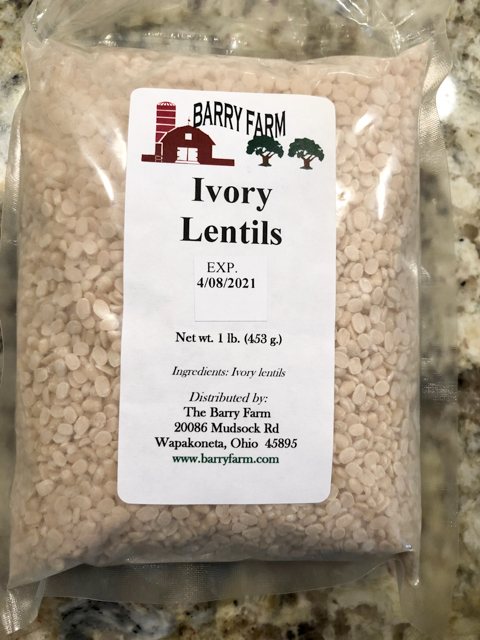
White lentils… I first learned about them through Mimi, when she blogged about a salad. Stay tuned for a recipe showcasing them. Unfortunately I could not find them in our town, but I was so intrigued that I had to place an order online. I know, the sacrifices I make for the sake of food blogging…

In our kitchen…

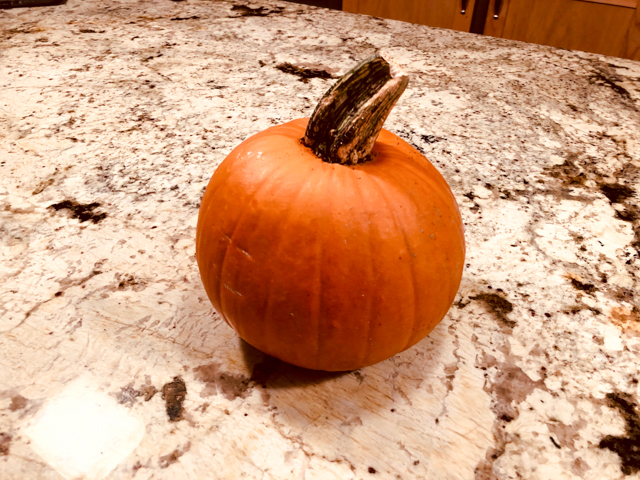
It is that time of the year. Pumpkin rules!  This one from our farmer’s market, should turn into a dessert. No, not pumpkin pie. I have slightly more exotic plans for this baby…

In our kitchen…

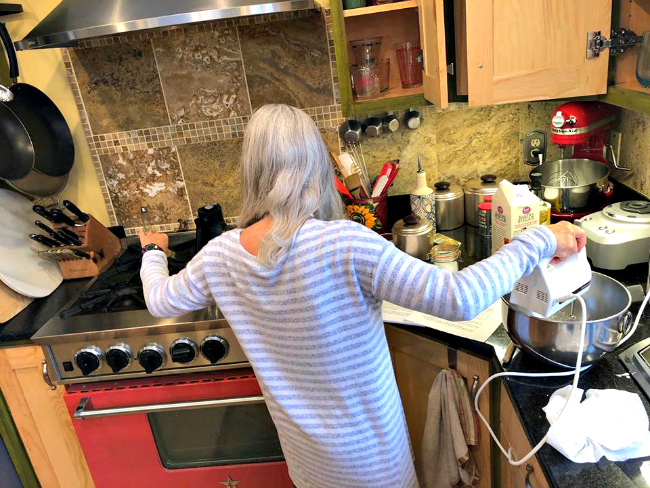
Sometimes things get wild… Please, no questions.

In our kitchen…


Thanks to the efforts of my dear husband, I now have the perfect tool to make spun sugar. I am still at a stage of covering all countertops, most kitchen appliances, and 2/3 of our dogs with spun sugar on several levels of thickness. Practice makes perfect. Here’s to hoping for a long life for Sally.

In our kitchen…

While in London, I also had the opportunity of meeting another food blogger I’ve known and followed for years. The one and only Philip, who was a finalist in the show Britain’s Best Home Cook.  He made me an amazing lunch that was crowned by his homemade lemon pie (he even blogged about it, check it out). He also offered me delicious chocolate cookies called “Bourbons” and showed me the special cutters used to make them from scratch. I knew I had to have them. I already made two of the four kinds, and you will soon read all about them.

In our kitchen…

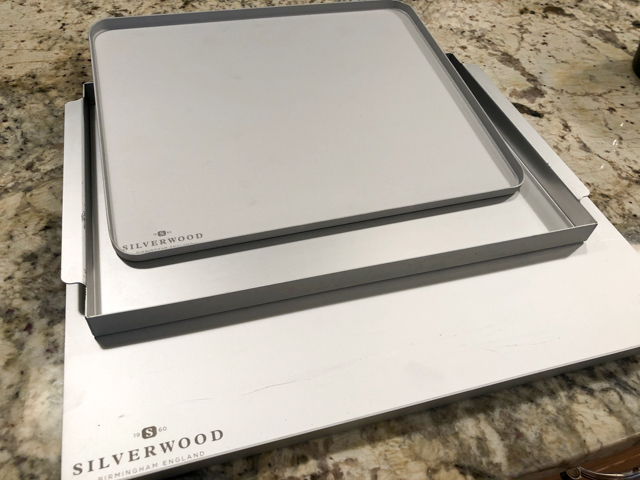
A few more items from London. I had heard nice things about Silverwood baking pans, and had to bring these home with me. They are beautiful, and work like a dream.

In our kitchen…


Pizza party for our lab members!  We love doing those, I make the dough early in the morning (using my default recipe), let the dough rise in the fridge the whole day, when guests arrive the toppings are ready to go, and we can have a pretty relaxed get together in which the hosts can have as much fun as the guests…

In our kitchen…


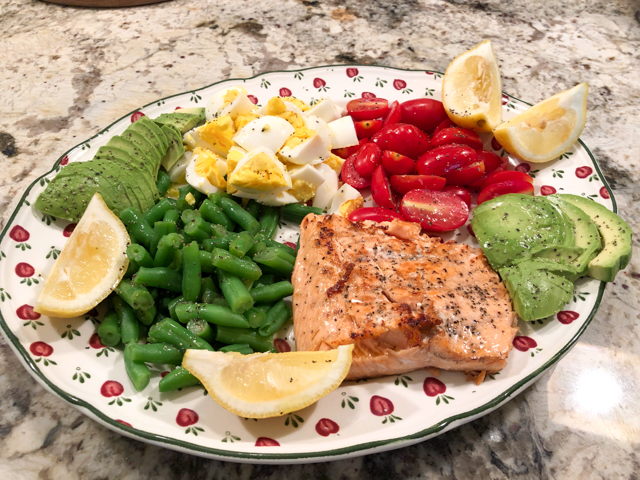
What is quickly becoming a routine for our Saturday lunch: Cobb Salad, in many different interpretations.  This one used salmon made in our own smoker, very mild flavor.

In our kitchen…

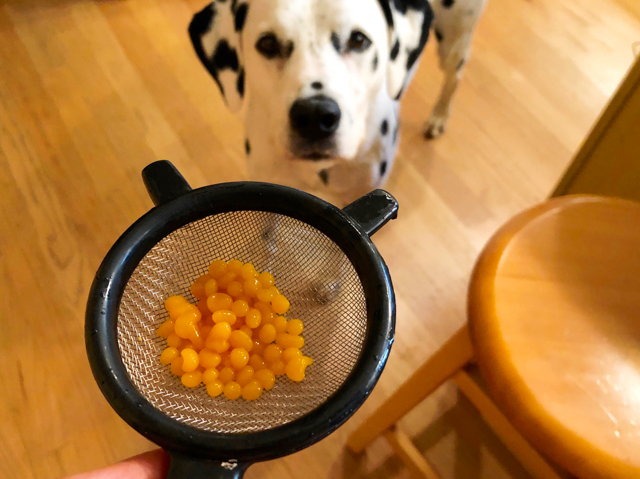
Mango pearls, made with agar-agar and mango pulp. Approved by the resident pup with a gourmet palate (yeah, right).

In our kitchen…

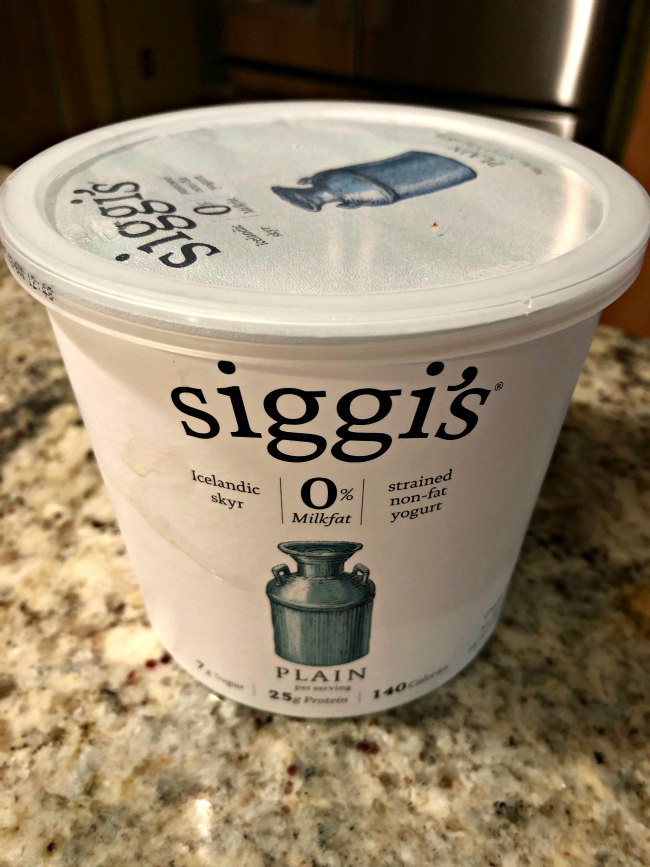
Icelandic yogurt (skyr). We eat a lot of non-fat yogurt, reserving the full-fat for cooking and baking. This one is simply the best.

And now it’s time for the pups to bark their story.

If he is going to be a complete jerk about what goes on in this house, he can talk to the tail…

Because I actually do some work around here, as this photo proves. 


Indeed, in a rare (cough, cough) moment of clumsiness, I had dumped a small container of yogurt, making considerable mess on the floor. Buck to the rescue, making clean-up a lot easier.

Speaking of clean-up, we go through this routine more often than we like to admit. Oscar is The Burr Magnet, and a complete Drama Boy when it’s time to get them pulled off, no matter how gently we do it.

Not sure what to write as a caption. Honestly, we have absolutely no idea how the remote ended up in there. It could be Bogey Quit That (™) unique way of disapproving our entertainment choices.

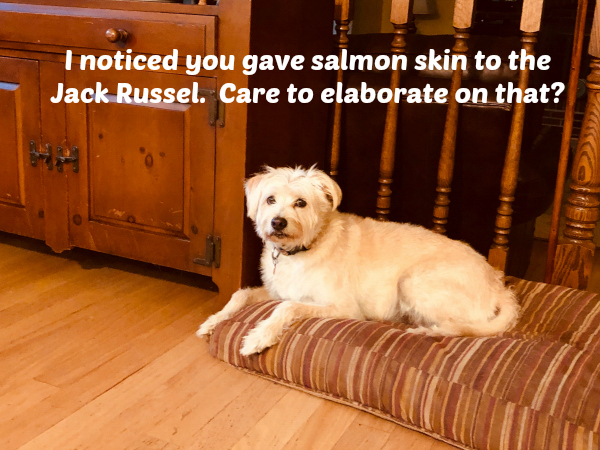
But unfortunately, they were forced to endure a full month of kennel due to our trip to the UK. It was hard for all of us…

.

..

Indeed, we were in the UK for a little over 30 days. I share with you a few shots from the trip, mainly during weekends when we had a chance to explore the city a bit.

We had some days with nice weather…

Some days… not so much…

We visited magical Stonehenge….

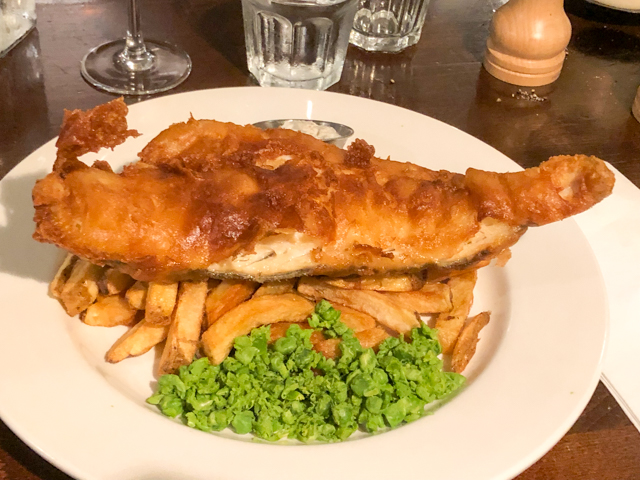
We had amazing – truly amazing – fish and chips (with mandatory mushy peas).

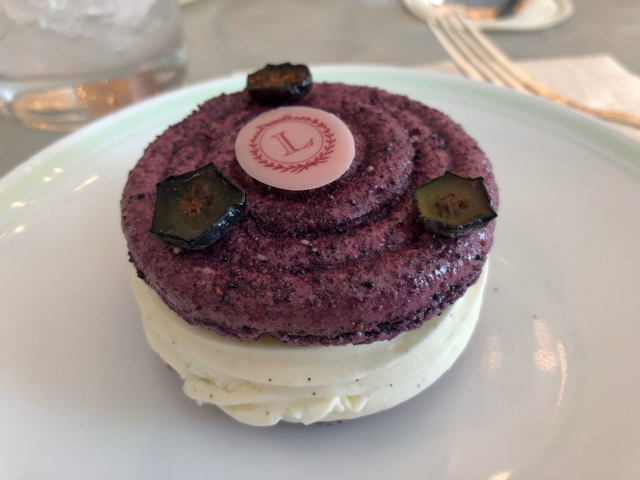
I had a small dessert-macaron at Laduree (that place is a dream).

And by complete accident I stumbled upon a book signing by Nadiya Hussain, winner of Great British Bake Off a few years back. I told her how much we loved watching her, and that in fact I watched her season at least three times….

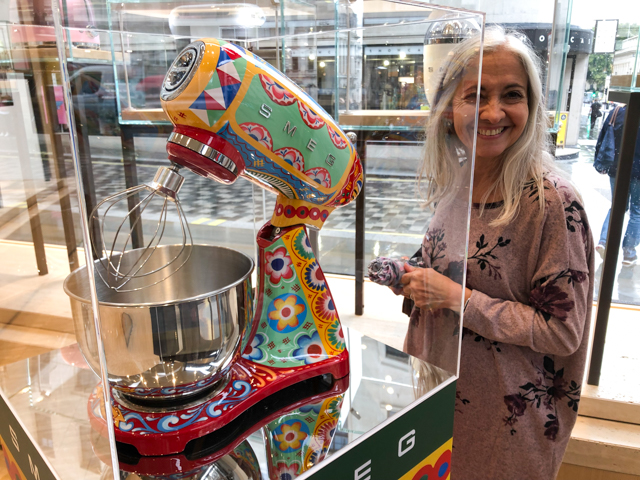
I fell in love but bravely walked away from the mixer of my dreams….

And had a special dinner with my forever husband at Rules Restaurant, where we had a romantic meal together 15 years ago…


But even long trips come to an end… and we were absolutely thrilled to go back to our routine…  Dogs sleeping nicely on the first evening back…

I hope you enjoyed this little tour of the Bewitching Kitchen and a few glimpses of London. I will have a bit more to share about the trip in future posts, as my dear friend Denise took me to some pretty special spots. But that’s another story, to be told another time…

Until my next In My Kitchen post…

ONE YEAR AGO: In My Kitchen, October 2018

TWO YEARS AGO: In My Kitchen, October 2017

THREE YEARS AGO: Little Bites of Paradise

FOUR YEARS AGO: Coxinha de Galinha: A Brazilian Delicacy

FIVE YEARS AGO: Prosciutto-Wrapped Shrimp Skewers

SIX YEARS AGO: A Simple Dinner

SEVEN YEARS AGO: Brown Butter Tomato Salad

EIGHT YEARS AGO:  Spelt and Cornmeal Rolls

NINE YEARS AGO: Roasted Potato and Olive Focaccia

TEN YEARS AGO: Multigrain Bread Extraordinaire
 

YOGURT TART

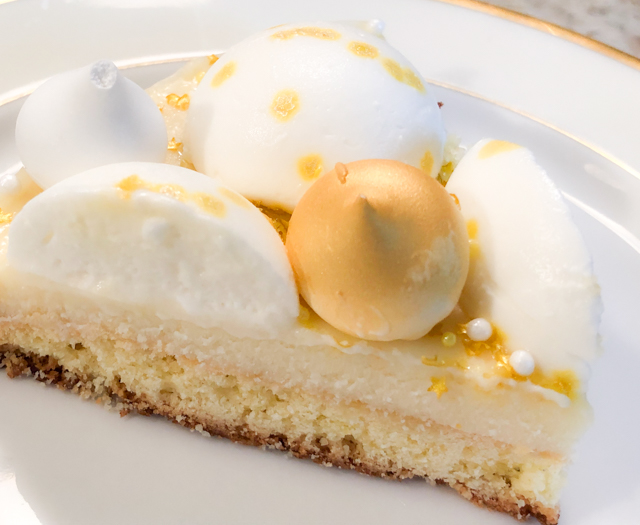
Not too long ago I was browsing the internet searching for entremet cakes, and stumbled on a site that was new to me: Cooking Me Softly, hosted by Arianna, a chef from Italy. All I can say is that I had a very hard time moving away from the computer. Her concoctions are things of complete beauty, her flavor combinations unique and her presentation style superb. Not only she shares detailed recipes, but also short videos with the crucial stages of preparation. Basically, her site is culinary gold for those into patisserie. She blogs in Italian, but I can follow most of it closely enough to get the important points. Or so I hope. I fell in love with her Yogurt Tart the moment I first saw it, and could not wait to try and make it. The use of semi-spheres of mousse on top of the tart? Genius.

YOGURT TART
(slightly modified from Cooking Me Softly)

for Sablé Breton:
80 g egg yolks
100 g granulated sugar
125 g very soft butter
125 g pastry flour
2 g salt
5 g baking powder
grated lemon peel (1 lemon)
MyCryo cocoa butter (optional)

for white chocolate ganache:
340 g Lindt white chocolate
85 g heavy cream

for yogurt mousse:
120 g full-fat Greek yogurt
30 g granulated sugar
15 g of lemon juice, sieved
240 g fresh cream
6 g gelatin, 200 bloom
18 g cold water for gelatine hydration

for decoration:
small meringues
Gold dust
sprinkles of choice

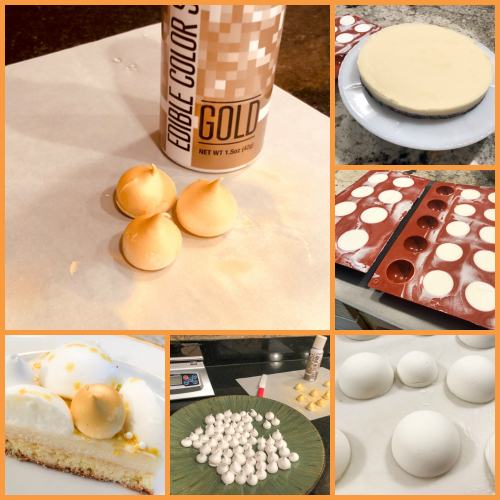
Make the cookie base. In a Kitchen Aid type mixer, whisk the yolks with sugar and lemon zest until pale. Replace the whisk with the leaf beater, add the sifted flour with baking powder, salt, and then the butter. Mix well until creamy.  Place in a piece of plastic wrap, form as a disc and refrigerate for 8 hours.

Roll between two sheets of parchment paper to 1 mm thickness an put in the fridge for another hour, as you heat the oven to 350 F.

Cut a disc of dough with a 20 cm ring (7 + 3/4 in), and bake inside the ring for 20 to 25 minutes. Remove from the oven, and while still hot sprinkle MyCryo over the surface. Allow it to cool completely. Before continuing with assembling, place the base inside the ring and add a band of acetate around it so that the ganache will be poured nicely on top. I like to use a ring that is adjustable, so that I can tighten it better around the base. Often the base shrinks a little during baking.

Make the chocolate ganache. Melt the chocolate gently in the microwave or in a double boiler. Heat the cream to simmering (about 175 F). Add to the chocolate in three additions, whisking gently to fully incorporate the chocolate and the cream.  Reserve. Cool to about 90F before pouring into the cool base. Place in the fridge to cool completely and then in the freezer overnight.

Make the yogurt mousse. Hydrate the gelatin in the water indicated in the recipe. Heat part of the yogurt with the sugar to about 140 F.  Melt the gelatin heating gently for a few seconds in the microwave (do not boil it). Add the melted gelatin to the warm yogurt/sugar mixture.

Add the lemon juice, the remaining cold yogurt and mix. Whip the cream to the consistency of melted ice cream, and fold gently into the yogurt base. Spoon the mousse into a piping bag (no need for a piping tip) and fill half-sphere molds (3.4 and 5 cm in diameter), smoothing the surface well. Put in the fridge to cool and then freeze overnight.

Assemble the tart. Remove the base with chocolate ganache from the freezer, place in a serving tray and remove the acetate. Arrange the mousse spheres of different diameters over the ganache. Decorate with mini-meringues plain and painted with gold spray. Put in the fridge for about 6 hours to allow the ganache to soften and the mousse to thaw.

ENJOY!

to print the recipe, click here

Comments: I truly enjoy making desserts that involve multiple components particularly because they can be made in advance and wait in the freezer or fridge. Finishing the dessert then is easy and fun (assuming it all worked well in the previous steps). For this preparation, Arianna’s video was very helpful, as the Sable Biscuit is quite a bit softer than I anticipated. Watching how she handled it was key to succeed. Also make sure you make the dough the day before you intend to bake it, it needs those 8 hours in the fridge. Another important point is the white chocolate ganache: you need it to be firm enough to slice and hold its shape. Arianna uses a specific brand of chocolate that would be a bit of a hassle for me to find. Using her proportions with the Lindt bar, the ganache ended up way too loose, so I made another batch using a 4:1 ratio chocolate to cream. You can probably get by with a 3.5:1, but not much less than that.

My schedule went like this: I made the biscuit dough on a Friday evening, baked it Saturday morning and made the mini-meringues, the chocolate ganache and the mousse on Saturday afternoon. Once the ganache cooled enough I spread it over the biscuit base and froze it. Sunday afternoon I un-molded the frozen mousse spheres, sprayed some of the meringues with edible gold color, and assembled the tart.

The only issue I had was the golden stars used for decoration. The ones in contact with the ganache held their shape well, but the yogurt mousse (probably due to its acidity) melted the stars within an hour or so.

The flavors were quite amazing, as the sweetness of the white chocolate ganache stood well to the bright flavor of the yogurt mousse. The biscuit base had excellent texture, even if I overbaked it slightly. It was hard to see it inside the ring, next time I’ll be more careful.

Arianna has a cookbook published online and I could not resist getting my copy. It is absolutely amazing, you can get it with a click here.  The name is just too clever: Aria di Dolci. Loved it! Keep in mind it is in Italian, so you need to have some level of understanding of the language.


ONE YEAR AGO: Grilled Lamb-Stuffed Pita Bread

TWO YEARS AGO: Elderflower Macarons

THREE YEARS AGO: A Duet of Sorbets

FOUR YEARS AGO: Sobering Peach Sorbet

FIVE YEARS AGO: Spiralizer Fun

SIX YEARS AGO: Beer-Marinated Grilled Skirt Steak

SEVEN YEARS AGO:  Secret Recipe Club: Corn Chowda

EIGHT YEARS AGO: Page-A-Day Calendar (Pits and Chief 5 minutes of fame…)

NINE YEARS AGO: Home Sweet Home (our beloved Pits in one of his last photos)

TEN YEARS AGO: Marbled Rye

POLENTA BITES WITH SPICY TOMATO SAUCE

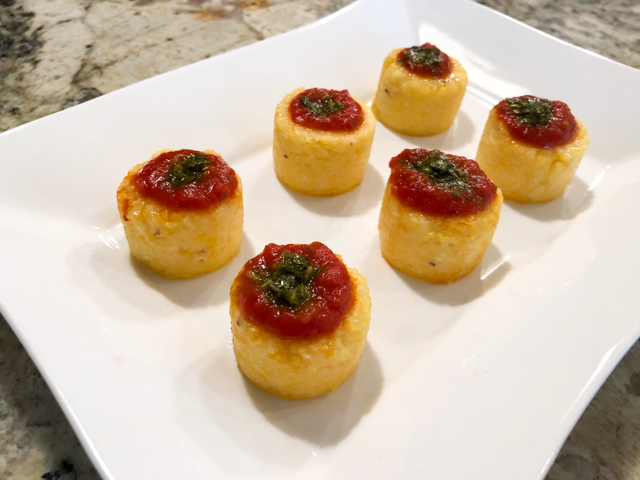
I like to think I’m a person who resists temptations. You know, self-control, determination, that sort of thing. It all goes reasonably well until I am confronted with a new, sexy silicone mold. Or a pair of colorful earrings. But that’s about it. Ok, maybe nail polish is hard to say no to at times. I swear, that’s it now. Back to cooking. Silikomart has been my obsession for a very long time. Today I share with you a cute appetizer idea using one of their molds: Sushi. Adorable. Can you make it without the mold? Absolutely!  But… if you also suffer from Silikomart-weakness, maybe you should bring one home…

POLENTA BITES WITH SPICY TOMATO SAUCE
(from the Bewitching Kitchen)

200 g corn flour (for polenta, quick-cooking or regular)
500 ml water
salt to taste
1 T butter
1 cup tomato sauce (store bought or home made)

for the spicy cilantro sauce (makes more than you’ll need):
1 cup cilantro leaves
1/4 cup lime juice
2 tsp Asian fish sauce
1/8 cup rice vinegar
2 tsp sugar
1 tsp Sriracha sauce 

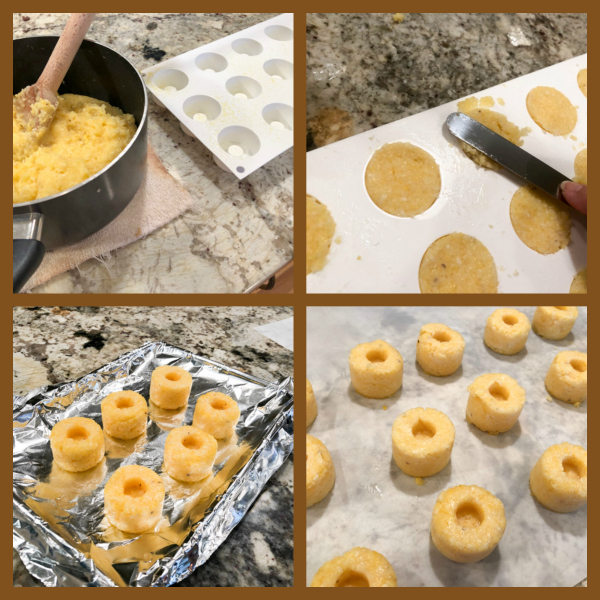
Bring salted water to a boil in a saucepan. Pour the corn flour slowly constantly stirring with a spoon. Cook according to the brand of corn flour you are using. I used regular polenta, and it took about 30 minutes to get fully smooth. Once the polenta is cooked, stir in the butter.

Make the spicy cilantro component. Place the cilantro leaves in a food processor and whirl until finely minced. Add the remaining ingredients and process until well combined. Reserve. Leftovers keep a few days in the fridge. 

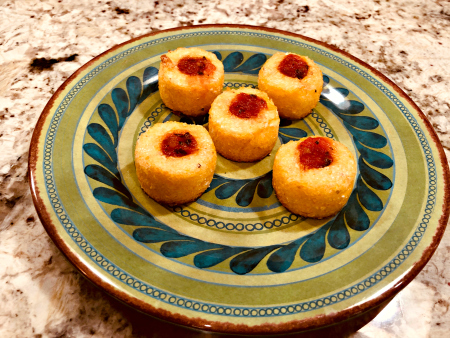
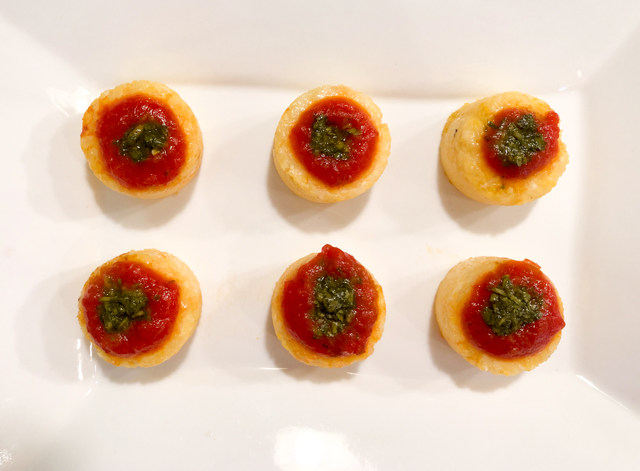
Pour the polenta into the Sushi Maki silicone moulds and level with a spatula. Let rest until solidified, then unmold them, spoon the tomato sauce in the small cavity, and a touch of spicy cilantro dressing.

Serve warm or cold.

ENJOY!

to print the recipe, click here

Comments: These polenta bites can stand very well with just the tomato sauce and if you like, a bit of cheese on top, a quick run under the broiler. It turns out I had made a mahi-mahi sous-vide just a couple of days before, and the spicy cilantro sauce was part of that recipe. I decided to add just a little touch to top the tomato sauce and it all worked surprisingly well, so I incorporated in this post. I realize that I went overboard with the sauce and hid the nice little hole on the top of the mold. Oh, well… no major harm done. But I exercised a little more restraint on my second batch…

In this case, I finished them with a brushing of olive oil and a visit to the air-fryer for about 10 minutes at 390 F. Delicious texture, probably even better if serving tem as finger food. If you don’t have an air-fryer, just place them in a 450 F oven until golden brown.  Then top with some warm sauce, and serve.

You can use mini-muffin tins to make the exact same type of preparation, but there’s something about the Sushi mold that I find pretty irresistible. I got mine on ebay last year, but The Place that Sells it All carries it. Obviously.

ONE YEAR AGO: Vague Mousse Cake

TWO YEARS AGO: Cottage Loaf, my very own technical challenge

THREE YEARS AGO: Pork Ribs: Sticky, Spicy and Awesome

FOUR YEARS AGO: Sobering Peach Sorbet

FIVE YEARS AGO: Buttermilk-Blueberry Breakfast Cake

SIX YEARS AGO: Silky Cauliflower Puree with Almond Milk


NINE YEARS AGO:
 Popeye-Pleasing Salad
.
TEN YEARS AGO: Summer’s Finale


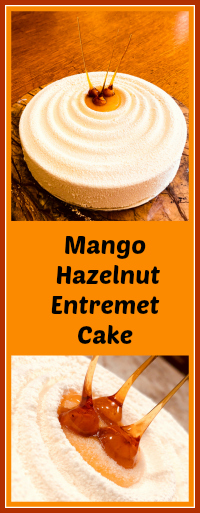
MANGO HAZELNUT ENTREMET CAKE

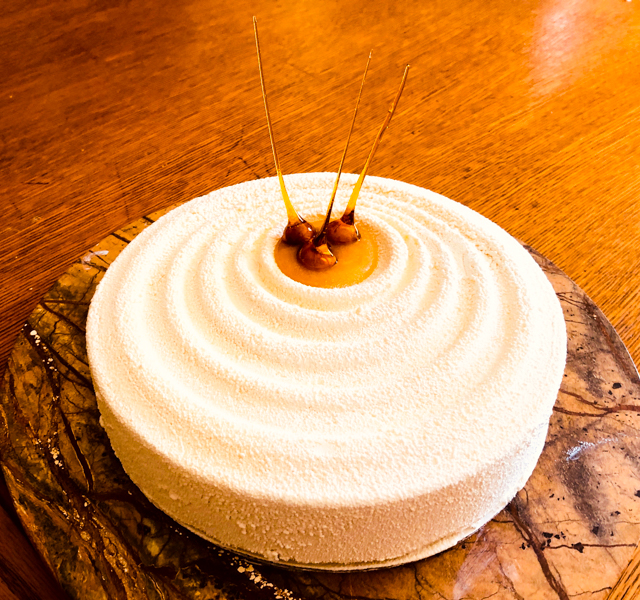
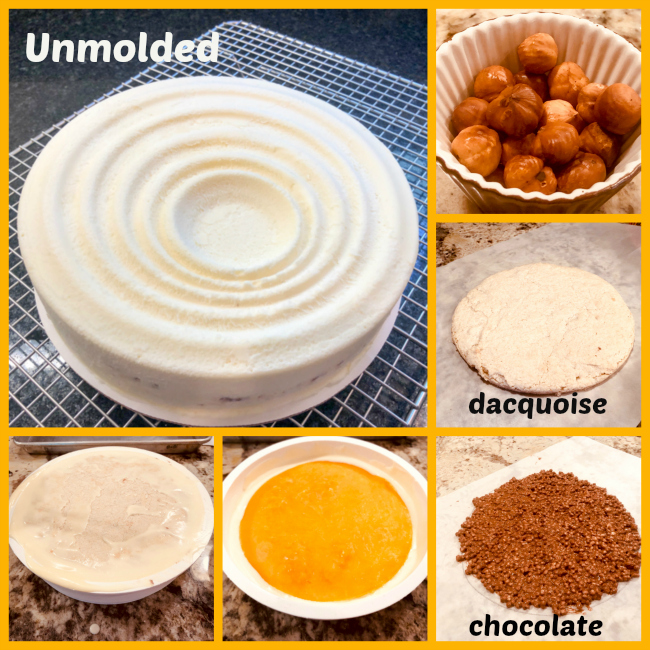
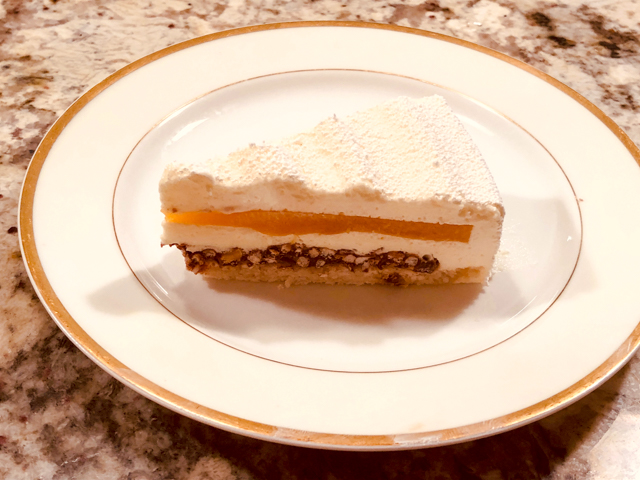
It’s been a while since I made what is probably my favorite type of dessert. As far as entremet goes, this is a reasonably simple example, with a single insert in the center (mango gelée) and only two components in the base, a hazelnut dacquoise and a crunchy chocolate layer. I used the Silikomart Vague mold, I love its design and how easy it is to remove the frozen cake for final decoration, which involved chocolate spray and a few caramel-coated hazelnuts.

MANGO HAZELNUT ENTREMET CAKE
(from the Bewitching Kitchen)

For the hazelnut dacquoise:
75 g egg whites, at room temperature
50 g sugar
70 g hazelnut flour (I processed toasted hazelnuts)
50 g sugar
20 g all-purpose flour

Heat oven to 350F.

Beat the egg whites (with whisk attachment) until you can see a trail forming as the beater moves through them. Add the sugar slowly and beat until firm peaks form, but do not overbeat or it will get grainy (and ruined).  Add the hazelnut flour mixed with remaining 50 g of sugar and the flour, folding delicately. Pour or pipe the mixture in a circle about 8-in diameter over parchment paper. Cook for about 10 minutes, let it cool on a rack, while still a bit warm cut a circle of the exact dimension of the mold you’ll use to make the dessert (if using Vague mold, that will be 20 cm or 7 and 3/4 in).

For the mango insert:
150 g mango puree (I used frozen mango chunks)
25 g sugar
5 g gelatin in sheets (230 Bloom)

Soak the gelatine cut into pieces in cold water for 10 minutes.

Bring the puree together with the sugar to 120F, add the drained gelatin, mix and pour in a 6-inch ring, covered on the bottom with film and placed on a tray. Remove a small amount (about 2 tablespoons) for the decoration on top.

for the chocolate-crisp:
113 g Lindt milk chocolate with hazelnuts
10 g pistachio paste (or add 2 tsp coconut oil)
10 g puffed quinoa (or rice crisps cereal, or crumbled corn flakes)

Toast the puffed quinoa in a 350F oven for a few minutes, until fragrant. Melt the chocolate gently and mix it with the toasted quinoa and the pistachio paste. Spread as a thin circle on parchment paper, with dimensions a bit bigger than the bottom of the dessert mold.  Once it cools slightly,  cut it to fit exactly on top of the hazelnut dacquoise (20cm or 7 and 3/4 in).

For the white chocolate mousse:
175 g whole milk
35 g sugar
70 g egg yolks
7 g gelatin in sheets
175 g white chocolate
1/4 tsp vanilla paste
350 g cream

Soak the gelatin in cold water for 10 minutes. Break up the chocolate and place it in a bowl with the vanilla paste.

Bring the milk to a simmer in a saucepan. Whisk the egg yolks and sugar by hand in a bowl, pour over a bit of the simmering milk to temper it, then transfer the whole mixture to the pan and bring the temperature to 180F. Remove from heat, add the squeezed gelatin, pour into the bowl with the chocolate and emulsify using an immersion blender or a whisk. Make sure it is all very well combined and smooth. Allow it to cool.

Meanwhile whip the heavy cream to a consistency of melted ice cream. When the custard is around body temperature or just a bit warmer, fold the cream into it. Pour about 1/3 of the mixture into the Vague mold , place the frozen mango insert, pour chocolate mousse almost to the top, allowing just enough room for the crunchy chocolate layer and the dacquoise.  Add them, and fill any gaps on the sides with mousse. Wrap with plastic and freeze overnight.

for the chocolate spray:
300 g white chocolate
200 g cocoa butter

Melt together and place in sprayer at 90 F (I use a normal paint sprayer dedicated to chocolate only).

Turn out the frozen cake and spray immediately with a light coating of white chocolate suspension.  Melt the reserved mango gelatin very gently, and spoon some in the center of the mold. Keep in the fridge for at least 4 hours before serving. Decorate with caramel-coated hazelnuts.

ENJOY!

to print the recipe, click here

Comments: I am very happy with the flavors and textures of this baby. The tricky part of this type of dessert is assembling it, because it’s a process that is a bit “in the dark”, so to speak. With a regular layered cake, you can visualize the layers well, because you either bake them individually or cut slices from a bigger cake. As the cake is assembled, it is also easier to judge how much filling to add so that the layers end up as uniform as you want them to be. In mousse cakes like this one, it becomes a bit of a guessing game. For instance, how much to allow the insert to sink in, how to make sure it is properly leveled,  how to prevent large air bubbles to form, or to make sure the sides are smooth.  Small details can go wrong, but you may not realize until unmolding the frozen cake next day. Talk about cake-anxiety…  😉

You can see that part of the mango insert got a little wavy. That happened because when I first made the insert and set it in the fridge overnight, the pan got a bit tilted and I had to melt the layer again and re-freeze it, not an ideal situation. Lesson learned.  It is crucial to have space in your freezer that allows all components to lay flat and absolutely leveled.

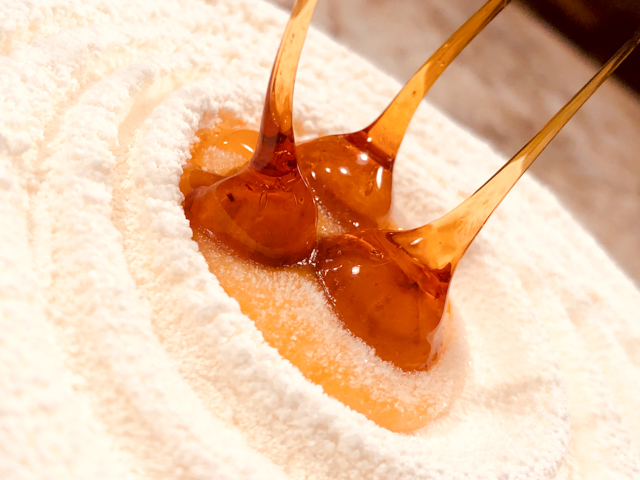
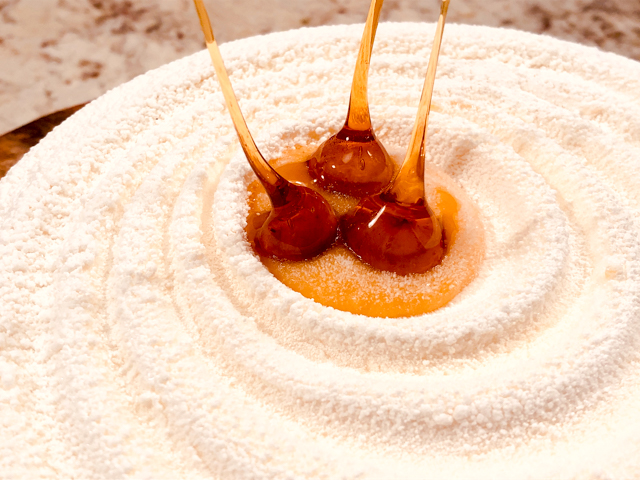
The most fun part? Making the hazelnut with the pointy caramel bits. I followed the method described in Martha Stewart’s site, and it worked like a charm. My only advice is that you make more hazelnuts than you need. Some end up cracking as you stick the skewer, so it’s better to start with more. Also, some might roll a bit as the caramel drips compromising the shape of the drip. It is very important to let the caramel rest before coating the hazelnuts, but once it reaches the right viscosity, you must work fast. It is possible to re-warm the caramel briefly to continue using it, but it’s a bit of a hassle. I prefer to hit that magical point and work with it right away.

Finally, don’t let the lack of a Silikomart mold stop you from making this dessert. A simple ring or springform pan will work, as long as you have a second ring with smaller diameter to form the insert. And the velvet coating is also optional (although you can also buy a spray can with the suspension ready to use; be ready for sticker shock!). The surface is very smooth to start with (see the large photo in the composite picture), so you could leave it as it is, or melt some white chocolate and drizzle it all over the top, in a Pollock-manner.  You could dye the chocolate orange and then add the hazelnuts here and there.

ONE YEAR AGO: Lebanese Lentil Salad and a Cookbook Review

TWO YEARS AGO: Cottage Loaf

THREE YEARS AGO: Sourdough Loaf with Cranberries and Walnuts

FOUR YEAR AGO: Sichuan Pork Stir-Fry in Garlic Sauce

FIVE YEARS AGO: Our Green Trip to Colorado

SIX YEARS AGO: Ditalini Pasta Salad

SEVEN YEARS AGO: Celebrate Wednesday with a Thai Seafood Curry

EIGHT YEARS AGO:  Post-workout Breakfast

NINE YEARS AGO: Semolina Barbecue Buns

TEN YEARS AGO: Lavash Crackers