INCREDIBLY SIMPLE TIMES FOUR: OCTOBER 2020

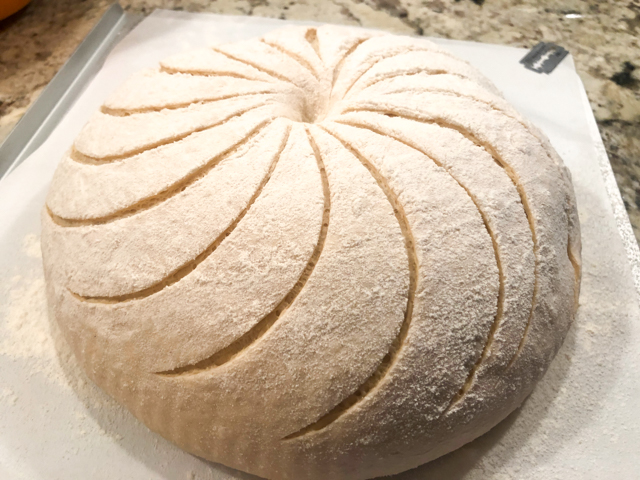
It’s been a while since I shared with you recipes that are super simple but tasty enough to justify being featured on a blog post.

INCREDIBLY SIMPLE #1
EGGS WITH ZA’ATAR AND LEMON

This very simple “recipe” is from a wonderful cookbook called “Falastin.”  Gently boil as many eggs as you want, but just for 6 minutes. The idea is to get the yolk still pretty creamy. Now in a small bowl, whisk olive oil, lemon juice, and za’tar. Peel the eggs, and chop them coarsely, drizzle your little sauce and sprinkle salt on top. Amounts are totally flexible, I usually go with 2 eggs, 1 tablespoon olive oil and then improvise.  I don’t know how many times I’ve called this lunch, with Ak-Mak crackers or a slice of sourdough bread. So good!


INCREDIBLY SIMPLE #2
SMOKY CHICKPEAS

Inspiration for this recipe came from Steeped: Recipes Infused with Tea (I adore it). You will need some smoked tea (Lapsang Souchong), but it is totally worth it to get some and keep in your pantry, even if you don’t enjoy it as a regular tea. I use it in chocolate ganache and quite often in cooking. It gives the food a very nice, subtle smoky flavor.

Slice open one bag of smoked tea, mix its contents with some cumin, smoked paprika, and salt. Open a can of chickpeas, drain and rinse well. Add into a bowl, drizzle some grape seed oil all over it, add the dry spice mixture and mix.  Spread on a baking sheet lined with aluminum foil, and roast in a 400F oven for 25 minutes until golden brown.  Once again, amounts can be totally eye-balled, no need for precision here. Relax and have fun with it.


INCREDIBLY SIMPLE #3
AROMATIC BASMATI RICE

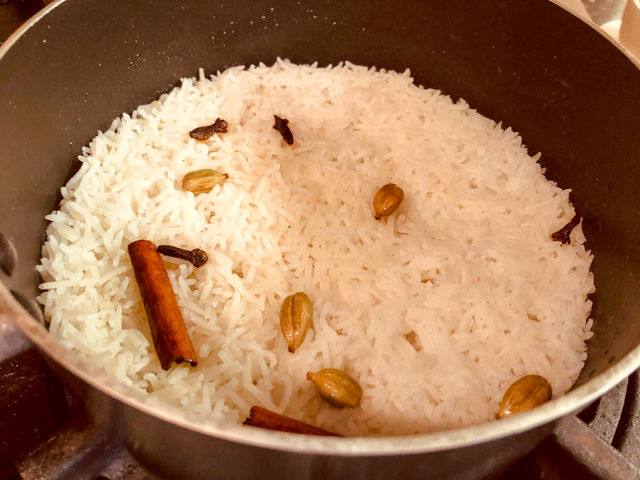
I found this gem of a recipe at Spice House website and made it four times in a row. That tells you how much we enjoyed it. It just turns a regular batch of rice into something special.  I made some adjustments to their recipe as I felt that the rice was turning out a bit too underdone for our taste.

AROMATIC BASMATI RICE
(adapted from Spice House)

1 cup Basmati rice, rinsed
1 Tablespoon grape seed oil (or another mild-flavored oil)
5 whole cardamom pods
2-3 whole cloves
1 cinnamon stick
salt to taste
2 cups cold water  

Add oil to a non-stick saucepan and place the pan over medium heat. When the oil is hot, add the cardamon (you can lightly crush them if you want more flavor), cloves and cinnamon stick to saute briefly. When fragrant, add rice and salt. Saute a minute or so to coat the grains of rice with the flavored oil. Add water, but don’t put the lid on yet.

Once the water boils, turn the heat down and simmer uncovered for 7 minutes. Cover the pan, and let it cook on very gently heat for 7 more minutes. Turn the heat off and let the rice sit in the pan for 10 minutes before removing the spices and fluffing the rice for serving.

ENJOY!

to print the recipe, click here

Make sure to count how many little spice pieces you add to the pan so you can be sure to remove them all, although they are pretty visible on the cooked rice later.  There is so much flavor in this recipe, I guarantee you will be hooked on it.

.

INCREDIBLY SIMPLE #4
BAKED SALMON WITH SOY-GINGER GLAZE

BAKED SALMON WITH SOY-GINGER GLAZE
(inspired by At Home with Natalie)

3 salmon filets
1/4 cup soy sauce
1/4 cup mirin (sweet rice wine)
1 Tablespoon brown sugar
1 Tablespoon freshly grated ginger
1 tsp sesame oil (do not add more, it is powerful stuff)
salt to taste
sesame seeds to sprinkle on top

Place the salmon filets (skin side down) over a baking sheet covered with aluminum foil leave at room temperature while you heat the oven to 350F and reduce the sauce for glazing.

Mix the soy sauce and mirin in a small non-stick saucepan, add the ginger, brown sugar and sesame oil. Simmer gently for a few minutes, until it starts to get a little thicker.   Brush the top of the filets with some of the glaze, season very lightly with salt, and place in the oven for 20 minutes. Reserve the rest of the glaze.

Remove the pan from the oven, brush with more glaze and sprinkle sesame seeds. Return to the oven, and cook until done to your liking. Serve immediately.

ENJOY!

to print the recipe, click here

We eat salmon every week, but usually the husband is the seafood cook in our house. I rarely venture into his department, but was tempted to try this very simple preparation. I know I’ll be making it regularly, the only key thing is to get the fish cooked to the exact point you want (which is easier to do with sous-vide, but sometimes it’s nice to simplify things further).  Probe the filet with a paring knife, and remove from the oven when it reaches your personal Nirvana level.

ONE YEAR AGO: Halloween Entremet Cake

TWO YEAR AGO: Pork with Prunes, Olives and Capers

THREE YEARS AGO: Kansas Corn Chowder

FOUR YEARS AGO: Impossibly Cute Bacon and Egg Cups

FIVE YEARS AGO: Pulling Under Pressure

SIX YEARS AGO: Cooking Sous-vide: Two takes on Chicken Thighs

SEVEN YEARS AGO: Miso Soup: A Japanese Classic

EIGHT YEARS AGO: On my desk

NINE YEARS AGO: A must-make veggie puree

TEN YEARS AGO: Vegetarian Lasagna

ELEVEN YEARS AGO:  Brazilian Pão de Queijo


SUNBURST PUMPKIN SOURDOUGH

OCTOBER 16th: WORLD BREAD DAY!

It is that time of the year, when leaves turn orange and red, pumpkins pop up in every recipe (including many where they don’t belong, but let’s not get into a sour mood).  I share with you today a sourdough bread to celebrate Fall. It does have a little canned pumpkin in the formula, but I promise you the taste is very mild, it just contributes moisture and it slightly changes the final texture of the crumb. We loved this bread and hope you’ll also like it if you make it.

SUNBURST PUMPKIN SOURDOUGH
(from the Bewitching Kitchen)

475 g white bread flour
25 g whole wheat flour
120g starter at 100%
100 g canned pumpkin
340g water
10g salt

Add all ingredients to the bowl of a KitchenAid type mixer and using the dough hook, work the dough for 4 minutes at low speed. Adjust flour if necessary, it should still stick to the bottom of the bowl not cleaning it completely as the dough moves.

Remove from the bowl, knead briefly by hand and let it ferment for 3 and a half hours folding every 45 minutes. Shape as a round loaf, refrigerate overnight, seam side up.

Heat the oven to 450F, invert the dough on parchment paper, so that the smooth side is now up. Dust the surface with regular flour, lightly but uniformly. Score with a brand new razor blade, in concentric arcs from the center. Bake for 45 minutes in a Dutch oven, covered for 30 minutes, removing the lid for the final 15 min.  Let it cool completely before slicing.

ENJOY!

to print the recipe, click here

Comments: I’ve been really in love with this method of starting the kneading in the KitchenAid and finishing with foldings. It gets a nice jump start on gluten formation, and it has the advantage of being very “clean”.  When you do the whole incorporation by hand, the two initial foldings can be pretty messy, the dough gets on the fingers, sticks to the sides of the bowl… it’s not too big a deal, but allowing the KitchenAid to do that initial work makes clean up so much easier. I know bread baking purists will turn their noses but… it works for me.

This bread was a loud, loud singer as it cooled down. And the crumb had the kind of structure we like. Not too open, not too tight.

As I mentioned, you cannot taste pumpkin, it is just a very mellow sourdough, with a creamy texture given by the pumpkin puree. If you like a more orange hint to the crumb, adding turmeric is a good option, but not too much, I’d say 1/2 tsp for this size loaf.

ONE YEAR AGO: Sourdough Four-Play

TWO YEARS AGO: World Bread Day 2018

THREE YEARS AGO: Slow-Roasted Tomatoes

FOUR YEARS AGO: Spicy Cotija and Black Olive Sourdough

FIVE YEARS AGO: Apple Cinnamon Oatmeal Cake

SIX YEARS AGO: Sourdough Rye Bread with Flaxseeds and Oats

SEVEN YEARS AGO: PCR and a Dance in the Mind Field

EIGHT YEARS AGO: October 16: World Bread Day

NINE YEARS AGO: The US Listeria Outbreak 2011

TEN YEARS AGO: 36 Hour Sourdough Baguettes

ELEVEN YEARS AGO: October 16 is World Bread Day


CHOCOLATE BONBONS WITH MANGO-GANACHE FILLING

It’s been a long time since I tried my luck with bonbons. Six months, to be precise. Every weekend I kept adding it to my list of little culinary adventures, but somehow postponing it to that uncertain time called “near future.”  But it finally happened. I tricked myself by making the filling first, so that I had to put it to use. Psychology 101. It worked. If you are not interested in making bonbons, consider the filling for macarons or sandwich cookies. I had some leftover and made a small batch of macarons to take care of it. They turned out into “Funky Rose Macarons” and I share photos in the end of this post.

CHOCOLATE BONBONS WITH MANGO-GANACHE FILLING
(from the Bewitching Kitchen, adapted from several sources)

for the shells:
300g dark tempered dark chocolate for shells
100g cocoa butter
1/2 tsp titanium oxide
two colors of fat-soluble dye of your choice
gold pearl dust (optional)
150g tempered dark chocolate for closing bonbons

for the filling:
160g dark chocolate, chopped (I used Lindt 70%)
56g heavy cream
35 g mango purée
7 g light corn syrup
7 g butter,  soft   ⅛ ounce
1/8 tsp ground coriander

Start by making the filling. Place the chopped chocolate in a medium-size bowl. Pour the cream into a small, heavy-bottomed saucepan and add the mango purée and corn syrup.   Cook over medium-high heat until the cream mixture reaches a rolling boil. Pour onto the chopped chocolate. Let sit for 2 minutes undisturbed, then stir slowly to incorporate.  Once the ganache cools to about 95F add the butter and the coriander.  Place the ganache in a piping bag, and it can be piped into tempered shells once it is at 88F. You can make the ganache in advance and warm gently to use.

Make the shells. Clean your mold with alcohol and rub every cavity very well with a cotton ball or a make-up pad. Heat the cocoa butter very gently, preferably don’t let it go over 115F. Add titanium oxide and blend it vigorously with an immersion blender. In the composite photo below, you’ll see that melted cocoa butter is translucent, yellow. Once you add titanium oxide it will turn white and opaque, that’s what you need as a starting point to add any color you want.  Divide the cocoa butter in two portions, add the color you want (make sure it is fat-soluble or your cocoa butter will seize). Add each color to a piping bag (do not cut the tip).  Now, gently roll the bag on a surface, back and forth, back and forth, so that the cocoa butter cools and tempers.


Check the temperature every few minutes, it will cool reasonably fast. If you have an infra-red thermometer, that’s the easiest way to do it. Once the temperature drops to 92F it will be ready to add to the molds. Simply use a gloved finger and paint each color inside the cavities. If you want to add some gold tones to it, once the cocoa butter sets, you can brush lightly with pearl dust.

Temper 300g of dark chocolate and fill the cavities. Tap the mold to release any air bubbles, then invert the mold to let the excess chocolate drip (do that on top of plastic wrap so you can collect the chocolate to use again later, or to do some decorations while it’s still tempered. I made some spider webs, because…. that’s the spirit!

Let the mold sit inverted and suspended over your countertop (the easiest way to do it is to use those silicone dough strips so that the mold does not touch any surface. After one hour at room temperature, you can flip the mold and fill the cavities with your prepared ganache (make sure it is not over 88F so that your shells won’t be melted and lose temper). Make sure to leave a little space for the chocolate that will seal the bonbons.

Now temper 150g chocolate and use it to cover the shells. Right before you pour the chocolate, heat the surface of the mold with a hairdryer very very briefly. You do that to melt just a bit the edge of the shells. Pour the chocolate and place a sheet of acetate covering the whole mold. Hold the top with one hand, and use the other hand to scrape the acetate very hard, so that all excess chocolate will drip out and the acetate will be stuck to the mold.


Ideally, wait for 12 to 24 hours to un-mold, but you can also leave it for 1 hour at room temperature and then place it in the freezer for exactly 15 minutes. The shells will contract and be ready to un-mold then.  Be brave and bang the mold hard on a countertop, the shells should pop out. Full crystallization of the chocolate will happen over time, just leave it at room temperature.  Marvel at the random pattern of colors you got.

ENJOY!

to print the recipe, click here

Comments: I had some issues with the painting of the mold, my colored cocoa butter kept forming a puddle at the bottom instead of painting nicely on the sides, although the temperature seemed “spot on” (to quote Paul Hollywood). So I kept cleaning it all with cotton balls (it was nightmarish) and trying again, and again. Finally, in complete despair, I stuck the clean mold in the freezer for 5 minutes and that worked like a charm, because the cocoa butter then set exactly where I wanted it to be.  Of course, when making bonbons you are “in the dark” about the whole process until the very end – the thrilling moment of un-molding the beauties.

If you read my first adventure with bonbons, at that time I had some problems closing the shells. This time I used a different method, much more efficient. Pour the tempered chocolate on the filled molds, and press a sheet of acetate (cut to size) right on top of it, then scrape it firmly using one of these tools of a cake smoother. The chocolate will crystallize beautifully on the acetate, giving a nice shine to the bottom of the bonbon.

I wanted to dye the shells orange and red, but realized I did not have fat-soluble orange dye, so I went with pink and red, which would be more appropriate for a raspberry filling. But I am so happy with the results, the shells turned out super shiny and not a single bonbon cracked during un-molding. The gold dust did not show too well, I was afraid of over-doing it, next time I will add more.

The bonbons had a very thin and delicate shell, very uniform all the way around. All in all, it was a successful project. The kitchen looked like the aftermath of a paintball fight, and I was that player who was killed 9 times, but it was all worth it!

As I mentioned, I had leftover ganache. I kept it at room temperature, and next day whipped it with a handheld blender so that it was easier to pipe. Macarons were made using the Broma Bakery recipe (Swiss-meringue based), and orange food dye.  Half the batter I did the macaronage to the normal level and piped round shells. Half the batter I kept a lot thicker and piped with a Wilton 1M tip in rosette shape as I did in the past. I painted the edges of the petals with black, gold, and copper pearl dust dissolved in vodka. In some shells I used an air-sprayer with black dye, but I thought those turned out a bit too dark.


The tempered spider web decorations were also put to use on cupcakes.  I will be making a blog post in the near future (yes, that time frame I am so fond of!).

I hope you enjoyed my third adventure int the world of chocolate bonbons.
I have the feeling it won’t take me six more months to try again…

ONE YEAR AGO:  Giant Cookie Meets Mousse

TWO YEAR AGO: The Brazilian Battenberg

THREE YEARS AGO: Salzburg Sourdough

FOUR YEARS AGO: If I had One Hour

FIVE YEARS AGO: Apple Cinnamon Oatmeal Cake

SIX YEARS AGO: Sourdough Rye Bread with Flaxseeds and Oats

SEVEN YEARS AGO: Apricot-Raspberry Sorbet: A farewell to Summer

EIGHT YEARS AGO: Marcela’s Salpicon

NINE YEARS AGO: Pork Kebabs

TEN YEARS AGO: Fondant au Chocolat

ELEVEN YEARS AGOGot Spinach? Have a salad!

CURRIED SWEET POTATO FRITTERS

This is a wonderful take on sweet potatoes, that you could conceivably serve as a little appetizer, if you make them slightly smaller and use a lighter hand on the yogurt topping. Using cookie cutters to shape the patties makes the presentation very uniform and appealing, but of course if you don’t want to go through that step, simply add portions to the hot oil. They will be rustic but there’s really nothing wrong with that.

CURRIED SWEET POTATO FRITTERS
(adapted from Tea Time Magazine, November-December 2020)

for yogurt sauce:
1/3 cup yogurt
1 tsp agave nectar
1/8 tsp ground cardamon
1 Tbs lemon juice
pinch of salt

for fritters:
2 cups sweet potato, peeled and grated
1 egg
1/4 cup all-purpose flour
1/2 tsp curry powder
1/2 tsp salt
olive oil for shallow frying

Make the yogurt by mixing all ingredients in a small bowl, and keeping in the fridge until serving time.

Stir together all ingredients for the fritters (except olive oil)  in a large bowl.  Place a 2-inch cookie cutter over a baking sheet lined with parchment paper. Place a little over 1 tablespoon of the sweet potato mixture inside the cutter, patting it flat. Carefully remove the ring and make a second one. Use all the potato mixture, you should have between 8 and 10 fritters. Refrigerate to firm the mixture up for about 20 minutes.

Heat the olive oil in a large non-stick frying pan and sautee the little cakes on both sides until golden brown. Drain on paper towels, and serve with a dollop of the yogurt sauce on top. You can keep the fritters in a low-oven for a while if needed.

ENJOY!

to print the recipe, click here

Comments: You can make the little patties way in advance and keep them in the fridge. In fact, I recommend you do that because they will keep their shape better as you cook them. I did not want to make them too thin, because they would get too soaked in oil, so after sauteeing both sides, I placed them in a 350F oven for about 10 minutes.

When I make them again, I will go Pollock on the sauce, I think it will look pretty cool that way. And yes, this will undoubtedly be one of those recipes to show up regularly in our kitchen. We both loved it!

ONE YEAR AGO: Miso and Sesame Roast Chicken with Revelation Quinoa

TWO YEAR AGO: Incredibly Simple Times Four

THREE YEARS AGO: Parsnip, Coconut and Lemongrass Soup

FOUR YEARS AGO: In My Kitchen, October 2016

FIVE YEARS AGO: Paleo Moussaka

SIX YEARS AGO: In My Kitchen, October 2014

SEVEN YEARS AGO: In My Kitchen, October 2013

EIGHT YEARS AGO: Bourbon and Molasses Glazed Pork Tenderloin

NINE YEARS AGO: Crimson and Cream Turkey Chili

TEN YEARS AGO: Taking a break from the nano-kitchen

ELEVEN YEARS AGO: Chocolate Chip Cookies

LET’S GET SPOOKY!

I realize Halloween will not be the same this year, and that  makes me sad. But it is impossible to resist baking all kinds of spooky things, and with this post I share six options for your socially-distant Halloween celebration.

All macarons were filled with a chocolate ganache, but in the Devil and Mummy macs the ganache was made by steeping the cream with smoked tea. Bat Cookies are a hazelnut-almond dough, and the others are regular sugar cookies.

DEVIL MACARONS

I used my default recipe which you can find here (and also a video tutorial in case you’d like to bake along with me). The idea of the decoration came from a brand new cookbook (The Wicked Baker) by one of the most fascinating contestants of the Great British Bake Off, the one and only Helena Garcia. She used a similar decoration for donuts, but I adapted it for macarons. The ears were made with Royal Icing dyed black, and piped on parchment paper in the appropriate format. Make more ears than you’ll need, as they break easily.  The same Royal Icing was used to pipe the devilish tail. Once you assemble the shells with the filling, quickly add the ears, while the ganache is still soft.

Recipe for the smoked chocolate ganache:
150g heavy cream (you won’t use the full amount in the ganache)
1 bag smoked black tea (Lapsang Souchong)
2 tsp corn syrup
230g semi-sweet chocolate in pieces

Start by making the filling, as it must cool down before using. Bring the heavy cream to a gentle boil, add the tea bag. Turn the heat off, close the pan and leave the tea infusing for 30 minutes. Squeeze the tea bag and remove it. Bring the cream to a gentle boil again, then pour 115g of it over the chocolate. Leave it for 5 minutes, gently whisk until smooth, add the corn syrup. Cool it until it gets to a good consistency for piping on the shells.

MUMMY MACARONS

Also made with my default recipe, and filled with Smoked Chocolate Ganache. Once the shells are assembled, simply use white Candy Melts to make a random drizzle on the surface, and quickly add store-bought candy eyes (from Wilton).

Those were made in fact two years ago, and I totally forgot to blog about them. Back then, there was a thing called “Halloween Party” with guests and all (sigh). Bogey approved the macs, but was a bit spooked by a special version I made at the time.

Isn’t that pup the most adorable being in the universe? Noticed the paw?


SPIDER MACARONS

The shells were made with a new (to me) recipe. I used the Swiss meringue method, in a version that is super easy to memorize: 100g of every ingredient. All details in this recent post from Broma Bakery. I really like the way the shells baked with tall feet, and I did not even passed the almond flour + powdered sugar through the food processor, which made the whole process even simpler.

I loved making the spider decorations. I used marzipan dyed black, and then formed the head and the body of the little spiders, glueing them to the shells with candy melts. A little food-safe black pen to make the spider legs, and that was it! If you prefer less marzipan on the shells, roll the marzipan thin, and cut circles, one bigger for the body, one smaller for the head. It will have a similar look, but for those who are not wild about marzipan, even better to enjoy!

Chocolate Ganache Filling

100 g heavy cream
220g dark chocolate, chopped finely (I used Lindt 70%)
15 g butter
15 g honey
1/2 tsp vanilla extract

Gently melt the chocolate with the butter in a double-boiler or microwave at 50% power. Set aside.

Pour the cream together with the honey and vanilla into a small saucepan and place over medium heat until it reaches almost boiling point. Pour slowly over the chocolate-butter mixture, mix until homogenized.  Keep at room temperature for about 3 hours before using to fill the shells. You can make also make it the day before.

BAT COOKIES

Another decoration idea from The Wicked Baker, Helena’s cookbook. She used sugar cookies, I went with a slightly different recipe for the cookie base.

HAZELNUT-ALMOND CUT-OUT COOKIES
(from the Bewitching Kitchen)

188g butter at room temperature, cut in small cubes
78g powdered sugar
63g eggs
250g all-purpose flour
42g ground hazelnuts
42g ground almonds
1/4 tsp salt

In a Kitchen Aid type mixer with the paddle attachment cream the butter with powdered sugar until soft and smooth. Gradually add the eggs, and keep beating until fully emulsified.

Add the flour, hazelnuts, almonds and salt, mixing gently to a homogeneous mixture. Transfer the dough to a floured surface, pat as a disc and refrigerate for about 2 hours.

Roll out and cut in any shape you like. Freeze the cut cookies for 10 minutes before baking at 350F for about 12 minutes, until edges start to get a little color. Decorate with Royal Icing or serve plain, they are delicious even without decorations.

ENJOY!

to print the recipe, click here

A little Royal Icing, sprinkles, and food pen to finalize the bat-look…  Very simple to decorate, and the hazelnut-almond base really adds a lot to the cookie.

SPOOKY SUGAR COOKIES

I love using these cookie cutters that make the design for you, because I’m not that good at piping fancy designs (I am working on it, but well, you know how it goes). For the houses, I wanted a “granite” look, and it was easy to do with food gel diluted with a bit of vodka (or lemon extract). You need to eye-ball the dilution factor, so that the color is a little faded and does not cover the surface of the cookie completely. I used purple and dark blue from Artisan Accents, and completed the decoration with Royal Icing dyed orange or black.

For the sugar cookie basic recipe, I followed Bakeat350 to a T. I love that you don’t need to refrigerate the dough before rolling it out. All recipes I’ve tried from that site worked wonderfully, and I’ve tried plenty, as every week I include a small batch of sugar cookies in my donations to Common Table.

FRIENDLY GHOST MACARONS

I used my default recipe for these, and the same chocolate ganache used for the Spider Macs, posted above.  All you need is a template to pipe your little ghosts, and to make sure the macaron batter is not too thin, stop shorter in the macaronage, so that when you pipe the design it stays as it is.  There are many templates available in the net, I used this one. The only issue I had with these macs is the slight browning in the oven. It is pretty tricky to keep the white color unchanged. In a batch I made earlier, I painted some pearl dust all over the surface, but it used up so much pearl dust, I am not sure it was worth it.

For more recipes to inspire you, click on this link from last year. Amazing how we had no idea how much our world would be changed 365 days later.

ONE YEAR AGO: Miso and Sesame Roast Chicken with Revelation Quinoa

TWO YEAR AGO: Incredibly Simple Times Four

THREE YEARS AGO: Parsnip, Coconut and Lemongrass Soup

FOUR YEARS AGO: In My Kitchen, October 2016

FIVE YEARS AGO: Paleo Moussaka

SIX YEARS AGO: In My Kitchen, October 2014

SEVEN YEARS AGO: In My Kitchen, October 2013

EIGHT YEARS AGO: Bourbon and Molasses Glazed Pork Tenderloin

NINE YEARS AGO: Crimson and Cream Turkey Chili

TEN YEARS AGO: Taking a break from the nano-kitchen

ELEVEN YEARS AGO: Chocolate Chip Cookies