SOMEBODY STOP ME!

I simply cannot help it. I’m about to share yet another recipe for cauliflower-in-disguise. But, believe me, this one will change your life. Have I ever promised to change your life with a recipe? No. So trust me, because I never lie. Cross my heart, etc etc. The whole thing starts as 99% of the cauli-rice recipes do: process the florets into bits.  But then, the twist: instead of boiling or simmering it, you will roast the riced cauliflower. Yes, straight into the oven with a delicate coating of coconut oil. And here I am, salivating just by the thought of how great this recipe turns out. Every. Single. Time Perfection, my friends. Perfection. I am so in love with cauliflower that Phil could be a bit jealous of it.

Cauli-Rice with Asparagus and Almonds

BAKED CAULI-RICE WITH ASPARAGUS AND ALMONDS
(adapted  from  The Clothes Make the Girl)

1 head of cauliflower, any color you like
1 tablespoon coconut oil, melted
3/4 teaspoon of salt
ground black pepper to taste
sautéed asparagus
toasted slivered almonds

You will basically process the cauliflower into bits, then roast it with the coconut oil in a 425 F oven. For all the details of the recipe, click here

Meanwhile, prepare your asparagus using any favorite recipe and mixture of spices. Toast some almonds lightly seasoned with salt.  When the cauli-rice is baked, transfer it to a serving bowl, top with the asparagus and almonds, and serve right away.

ENJOY!

composite

Comments:  The difference this method makes in the final product is hard to imagine. The cauli-rice gets all loose and with the exact amount of moisture, not soupy and lifeless. The coconut oil will be barely noticeable. I suspect that even if you don’t care for its taste in this preparation you won’t object. Perfect marriage.

You can take this dish into so many different directions: make it Mexican with the right mixture of spices, add a nice home-made salsa on top. Make it Indian with a curry blend, make it Italian, Brazilian, Korean, it is truly a superb blank canvas to work on.

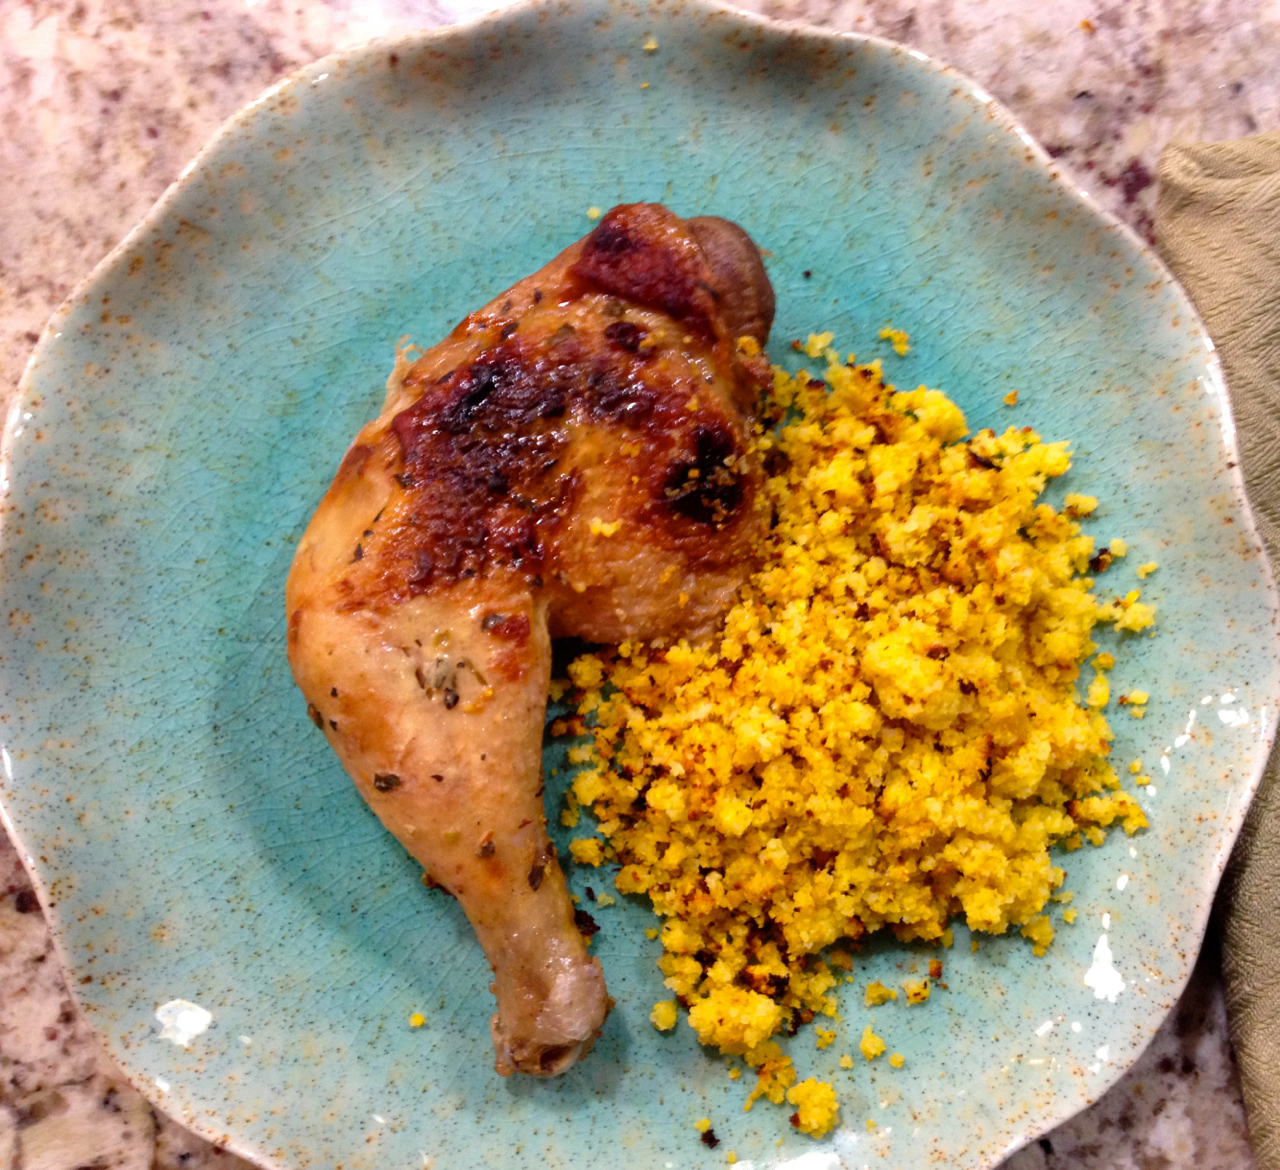
I’ve made it several times so far, and also used a yellow-orange cauliflower for a show-stopper of a side-dish. I love it. Love it. Period.  Here it is, next to a roasted chicken leg made with a marinade that included a certain ginger syrup of my past.

CauliRiceOrange
I say goodbye with the firm intention of not blogging on cauliflower for at least a week!. I’ve got will power, I’ll nail this. Although….

ArtichokeFlirt11

ONE YEAR AGO: Zucchini Pasta with Cilantro-Cashew Pesto

TWO YEARS AGO: Bran Muffins, Take Two

THREE YEARS AGO: Brown Butter Chocolate Chip Cookies

FOUR YEARS AGO: Mogo Mojo

FIVE YEARS AGO: Slow-Roasted Chicken Thighs: an Ice-Breaker


GOING SKINNY AND LOVING IT!

No, my weight has not dropped that much.  What is going skinny is my Eggplant Parmigiana, since I radically changed my recipe after stumbling on this post by Mike at The Iron You. Mike’s blog line is “Eat Well – Exercise More – Become a Healthier You”.  I can definitely sign below that. He knows how to match nutrition with a challenging exercise routine, and his posts are always super-fun to read.  Anyway, he started that particular article with a mild rant about the way most people approach this classic dish.  Reading it, I was forced to admit to being guilty of some of the crimes. Granted, I’ve never went to the extent of frying my eggplant slices, but I definitely used a heavy hand with the cheese and sauce. My version of eggplant parm made me leave the table feeling heavy and sluggish, a feeling I don’t care for at all. Mike proves that there’s no reason for it. Just a few tweaks and you will have a fantastic dish, still able to carry the label of comfort food, but considerably lighter than 99% of the recipes in restaurants, cookbooks, and the blogosphere.  I hope you will give this version a try, it will knock your socks off.  And, apparently in English that is a very good thing.

SkinnyEggplantParmigiana

SKINNY EGGPLANT PARMIGIANA
(very slightly modified from The Iron You)

3 medium eggplants
2 garlic cloves, peeled (I omitted due to our vampire genes)
1 29 oz / 820 gr can diced tomato
1 cup / 1.8 oz / 50 gr Parmigiano-Reggiano cheese, grated
2 eggs, beaten
2 teaspoons almond milk (my adaptation)
1 medium shallot, chopped
2 tablespoons olive oil, divided
handful of fresh basil leaves, roughly chopped
2 teaspoons fine grain sea salt, divided
black ground pepper to taste

Preheat oven to 400°F (200°C) and place a rack in the middle. Line two baking sheets with parchment paper and lightly grease with some olive oil. Set aside.

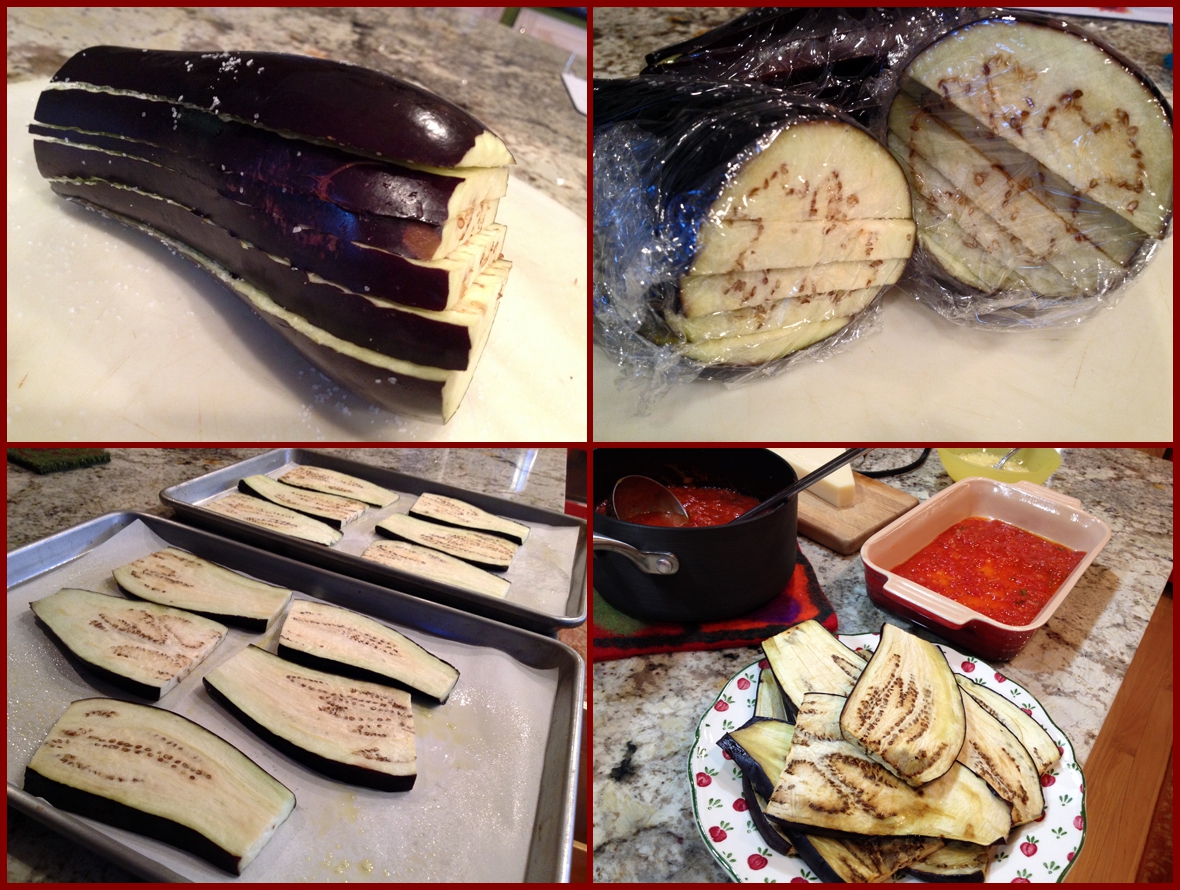
Cut each eggplant lengthwise in 1/4 inch slices, liberally sprinkle with salt on one side, and add the slices back together, tightly assembling the eggplant and wrapping with plastic wrap.  Leave them over the counter for about 20 minutes. You will notice a darkish liquid forming inside the package. Open the package over the sink, and briefly rinse the slices, drying them with paper towels.

Arrange the eggplant slices on a single layer on the baking sheets. Bake in the oven for 12 to 15 minutes, until the slices begin to turn deep brown on top.  Remove the slices to a platter and allow them to cool slightly before proceeding.

In the meantime make the tomato sauce. Heat the olive oil in a large saucepan over medium heat, add shallots and garlic and saute’ for 5 minutes, until onion begins to golden. Add diced tomatoes, 1 teaspoon of salt, basil, reduce the heat to low and let simmer for 15 minutes. Turn the heat off and set aside.

Lightly grease with 1 tablespoon of olive oil the bottom and sides of an 8 by 12-inch baking pan. (a brownie pan works perfectly). Beat two eggs with the almond milk and reserve. Cover the bottom of the baking dish with some tomato sauce and arrange eggplant slices on top to form a uniform layer. Cover the eggplant with some tomato sauce, some Parmigiano cheese and top with 2 tablespoons of beaten eggs . Repeat to make 3 layers, making sure to end with a uniform layer of tomato sauce and top with the remaining cheese.
.
Bake in the oven for about 40 minutes until hot and beginning to brown. Let rest at for 10 minutes before serving.

ENJOY!

to print the recipe, click here

And now it’s time for me to brag a little… Many years ago, I sent a cooking tip to Fine Cooking magazine, and my tip won the best of the issue!  I got several cool gifts, including a salad spinner I still own, and love.  It was a nice surprise to win.  The cooking tip I submitted was what I just shared here with you, the way I draw the bitter juices out of eggplant. Most instructions involve salting the slices and weighing them down, or submerging them in salted water.  I find my method very convenient, and quite efficient.  It is explained in detail in the recipe, in case you missed it. The secret is to tighten the package of plastic well around the eggplant.

SkinnyEggplanComposite

I cut the eggplant lengthwise, and when assembling the dish,  each layer goes in one orientation, so that they criss-cross. That makes slicing the casserole a lot easier later.  Also, since the beaten eggs are a little hard to spread over the layers, I added a touch of almond milk to thin it, a la egg wash.  You can omit it, or use milk or even water if you prefer, but don’t add too much, just enough to make it easier to spread.

It was so much fun to make this dish, that I feel like sharing a couple of shots of the process…

firstlayerHere is the first layer ready, just a little cheese and a little beaten egg on top of the eggplant…

LayersReadyAnd the dish, ready to go into the oven… make sure to bake it over a larger baking sheet to avoid messing up your oven.

It is very important to let the dish rest for at least 10  minutes, but longer will be better. Next day, leftovers were perfect warmed up for a few minutes in the microwave.  In fact it tasted even better than the first day, so if you have a dinner party to host, this could be a nice option to make in advance.  It is also gluten-free, in case you have friends with gluten issues.

Leftovers

We loved this preparation so much,  there is no way I’m going back to my former recipe!  I also think that if you cut the eggplant parmigiana in small squares they could work well as appetizers for a dinner party.  Substantial for an appetizer course, but so very delicious!  You would definitely have to cut it the following day, because  when it comes out of the oven it will be too tricky to do it.

Mike, thanks again for the wonderful take on one of our favorite eggplant preparations!


ONE YEAR AGO: Supernova Meets Wok

TWO YEARS AGO500 Posts and The Best Thing I ever made

THREE YEARS AGO: Back in Los Angeles

FOUR YEARS AGO: White House Macaroni and Cheese

FIVE YEARS AGO: Korean-Style Pork with Asian Slaw


PAN-CHARRED VEGGIES FROM COOKING LIGHT

Cooking Light magazine, in their April 2014 issue published a nice article about pan-charring veggies for a boost in flavor. More than simply offering a recipe, they shared a general method to deal with veggies like asparagus and green beans. Veggies that can take the heat, so to speak. All you need to do is choose three basic components: the fat to coat the veggies after the initial charring, the acidic ingredient to brighten things up and the herbs added right before serving.  No matter which veggies you are dealing with, they will be ready in no time.  I know I sound like a broken record, but when I get home from work and it’s my turn to cook, the last thing I want is a side-dish that takes 45 minutes to prepare.  Give me something fast and flavorful, and I am game!

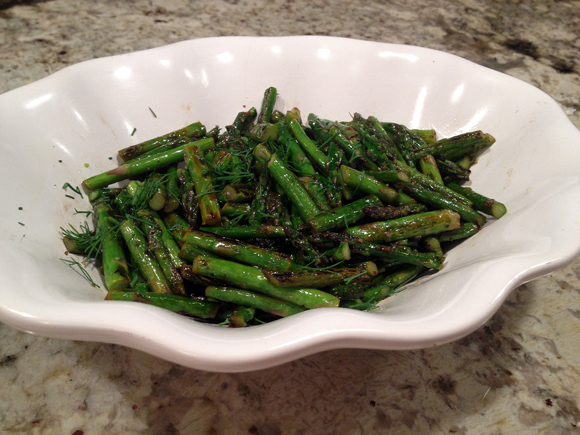
So here is my take number one on this method: charred asparagus flavored with lemon juice and fresh dill at the end… Before you accuse me of the capital culinary sin of non-seasonal cooking, let me say that this dish was made last May, not too long after I got the magazine. As usual, it takes me a while to go from table to blog. But, since last week I used this method to cook delicious green beans, I am taking the opportunity to talk about both dishes. Clearly, it’s all about the char…

AsparagusDill

PAN-CHARRED ASPARAGUS
(adapted from Cooking Light, April 2014)

Cooking spray
8 ounces asparagus, cut in pieces
1 + 1/2 teaspoons walnut oil
2 teaspoons lemon juice
2 teaspoons chopped fresh dill
1/4 teaspoon salt
.
Heat a medium, heavy skillet (not nonstick) over high heat for 2 minutes.

Coat pan with cooking spray. Immediately add asparagus pieces to pan, shaking them into a single layer; cook, without stirring, 2 minutes or until asparagus is very lightly charred. Cook asparagus 5 more minutes or until crisp-tender and evenly charred, tossing occasionally.

Remove pan from heat. Let asparagus rest 1 minute. Add walnut oil; toss to coat asparagus pieces. Add lemon juice; toss. Turn on heat if necessary to evaporate most of liquid. Sprinkle asparagus with dill and salt; toss. Serve right away.

ENJOY!

to print the recipe, click here

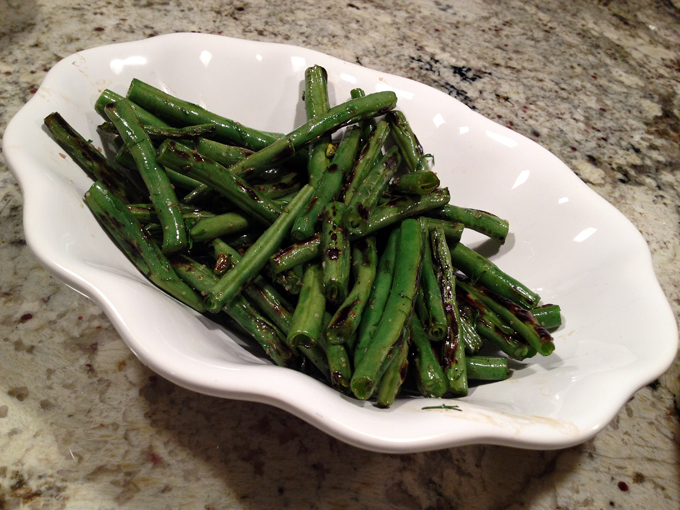
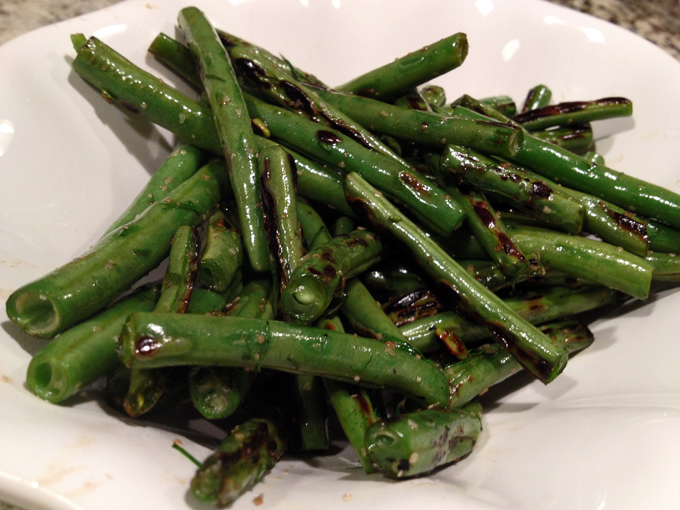
And here is my take number two: the exact same method, using olive oil to coat green beans, a touch of apple cider vinegar as the acidic component, and fresh tarragon added at the end. Tarragon straight from the garden of our friend Cindy, who recently visited us with her husband. Remember, I am the lucky woman with the super generous friends…

GreenBeansTarragon2
Now, as I mentioned, this is all about the char… Look at these dark spots, aren’t they making you crave some green beans?

GreenBeansTarragon

Back in 2010 I  wrote a blog post about “Blasted Broccoli“, stove-top version. We loved that recipe so much that I went through a long phase of cooking it weekly. I can see that this method could be adapted for broccoli too. Or sugar snap peas.  Avocado oil, coconut oil, use your imagination (and your pantry) and play with this method.  You won’t be disappointed…

ONE YEAR AGO: Pomegranate Chicken Thighs and Carrot Mash

TWO YEARS AGO: The Many Faces of Kale

THREE YEARS AGO:  Short and Sweet

FOUR YEARS AGO: Ciabatta, a Classic Italian Bread

FIVE YEARS AGO: Magical Lamb Stew


A NEW TAKE ON CAULIFLOWER PUREE

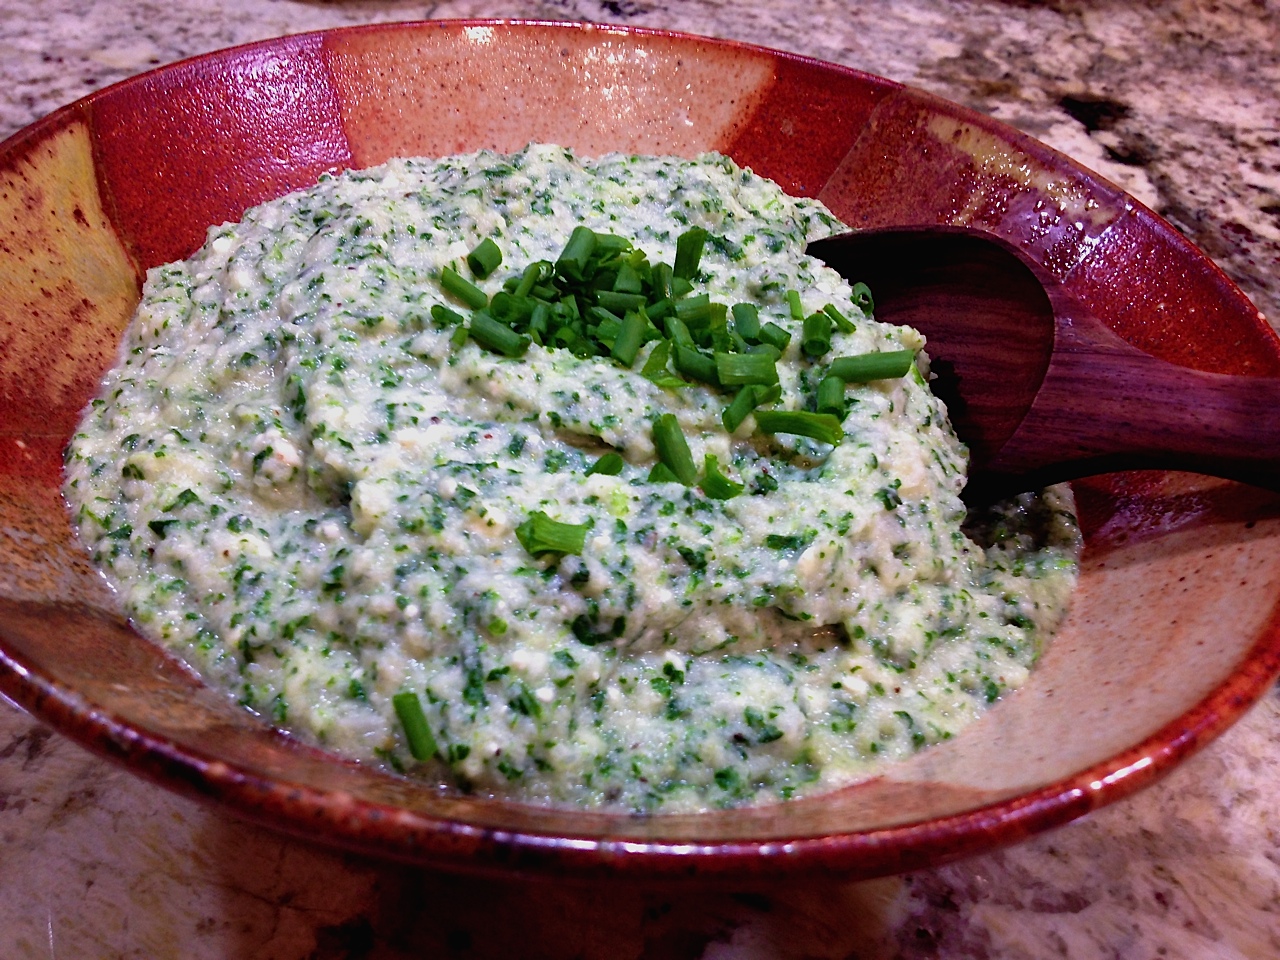
Regular readers of my blog will likely say to themselves – there she comes AGAIN, with yet another recipe for mashed cauliflower.  When is she going to stop?  Probably not in the near future, because I keep finding interesting ways to enjoy one of my favorite side dishes. This version turned out pretty tasty,  so I must share with you, magnanimous person that I am. I got the idea from a post over at  Closet Cooking, and made a few changes to use what I had around in the fridge.  The spinach adds a lot in terms of flavor and nutrients.  This one will definitely be a regular appearance at our table.

Cauliflower Puree


CAULIFLOWER-SPINACH PUREE
(modified from Closet Cooking)

1 medium head cauliflower, cut into small florets
1 tablespoon olive oil
5 ounces spinach
squeeze of lemon juice (1 or 2 teaspoons)
1/2 cup feta, crumbled
1/4 cup Greek yogurt, full-fat if you can find it (good luck!)
freshly ground nutmeg
almond milk to taste
salt and pepper
fresh chives, minced

Place the cauliflower in a steamer over boiling water and steam until fork tender, about 10 minutes. While the cauliflower cooks, sautée the fresh spinach in olive oil until wilted. Season with salt and pepper, add a little lemon juice and reserve.  Place the cooked cauliflower in the bowl of a food processor.  Add the feta cheese, yogurt, nutmeg, salt and  pepper, and process until well combined.  Add the reserved spinach, process for a few seconds.  If too thick add almond milk until you reach the right consistency.   The puree can  be warmed up for a minute in the microwave if the cold ingredients added to it cooled it down too much, but probably it will not be necessary.

ENJOY!

to print the recipe, click here

I loved this take on cauliflower puree so much that I made it again the following week,  using kale instead of spinach, and adding a little bit of sun-dried tomato to the mix.  It turned out almost great, but not quite.  A few details that I should have paid more attention to compromised the quality of the dish. I used chopped kale, pre-bagged, thinking it would make my life a lot easier. Well, it did, but it didn’t.  In the bagged version, the stems are chopped together with the leaves, so because I cooked them very little to preserve that nice bright green color, the stems were a bit tough.  Not pleasant in the middle of the smooth cauliflower puree.  So, my advice is to either go for spinach, or if you like the assertive taste of  kale, buy the leaves, and chop them. If the food police is not around, you can discard the stems, but if you have guilty feelings about it, cook the kale in two steps, stems first, leaves at the end.

This is such a nice side dish, it goes well with almost anything, from seafood to beef, and leftovers keep well in the fridge.  I bet they could be wonderful made into little fritters, adding an egg, maybe a bit of almond flour. This spinach version I shared today we enjoyed a while ago with Chicken Thighs with Roasted Tomato Salsa. The kale variation was matched with another interesting recipe from Cooking Light magazine, which I shall blog about in the near future: a Cremini Mushroom Meatloaf, which is actually a lot more mushroom than meat. Great recipe, stay tuned…   😉

ONE YEAR AGO: In My (NEW!) Kitchen

TWO YEARS AGO: The Lab Move and New Beginnings

THREE YEARS AGO: Honey-Oat Pain de Mie

FOUR YEARS AGO: Carrot and Leek Soup

FIVE YEARS AGO: Chicken Parmigiana 101


THE COUSCOUS THAT WASN’T

I am quite slow when it comes to following cooking trends. Chia seeds? Haven’t used them yet, although I do own a bag and lovingly glance at it from time to time. Then, there is cauliflower in its unexpected uses, like the super popular pizza crust and processed versions that mimic rice.  The only non-traditional preparation I embraced long ago was mashed cauliflower for a low-carb take on mashed potatoes. It turns out I am so fond of it, that the real thing almost never finds its way into our kitchen. It is a bit puzzling that I ignored all other “out-there” uses for cauliflower. Better late than never, I now profess my newest found love: cauli-couscous.  Please, if you haven’t tried it yet, do not twist your nose at it. The tiny bits of cauliflower end up with a texture very similar to its semolina cousin, and seem to absorb flavors even more efficiently.  A very versatile dish, you can take it in many different directions by changing the veggies, the spices, herbs, and the cooking liquid. Just as you would with… couscous!  😉

CauliCouscous
MEDITERRANEAN STYLE CAULIFLOWER COUSCOUS

(from the Bewitching Kitchen, inspired by many sources)

1 head of cauliflower, broken into florets
1 Tablespoon grapeseed oil + drizzle for chickpeas
1 can of chickpeas, drained and well rinsed
1/4 teaspoon ground cumin
3/4 teaspoon salt, divided (1/4 + 1/2 tsp)
pinch of cayenne pepper
juice of 1 lemon mixed with 1/4 cup water
8 cherry tomatoes, quartered
1 English cucumber, diced
1/4 cup slivered almonds, toasted
fresh parsley, minced (to taste)

Prepare the chickpeas: Warm a dry skillet over medium-high heat and toss chickpeas in warmed skillet for about two minutes to remove any residual moisture. Be sure to shake the pan and/or stir the chickpeas. Sprinkle the chickpeas with cumin, salt, and cayenne pepper.  Drizzle a little grapeseed oil over the seasoned chickpeas and toss to combine. Keep stirring the chickpeas and adjust seasonings as desired. When the chickpeas are well saturated with flavor, remove from heat and reserve.

Place the cauliflower florets in the bowl of a food processor. Pulse until the cauliflower reaches the desired consistency, not too fine, not too coarse.  You will need to stop the processor a few times and move the large pieces around.  Transfer to a bowl, and marvel at how beautiful your fake couscous looks.

Heat 1 Tablespoon of grapeseed oil,  add the cauliflower, and saute until it starts to get some color. Add the water and lemon juice, cover the pan and simmer just for a few minutes.  Add the tomatoes, cucumber, almonds, adjust seasoning with salt. Add the reserved chickpeas, toss gently to combine using low heat. Remove from heat, add the fresh parsley, and serve.

ENJOY!

to print the recipe, click here

 I was surprised by the amount of “couscous” the single head of cauliflower produced. Isn’t that beautiful?

RicedCauliflower

Once more I used the skillet dried chickpeas “invented” by Kelly, from Inspired Edibles. I did not want them to get soggy, so they were added in the final moments of cooking, right before serving. Still, even next day after a brief torture in the microwave, the chickpeas were very tasty.  Maybe  a little less crunchy, but nothing to be disappointed at.

On a side note, whenever I say “invented” I think about one of Seinfeld’s classic episodes… Merlot? Never heard of it. Did they just invent it?”  😉

ingredients

I decided to call this recipe “Mediterranean” because it does have a lot of the usual suspects in that style of cooking. Plus, Mediterranean has a nice gastronomic reputation. Everybody loves it.  😉

Before I leave you, I’d like to share a list of very creative uses for cauliflower, some will surprise you, I am sure. Did you know you can use it for a fake bechamel-style sauce?  And that’s just the tip of the iceberg…

For the basic crust: The Best Cauliflower Pizza Crust, from Lucky Penny Blog

For a gorgeous example of the cauli-pizza:  Roasted Pear and Caramelized Onion Pizza, from Inspired Edibles

Cauliflower Crust Calzone, from The Iron You

Cauliflower Crust Stromboli, from The Iron You

Paleo Moussaka, from The Iron You (Mike, aka Cauliflower Overlord, is a cauliflower magician, and in this post he uses it in a very interesting bechamel type sauce)

Cauliflower Fried Rice, from Skinnytaste

Spicy Buffalo Cauliflower “Wings”, from Inspired Edibles

Cauliflower Pancakes, from Healthy Recipes

Cauliflower Gnocchi, from The Food in my Beard

Ricotta and Cauliflower Gnocchi, from Divalicious Recipes in the City

Cauliflower Pesto, from Vintage Cooking Notes, tried and loved by yours truly

 and if you thought sweets are off-limits, think again 

Cauliflower and Chocolate Ice Lollies with Pistachio Dust, from Veggie Desserts

Cauliflower Chocolate Cake, from Divalicious Recipes in the City

Chocolate Chip Banana Cauliflower Muffin, from Once Upon a Gourmet Gin

 I hope I convinced  you to give cauliflower couscous a try, I am definitely in the mood for a cauliflower pizza crust, just for the fun of it…

ONE  YEAR AGO: Tlayuda, a Mexican Pizza

TWO YEARS AGO: Paradise Revisited

THREE YEARS AGO: Feijoada, the Ultimate Brazilian Feast

FOUR YEARS AGO: Vegetable Milhojas

FIVE YEARS AGO: Italian Bread