LAMB SHANKS EN PAPILLOTE WITH CAULIFLOWER-CELERIAC PUREE

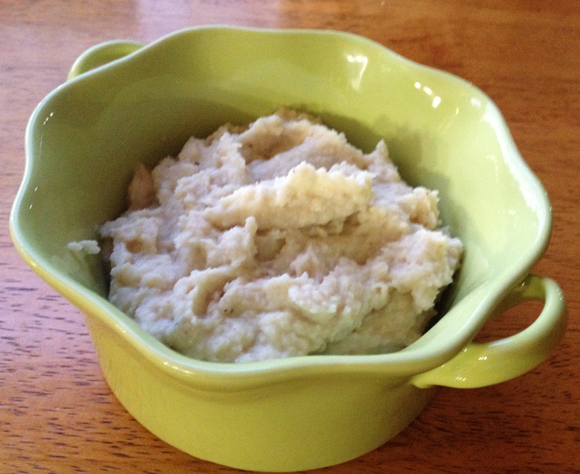
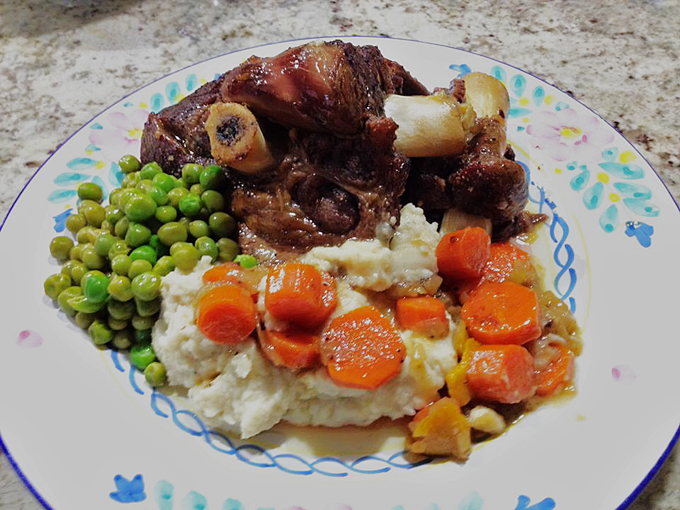
One of Phil’s favorite dishes is a nice, melt-in-your-mouth lamb shank. When we go out for dinner, if the restaurant offers lamb shanks, chances are he will order it. Lamb can be a bit tricky to cook at home. It’s usually not very cheap, so the pressure not to ruin it goes up a couple of notches. Our grocery store sometimes has lamb shanks on sale, but I usually stay away from them. Not this time. The price was too good to resist, and I decided to face the challenge. Brought them home without any specific recipe in mind, which proves I was in full daring mood. A quick search on the net pointed me to this simple and straightforward method from Fine Cooking, that gave me the opportunity to practice the “papillote” thing. It also gave me the opportunity to drive all the way back to the grocery store to get leeks (sigh). To offset the richness of the meat, I served it with a super light side dish, mashed cauliflower and celery root. Honestly, I think the puree might have stolen the show, it was superb!

LambPapillote
LAMB SHANK EN PAPILLOTE
(slightly modified from Fine Cooking magazine)
.
4 medium leeks (white and light-green parts only), cut into 1-1/2-inch lengths
4 medium carrots, halved lengthwise and cut into 1-1/2-inch lengths
4 sprigs fresh rosemary
4 strips orange zest, each about 3 inches long
Crushed red pepper flakes
Kosher salt and freshly ground black pepper
4 lamb shanks (about 1 lb. each)
1 Tbs. extra-virgin olive oil
1/2 cup dry vermouth or dry white wine
1-1/2 Tbs. unsalted butter, cut into 4 slices
.
Position an oven rack in the lower third of the oven and heat the oven to 300°F.
.
Arrange four 16×16-inch squares of heavy-duty aluminum foil on a work surface. Put one-quarter of the leeks, one-quarter of the carrots, 1 rosemary sprig, and 1 strip of orange zest on each square. Season each with a pinch of crushed red pepper flakes, salt, and pepper. Set aside.
.
Pat the lamb shanks dry and season generously with salt and pepper. Heat the oil in a large skillet over medium heat until shimmering hot. Working in batches if necessary to avoid crowding, brown the shanks on all sides, about 10 minutes total per batch. Transfer 1 shank to each foil square, arranging it on top of the vegetables. Draw up the edges of the foil to capture any juice, but don’t seal the packets yet.
.
Return the skillet to medium heat, add the vermouth, and bring to a simmer, scraping the skillet with a wooden spoon. Remove from the heat. Portion the vermouth evenly among the 4 packets, pouring it over the lamb. Dot each shank with a slice of the butter. Fold the foil to form rectangular packets, sealing the seams tightly. Arrange the packets on a baking sheet; it’s fine if they touch but they shouldn’t overlap.
.
Bake for 3 hours; then check for doneness by carefully opening one of the packets (watch out for the steam) and testing the meat with a fork—it should be tender and pulling away from the bone. If necessary, continue to bake for another 10 minutes and check again.
.
Transfer the contents of the packets to large plates or pasta bowls, surrounding the shanks with the vegetables and juice. Remove the rosemary and orange zest before serving.
.
                                                    to print the Lamb Shank recipe, click here
.
mash
CAULIFLOWER-CELERIAC PUREE

(from the Bewitching Kitchen, inspired by many sources)

.
1 head cauliflower, cut in individual florets
1 head celeriac, peeled and cut in 1 inch chunks
1 tablespoon olive oil
2 medium shallots, thickly sliced
salt and pepper to taste
coconut milk (about 1/4 cup)

dash of ground nutmeg

Heat oven to 375°F.
.
Steam cauliflower florets until very tender.  Coat the celeriac chunks and shallot slices with olive oil in a large bowl, season with salt and pepper. Roast until tender and with a light browning around the edges, 25 to 30 minutes, moving pieces around.
.
When the celeriac is easily pierced with a fork, transfer the pieces to a pan, add the steamed cauliflower florets, and start mashing it all with a potato masher, or use an immersion blender, depending on the texture you like.Turn the burner to low heat, add a dash of nutmeg, and add enough coconut milk to give it a nice creamy feel. Mix well and cook on low heat for a couple of minutes. Taste and adjust seasoning.
.
You can also use the food processor to make the puree, if you like a much smoother texture.
 .
ENJOY!
to print the Cauliflower-Celeriac puree recipe, click here

served2

Comments: The most important step in this recipe is taking the time to brown the lamb shanks. I halved the recipe, since it was just for the two of us, but decided to post the recipe as published in the magazine which feeds four.  I confess that I forgot to add the butter on top of the shanks when closing the packages, but that did not seem to hurt anything.

Make sure you have a very big aluminum foil because it is important that the package closes well around the meat.  Also, the recipe called for a cooking time of 2 to 2.5 hours, but I really like the lamb falling off the bone so I did not even bother checking it before 3 hours. Do what suits your taste best.

The mashed cauliflower & celeriac was simply amazing!  If you’ve been following the Bewitching Kitchen for a while, you know I love to play with cauliflower in all sorts of recipes, and you’ll find many versions of mashed cauliflower in the blog.  This is a new favorite.  If you serve it for guests, it will be pretty hard for them to figure out the components, but even if a little puzzled, they’ll be in love with it. Some recipe sources advise to pass celeriac puree through a fine sieve to improve texture, but I didn’t, and it was still very smooth and pleasant. Of all jobs in the kitchen, passing things through a sieve is the one I despise the most, and always find excuses to skip it. My number one excuse is “I do not want to do it“.

This meal would be great for company, since you can assemble the packages and start roasting the meat 3 hours before you plan to serve dinner.  The mashed cauliflower can also be reheated without compromising flavor or texture. One of the wonderful things about papillote cooking is the aroma that is released once you open the package, it will certainly awe any guests!

ONE YEAR AGO: Chestnut Brownies and a Blog Award!

TWO YEARS AGO: Quinoa with Cider-Glazed Carrots

THREE YEARS AGO: Celebrate Wednesday: Heirloom Tomatoes Steal the Show

FOUR YEARS AGO: Pain de Provence

FIVE YEARS AGO: Golspie Loaf, from the Scottish Highlands

SILKY RUTABAGA PUREE

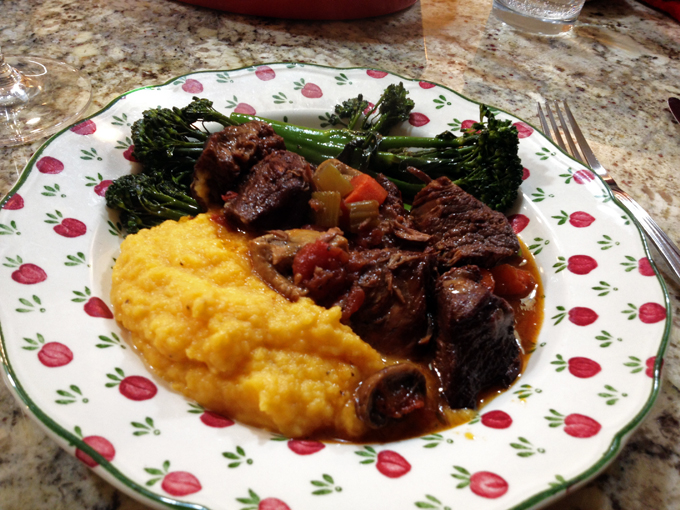
Many years ago (pre-blogging life) I had an encounter with jicama that left me traumatized.  I sliced it very thin and ate it the way Marcela often recommends it, as a refreshing, light alternative to corn tortillas.  I intensely disliked it, but through a convoluted set of events, a few days later realized that jicama that was not.  I had bought, sliced, and endured a rutabaga. Big oops moment!  I stayed away from both veggies for quite a long time, but finally made peace with them. Jicama does a reasonable job as tortilla-wannabe, and as far as rutabaga goes, it kills me that I took so long to finally cook it. I fell in love with this mashed version at the first spoonful. Creamy, smooth, with a unique flavor, perfect to showcase some Boeuf Bourguignon… or any other type of beef stew that might be calling your name.  Truth is, if you cannot make winter disappear by snapping your fingers, the alternative is to fight it with comfort food. Like this root veggie puree with a touch of coconut milk.  You will love it, I promise!

RutabagaPuree
SILKY RUTABAGA PUREE
(slightly modified from A Calculated Whisk)

3 medium rutabagas, peeled and cut into 1-inch chunks
1 large yam, peeled and cut into 1-inch chunks
1 teaspoon kosher salt
2 tablespoons extra virgin olive oil
1/4 cup coconut milk
salt and freshly ground black pepper, to taste
dash of nutmeg

Place the rutabaga and yam chunks in a saucepan with the salt and water to cover. Bring to a boil, reduce the heat, and simmer, covered, until the veggies are very tender when pierced with a fork, about 20 minutes. Drain, reserving some of the cooking liquid. Place the rutabaga, yam, olive oil, coconut milk. salt, and pepper in a food processor and process until smooth, add the nutmeg and process briefly. Taste and adjust seasonings as desired. If needed, adjust consistency with some of the reserved cooking liquid.

ENJOY!

to print the recipe, click here
served

Comments: This meal was perfect for a snowy Saturday evening.  I cooked the beef stew low and slow for over 4 hours, it was luscious, the red wine mellowed down by the long gentle simmer in the oven.  The rutabaga puree, perhaps an unusual side dish for Bourguignon,  was quite a nice match not only in taste and texture, but also in its color, bright golden.  When we sat down to enjoy our dinner, Phil took a first bite and immediately decided it was worthy of a special bottle of wine, one we bought in France many years ago. That was a great move…  Almost made me forget the snow outside. Almost.

composite

Life is good!

ONE YEAR AGO: Bon Bon Chicken: Light and Spectacular!

TWO YEARS AGO: Seafood Extravaganza Pasta

THREE YEARS AGO: A Pearfect Drink

FOUR YEARS AGO: Ming Tsai Under Pressure

FIVE YEARS AGO: Paris, Je t’aime

ZUCCHISAGNA: A TWIST ON A CLASSIC

I don’t think there is such a thing as a person who doesn’t like lasagna. I may have already mentioned that the technician of the lab where I did my PhD in Brazil did not like chocolate nor french fries. Outrageous! She still loved lasagna, proving the point I just made. I hope you’ll let this stretch in Logic 101 slide… 😉 Anyway, I am a lover of this Italian classic, but it’s one of those dishes that can make you feel super full at the end of the meal, even if you exercise severe portion control. Layers of pasta with bechamel, meat sauce, usually a pound of cheese per square inch…. I never order it in restaurants, and confess to making it at home only once in a blue moon. Using thin slices of veggies to play the role of the pasta lightens things up quite a bit. You can use eggplant, butternut squash (Anne Burrell has a great take on this version, BTW), and of course, zucchini as I did here.  A couple of details are important to keep in mind, though. You must pre-cook the zucchini slices or you’ll run the risk of having a watery, unappetizing concoction in your hands. And use a light hand on the cheese.  The delicious meat sauce should be the center of  your attention. Vegetarians? This dish is not for you, sorry. Primal-afficionados? Grab your forks, and dig in!

Zucchisagna1ZUCCHINI RIBBON LASAGNA
(adapted from Martha Stewart)

1 can (28 ounces) whole peeled plum tomatoes, with juice
2 tablespoons extra-virgin olive oil
1 shallot, finely chopped
1/4 teaspoon red-pepper flakes
12 ounces ground turkey, preferably dark meat
2 teaspoons dried oregano
2 teaspoons salt
5 medium zucchini, trimmed
olive oil and lemon juice for brushing zucchini
1 + 1/2  cups full-fat ricotta cheese
1 egg
1/4 teaspoon extra-virgin olive oil
Freshly ground pepper
1/4 cup grated Parmigiano-Reggiano cheese

Make the sauce: Pulse tomatoes with juice in a food processor until finely chopped. Heat oil in a large skillet over medium heat. Cook shallot and red-pepper flakes, seasoned lightly with salt, stirring occasionally, until shallot is tender. Add turkey; cook, breaking up any large pieces, until browned. Add tomatoes, bring to a boil. Reduce heat; simmer until thick, about 20 minutes. Stir in oregano and 1 teaspoon of salt. Let cool.

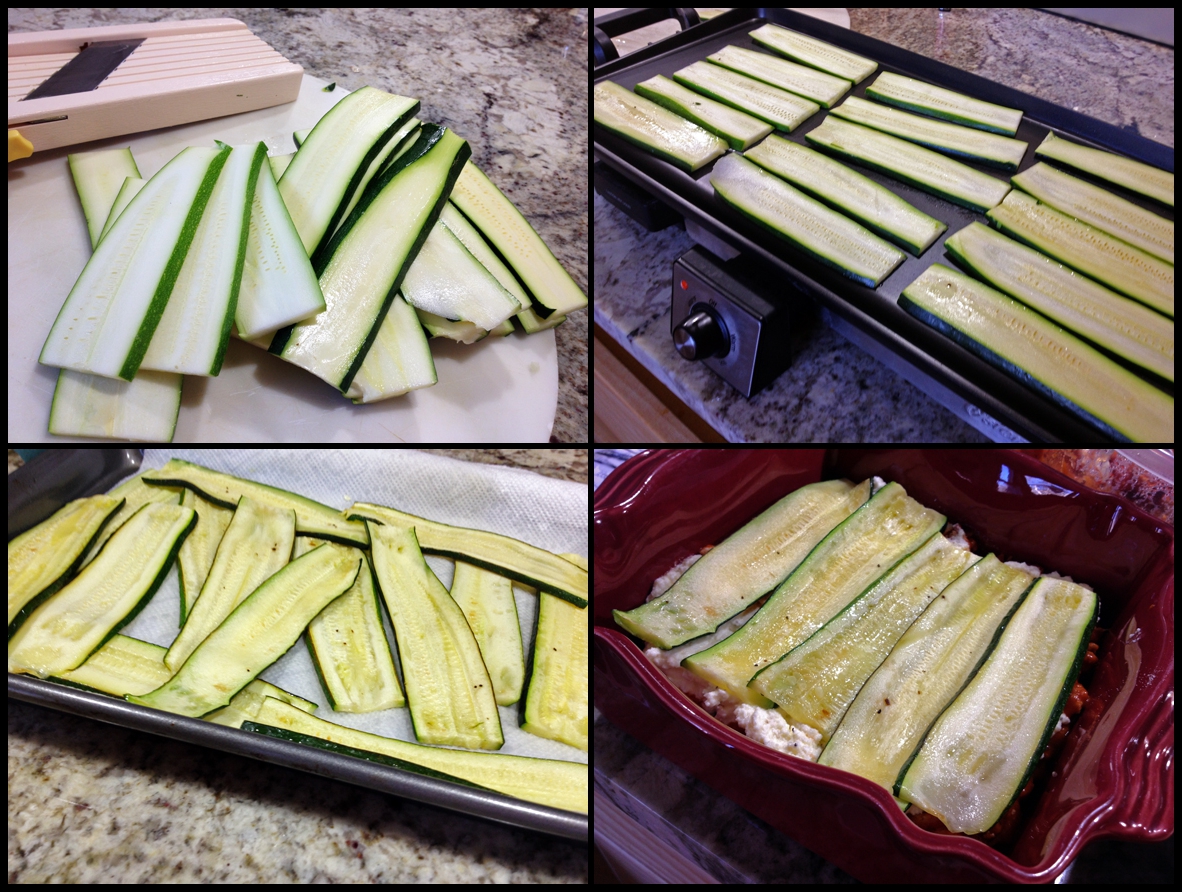
Make the lasagna: heat oven to 375 degrees. In a small bowl, mix the ricotta with the egg, season with salt and pepper. Reserve. Slice zucchini lengthwise into thin strips (about 1/8 inch thick) using a mandoline or a sharp knife. Brush each slice with a 1:1 mixture of olive oil and lemon juice, and cook on a griddle or grill pan for a few minutes on each side until the slices get some color. Blot on kitchen paper and let them cool to room temperature. Place 5 or 6 zucchini slices, overlapping slightly, in the bottom of an 8-inch square baking dish. Top with 1 cup sauce. Dot with ricotta. Repeat twice with zucchini, remaining sauce, and ricotta, alternating direction of zucchini at each layer. Finish with a final layer of zucchini, cover the dish with ricotta, sprinkle the Parmigiano on top.

Bake uncovered until lasagna bubbles and top is nicely brown, about 50 minutes. Let stand for at least 10 minutes before slicing.

ENJOY!

to print the recipe, click here

composite1

Comments: As I read the recipe from Martha Stewart’s site, a few things bothered me. First, the use of raw zucchini to assemble the lasagna.  In my opinion, that is asking for trouble. Second, the ingredient lists TWO medium zucchini for the full recipe. Unless their zucchini was treated with massive doses of auxins, two won’t be enough.  I used 4 medium zucchini, 50% more ricotta than called for, and my ingredients were enough to assemble a 7-inch square dish instead of an 8-inch.  Of course, some variation is expected, but overall I think the recipe as published in her site had some issues. My version worked great, this was a delicious meal, satisfying without that feeling of “I am going to explode if I don’t go for a walk” often associated with the real lasagna.  Not that there’s anything wrong with it, but… when you want something lighter, try this version. It won’t disappoint you at all…

served1

Dinner is served: Zucchisagna with Baby Greens in Lemony Dressing

ONE YEAR AGO: Ricotta Meatballs

TWO YEARS AGO: Farro Salad with Roasted Leeks

THREE YEARS AGO: It all started with a roof

FOUR YEARS AGO: Carrot and Sweet Potato Puree

FIVE YEARS AGO: Impromptu Pasta Dinner

BLOG-WORTHY ROASTED BUTTERNUT SQUASH

Normally I would refrain from blogging about such a simple recipe. Hard to even call it a recipe, actually. Most people know too well how to roast ANY veggie. Cut it, coat pieces with olive oil, season lightly and into the oven it goes. But, I feel that this version is worth talking about as it exceeded my expectations.  All you have to do is use coconut oil as the fat, and add some Southwest spice mix from Penzey’s or make your own version mixing the usual suspects listed in the ingredients. For my taste, this was 2 logs above the level of deliciousness of your regular roasted squash, demanding the exact same amount of work and time. That’s blog-worthy in my book!

RoastedButternutSquash


OVERVIEW OF THE  RECIPE:  cut a butternut squash in 1/2 inch to 1 inch chunks. Add to a large bowl.  Melt 1 to 2 Tablespoons of coconut oil and drizzle all over. Sprinkle a nice amount of Southwest spice, a little extra salt, some freshly ground black pepper.  Quickly toss it all together, the coconut oil will solidify and turn white again, do not worry about it.  Place it as a single layer on a baking dish, and roast at 400 to 425 F until nicely brown, it should take a maximum of 30 minutes, depending on the size of the pieces of squash, and your chosen temperature. Adjusting seasoning with salt right after roasting. If you had issues to distribute the coconut oil evenly, move the pieces around a few minutes into the roasting.

ENJOY!

composite

Since this was actually a non-recipe, I will include a bonus goodie by sharing the recipe for the pork tenderloin I served with it. Same approach as the basic 7-6-5 method  blogged about years ago, but with a new type of marinade.

PORK TENDERLOIN WITH MAPLE-BALSAMIC MARINADE
(from the Bewitching Kitchen)

1 pound pork tenderloin
2 tablespoons maple syrup (or honey)
2 tablespoons olive oil
1 teaspoon Herbes de Provence
1/2 teaspoon roasted garlic powder (or fresh garlic, minced)
1/2 teaspoon paprika
1/2 teaspoon freshly ground black pepper
3/4 teaspoon salt
zest of 1 lemon

Prepare the marinade by combining all the ingredients, whisking well. Place the tenderloin in a bag or shallow dish, pour the marinade all over, and place in the fridge for 2 to 12 hours. Overnight should be ok too.

Remove the meat from the marinade, place the meat on the grill, close the lid and grill for 7 minutes. Turn the pork tenderloin over, close the lid again, and grill for 6 minutes.  Don’t open the lid, just turn off the heat and keep the meat inside for 5 minutes. The internal temperature should be 145 F to 150 F. If not, close the lid and leave the meat for a few more minutes.  Remove the meat to a serving platter and let it rest for 5 minutes before slicing.

ENJOY!

to print the recipe, click here

servedDinner is served!
Pork tenderloin, roasted butternut squash & coleslaw.

Come to think of it, this is a meal that could be on the cover of The Modern Cavemen Magazine. 🙂  Paleo or not, I could enjoy it anytime without complaining. Flavorful, light and filling at the same time.  The coconut oil is really spectacular on the butternut squash, but of course, if you prefer a more classic take, stick with olive oil. Coleslaw is a concoction that doesn’t get enough attention. When prepared from fresh ingredients with a home-made dressing it’s a fantastic side dish.  Goes well with all types of main dishes, beef, poultry, seafood.  Refreshing, crunchy, it’s got it all…

ONE YEAR AGO: Chocolate Currant Sourdough Loaf & Roasted Beet Hummus

TWO YEARS AGO: Sesame and Flax Seed Sourdough

THREE YEARS AGO: Spanakopita Meatballs

FOUR YEARS AGO: Saturday Morning Scones

FIVE YEARS AGO: Pain de Mie au Levain

SILKY GINGERED ZUCCHINI SOUP

For the last couple of months I became interested in the Paleo nutritional system, as most people who follow it appear to be very fit. It got me curious. It also did not hurt that Dr. Loren Cordain,  the man behind the Paleo approach is now part of our extended family: Phil’s sister recently married his uncle-in-law. Small world! Anyway, fully aware of my self-inflicted moratorium on cookbooks in 2015, I did what a sensible food blogger would do and bought some Paleo-oriented publications last November. As you can see, I have an amazing ability to outsmart myself.  If you have any interest in the subject, I highly recommend Well Fed2, The Frugal Paleo Cookbook, and Nom Nom Paleo Food for Humans. Don’t worry, the Bewitching won’t turn into a Low-carb, Paleo, Vegan, or “insert any diet system here” blog.  There will be bread, pasta, rice, couscous, a lot of meat, and sweets. Omnivore, and loving it! –  has always been my motto, and that isn’t changing. But the truth is that one can cook a ton of tasty stuff under the Paleo approach. Plus, it’s all reasonably low in carbohydrates and high in protein, a kind of eating I’ve favored for the past 4 or 5 years. This soup is a perfect example of deliciousness that is low in fat, low in carbs, and keeps me satisfied from lunch until dinner.  As you may notice,  I included a cheese crisp that would not be blessed by Paleo folks.  It would make this version Primal, I suppose. Still hanging around caves, but with a little more pizzazz, sipping the occasional wine from a coconut shell.

ZucchiniSoup


SILKY GINGERED ZUCCHINI SOUP OVERVIEW

The secret for this smooth and delicious soup is the use of ginger and coriander as background spices. The soup starts with a simple saute of onion and garlic, then ginger and coriander in powdered form are added, releasing their flavors in the hot oil. Next, zucchini pieces join the party, and the whole thing will be simmered for about one hour in your favorite type of broth (chicken, veggie, or beef).  When the zucchini is super tender, the soup is blended and ready to be enjoyed.

You can find the recipe in Melissa’s site with a click here.
It is also in her cookbook Well Fed2.

simmering

I’ve made this soup almost as many times as I made Mike’s Creamy Broccoli Soup. Sometimes I used chicken broth, sometimes a mixture of chicken broth and water.  A squirt of lemon juice right before serving is a nice touch too. Cheese crisps pair very well with the zucchini. To make them I followed the method that Mike described in his original post for the broccoli soup.  On the first photo of this post, I used a Cheddar type cheese, and in the photo below I went with Parmigiano-Reggiano.  I like Parmigiano better, because it releases less oil as it bakes, and has that unique sharpness that contrasts very well with the silky soup.

unnamed-5

I confess I was afraid of making the crisps from scratch, due to traumatic experiences of a distant past. At that time I tried making them on a non-stick skillet on the stove top, and ended up with a complete mess, pretty much inedible.

But preparing them in the oven was a totally different experience. First, place parchment paper over a baking sheet (or use Silpat).  Then add small amounts of shredded cheese of your choice separated by about 1-inch.  They won’t spread too much, but better safe than sorry.

cheese

Watch them carefully, because they will go from perfect to burned in a matter of seconds….

crisps

Carefully transfer them to a rack, so that they get crisp. You can use them right away, or store for later.
crisps_rack

You will find all sorts of uses for these crisps… This beautiful Mexican-Caprese was made by my beloved husband…  and embellished by the crisps…

TexMexCapreseDressing was avocado oil infused with basil (he used the handy cubes from Dorot), a little lemon juice for good measure.

But back to the zucchini soup: a real winner of a recipe. I normally make a batch in the weekend, and it becomes my lunch for three days in the following week. If I don’t  have cheese crisps I top it with toasted almonds, or a diced hard-boiled egg. Simple, and quite nutritious.

Before I leave you, I want to share the best text I’ve seen in a long time concerning healthy-eating. It is a well-written satire on the state of nutritional advice these days. Hilarious, but unfortunately quite close to our reality these days.  Enjoy it with a click here. A little quote as a teaser:

The ONLY way to eat is seasonally, locally and sustainably.  If you live in a place where snow falls and kills crops and animals starve you should eat snow and only snow.  To do anything else will cause immediate and untimely death”.  
(from Sarah Yates, A Little House in the Hills).

🙂

ONE YEAR AGO: Sweet Fifteen!

TWO YEARS AGO: Sesame and Flaxseed Sourdough

THREE YEARS AGO: Green Beans with Miso and Almonds

FOUR YEARS AGO: Saturday Morning Scones

FIVE YEARS AGO: White Bread