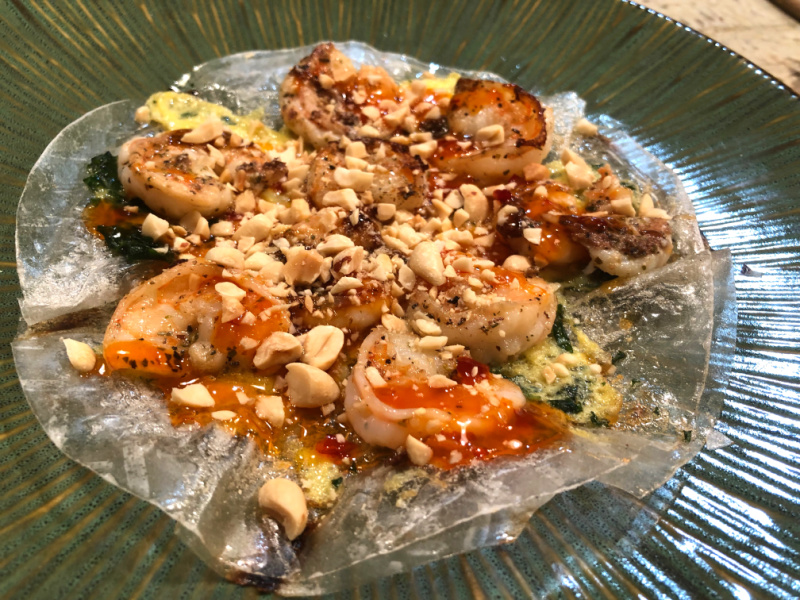
VIETNAMESE “PIZZA”: BANH TRANG NUONG

I am super excited to share this recipe with you! I had never heard of this concoction, which is essentially a street food in Vietnam. But during our trip to California last month I had the chance to try it in a restaurant in Los Gatos and could not wait to make it at home. Rice paper instead of pizza dough. Scrambled egg instead of tomato sauce. Seafood almost always the topping, although the one I had used pork belly instead.
VIETNAMESE “PIZZA”
(from the Bewitching Kitchen)

for each individual pizza:
2 rice paper round sheets
2 tablespoons olive oil
fresh herbs of your choice (I used basil and oregano)
1 egg, scrambled (it is easier to scramble 2)
salt and pepper to taste
cooked shrimp, 4 to 5 per serving
Thai sweet red chili sauce (store-bought is fine)
roasted salted peanuts

Make a flavored olive oil sauteeing the chopped herbs with the oil until fragrant. Reserve. Cook the shrimp by any method you like. I just used a little butter, salt, pepper and a squirt of lemon juice. Reserve. Scramble the egg with salt and pepper, and if you have a plastic squirt bottle, pour the egg mixture inside. Reserve.

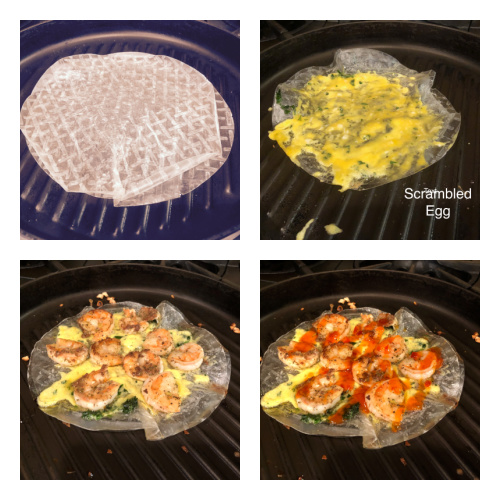
Heat a griddle pan on medium heat. Grab two sheets of rice paper and spray water all over the surface of one of them, add the other on top. Quickly add the double paper to the pan, and carefully using a couple of spatulas or wooden spoons, make the heat stick them together. Once they start to join and the bottom is getting opaque, flip the papers and start heating the other side, always working on the surface to make them glue well. Once the paper starts getting white, brush a bit of the flavored oil on the surface, then pour the scrambled egg, a small amount will do. Push it to the edge with the back of a spoon, but don’t let it fall off on the pan. Cook until the egg starts to set, then quickly add the shrimp. Cook until the shrimp is warmed through. Sprinkle a good amount of sweet chili sauce all over, then the crushed peanuts, and serve. Adjust seasoning with salt and pepper.

Best way to serve it is to cut in wedges with scissors!

ENJOY!

PDF coming soon, stay tuned
Comments: This was such a delicious meal, I think I still need to practice the preparation, particularly handling the double rice paper, but overall I am super happy with the outcome. It is quite unusual, I know we’ll be enjoying it often with different toppings. If you’ve never heard of BANH TRANG NUONG, give this concoction a try, chances are you will fall in love with it also.

You can see a video of the preparation here, but I should warn you things did not go as smoothly for yours truly. Maybe different brands of rice paper behave differently. At any rate, it is worth any trepidation to get to the finish line…

ONE YEAR AGO: Chocolate Bonbons with Mango-Ganache Filling

TWO YEARS AGO:  Giant Cookie Meets Mousse

THREE YEARS AGO: The Brazilian Battenberg

FOUR YEARS AGO: Salzburg Sourdough

FIVE YEARS AGO: If I had One Hour

SIX YEARS AGO: Apple Cinnamon Oatmeal Cake

SEVEN YEARS AGO: Sourdough Rye Bread with Flaxseeds and Oats

EIGHT YEARS AGO: Apricot-Raspberry Sorbet: A farewell to Summer

NINE YEARS AGO: Marcela’s Salpicon

TEN YEARS AGO: Pork Kebabs

ELEVEN YEARS AGO: Fondant au Chocolat

TWELVE YEARS AGOGot Spinach? Have a salad!

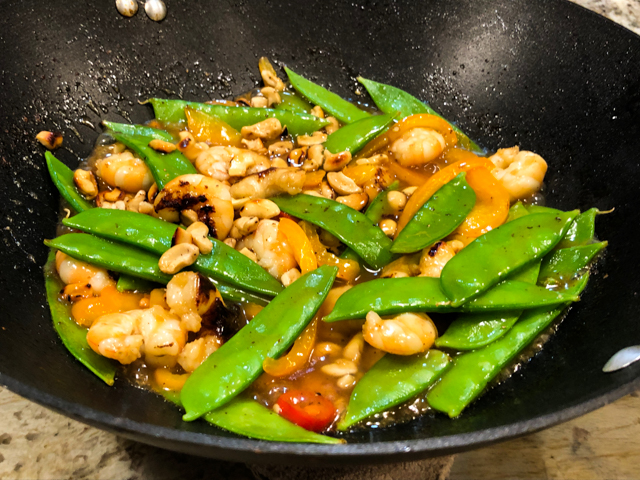
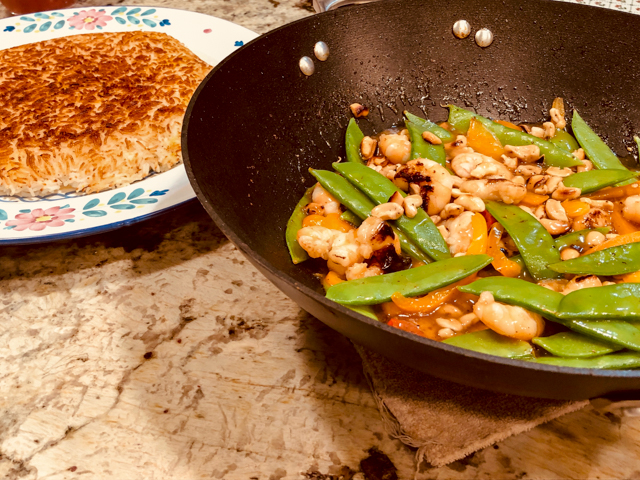
SHRIMP STIR-FRY WITH SNOW PEAS AND CASHEWS

You simply cannot beat the speed and convenience of a stir-fried meal and I also love the fact that contrary to what the name suggests, very little oil is needed. I do a very quick brining step for the shrimp, 10 minutes is more than enough, but you can omit that if you don’t mind a slightly less tender texture.

SHRIMP STIR-FRY WITH SNOW PEAS AND CASHEWS
(from the Bewitching Kitchen)

1 pound large shrimp, peeled and deveined
2 cups water
2 Tablespoons salt
1 Tablespoon sugar
squeeze of lemon juice
1 Tablespoon grape seed oil
minced garlic (optional)
grated ginger
6 to 8 ounces snow peas
1 yellow bell pepper, sliced thin
1/3 cup cashews, lightly toasted
salt and pepper to taste

for the finishing sauce:
1/2 cup water
2 Tablespoons dry sherry
1 Tablespoon soy sauce
1 tsp sugar
1/2 Tablespoon cornstarch

Dissolve the salt and water in 2 cups of water in a medium bowl. Add the shrimp and leave in the solution for 10 minutes as you prepare the other ingredients. Make the finishing sauce by whisking all components in a bowl. Reserve.

Drain the shrimp, rinse very briefly and pat dry.

Heat a wok or large nonstick skillet over high heat for 2 minutes. Add the oil to the pan and swirl to coat. Add the ginger and garlic (if using), when fragrant add the snow peas and bell pepper. Stir-fry for a couple of minutes, add the shrimp, and cook for a couple more minutes, stirring frequently. Add the cornstarch mixture and cook until the sauce has thickened. Adjust seasoning with salt and pepper. Top with the cashews and serve right away.

ENJOY!

to print the recipe, click here

Comments: Normally this dish would be served with plain white rice, but sometimes we cannot resist the appeal of the quick version of tahdig. So that ‘s how we enjoyed this delicious stir-fry. Also, maybe you’ve noticed a red pepper in the first photo? That was a Serrano from our garden, I added without knowing how hot it would be. If you feel brave, add some hot peppers to yours too. I often talk about how good a recipe can be a couple of days later as my lunch. No luck this time, zero leftovers!

ONE YEAR AGO: Pickled-Roasted Chickpeas with Cashew Cream

TWO YEARS AGO: Twice-Baked Goat Cheese Souffle

THREE YEARS AGO: A Star from England in the Bewitching Kitchen

FOUR YEARS AGO: Hommage to the Sun

FIVE YEARS AGO:The Fabulous Three
.
SIX YEARS AGO: Turkey-Chorizo Burger with Green Chile Dressing
.
SEVEN YEARS AGO:Taco Salad
.
EIGHT YEARS AGO: Semolina Sourdough Boule
.
NINE YEARS AGO:Forgive me, for I have sinned
.

TEN YEARS AGOCracked Wheat Sandwich Bread
.
ELEVEN YEARS AGO:  Au Revoir, my Bewitching Kitchen
.
TWELVE YEARS AGO:French Bread


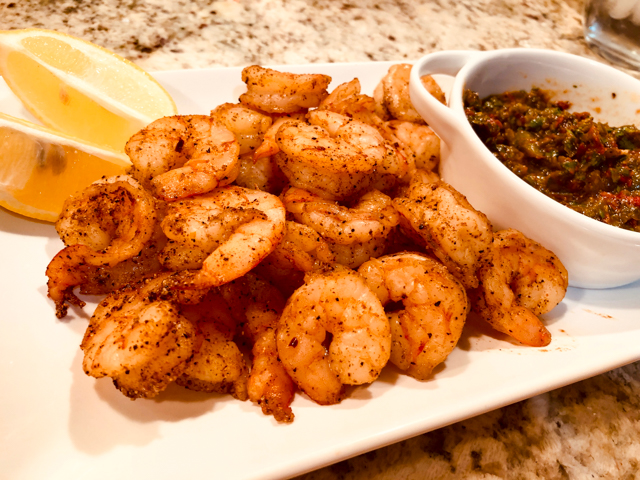
SMOKED SHRIMP TACOS WITH ROASTED JALAPENO SALSA

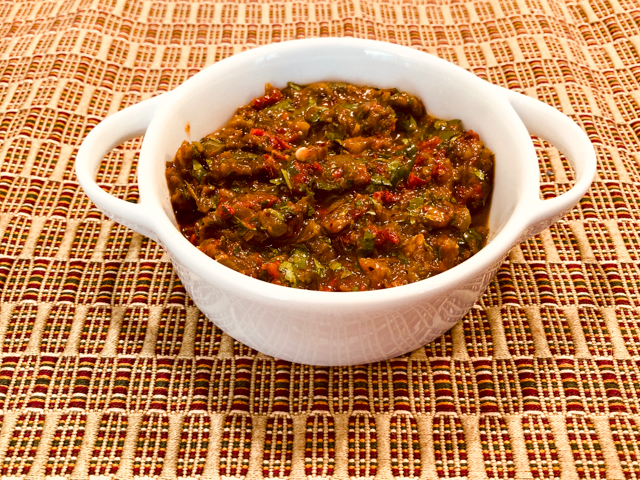
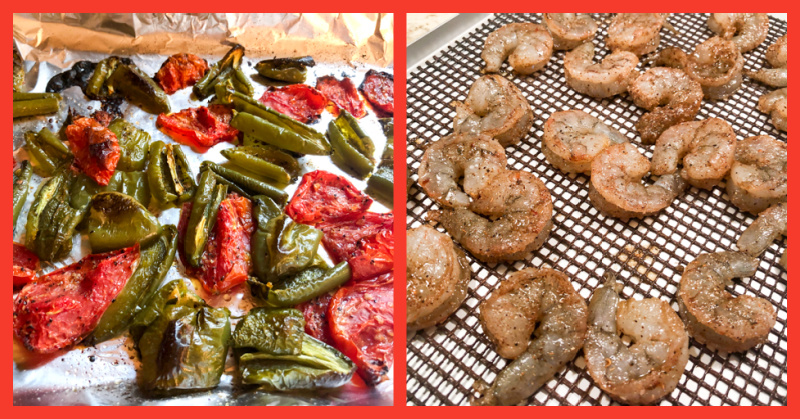
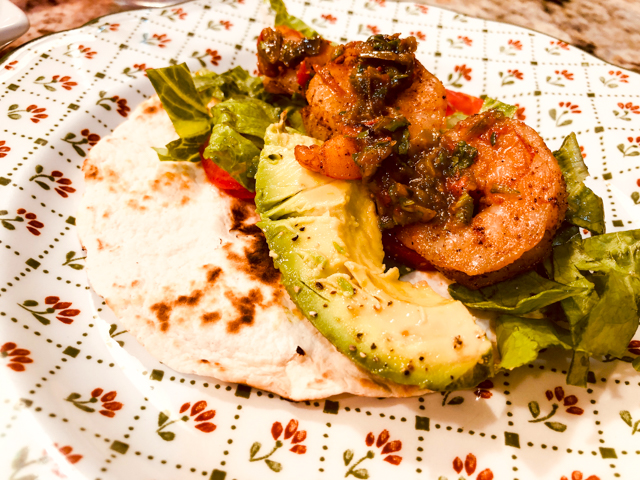
To make this simple recipe, you’ll need a smoker. If you don’t have one, use the same rub on the shrimp and grill it. I am not too wild about liquid smoke, and would rather omit that component than include it in the rub, but if you have a brand you are fond of and know how much to use, go for it. The Roasted Jalapeno Salsa was published last week on Mimi’s blog, and I made it on the same day I read it. I just knew we would love it. Beware, it is spicy!

SMOKED SHRIMP TACOS WITH ROASTED JALAPENO SALSA
(from The Bewitching Kitchen and Mimi’s blog)

for the dry rub:
1/4 cup granulated sugar
1/8 cup firmly packed brown sugar
2 tsp hot chili powder
2 tsp salt
1 teaspoon ground coriander
1 teaspoons ground black pepper
1/2 teaspoon ground ginger

1 pound jumbo shrimp, peeled, deveined, and tails removed

Heat the smoker to 200F with mesquite, oak, or pecan wood.

In a small bowl, mix together all the ingredients for the dry rub. Pour the rub over the shrimp and make sure everything is well coated. Add the shrimp to the smoker and smoke for 15 to 20 minutes. Serve with the salsa, and your favorite toppings.

ROASTED JALAPENO SALSA
(slightly modified from Chef Mimi)

6 large jalapeños
4 Roma tomatoes
2 tablespoons olive oil
1/2 teaspoon salt
1 generous bunch cilantro, chopped
Juice of 1/2 lemon
1 teaspoons honey
2 tablespoons olive oil
1/2 teaspoon salt
Pepper, to taste

Heat the oven to 400 degrees F.

Start by preparing the jalapeños. Remove the stems, then slice them vertically around the core of seeds. Discard the seeds and stems. Roughly chop the jalapeño slices and place them in a medium-sized bowl. Chop the tomatoes into quarters and remove the seeds, then place them in with the jalapeños. Toss the mixture with the oil and salt, then place it in a baking/roasting dish. Roast until vegetables are caramelized, about 30 minutes.Place the roasted jalapeno-tomato mixture with the cilantro and other ingredients in a food processor and pulse, until the desired texture.

ENJOY!

to print the recipes, click here

Comments: I made the salsa around lunch time, kept it in the fridge and brought to room temperature as I prepared the shrimp. Everything was ready then in less than 30 minutes, perfect weeknight meal. The shrimp turned out juicy and tender, with a nice flavor from the dry rub. And the roasted jalapeno salsa went perfectly with it. But if you are not into spicy food, this is definitely not for you. My Dad, the pepper-addict, would be proud of me! The shrimp is actually quite mildly flavored, so consider just serving it with a store-bough mild salsa if you prefer.

ONE YEAR AGO: Corn Fritters

TWO YEARS AGO: Minnie Macarons

THREE YEARS AGO: Air-Fried Mexican Meatloaf

FOUR YEARS AGO: Mimi’s Sticky Chicken, a Call from my Past

FIVE YEARS AGO: Perfect Soy-Grilled Steak

SIX YEARS AGO: The Devil’s Bread

SEVEN YEARS AGO: Heart of Palm Salad Skewers

EIGHT YEARS AGO: Potluck Frittata and Lavoisier

NINE YEARS AGO: Home-made Corn Tortillas

TEN YEARS AGO: Whole-Wheat Spaghetti with Peanut Sauce

ELEVEN YEARS AGO: Brigadeiros: A Brazilian Party!

TWELVE YEARS AGO: Lemony Asparagus

GINGER-DILL SALMON

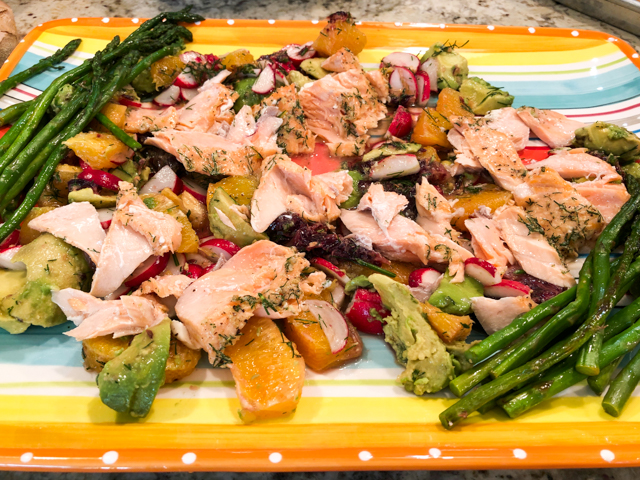
I get disappointed when pictures do not do justice to a recipe. You will have to trust me, this salmon was like an explosion of flavors and textures, even if it looks a bit “messy” on the plate. It is actually supposed to be just like that. The husband found the recipe in The New York Times, in an article highlighting favorites of their food editors. I can see why.

OVEN-ROASTED GINGER-DILL SALMON
(slightly modified from The New York Times)

1 salmon fillet, skin-on 
Kosher salt and black pepper
6 tablespoons finely chopped dill
1 (1-inch) piece ginger, scrubbed and finely grated  
2 tablespoons extra-virgin olive oil, plus more for serving
1 blood orange (or additional regular orange)
2 oranges
6 small radishes, cut into thin wedges
1 avocado
Flaky sea salt, for finishing (optional)

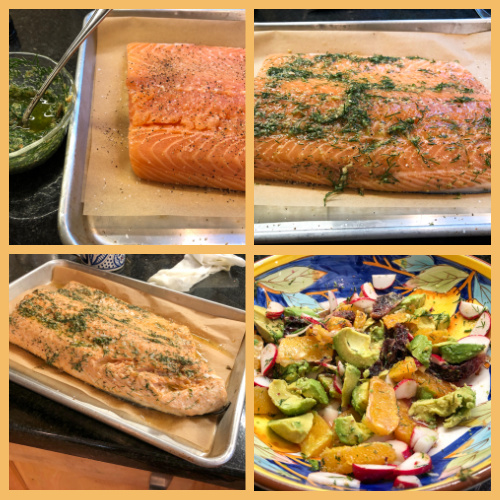
Heat oven to 325 degrees. Line a sheet pan with non-stick aluminum foil.  Pat the salmon dry, then place on the tray skin-side down and season with salt and pepper.


In a medium bowl, stir together the dill, ginger and olive oil until combined. Season with salt and pepper. Spread half of the dill-ginger mixture over the top of the salmon. (Reserve the remaining dill-ginger mixture.) Bake until cooked through, 15 to 20 minutes.  

As the salmon cooks, cut off the top and bottom of the two types of oranges and remove the segments. Squeeze the peels into the remaining dill-ginger mixture to get out any juice.  Transfer the fruit and any juice on the cutting board to the bowl. Add the radishes, season generously with salt, and stir gently to combine.


Break the salmon into large pieces, and divide across plates with the citrus salad. Peel and pit the avocado, then quarter lengthwise and add to plates. Season with salt. Spoon the juices from the bowl over top, and season with black pepper, another drizzle of olive oil, and flaky sea salt, if using.

ENJOY!

to print the recipe, click here

Comments: The husband is the seafood cook in our home, but every once in a while I venture into his domain. This was quite spectacular, even if I say so myself. We loved the contrast of the hot salmon with the cold citric salad. Perfect for a warm Summer evening. I highly, highly recommend it.

ONE YEAR AGO: Eleven Years, Time for Goodbye

TWO YEARS AGO: Salmon Tacos

THREE YEARS AGO: A Dream that did not come true

FOUR YEARS AGO: Kaleidoscopic Macarons

FIVE YEARS AGO: Zucchini Noodles with Sun-dried Tomato Pesto

SIX YEARS AGO: In My Kitchen, July 2015

SEVEN YEARS AGO: Sous-vide Pork Chops with Roasted Poblano Butter

EIGHT YEARS AGO: Roasted Strawberry-Buttermilk Sherbet

NINE YEARS AGO: Amazing Ribs for the 4th of July!

TEN YEARS AGO: Baby Back Ribs on the 4th of July

ELEVEN YEARS AGO: Blueberry Muffins

TWELVE YEARS AGO: A Pie for your 4th of July

GRILLED SHRIMP WITH PARSLEY OIL OVER BLACK RICE NOODLES

This goes to the OMG FILES. Everything worked great together, and the husband went crazy for it too. He kept saying this is restaurant-quality meal. Top-notch restaurant. I must say that for something so simple to put together, it is amazing how tasty it was. The parsley oil stole the show. Think pesto, but lighter. You can use regular pasta, but there’s something about the texture of a rice noodle that worked even better with the shrimp.

GRILLED SHRIMP WITH PARSLEY OIL OVER BLACK RICE NOODLES
(from the Bewitching Kitchen)

for the shrimp:
1 cup tightly packed fresh flat-leaf parsley
3 tablespoons freshly squeezed lemon juice
1/3 cup extra-virgin olive oil
salt and pepper
2 pounds Jumbo shrimp, peeled and deveined
1/2 to 1 tsp Tajin Mexican seasoning
2 tablespoons grapeseed oil

Make the parsley oil: coarsely chop the parsley and place in a food processor. Add the lime juice, olive oil, season with salt and pepper. Process to a paste. Reserve.

Make the shrimp: whisk the grapeseed oil with Tajin seasoning. Add the shrimp and toss to coat well. Season lightly with salt. Grill the shrimp until cooked through, around 3 minutes per side, depending on how hot is your grill.

Serve the shrimp with the parsley sauce spooned all over it.

for the noodles:
(adapted from Joanne’s blog)
12 oz cherry tomatoes
3 Tablespoons olive oil
1/2 tsp cumin seeds
1 tsp brown sugar
zest of 1/2 lemon
salt and pepper to taste
black rice noodles (I used this brand)

Heat the oven to 425F. In a large bowl, mix the tomatoes with the olive oil, cumin, sugar, lemon zest, salt, and a grind of black pepper. Toss to combine, then transfer to a baking dish. Place in the oven and roast for 30 minutes, or until it starts to get brown at spots.

Cook black rice noodles according to the instructions in the package. Toss with the roasted tomatoes, making sure to incorporate all the juices that accumulate in the baking dish. Serve alongside the shrimp.

ENJOY!

to print the recipe, click here

Comments: I am not too fond of grilling shrimp. If using a skewer, it is best to use two so that they don’t move around, but assembling that leaves me exhausted just thinking about it. So this time I went with a grilling basket, which is something usually maneuvered by the husband. He always does sea bass or red snapper using that gadget. I am quite impressed. Both by the husband and the gadget.

I sprayed the grid with a little olive oil, added the marinated shrimp, closed it, and placed on the grill. The shrimp cooked like a dream, perfectly juicy. Flipping them over midway into the grilling time was a breeze. Grab the basket by the handle, flip, and you are done. Granted, washing the basket is a bit of a hassle, but overall a small price to pay.

I hope you try this meal, either the whole thing or at least the shrimp component with that amazing parsley oil. We are still talking about it…

ONE YEAR AGO: Chicken Shawarma, the Easiest Way

TWO YEARS AGO: Marshmallow Macarons

THREE YEARS AGO: Mango-Lime Macarons

FOUR YEARS AGO: Honey-Glazed Sriracha Meatballs

FIVE YEARS AGO: Slow-cooker Braised Lamb Shanks

SIX YEARS AGO: How about some coffee with your steak?

SEVEN YEARS AGO: Celebrate Wednesday with a Spiral Kick

EIGHT YEARS AGO: Carrot Flan with Greens and Lemon Vinaigrette

NINE YEARS AGO: Granola Bars

TEN YEARS AGO:  Awesome Broccolini

ELEVEN YEARS AGO:  A Twist on Pesto

TWELVE YEARS AGO: Ciabatta: Judging a bread by its holes