THE HOME BAKERS COLLECTIVE: FEBRUARY PROJECT

If you don’t know what the Home Bakers Collective is all about, I invite you to read my post about it with a click here. This month’s challenge was conceived by the one and only Carlos, Tent-Baker-Extraordinaire, Newly-Dad of Franklin Chip, a chocolate lab who is the most adorable thing roaming the planet at the present time. Check him out. Back to the challenge. Methinks Carlos made this one for me. Because, seriously, look at his brief: If you were a macaron, which macaron would you be? Can you imagine my sheer joy?  Of course, I could not wait to bake this batch, although it was not as easy and straightforward to decide what to do. I had two main paths in my mind, one focusing on color, the other on flavor. It was tricky to come up with something that would join both harmoniously. So I went with flavor. Tropical, of course, but with some spice. Swirls and sprinkles, of course. Because by now everybody knows I am a serial sprinkler.

SALLY’S SPICY MANGO AND COCONUT MACARON
(from the Bewitching Kitchen)

for the shells:
200 g powdered sugar
115 g almond meal
115 g egg whites at room temperature
1/8 tsp cream of tartar
100 g superfine sugar
orange gel color from Artisan Accents
2 drops coconut extract

for the mango gelee filling:
2g gelatin (powdered or 1 sheet)
water to bloom gelatin (10 mL if using powdered)
60g sugar
60g water
60g mango puree (I used canned)
2tsp lime juice
1/4 tsp Sarawak pepper, ground
1g agar

for the coconut ganache filling:
4g powdered gelatin (I used Knox)
20g cold water
375g heavy cream
130g white chocolate
1/4 cup shredded coconut, unsweetened
to decorate:
Royal icing or Candy melts + sprinkles (optional)

Line 3 heavy baking sheets with parchment paper or Silpat mats. Layer the powdered sugar and almond meal in a food processor. Pulse until the mixture looks like fine meal, about 15 seconds. Pass through a sieve and transfer to a small bowl. Set aside.

Place the egg whites and pinch of cream of tartar in the bowl of a stand mixer fitted with the whisk attachment. Whip the whites with the cream of tartar until they look like light foam.

Slowly add in the granulated sugar in three to four additions, trying to aim the stream between the whisk and the side of the bowl. Turn the speed up to medium-high. Continue to whip the meringue until it is soft and shiny. It should look like marshmallow creme. Add the gel color and the coconut extract drops. Staying at medium-high speed, whip until firm. Transfer the whites to a medium bowl.

Fold in the almond meal mixture in three increments. Paint the mixture halfway up the side of the bowl, using the flat side of a spatula. Scrape the mixture down to the center of the bowl. Divide in two portions, color one orange, leave the other plain. Proceed with the macaronage, mixing each mixture to the correct texture (molten lava is the term of choice, I like to form a figure 8 with the batter and also check a small amount placed on parchment, the texture should smooth out in 30 seconds or so).  Place both batters inside the same piping bag fitted with an 8mm tip, or any tip you feel comfortable for piping.

Slam each sheet hard four to six times on the counter. Let the unbaked macarons dry until they look dull, about 30 minutes.

While the macarons are drying, heat the oven to 300 F. Bake one sheet at a time on the middle rack. Check in 11 minutes. If the tops slide, then bake for 2 to 3 more minutes. Let the macaroons cool for 10 minutes before removing from the pan.

Make the gelee filling: Bloom the gelatin by submerging it in water until it softens, about 10 minutes.  Combine the 60g water with mango puree, lime, pepper and agar. Bring the mixture to a boil and boil for 1 minute. Remove from heat, add gelatin.  Pour into a baking sheet lined with plastic wrap and place in fridge until set.  Cut small circles that will sit in the center of each shell.

Make the coconut ganache. Place the powdered gelatin into a small saucepan along with the cold water, let it sit for 10 minutes. It will turn into a hard paste.

Add the heavy cream into a saucepan along with the shredded coconut. Simmer until it almost boils, turn the heat off, cover the pan and allow it to sit for 15 minutes. Drain the shredded coconut, bring the weight back to 375g with additional heavy cream. Bring to a simmer, then add to the chocolate. Add the gelatin, and mix well to incorporate everything together and melt the chocolate. Use an immersion blender if desired. Place the mixture in the fridge for a few hours. It is best if made the day before and kept refrigerated. Whip before using.

Assemble the macarons: find two macarons similar in size and add a round of mango gelee in the center. Surround with coconut ganache. Close the shell.

Decorate the tops with swirls and sprinkles. Because, why not?

ENJOY!

to print the recipe, click here


Comments: This was my first time making a double filling for the macarons and there’s definitely a learning curve associated with it. For instance, the agar-layer generates a bit of moisture, so if you are not consuming the macarons within two days, the texture will suffer a bit. I think the issue can be prevented with a very thin layer of melted white chocolate before filling the shells, to form a barrier.  But if you intend to consume the macarons in a couple of days, I would not worry about it.
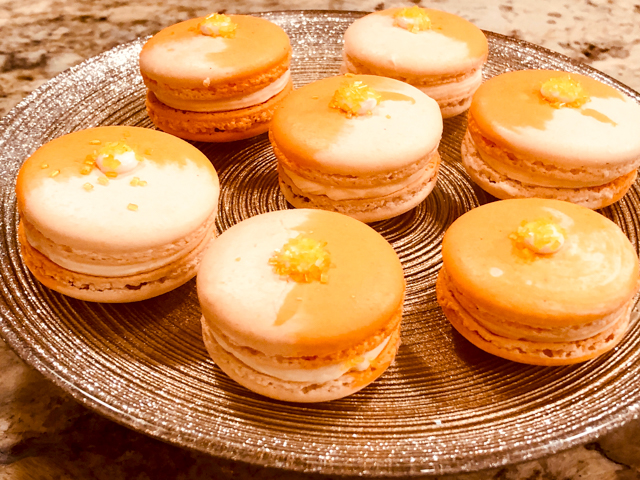
The pepper. I had several options to try, including Szechuan peppers that would probably be pretty cool to use also. In the end, I sat down with Mr. Pierre Herme’ and he advised me to search for Sarawak pepper. Well, ok, it was not exactly him, flesh and bone (borrowing a Brazilian expression), but his book. Minor detail. So I amazoned the pepper, and used the same amount he did in his Mahogany Macarons, recipe found here. My agar layer is however totally different from his filling, just the pepper in common.


I loved the contrast of mango-gelee and the shell, plus the creaminess of the ganache around it. Infusing the ganache with shredded coconut gave it enough flavor, and more natural than coconut extracts, which often will give that odd sun-tanning lotion aura.

Did I  hit my self-macaron perfectly? Well, it is not as colorful as I could make it, but I think the swirls and sprinkles compensate for the restraint in the color department. The taste is spot on, to quote a certain judge from a certain baking show. What do you think, does it “look” like yours truly?

Carlos, I loved this challenge and I can hardly wait to see what everyone else baked!
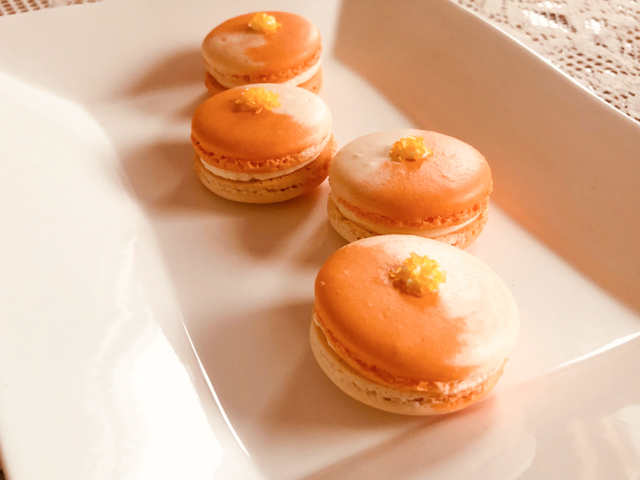
To all my readers, make sure to stop by The Home Bakers Collective, and say hi to my friends, each one waiting for you with a very personal macaron in hand. (It might take a few hours after publication of my post for the collective to get updated, so try later if there’s nothing there yet).
ONE YEAR AGO: Bouillabaise for a Chilly Evening

TWO YEARS AGO: Bergamot-Cherry Macarons

THREE YEARS AGO: Roasted Veggies with Queso Cotija Dressing

FOUR YEARS AGO: Creamy Broccoli and Mushroom Casserole

FIVE YEARS AGO: Maple Walnut Biscotti

SIX YEARS AGO: Barley Risotto with Peas

SEVEN YEARS AGO: Oatmeal Fudge Bars

EIGHT YEARS AGO: Cauliflower Steaks

NINE YEARS AGO: Soft Spot for Chevre

TEN YEARS AGO: Quick sun-dried Tomato Crostini
 

MACARONS FOR THE HOLIDAY SEASON


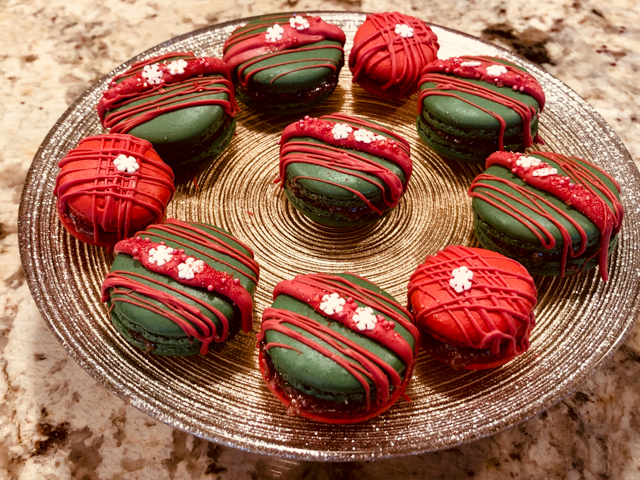
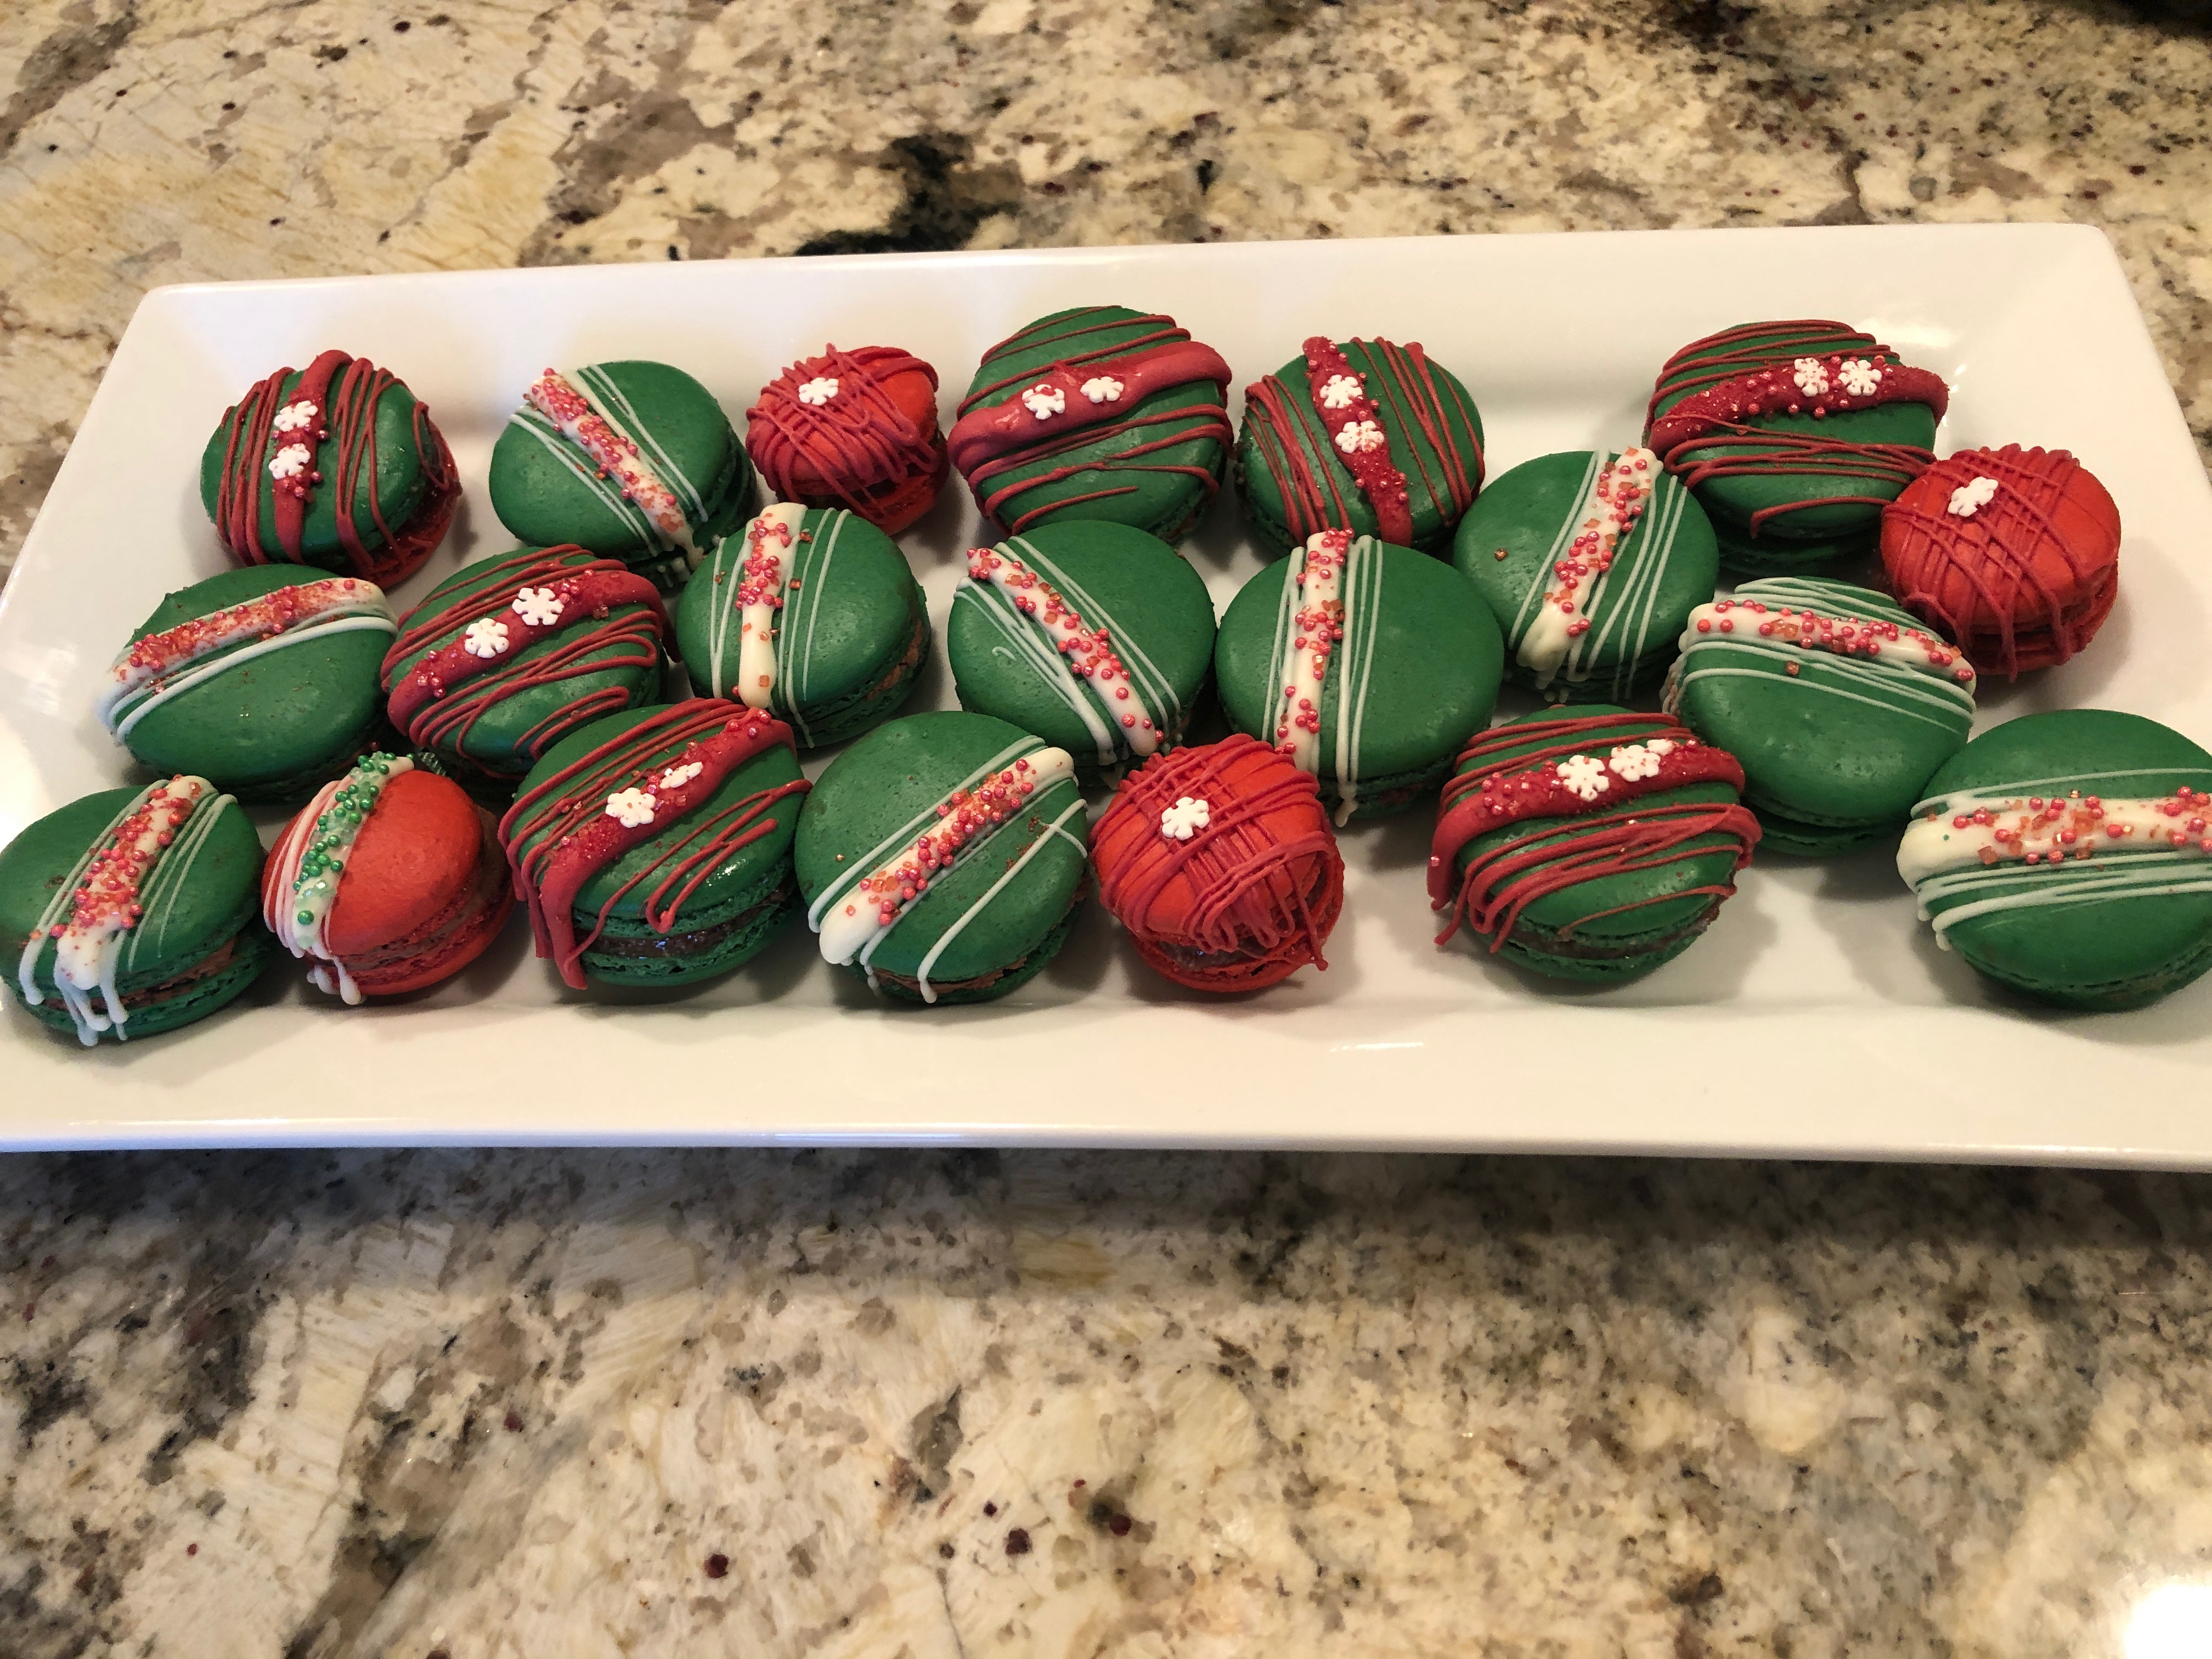
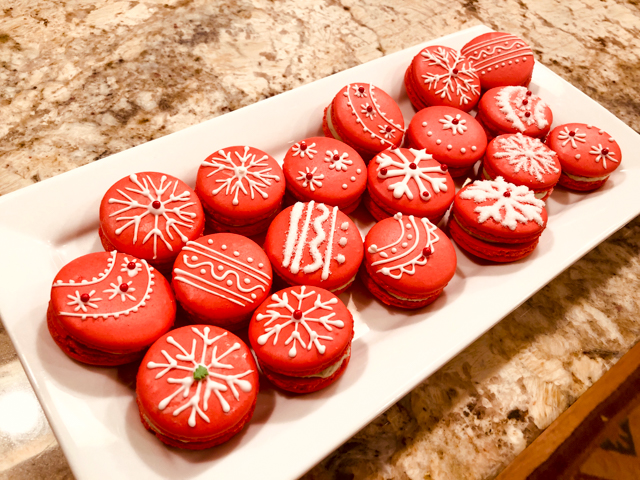
One recipe, two colors, four different ways to decorate, from simple to a little more time-consuming. It is definitely the reason why I adore macarons. You can dress them up for party or keep them simple, and play with filling flavors that match any season. For these Christmas-inspired versions, I filled some with raspberry jam and others with white chocolate-mint ganache.

CHRISTMAS MACARONS
(from the Bewitching Kitchen, adapted from Colette Christian)

for the shells:
200 g powdered sugar
115 g almond meal
115 g egg whites at room temperature
a pinch of cream of tartar
100 g granulated sugar
Red or Green gel color from Artisan Accents
1/4 tsp vanilla paste

for the filling:
Raspberry jam
or
240g white chocolate, chopped
5 Tablespoons heavy cream
1/4 to 1/2 tsp peppermint extract
1/8 cup mini mint chocolate chips (optional)

to decorate:
white candy melts
red food color
gold dust dissolved in lemon extract or vodka
sprinkles of your choice
or
Royal Icing:
40 g egg whites
210 g powdered sugar
lemon juice

Line 2 or 3 heavy baking sheets with Silpat mats. Layer the powdered sugar and almond meal in a food processor. Pulse until the mixture looks like fine meal, about 15 seconds. Pass through a sieve and transfer to a small bowl. Set aside.

Place the egg whites and pinch of cream of tartar in the bowl of a stand mixer fitted with the whisk attachment. Make sure that the bowl and the whisk are impeccably clean. Starting on medium speed, whip the whites with the cream of tartar until they look like light foam. The whites should not appear liquid. The foam will be light and should not have any structure.

Slowly rain in the granulated sugar, trying to aim the stream between the whisk and the side of the bowl. Turn the speed up to medium-high. Continue to whip the meringue until it is soft and shiny. It should look like marshmallow creme. Add the gel color and the vanilla. Staying at medium-high speed, whip the egg whites until the mixture begins to dull and the lines of the whisk are visible on the surface of the meringue. Check the peak. It should be firm. Transfer the whites to a medium bowl.

Fold in the almond meal mixture in three increments. Paint the mixture halfway up the side of the bowl, using the flat side of a spatula. Scrape the mixture down to the center of the bowl. Repeat two or three times, then check to see if the mixture slides slowly down the side of the bowl. Put the mixture in a piping bag fitted with one of the tips listed above. Pipe on the prepared baking sheets.

Slam each sheet hard four to six times on the counter. Let the unbaked macarons dry until they look dull, 30 to 40 minutes.

While the macarons are drying, heat the oven to 300 F.  Bake one sheet at a time on the middle rack. Check in 11 minutes. If the tops slide, then bake for 2 to 3 more minutes. Let the macaroons cool for 10 minutes before removing from the pan.

Make the filling:  Melt the white chocolate with the mint chips (if using) in a double boiler or microwave, very gently. Add the heavy cream and stir until smooth. Add the peppermint extract. Allow it to cool to almost room temperature and whisk with a hand-held mixer to achieve piping consistency. Do not over-whip or the ganache will go grainy. Use to fill shells.

Decorate with melted Candy melts and sprinkles. For the brush effect, use a fan brush on a mixture of gold dust with lemon extract. To make the Royal Icing mix all ingredients in a Kitchen Aid type mixer for 5 minutes, adjust consistency with lemon juice or powdered sugar.

Store macarons in the fridge for 24 hours before serving.

ENJOY!

to print the recipe, click here


These shells were decorated with Royal Icing using either a very fine piping tip (Wilton number 1), or a slightly bigger tip (Wilton number 3). Sanding sugar was sprinkled on some macarons while still wet and allowed to dry.  They were filled with White Chocolate Ganache, and tasted amazing!


The filling for this batch was a simple, store-bought raspberry jam, decorated with white candy melts dyed red.

Raspberry Jam filling once again, with a drizzle of white candy melts and sprinkles…

They really make it for a nice, festive presentation that screams Christmas! I made them when I had a special interview at home for our evening news… If you’d like to see it, click here


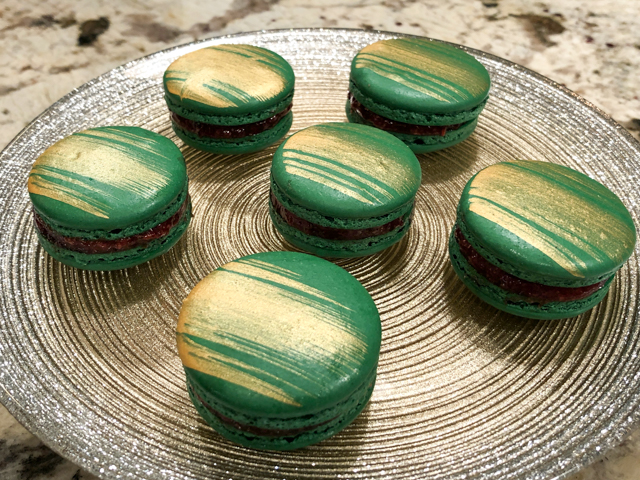
But the simplest of all to decorate might be one of my favorites… I love the contrast of gold with green… Red and gold could be wonderful too, I might bake another batch before saying goodbye to 2019.

ONE YEAR AGO: Apple and Sobacha Caramel Dome Cake 

TWO YEARS AGO: White Chocolate Peppermint Macarons (serendipity?)

THREE YEARS AGO: Shrubs, a fun alternative to alcoholic drinks

FOUR YEARS AGO: Date Truffles 

FIVE YEARS AGO: Mascarpone Mousse from Baking Chez Moi

SIX YEARS AGO: Pumpkin Brigadeiros

SEVEN YEARS AGO: Pumpkin Espresso Loaf

EIGHT YEARS AGO: Caramelized Carrot Soup

NINE YEARS AGO: Miso-Grilled Shrimp

TEN YEARS AGO: A Special Holiday Fruitcake

FALL-INSPIRED BAKING

Everyone who knows me is well-aware I am a summer-creature all the way. But there’s something about the colors of autumn that fascinate me. I suppose they fascinate all human beings. Growing up in Brazil, I had never seen trees turning color, but used to marvel at photos from Vermont or other places famous for having the most spectacular color change in their trees. Now I enjoy them in our own backyard, Phil planted a beautiful maple tree that is thriving nicely, each year more magnificent, with a more intense red tone in the leaves. Gorgeous. Today I share with you a series of recent bakes inspired by the season.

I will start with the Maple Leaf Chocolate Sugar Cookies, because I loved making them.

MAPLE LEAF CHOCOLATE COOKIES
(cookie recipe from Lilaloa and decoration technique from Salt and Serenity)

for the cookie dough:
227 g (1 cup) slightly softened unsalted butter
43 g vegetable shortening (43 grams)
300 g granulated sugar
2 large eggs ( about 100 grams)
1 teaspoon vanilla paste
1/2 teaspoon salt
3/4 teaspoon baking powder
80 g unsweetened cocoa powder
490 g all-purpose flour
(if saving the dough to roll at a later time, use 420 g flour)
for the Royal Icing:
80 g egg whites
420 g powdered sugar
food dye (brown, red, orange, and yellow)

Heat oven to 375 F. Line two baking sheets with parchment paper.
Cream butter, shortening and sugar together in the bowl of a KitchenAid type mixer with the paddle attachment. Add eggs, vanilla, baking powder and salt and mix well.
Stir in the cocoa until well blended.

Add flour and mix until the flour is completely incorporated and the dough holds together in a ball. Roll out on lightly floured surface, cut in the desired shapes.I like to place the baking sheet in the freezer for 5 minutes or in the refrigerator for 15 min before baking. Bake for 7 to 10 minutes, cool completely before icing.

Make the Royal icing: whisk the egg whites and powdered sugar using a KitchenAid type mixer until fully smooth. Adjust if needed with sugar or a little milk. I like to have it at around 15 second-icing consistency, because it works both for piping the edge and flooding, which is all I need for this design.

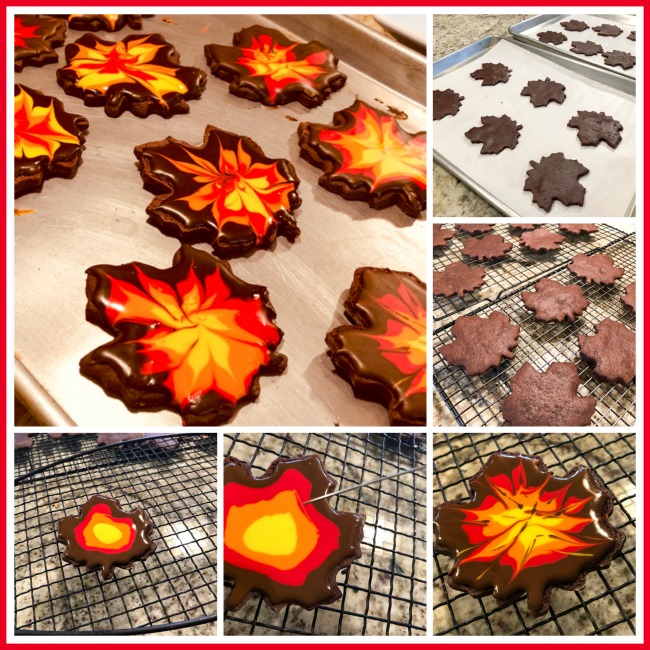
Pipe the four colors starting with brown, finishing with yellow, but feel free to play with them in other arrangements. Pull the colors with a needle or toothpick, watch the tutorial online for details. Allow the icing to fully set at room temperature.

ENJOY!

to print the recipe, click here

Comments: I urge you to visit Salt and Serenity and watch Cindy’s video explaining how to make this eye-catching design. It is one of those things that seem very complicated until you see how it’s done. Basically, if “I” could do it, you will be able to do it also. Trust me. It is important to use a cookie recipe that holds its shape well, and I was happy with the one I used, especially because you can roll the dough without resting it in the fridge. You know I am not the most patient baker out there.

Moving on to Halloween Brigadeiros…

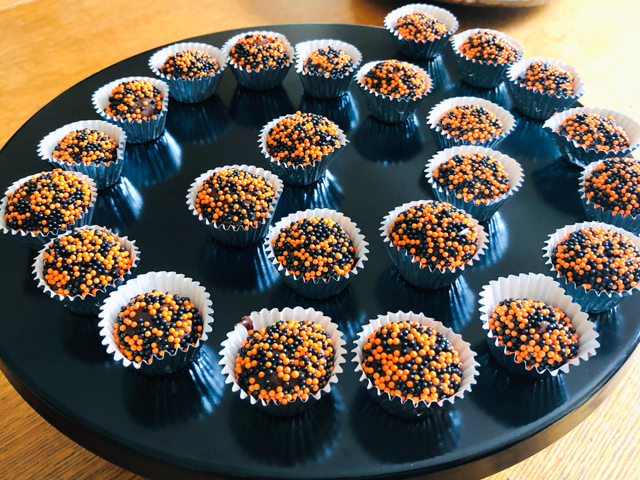
Brigadeiros are the most typical candy from Brazil, and totally addictive.  I used my default recipe and simply coated them with orange and black non-pareils. For the recipe and to read more about them, visit my old post with a click here.

PUMPKIN CUPCAKES
(adapted from many sources)

for the cupcakes:
170 g granulated sugar
130g brown sugar
225 g all-purpose flour
1 + 1/2 tsp baking powder
½ teaspoon baking soda
2 teaspoons ground cinnamon
3/4 teaspoon ground ginger
1/2 teaspoon ground nutmeg
1/4 tsp salt
320 g canned pumpkin (about 3/4 of a small can)
150 ml grapeseed oil
3 large eggs
for the icing:
120g unsalted butter, softened
190 g cream cheese, at room temperature
675 g powdered sugar
sprinkles to decorate

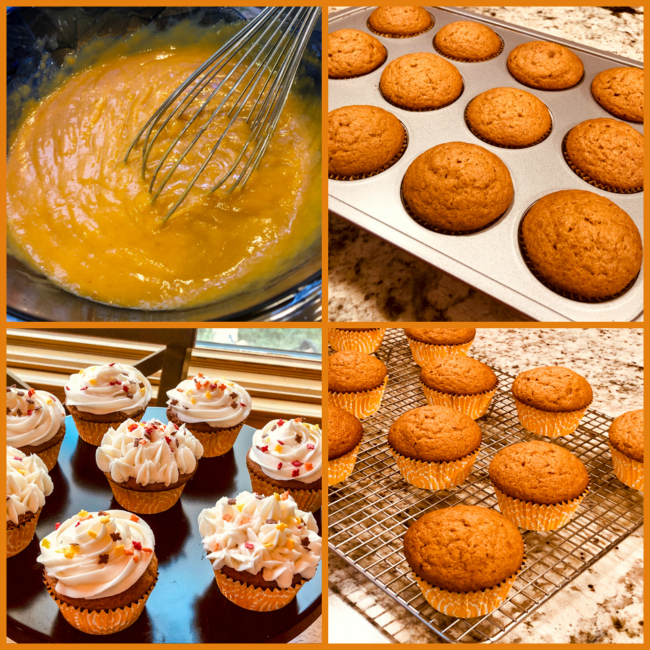
Heat the oven to 375 F.  Place both sugars in the bowl of a KitchenAid type mixer and blend with the whisk so that no lumps remain in the brown sugar. Sift all other dry ingredients and mix well with the sugars.

In another medium bowl mix well the pumpkin, oil and eggs. Add to the KitchenAid bowl and mix with the paddle attachment until smooth. Place paper liners in a 12-muffin baking pan, and fill each about 3/4 of the volume.

Bake until a toothpick comes out clean, about 18 minutes.

Make the icing while the cupcakes bake and cool. Beat the butter and cream cheese with an electric mixer until pale and very smooth. Sift the icing sugar into a large bowl, then add to the butter mixture in three additions, beating well each time. 

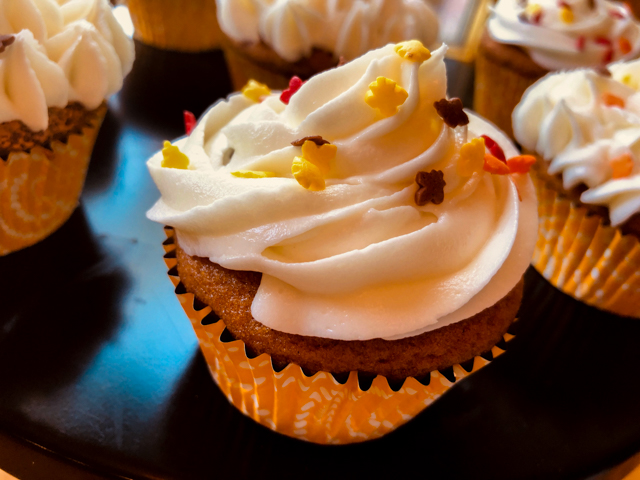
When the cupcakes are completely cool, frost them using the icing tip of your choice. I used Wilton 1M.  Decorate with your favorite sprinkles.

ENJOY!

to print the recipe, click here

Comments: These are deliciously soft cupcakes, with the perfect amount and combination of spices. I used two different styles of piping trying to change things a bit, but the traditional swirl still gets my vote. I suppose if you want to go the more austere route, these cupcakes will shine with just a dusting of powdered sugar, so keep that in mind.

And finally, how could I possibly make a Fall inspired baking post without French macarons?

I used my default recipe, which you can find here, but added orange and brown food color at 4:1 proportion.

PUMPKIN MACARON FILLING

1/2 cup butter, softened
1/4 cup canned pumpkin pureed
2 cups powdered sugar (220 g)
1 tsp vanilla
1/2 tsp cinnamon
1/4 tsp ground ginger
1/8 tsp nutmeg
pinch of allspice
to decorate:
White Candy melts (about 3/4 cup)
black gel food dye
sprinkles of your choice

Cream the butter and pumpkin puree with an electric mixer. Add in the sugar and spices. Mix well and scrape down side of bowl. If needed, thin with a very small amount of milk or heavy cream.

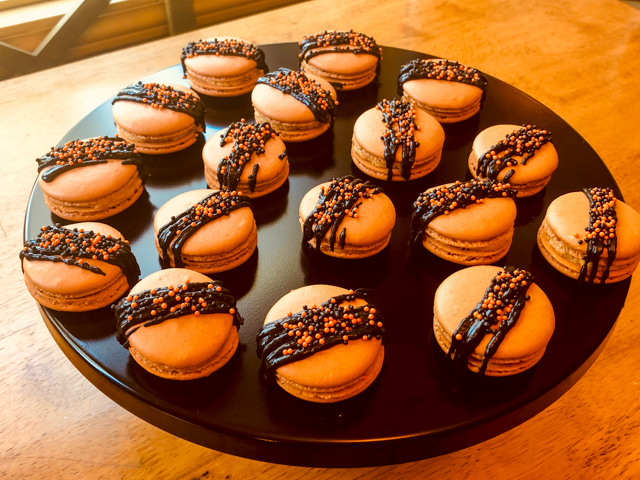
Add a small amount of buttercream to a macaron shell, top with another shell. Melt the Candy melts in a microwave or double boiler. Add black food dye. Place in a piping bag, cut a very small hole in the plastic. Pipe lines on top of the macarons, immediately add sprinkles before the drizzle sets.

As always, leave the filled macarons in the fridge overnight before serving them.

ENJOY!

to print the filling recipe, click here

Comments: This is my second version of a pumpkin macaron, and I like this filling better, it has a more complex flavor. For the drizzle with black candy melts I did something a bit different, and unfortunately I am not quite sure how reproducible it is. You are welcome to try it, but if it does not work for you, don’t get mad at me. A couple of months ago I was heating candy melts and used too high power in the microwave. The suspension kind of broke, and I simply tossed it and started all over. Later I learned that you can recover the broken suspension if you add a bit of oil such as grapeseed or safflower. Something mild in flavor, obviously. This time I made the suspension break and brought it back but not to the point that it was fully smooth. I wanted some texture, and I think it worked well, at least it was close to what I had in mind.  So, next time Candy Melts play a trick on you, consider using it to your advantage…

I hope you enjoyed my quartet of bakes. Since summer is over, I might as well embrace what’s good about cooler weather: BAKING WITH ABANDON!


ONE YEAR AGO: On a Halloween Roll

TWO YEARS AGO: Pumpkin Macarons

THREE YEARS AGO: Zucchini, Lemon & Walnut Cake

FOUR YEARS AGO: Paleo Energy Bars

FIVE YEARS AGO: Pecan-Crusted Chicken with Honey Mustard Dressing

SIX YEARS AGO: Mozzarella Stuffed Turkey Burgers

SEVEN YEARS AGO:  Cashew Chicken Lettuce Wraps

EIGHT YEARS AGO: Clay-pot Pork Roast

NINE YEARS AGO: Panmarino

TEN YEARS AGO: A Classic Roast Chicken

MINNIE MACARONS: A FUN PROJECT WITH A HAPPY ENDING

Flash-back from the past, one of my favorite macaron projects!

sallybr's avatarBewitching Kitchen

It all started with a very innocent email from my daughter-in-law. Inside a simple phrase and a single picture… The phrase: Something for you to try… The picture: a gorgeous Minnie Macaron sold at Disney. Miss G, our grand-daughter is crazy about all things Minnie. Basically, the universe conspired to make me  bake a batch.

MINNIE MACARONS
(from the Bewitching Kitchen)

for the shells:
198 g powdered sugar
113 g almond meal
113 g egg whites at room temperature
a pinch of cream of tartar
100 g granulated sugar
Pink Gel color from AmeriColor
2 drops vanilla extract

for the filling:

280 g strawberries, stems removed
140 g sugar
1 lemon, juiced
250 g white chocolate, chopped fine
1/3 cup heavy cream (about 80g)
1 tablespoon butter

to decorate:
pink bows (melted Candy Melts with a drop of pink gel color)
gold and pink sparkling sugar

Make the filling:  Prepare fresh strawberry…

View original post 1,318 more words

MARSHMALLOW MACARONS

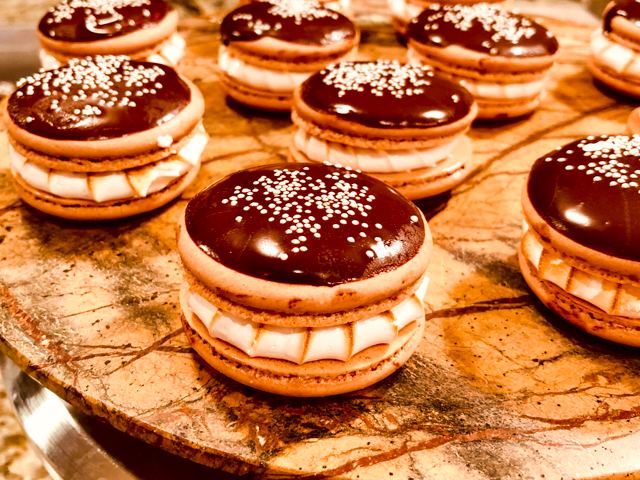
I wanted the first post in my second decade of blogging to be special. Macarons have a permanent spot in my heart. My fascination with these cookies made me persist after many failures, but what ultimately led me to conquer them was getting the perfect instructor to virtually hold my hand and show me the tricks to master these finicky creatures. Colette Christian is her name. Her class on Bluprint (former Craftsy) will turn ANY person into a confident macaron baker. If you’ve been following my blog for a while, you may notice that her recipe is my go-to. I sometimes venture into Italian and Swiss territory just for fun, but if I have a very important batch to make I don’t blink, Colette’s tried and true it is.  Her instructions are flawless, and if you have questions she always answers them. The inspiration for the flavor and looks of this batch came from Ettore Cioccia, an Italian patissier who works in Spain. I follow his beautiful productions closely online.

MARSHMALLOW MACARONS
(adapted from Colette Christian’s Craftsy version)

for the shells:
198 g powdered sugar
113 g almond meal
113 g egg whites at room temperature
a pinch of cream of tartar
100 g granulated sugar
caramel food gel from Chefmaster
1/8 tsp vanilla extract

for the filling:

90g egg whites  (from about 3 eggs)
130g sugar (superfine if available)
1/8 teaspoon kosher salt
1/8 teaspoon cream of tartar

to decorate:
4 ounces (113 g)  70% chocolate
1 + 1/2 tsp coconut oil
white non-pareils sprinkles

Line 2 or 3 heavy baking sheets with parchment paper or Silpat mats. Layer the powdered sugar and almond meal   in a food processor. Pulse until the mixture looks like fine meal, about 15 seconds. Pass through a sieve and transfer to a small bowl. Set aside.

Place the egg whites and pinch of cream of tartar in the bowl of a stand mixer fitted with the whisk attachment. Make sure that the bowl and the whisk are impeccably clean. Starting on medium speed, whip the whites with the cream of tartar until they look like light foam. The whites should not appear liquid. The foam will be light and should not have any structure.

Slowly rain in the granulated sugar, trying to aim the stream between the whisk and the side of the bowl. Turn the speed up to medium-high. Continue to whip the meringue until it is soft and shiny. It should look like marshmallow creme. Add the gel color and the vanilla. Staying at medium-high speed, whip the egg whites until the mixture begins to dull and the lines of the whisk are visible on the surface of the meringue. Check the peak. It should be firm.

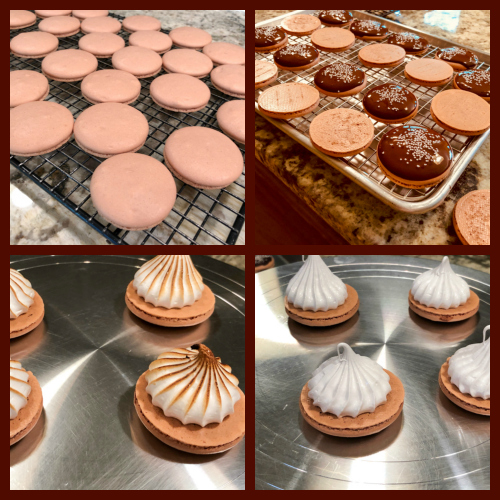
Switch to paddle attachment. Add half the almond meal mixture, turn the mixer on low and mix for about 3 seconds. Stop and add the rest of the almond mixture, turn the mixer on low, and process for about 5 more seconds. It should still be reasonably thick, but the grains of almond should be more or less disappearing in the batter.  Remove the bowl from the mixer, and finish the macaronage by hand.  Put the mixture in a piping bag fitted with one of the tips listed above. Pipe on the prepared baking sheets.

Slam each sheet hard four to six times on the counter. Then fist bump each end of the sheet’s underside twice. Let the unbaked macarons dry until they look dull but not overly dry. Drying time depends on humidity. Ina dry climate, the macarons can dry in 15 to 20 minutes; in a humid climate, it can take 35 to 40 minutes.

While the macarons are drying, heat the oven to 300 F. Bake one sheet at a time on the middle rack. Check in 11 minutes. If the tops slide, then bake for 2 to 3 more minutes. The macarons should release without sticking. Check one or two. If they stick, put them back in the oven for 1 to 2 more minutes. Let the macaroons cool for 10 minutes before removing from the pan.

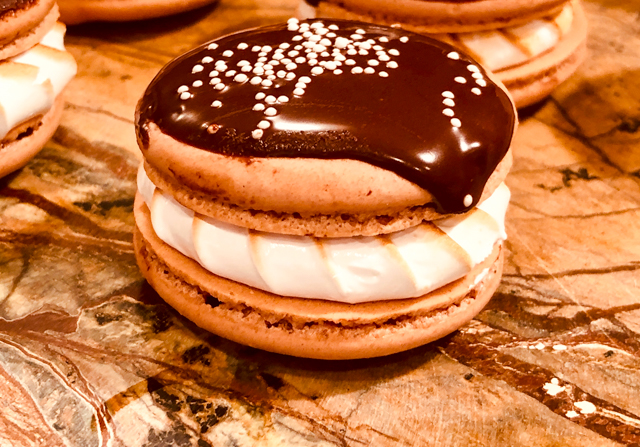
Decorate half the shells with chocolate. Place chocolate and coconut oil in a microwave-safe bowl. Melt gently, mixing well. Dip half of the shells into the chocolate, leave to almost set. Add the white sprinkles when the chocolate is still a bit sticky to the touch. Reserve.

Make the filling: Fill a wide pot with a couple of inches of water. Place over high heat until almost boiling, then adjust temperature to maintain a gentle simmer. Combine egg whites, sugar, salt, and cream of tartar in the bowl of a stand mixer. Set over steaming water, stirring and scraping constantly with a flexible spatula, until egg whites reach 175°F. It should take less than 10 minutes. Transfer to a stand mixer fitted with a whisk attachment and whip at high speed until meringue is glossy and beginning to ball up inside the whisk, about 5 minutes.  Place the mixture in a piping bag fitted with a closed start tip. Pipe on the shells that are not decorated with chocolate.  Burn the surface with a torch, and immediately close the macaron with a decorated shell.  Press gently so that the burned design shows through the edge.

 Store in the fridge for 24 hours for perfect texture.

ENJOY!

to print the recipe, click here

Comments: These macs were a ton of fun to make…  I wasn’t sure how the Swiss  meringue would behave as I torched it, but the whole thing worked flawlessly. Remember that I cooked the egg whites to a slightly higher temperature than most recipes call for, resulting in a more stable meringue. I piped and torched four at a time.  More than that could be a bit tricky. The chocolate shell was still pretty nice after 2 days in the fridge.  You could use tempered chocolate or if you truly want to simplify, candy melts work too. However, real chocolate tastes a lot better and in this case there’s quite a bit of it on the shell. Just make sure to coat the shells carefully so that no chocolate drips to the side.

Although, I doubt anyone would mind a little chocolate insinuating its presence down the shell… Would you?


About Chef Colette Christian

Chef Christian not only teaches SIX classes at Bluprint (Macarons, Miniature French Desserts, Croissants, Pain au Chocolat, Danish and other goodies), she also published a macaron cookbook that goes way beyond the basics to show amazing decorating techniques and cool things to bake using macarons as the basic method. To order your copy click here.  To visit her blog click  here.


ONE YEAR AGO: Fujisan Bread

TWO YEARS AGO: Air-Fried Tomatoes with Hazelnut Pesto & Halloumi Cheese

THREE YEARS AGO: Red Velvet Layered Cake

FOUR YEARS AGO: Lemon-Lavender Bars

FIVE YEARS AGO: Quinoa Fried Rice

SIX YEARS AGO: Carrot Flan with Greens and Lemon Vinaigrette

SEVEN YEARS AGO: The Secret Recipe Club: Granola Bars

EIGHT YEARS AGO:  Awesome Broccolini

NINE YEARS AGO:  A Twist on Pesto

TEN YEARS AGO: Ciabatta: Judging a bread by its holes