RASPBERRY SORBET AT SUMMER’S END

Last week a colleague from our new department in KSU stopped by my office and asked if I liked raspberries.  No need to think much about the answer! It turns out that he is an amazing gardener, and a very active member of the Manhattan Community Garden, a project that started in 1974 and never stopped growing. Small plots of land are rented to whoever wants to grow fruits or vegetables. The city provides the water, tools, and a lot of advice. You can read more about it here. Maybe one day Phil and I can join and become better gardeners… 😉

Back to berries. A few hours later, our colleague comes back with a big box of raspberries, still warm from the sun!  I know, I know, everyone should be so lucky!  I wanted to put them to good use, so I made a delicious raspberry sorbet. Phil and I bravely fought over the last spoonful a few evenings later.   😉

RASPBERRY SORBET
(from the Bewitching Kitchen)

4 to 5 cups raspberries
1 cup fresh blueberries (optional, see comments)
3/4 cup sugar
3/4 cup water
1 tablespoon fresh lemon juice

Make a simple syrup by heating the sugar with the water in a saucepan (or microwave) until the sugar is fully dissolved.  Allow it to cool, no need to refrigerate.

Place the raspberries  in the bowl of a food processor  and process until very smooth, stopping to scrape the sides of the bowl once or twice.  Pour the puree through a fine-mesh strainer and strain the mixture, pressing down  and scraping the inside of the strainer with a silicone spatula.  You will need a little more than 2 cups of smooth puree.  If you don’t have enough, you can use blueberries to bring the volume up.

Whisk the simple syrup and the lemon juice into the raspberry purée. Cover and refrigerate until cold, at least 3 hours.  Pour the mixture in your ice cream maker and process it according to the instructions of your machine.  Once the sorbet is ready, place it in a container and freeze for a few hours before serving.

ENJOY!

to print the recipe, click here

Comments:  Making the puree of raspberries is very easy using a food processor, but I went through three sizes of strainers to find the one that allowed me to separate the seeds from the pulp without too much grievance. It is not a pleasant job, but it ensures a smooth sorbet, so Keep Calm and Carry On. I added a little bit of blueberries (simply processed, no need to strain them), to make a volume of puree that would work in my ice cream maker, but if you have enough raspberry pulp, you can get by without any other fruit.   Add 3/4 of the simple syrup to begin with, once you have the base all ready, taste it and decide if you need more.   Raspberries have different degrees of tartness, and if you add other berries (strawberries could work well too) you will need less sugar.  I cannot think of a better way to close the season…

ONE YEAR AGO: When three is better than two

TWO YEARS AGO: Grating Tomatoes (and loving it!)

THREE YEARS AGO: A Peachy Salad for a Sunny Day


THE SECRET RECIPE CLUB: BLUEBERRY GALETTE

The Secret Recipe Club is a fun monthly event in which bloggers are assigned in secret to make a recipe from another blog,  and then post about it at exactly the same time on reveal day.  The group is now so popular that new members must  wait in a long line for a chance to join.  This popularity also explains one of the rules: if you mess up and don’t post on reveal day, you are out of the game, leaving an opening for someone else to take your place. It’s only fair, after all: it’s very disappointing to have your blog “orphaned” on reveal day.

This month was a bit of a stretch  to participate, but I’m sure glad I did.  My assigned blog was  Baking and Creating with Avril.   Did you notice the “Baking” in the title?  I have a slight suspicion that the SRC organizers like to have a little fun at my expense…  How else could it be that I’ve been matched with serious bakers for months in a row?  😉  Still, I love a challenge, and as soon as I got the assignment I jumped into Avril’s cool site, in full “blog stalking mode”.  After narrowing a long list of tasty options, I could not decide between  the blueberry galette or the white chocolate cranberry  bars.   You see, she’s got some seriously delicious stuff posted.   Phil, the blueberry-addict, made the choice for me.  Blueberry galette it would be.

RUSTIC BLUEBERRY GALETTE
(from Baking and Creating with Avril) 

for the crust
1 +  1/2 cups all purpose flour
1 tablespoon sugar
1/2 teaspoon salt
1 + 1/2 sticks unsalted butter {ice cold}
1 egg yolk
3 tablespoons  milk
3 tablespoons apricot preserves, warmed

for the filling:
3 cups fresh blueberries
1/4 cup brown sugar
2 tablespoons Flour
1/4 teaspoon cinnamon
1/8 teaspoon nutmeg, freshly grated
a pinch of salt

Make the crust: In a bowl of a food processor add the flour, sugar and salt, process to combine. Drop the cold butter pieces and pulse until small pea size crumbles appear. In a small bowl combine egg yolk and milk.  Pour into food processor and pulse just until combined.   Take dough mixture out of food processor and put onto a piece of parchment paper.  Form dough into a large disk, wrap parchment paper around it and place in refrigerator to chill for at least 30 minutes.

Make the filling by mixing in a large bowl the blueberries, flour, brown sugar, pinch of salt, cinnamon and nutmeg.

Preheat your oven to 350 degrees. On a lightly floured surface roll out the chilled pie crust to about 12 inches in diameter. Transfer to a parchment lined large baking sheet. Place the filling in the center of the pie crust, then fold up the sides pleating every now and then. Brush with warmed apricot preserves. Place in preheated oven to bake for 50-60 minutes. Rotating the pan halfway through. Let cool for 15 minutes before slicing and serving.

ENJOY!

to print the recipe, click here

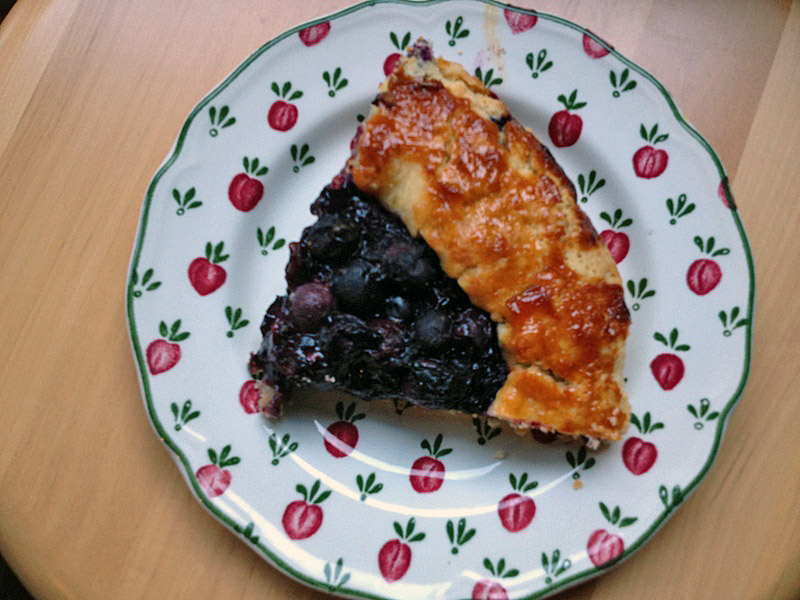
Comments:  As far as taste goes, I hit the nail in the head.  I could eat the filling of the galette by the spoonful over some nice, thick yogurt. But, let’s be honest: my product wouldn’t make the finals of the 2012 Galette Beauty Pageant.  In my defense, I made this recipe in one of the busiest weekends ever, preceded by a full day flying back to OK and a lab move that began the next  morning (Friday) at 5am!  That weekend found me  like a zombie trying to finish countless tasks at the same time.

But, I won’t sugar-coat the pill:  frantic times or not, pie crust is always tricky for me. Usually Phil comes to the rescue, but the poor guy had enough on his plate.  My pie dough was not as smooth as I hoped for, so I couldn’t make the beautiful pleats, trademarks of a nice galette.  Oh, well…   It gives me the opportunity to improve my baking skills, right? Alternatively, I can stand by the title and profess my galette as the most rustic ever! 😉

Don’t let my boo-boos prevent you from making it. Avril is right, the galette is incredibly tasty, and you should also consider making the original recipe (link is in Avril’s blog), that includes a mixture of fresh peaches and blueberries.  Oh, my….

Avril, it was nice to “meet” you through The Secret Recipe Club!  I hope you had a lot of fun finding your assigned blog and cooking from it!

ONE YEAR AGO: In My Kitchen, August 2011

TWO YEARS AGO: Journey to a New Home

THREE YEARS AGO: Friday Night Dinner (very tasty pork medallions)


THE SECRET RECIPE CLUB: MASCARPONE BROWNIES


The last Monday of the month is here again, and with it comes the much anticipated  reveal day for the members of Group D in The Secret Recipe Club.  For those who don’t know,  each month we are assigned (in secret) a blog to cook from.  We “stalk” the blog, pick a recipe, cook it, write a blog about it, and set it to go live at exactly the same time on reveal day.  This month my blog was Sweetly Serendipity, hosted by the beautiful Taryn, a baking goddess who lives in Boston and dreams of opening her own bakery some day. Yeap, that’s how serious she is. Once I started browsing her site and noticing the profusion of cakes, some extremely involved, I felt a bit uneasy.  For instance, I was smitten by  this cake, but it will have to wait for a less chaotic time in my life.  I kept on browsing her recipes, until I got to “mascarpone brownies”.  Simply scrumptious.  This is what she had to say about them:

It’s kind of like eating a dense chocolate souffle — their texture is light and airy, but the flavors are deep and delicious. They satisfy every feeling, and shower your mouth with a tantalizing array of sensations. They are smooth and creamy and absolutely perfect.

I had to bake a batch! 😉

MASCARPONE BROWNIES
(from Sweetly Serendipity)

for the brownies
1 cup unsalted butter
3 ounces  semisweet chocolate, finely chopped
1 cup white sugar
1/2 cup cocoa powder (sifted)
1/2 cup mascarpone cheese
3 large eggs, at room-temperature
2 teaspoons pure vanilla extract
1/2 cup all-purpose flour
1/2 teaspoon salt

for the ganache
6 ounces semisweet chocolate, finely chopped
6 tablespoons whipping cream
3 tablespoons unsalted butter

Preheat oven to 325F and cover a 8 x 8 pan with parchment paper.

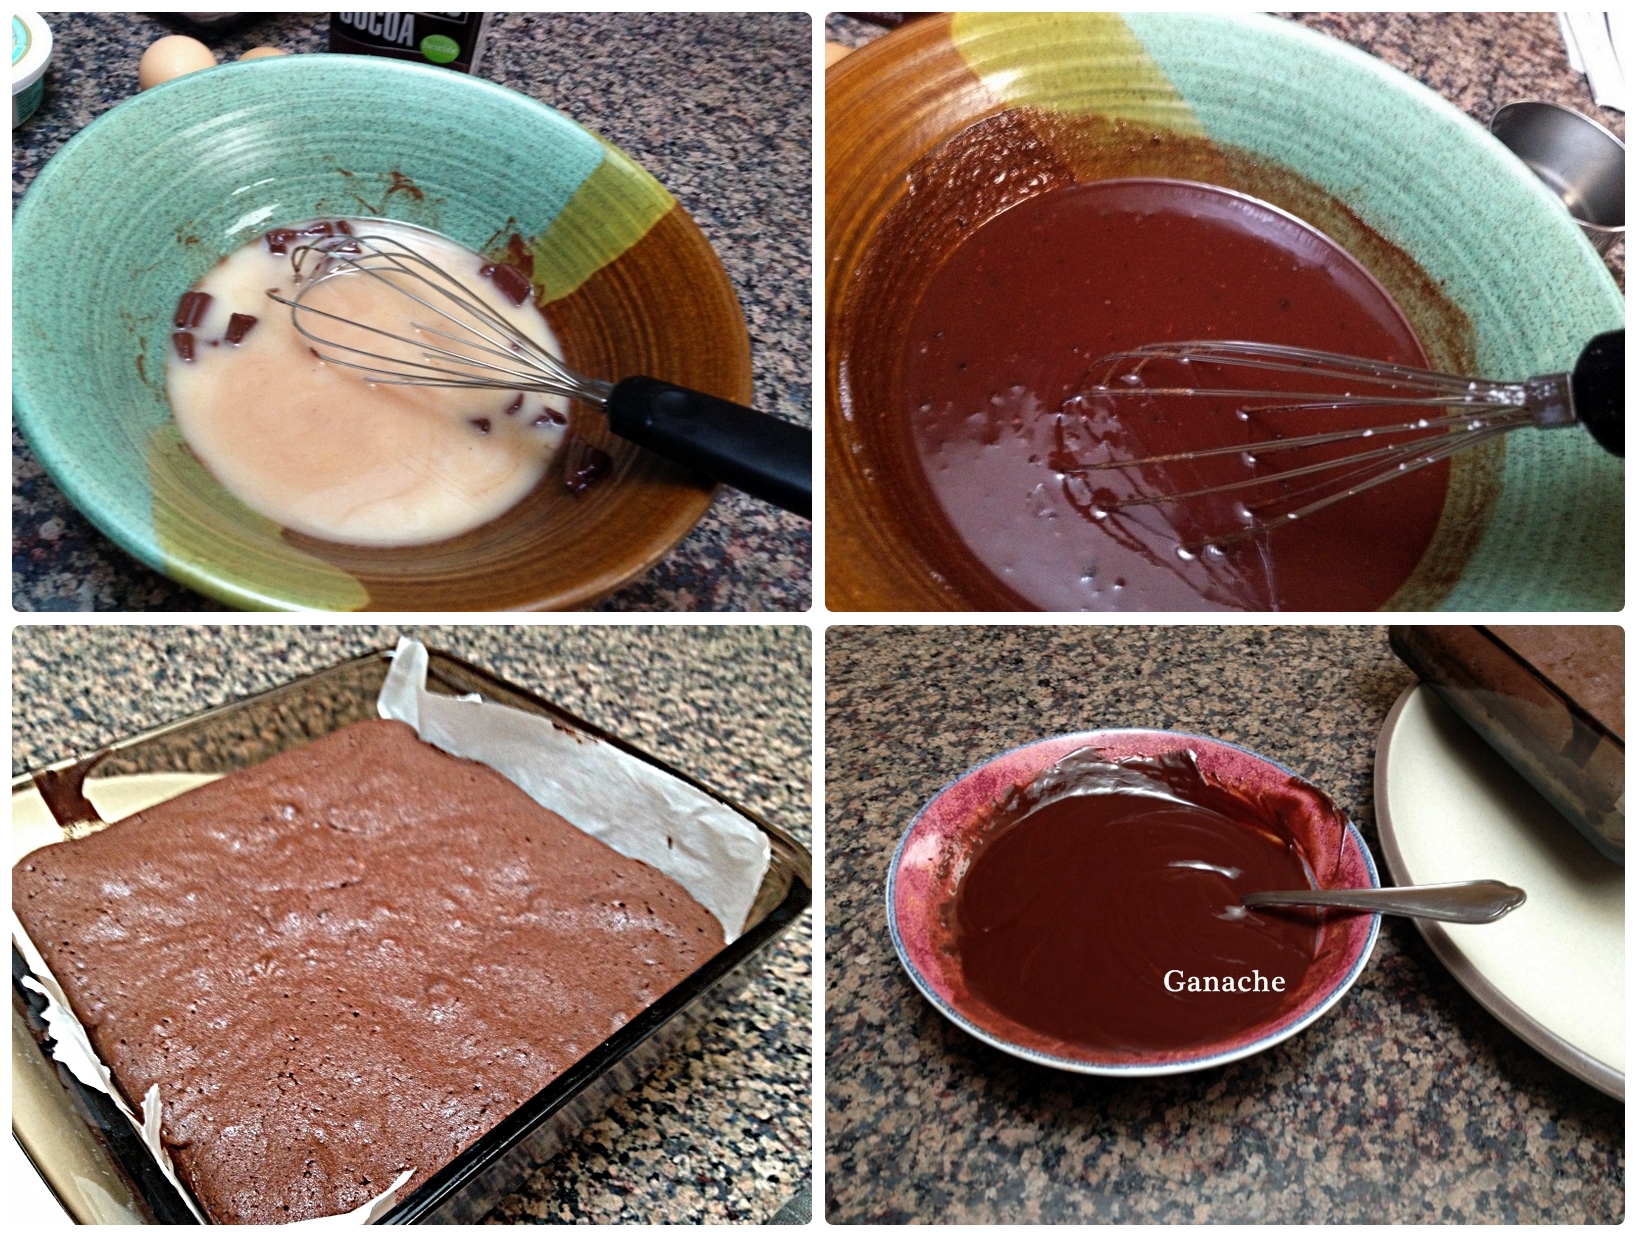
In glass mixing bowl melt butter in microwave on full power. Stir in chocolate and mix until combined. If the chocolate doesn’t fully melt, place it in the microwave again for a few seconds at a time.

Add sugar to the chocolate/butter mixture and mix until combined. Heat for an additional 30 seconds on high, remove and stir until it looks shiny. Don’t worry if it still seems a bit grainy.   Add marscarpone cheese, vanilla, eggs and mix until smooth.

Sift flour, salt and cocoa into the chocolate mixture and stir just until combined, making sure to scrape all sides of the bowl.  The batter will be rather light in texture, instead of dense and heavy like many brownie batters.

Pour the mixture into the prepared pan and smooth top to ensure even baking. Bake for 40-50 minutes until tester comes out clean. If the surface seems uneven, use the flat end of a potato masher to lightly tamp down the surface of the brownies while they are still warm.   This will help the ganache coat evenly. Leave in pan and set on wire rack to cool.

While brownies are cooling, make the ganache to pour over the top, a step you should do before the brownies are cold.  Heat butter and cream on medium power (taking care not to boil) in the microwave and add chocolate. Stir until all lumps disappear. Immediately pour over brownies. Let cool completely.  It is a good idea to place the pan in the fridge to allow the ganache to set.  Once chilled a knife will cut through the brownies quite cleanly. Make sure to clean your blade for each cut for a more polished look.

ENJOY!

to print the recipe, click here

These brownies were simply spectacular!  I never had a brownie with ganache on top, but it’s never too late to find new forms of decadence in life.  One piece of brownie will satisfy your chocolate craving for a while, so be the best person you can be and share!  😉
Taryn’s description for these brownies was perfect, I’ve got nothing to add!  They will be a hit at any party you take them to, and they are very easy to make, ganache included.   I actually made them in our almost completely bare kitchen in Oklahoma, using a couple of bowls, a baking dish, and a cheap whisk (bought for the occasion, as mine was 312 miles away, in Manhattan).


Taryn,  thanks for a great recipe!

Please visit my virtual buddies from Group D following the links provided by the blue frog at the end of the post, and have fun!

ONE YEAR AGO: Salmon Tacos

TWO YEARS AGO: Cinnamon Turban Bread

THREE YEARS AGO: Summertime Gratin


JACQUES TORRES CHOCOLATE CHIP COOKIES

Disclaimer: I am not a food snob.  A person who is not ashamed of confessing her love for Velveeta, and a weakness for Ramen instant noodles, cannot possibly qualify as a food snob.  However, I must say that unless you get a bag of Jacques’ chocolate disks (or, for added charm call them “fèves” like the French do), don’t bother making these cookies.  Regular chocolate chips, or even the best possible quality chocolate cut in pieces simply won’t do the job.  Food snob?  Who, moi?  😉

JACQUES TORRES CHOCOLATE CHIP COOKIES
(by Jacques Torres, published at The New York Times)

Heads up:
Dough must be prepared 24 to 72 hours before baking the cookies!

1 + 1/4 cup unsalted butter at room temperature
1 cup  + 2 tablespoons sugar
1 + 1/4 cup  brown sugar
2 eggs
1 teaspoon vanilla extract
1 +  1/4  teaspoon baking soda
1 + 1/2 teaspoon baking powder
1 + 1/2 teaspoon coarse salt
2 cups (minus 2 Tablespoons) cake flour
1 + 2/3 cup bread flour
1 pound bittersweet chocolate discs ( fèves)

Cream the butter and both sugars with an electric mixer until they are light and fluffy. Add the eggs, one at a time, beating well between additions. Add the vanilla and mix well.

Sprinkle the baking soda, baking powder, and salt across the mixture, distributing them as evenly as possible, and them into the dough. Add the flours and mix gently until just combined. Carefully stir in the chocolate disks, avoid breaking them into pieces, they must stay as intact as possible.  Scrape down the dough neatly down into the mixing bowl and press a plastic wrap directly onto it. Refrigerate the dough for 24  to 72 hours.

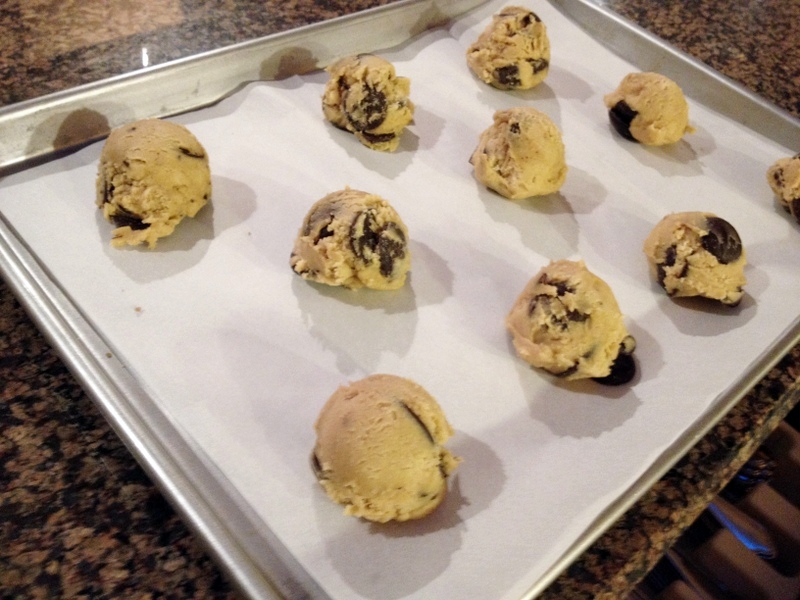
Heat the oven to 350 degrees F. Scoop the dough into balls just between the size of golf and tennis balls, adjusting any protruding chocolate discs so that they are horizontal in orientation. Bake them until they are pale golden brown, about 20 minutes.  You can also make smaller balls of dough and bake them for a shorter time.

ENJOY!

to print the recipe, click here

I had so much fun making these cookies!  First, they gave me the perfect opportunity to put to use a special gift from one of our graduate students (as I mentioned here).   Second, the fact that the dough must  be prepared in advance makes it a lot easier to bake them and bring them still warm to the lab, which was my main intention.   I made them smaller than the recipe calls for, so they baked a little faster.
I also saved two cookie balls in the freezer, and surprised Phil on a Sunday morning with freshly baked cookies to go along with his cappuccino.  I got some brownie points that weekend.  Or, maybe they were cookie points?  😉
These are now my favorite choc chip cookies!  They are deliciously messy to eat, as each disk melts in your  mouth, giving off an intense chocolate flavor,  absolutely decadent!  I would not add nuts to these cookies, by the way.  No distractions from the path to bliss. Only chocolate.

If you are in New York, visit Jacques Torres store and grab a bag  or two of these disks. If you are not in the Big Apple, order them online by clicking here. They are perfect for baking, but also great for that late night chocolate craving.  A couple of  “feves”, and you are all set!

ONE YEAR AGO: Ina Garten’s Banana Bran Muffins

TWO YEARS AGO: Beer Bread with Roasted Barley

THREE YEARS AGO: Tomato Confit with Arugula and Zucchini

BAKED COCONUT & “THE BRAZILIAN KITCHEN”

Or, you can call it as Brazilians do: Cocada de Forno

I am very excited to share this recipe, because it’s a very traditional Brazilian delicacy, one that brought me fond memories.  Full disclosure: as a child, I wasn’t too wild about coconut, the texture and the way the shredded pieces got into my teeth distracted from its flavor.  Thankfully I grew out of that phase, and now embrace  the fruit’s unique flavor and texture with the appreciation it deserves.  Cocada is a popular street food, sold in markets and coffee joints as small  pieces wrapped in a paper napkin.  You can take a look at them here.   This version, from the book “The Brazilian Kitchen“,  will produce a softer version, to be spooned out of a baking dish, or – if baked a little longer, as I did – a sort of blondie with intense coconut flavor.  Absolutely perfect for a spring or summer day, it might very well bring a blast of sunshine to your deepest winter.

COCADA DE FORNO (BAKED COCONUT)
(published with permission from Chef Leticia Schwartz)

8 Tbs butter (1/2 cup), at room temperature
1/2 cup granulated sugar
3 eggs
1/3 cup coconut milk
1/3 cup sweetened, condensed milk
1 Tbs rum (optional)
1 + 1/2 cups grated coconut (unsweetened)
2 Tbs all-purpose flour, sifted

Heat the oven to 350F. Lightly grease a 24-oz baking dish with butter or cooking spray.

Place the butter and the sugar in the bowl of an electric mixer fitted with the paddle attachment, and beat them together at medium speed until creamy, about 5 minutes.  Add the eggs, one at a time, and continue to mix.  Scrape the sides of the bowl after each addition.

Add the coconut milk, the condensed milk, and the rum (if using), and continue to mix until well blended (about one more minute).  Add the coconut and mix until incorporated.   Fold the flour with a rubber spatula, and spread the batter into the prepared baking dish.  You can make the batter ahead of time, keeping it in the fridge for up to 2 days.

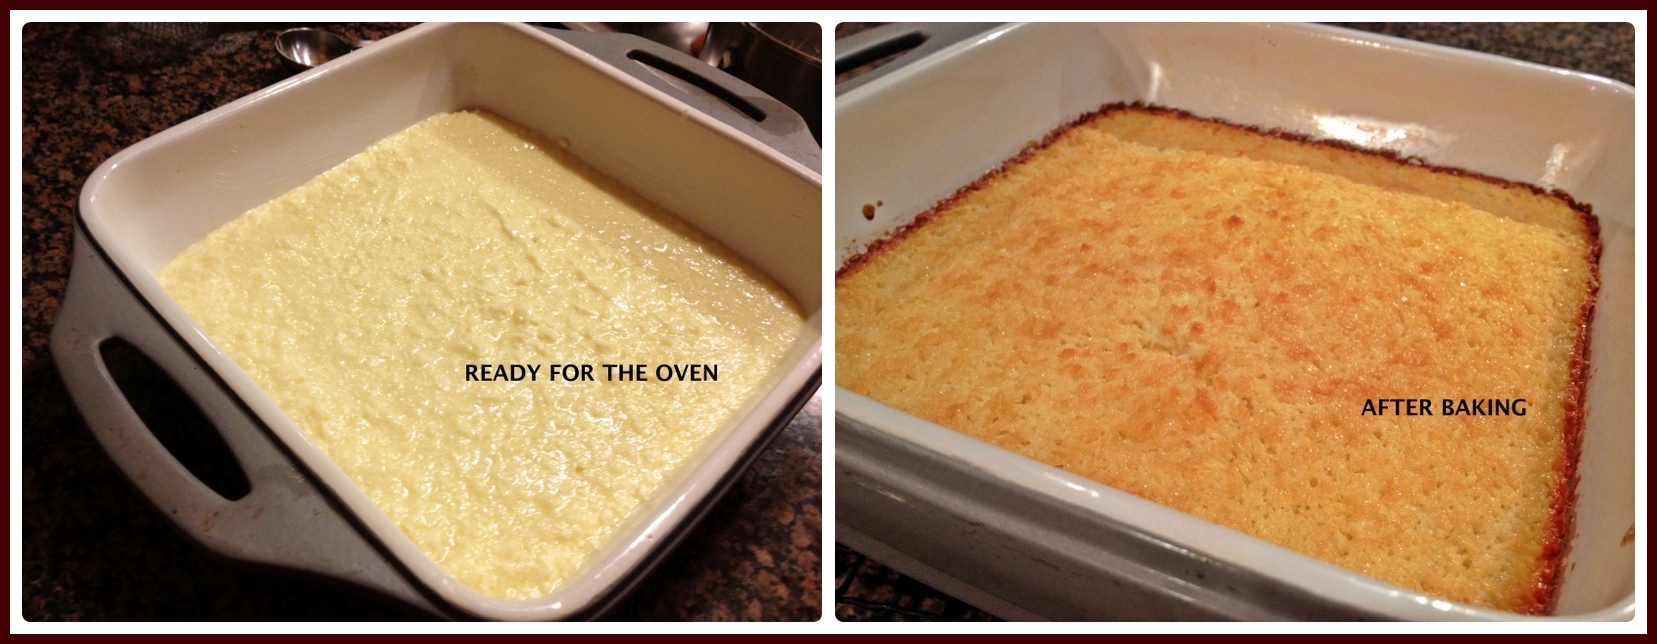
Bake in the 350 F oven until the top looks golden brown, the edges are set, but the center is slightly jiggly, about 20 minutes (or if you prefer a firmer consistency, bake until set, 30 to 35 minutes). Remove it from the oven and let it rest for 10 minutes.  Serve with a scoop of lemon sorbet for a magical experience…

ENJOY!

to print the recipe, click here

About “The Brazilian Kitchen“:    As you may remember, I’ve been on a self-induced cookbook-starvation-diet lately.  I bought this book as a gift for a dear friend, and had it at my bedside table for a few days.  I knew I had to say goodbye to it, but Leticia’s writing and her recipes were so enticing that I decided to photocopy some (many) pages.  Well, I didn’t have to:  Phil  ordered  one for me!  So, that explains how a person fully resolved not to buy cookbooks still manages to increase her collection… 😉

I could not be happier with my gift!  Leticia  covers many of my favorite Brazilian recipes, some of which I’ve featured in the blog: moqueca, chicken soup, black beans, pao de queijo, and brigadeiros.  Speaking of brigadeiros, she includes three recipes for them:  the traditional chocolate, and two tasty departures from the classic, coconut and pistachio brigadeiros.  Dreamy delight…

You will also find recipes for many other Brazilian classics:  acaraje‘ (bean fritters),  xim xim de galinha (chicken, shrimp, peanut and cashew stew), vatapa‘ (fish puree with coconut milk),  quindim (coconut custard cake).

But, what  I like the most about “The Brazilian Kitchen”  is that Leticia goes beyond the classics, and brings very creative dishes to the table, like “caipirinha risotto”, a playful take on the great Italian dish,  using the ingredients of Brazil’s signature drink: pinga and lime juice.

Want some more teasers?  Red pepper and Brazil nut pesto, sole with coconut ginger sauce, tilapia with acai’ sauce, dulce de leche molten cake,  Passion fruit cannoli… many wonderful temptations to cook and enjoy!

If you are curious about Brazilian cooking, this book is a must-have, so help the economy with a click... And, if you want to see Chef Leticia in action (she is also a great teacher!)  jump here for a demonstration on making cod fritters.

Leticia, thank you for allowing me to publish your recipe, and I look forward to your next cookbook!

ONE YEAR AGO: Two-Stage Risotto

TWO YEARS AGO: Life is a matter of taste    (and I still miss you, David Rosengarten!)

Add to FacebookAdd to DiggAdd to Del.icio.usAdd to StumbleuponAdd to RedditAdd to BlinklistAdd to TwitterAdd to TechnoratiAdd to Yahoo BuzzAdd to Newsvine