COFFEE MACARONS DRESSED UP TO PARTY

As I debate with myself the feasibility of changing my blog name to The Bewitching Macaron, I am here to share one more take on the French delicacies I am so in love with. Once again I used my basic recipe that works quite well, with a minor change. I dried the almond flour-powdered sugar mixture for a couple of days before using. That was a tip I found somewhere and decided to try. The filling is a slight modification from Nadiya, a contestant from the Great British Baking Show. Excellent, I highly recommend you give it a try if you are a coffee lover. If you are not a coffee lover, there is always the opportunity to become one. I am showing you the path of caffeine enlightenment. Grab my hand and walk with me…

COFFEE MACARONS
(adapted from a basic recipe from Craftsy)

Yield: About 72 shells; 36 assembled macarons

for the shells:
198 g powdered sugar
113 g almond meal
1/2 teaspoon instant coffee
113 g egg whites (I aged mine for three days)
1 g or a pinch of cream of tartar
100 g granulated sugar
Brown Gel color from AmeriColor
2 drops vanilla extract
for the filling:
100g dark chocolate (70% cocoa)
2 egg yolks
50g dark brown sugar
3 tablespoons water
1 ½ teaspoons fine instant espresso powder
150g unsalted butter, softened
to decorate:
gold sprinkles (optional)

Line 2 or 3 heavy baking sheets with parchment paper or Silpat mats. Layer the powdered sugar, almond meal and instant coffee in a food processor or mini processor. Pulse until the mixture looks like fine meal, about 15 seconds. Pass through a sieve and transfer to a small bowl. Set aside.

Place the egg whites and pinch of cream of tartar in the bowl of a stand mixer fitted with the whisk attachment. Make sure that the bowl and the whisk are impeccably clean. Starting on medium speed, whip the whites with the cream of tartar until they look like light foam. The whites should not appear liquid. The foam will be light and should not have any structure.

Slowly rain in the granulated sugar, trying to aim the stream between the whisk and the side of the bowl. Turn the speed up to medium-high. Continue to whip the meringue until it is soft and shiny. It should look like marshmallow creme. Add the gel color and the vanilla. Staying at medium-high speed, whip the egg whites until the mixture begins to dull and the lines of the whisk are visible on the surface of the meringue. Check the peak. It should be firm. Transfer the whites to a medium bowl.

Fold in the almond meal mixture in three increments. Paint the mixture halfway up the side of the bowl, using the flat side of a spatula. Scrape the mixture down to the center of the bowl. Repeat two or three times, then check to see if the mixture slides slowly down the side of the bowl. Put the mixture in a piping bag fitted with one of the tips listed above. Pipe on the prepared baking sheets.

Slam each sheet hard four to six times on the counter. Then fist bump each end of the sheet’s underside twice. Let the unbaked macarons dry until they look dull but not overly dry. Drying time depends on humidity. Ina dry climate, the macarons can dry in 15 to 20 minutes; in a humid climate, it can take 35 to 40 minutes. When the skin forms, top with gold sprinkles, if you so desire.

While the macarons are drying, heat the oven to 330 F (170 C/gas mark 3). Bake one sheet at a time on the middle rack. Check in 11 minutes. If the tops slide, then bake for 2 to 3 more minutes. The macarons should release without sticking. Check one or two. If they stick, put them back in the oven for 1 to 2 more minutes. Let the macaroons cool for 10 minutes before removing from the pan.

Make the filling:  Melt the chocolate in the microwave and leave to cool. Place the egg yolks in a heatproof bowl, and set aside. Put the sugar, water and espresso powder in a small pan, and heat gently until the sugar dissolves. Add the mixture to the egg yolks, whisking constantly.  Set the mixture over a pan of simmering water and continue to whisk gently until the mixture thickens. That should happen in less than 5 minutes, make sure the water is just at a gentle boil. Take the mixture off the heat and continue to whisk. Gradually add the butter, and keep whisking. Fold in the melted chocolate then set the mixture aside to firm up. Do not refrigerate, just keep it at room temperature until it is firm enough to pipe.

Assemble the macarons: find two macarons similar in size and add a good amount of filling to the bottom of one of them. Place the other on top and squeeze gently to take the filling all the way to the edge.  Store in the fridge for 24 hours for perfect texture.

ENJOY!

to print the recipe, click here

Comments: I wish I could say to you that this was a perfect batch, but it was not. Half of my macarons were “hollows”, which in macaron lingo means they have big air pockets inside, sometimes separating the cookie in two layers, making it impossible to use them.  I guess they could make nice crumbs over ice cream, or a layer for a trifle type dessert, but that’s about it. I don’t think drying the almond flour mixture for a couple of days explains the outcome, though. Macarons are finicky creatures and two batches made exactly the same way a few days apart might behave in completely different ways. Just a little too stiff the meringue, or too much energy in folding the batter, oven too hot, not enough drying time to form the skin.. and you can go from perfect macarons to a full-blown disaster. No feet, cracked, lumpy, hollows, the list of boo-boos can be intimidating. Still, even if I am not quite sure why I had problems this time, half of them were perfect, and I had enough to share with our group in a lab meeting. Not enough to share with the department, which is usually my goal. Oh, well. There is always next time. In fact,  I’ve got not one but two more macaron recipes to share. Told ya. Obsession. Although I prefer the word passion.

The taste was spot on, though. Just that small amount of instant coffee in the shells gave them a subtle coffee flavor, then the filling… oh, the filling… superb! I can see that used to frost cupcakes… maybe not appropriate to offer to that hyper-active 6 year-old… Made me think of this sign we saw hanging in a coffee shop in Frisco, CO.

😉

Pinning is sharing, sharing is loving!


ONE YEAR AGO: Blogging Hiatus

TWO YEARS AGO: Tomato Tatin

THREE YEARS AGO: Headed to Colorado!   

FOUR YEARS AGO: Farofa Brasileira

FIVE  YEARS AGO: Thai-Inspired Pork Tenderloin

SIX YEARS AGO: A yummy Brazilian cake: Bolo de Fuba’

SEVEN YEARS AGO:  Summer’s Tomatoes

EIGHT YEARS AGO: Leaving on a jet plane… 
SaveSave

SaveSave

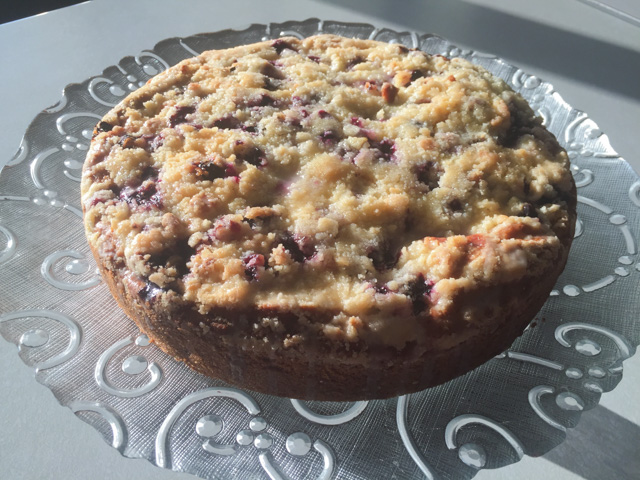
BLUEBERRY CRUMBLE COFFEE CAKE

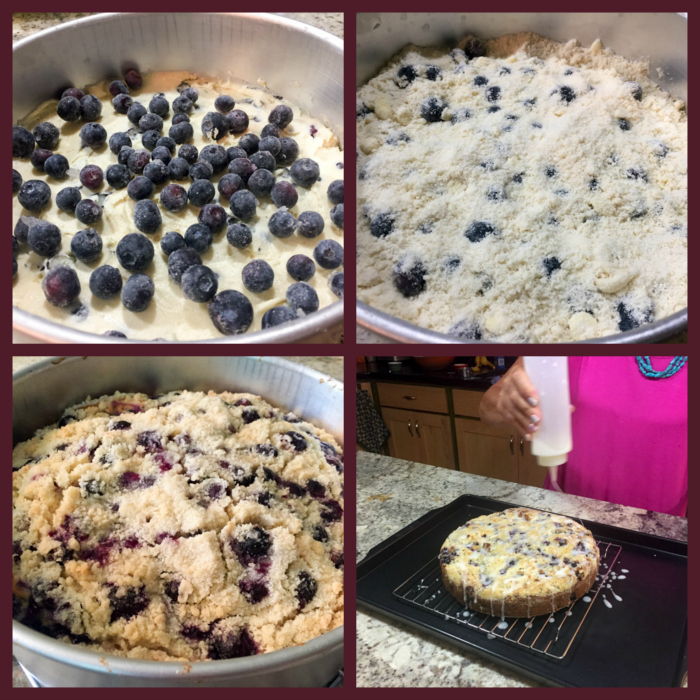
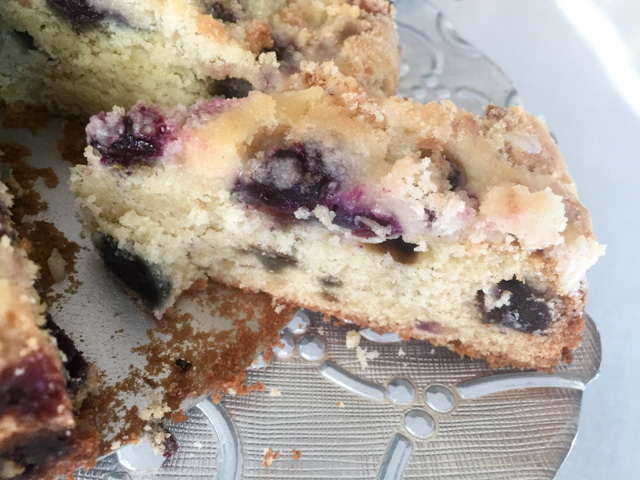
As I mentioned before, one great food blogger I follow is Helen Fletcher. She is an expert baker, and also a natural teacher. Each of her posts is a detailed tutorial that allows even the most insecure baker (Sally raises her hand…)  to feel comfortable to face a little baking challenge. A few months ago she blogged on a Blueberry Coffee Cake that had a nice twist to it, the inclusion of a crumb topping.  I was intrigued. It turned out as a delicious, moist and tender cake, one that prompted Phil to grant me an unexpected compliment: “this is exactly the type of cake my Aunt Mildred would bake and we loved so much!”  Can you grasp the full impact of those simple words put together? Me and his Aunt Mildred, joined in the same level of cake baking.  I had to hold myself on the side of the counter top, my knees went a bit weak as my blood pressure dropped from the sheer shock of it. And then… then I could not stop smiling.

EASY BLUEBERRY CRUMB COFFEE CAKE
(from Pastries Like a Pro)

for the cake:
2 + 1/4 cups all-purpose flour, divided (315 grams)
1 cup sugar (200 grams)
3/4 cup butter, cold (170 grams)
1 teaspoon baking soda
1 egg
1/2 cup buttermilk
9 ounces frozen blueberries (255 grams)
for the lemon glaze:
1 cup powdered sugar (130 grams or 4 1/2 ounces)
3 tablespoons lemon juice (plus more if needed)

Heat the oven to 350°F. Spray a 9″ cheesecake pan or springform pan and set aside.

Combine 2 cups flour and sugar in the bowl of a mixer. Cut the butter into small pieces and add it to the bowl. Mix on low at first until most of the butter has been cut in. Raise the mixer and continue to mixing until crumbs form. Aim for fine, not large crumbs.

Remove 1/3 of the crumbs (about 210 grams) and set them aside. They will be used for the topping.

Add the remaining 1/4 cup flour, baking soda, egg and buttermilk to the remainder of the crumbs in the bowl. Beat on low to bring it together then on medium to smooth it out. Stir half of the frozen blueberries into the batter. Spread it evenly in the pan.

Place the second half of the blueberries over the top of the batter. Sprinkle the reserved crumbs over the blueberries. Bake for 50 to 55 minutes until a tester comes out clean. The crumbs will be light in color. My cake took a little more than 1 hour in the oven.

Let cool before removing from the pan.

For the glaze, combine the powdered sugar and lemon juice in a bowl and stir until smooth and with the right consistency to be drizzled. Place the cake on a rack over waxed or parchment paper for easy clean up. Drizzle one way,turn the cake and drizzle in the opposite direction. Allow the glaze to set before serving.

ENJOY!

to print the recipe, click here

Comments: for a step by step tutorial, make sure to stop by Helen’s site using the link I provided under the recipe’s title. Once you pour the cake batter in the pan, it will seem as if it’s not enough.  Don’t worry, just go on and follow the recipe as specified. I suppose my glaze could have been slightly thicker so that it would stay more as a drizzle, but even if a bit thin, the taste was not compromised.

As usual, this was shared with our co-workers on a Monday morning. It is one of my favorite things to do, bake something on Sunday and share with our departmental colleagues. The cake was gone before 9:30hs, which is an excellent indication of approval. But, truth is, I could not ask for a better compliment than that of my beloved husband, the resident cake-critic, the one who was raised by bakers probably as talented as… Helen Fletcher!

Helen, thanks so much for another great recipe, I now need to take a deep breath and make your Portokalopita! If anyone is puzzled by the name, go visit her site, it is a cake that uses phyllo dough in the batter!  Can you imagine that?  Mind blowing!

ONE YEAR AGO: Fresh Strawberry Yogurt Bundt Cake

TWO YEARS AGO: Quinoa Salad with Red Grapes and Avocado

THREE YEARS AGO: Strawberry Coffee Cake

FOUR YEARS AGO: Lemon-Poppy Seed Muffins

FIVE YEARS AGO: Mascarpone Brownies

SIX YEARS AGO: Salmon Tacos

SEVEN YEARS AGO: Cinnamon Turban Bread

EIGHT YEARS AGO: Summertime Gratin


SaveSave

SaveSave

SaveSave

SaveSave

SaveSave

SaveSave

SaveSave

SaveSave

SaveSave

SaveSave

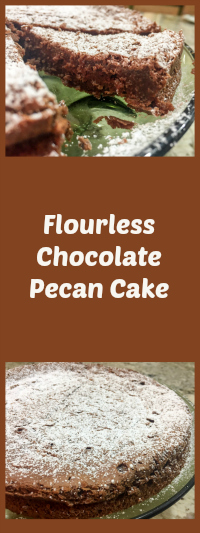
PATI JINICH’S FLOURLESS CHOCOLATE PECAN CAKE

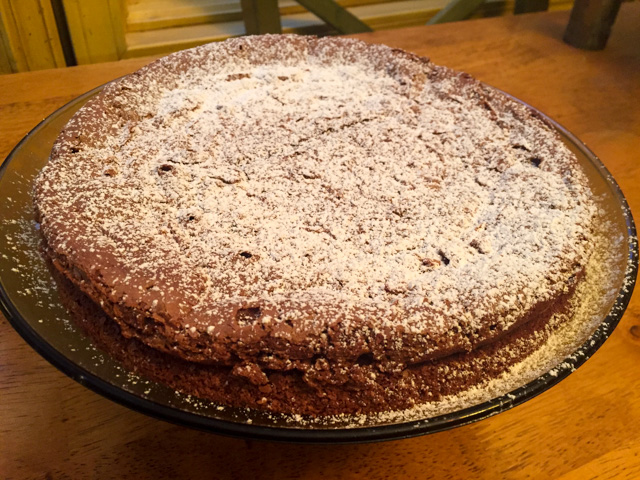
I started watching Pati’s show on PBS about a year ago. Not only every recipe I made from her show (and cookbook) worked great, but I became more and more fond of her warm personality, authenticity, down to Earth way. The type of person I would not think twice about inviting over for dinner or sitting down at a cafe to shoot the breeze. Her show is always refreshing and fun. In her travels around Mexico she visits interesting spots and focuses on real people, fishermen, cooks on street stands, farmers, I always learn something new. Come to think of it she is the antithesis of Giada in her current show on FoodTV. I keep losing my enthusiasm for Giada, more and more, due to her excessive focus on Hollywood-style glamour. Hosting a fashion dinner on the rooftop of the Prada store in Firenze, with chamber music playing and wearing a Dolce & Gabbana dress?  The whole time acting all matter-of-fact about it?  It’s a bit much for me…  But, back to Pati. This cake is a cinch to make, tastes wonderful, and is superb with a cup of coffee. Try it, and you will love it.

FLOURLESS CHOCOLATE PECAN CAKE
(from Pati Jinich)

1/4 cup  (56 g) unsalted butter plus 1 tablespoon for buttering the pan
6 ounces bittersweet chocolate
1 cup  (125 g) pecans
6 large eggs
1 teaspoon vanilla extract
1 cup (200 g) sugar
Pinch of kosher or coarse sea salt
confectioners’ sugar

Heat oven to 350°F. Butter a 9-inch springform pan and line bottom with parchment paper.

Melt the chocolate and the 1/4 cup butter in a microwave at 50% power for a couple of minutes, stirring after one minute. Set aside to cool.

Using a blender, chop the pecans finely. If you have a Vitamix, it will take about 30 seconds, do not let it turn into pecan butter. Add the eggs, vanilla, sugar, salt and melted chocolate mixture, blending until smooth. Pour the batter into the buttered springform pan and bake until a toothpick inserted in center comes out moist but not wet, about 40 minutes.

Once it has cooled a little, run the tip of a knife around the pan and release the cake from the pan. Invert onto a plate, and then again, or serve directly onto plates if left on bottom part of springform pan. Sprinkle with confectioners’ sugar and serve.

ENJOY!

to print the recipe, click here

Comments: This is by far the easiest cake ever to make. Perfect to bake with kids, since it will be ready in minutes with the help of a blender. Pour the batter into the pan, and you are done. It is very moist, the pecans giving it a perfect additional flavor that matches the chocolate quite well. It has of course the added benefit of being gluten-free, so if you bake for someone with gluten sensitivities, it is a must-have in your repertoire.

I took it to our department and it was a huge hit with everyone who arrived early enough on that Monday to enjoy a piece.  Pati says in her show that she’s been making this cake for many years, it is a favorite with her family. Once you baked it, you’ll see why. Simple, no fuss, sweet but not over the top, rich but not too extravagant. My favorite type of dessert.

ONE YEAR AGO: A Tale of Two Macarons

TWO YEARS AGO: Chocolate Chip Shortbread Cookies

THREE YEARS AGO: Chicken in Green Pipian Sauce, Sous-vide Style

FOUR YEARS AGO: Classic Shrimp Gobernador Tacos

FIVE YEARS AGO: A Walk Towards the Sunset

SIX YEARS AGO: In My Kitchen

SEVEN YEARS AGO:  Heavenly Home-made Fromage Blanc

EIGHT YEARS AGO:  A Perfect Sunday Dinner


SaveSave

SaveSave

SaveSave

SaveSave

SaveSave

SaveSave

SaveSave

SaveSave

SaveSaveSaveSave

SaveSave

SaveSave

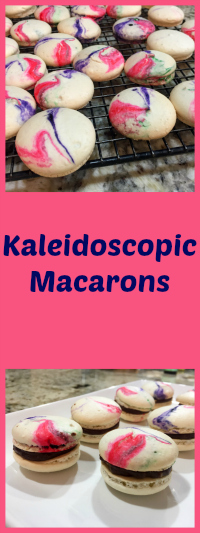
KALEIDOSCOPIC MACARONS

One more take on my ongoing obsession… But first, a relevant question: how far can we stretch the boundaries of these adorable cookies and still be comfortable calling them macarons? Apparently the boundaries are very blurry. From colors, types of fillings, decorations on top of the shells, we see endless variations. I cannot call myself a purist, as I am often taking liberties with classics, but I think my standards would be: macarons must be prepared with almond flour as the main component.  If other ground nuts are added, let them be a very minor player. Must contain a meringue incorporated with the flour by the macaronage method. Must have discernible feet. Other than those three requirements, I’ll accept anything. Savory fillings, neon-like colors, cute alternative shapes. For this batch, I experimented with a color effect. Some newbie errors took place, but I still performed better than I do at the golf course. Much, much better.

KALEIDOSCOPIC MACARONS
(from the Bewitching Kitchen, slightly adapted from Craftsy.com, 

Yield: About 72 shells; 36 assembled macarons

for the shells:
198 g powdered sugar
113 g almond meal
1/8 teaspoon dried lavender
113 g egg whites (I aged mine for three days)
1 g or a pinch of cream of tartar
100 g granulated sugar
Purple Gel color from AmeriColor
2 drops vanilla extract
for the filling:
chocolate ganache with finely chopped hazelnuts
recipe in this post

Line 2 or 3 heavy baking sheets with parchment paper or Silpat mats. Layer the powdered sugar, almond meal and lavender in a food processor or mini processor. Pulse until the mixture looks like fine meal, about 15 seconds. Pass through a sieve and transfer to a small bowl. Set aside.

Place the egg whites and pinch of cream of tartar in the bowl of a stand mixer fitted with the whisk attachment. Make sure that the bowl and the whisk are impeccably clean. Starting on medium speed, whip the whites with the cream of tartar until they look like light foam. The whites should not appear liquid. The foam will be light and should not have any structure.

Slowly rain in the granulated sugar, trying to aim the stream between the whisk and the side of the bowl. Turn the speed up to medium-high. Continue to whip the meringue until it is soft and shiny. It should look like marshmallow creme. Add the gel color and the vanilla. Staying at medium-high speed, whip the egg whites until the mixture begins to dull and the lines of the whisk are visible on the surface of the meringue. Bet until firm peaks form. Transfer the whites to a medium bowl.

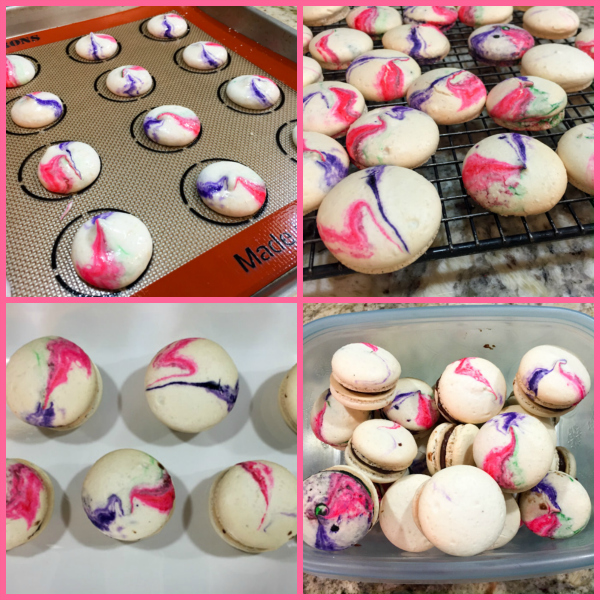
Fold in the almond meal mixture in three increments. Paint the mixture halfway up the side of the bowl, using the flat side of a spatula. Scrape the mixture down to the center of the bowl. Repeat two or three times, then check to see if the mixture slides slowly down the side of the bowl. Open a plastic wrap on the counter, paint three lines of gel color of your choice separated by one inch. Pour the dough on top, wrap the plastic around, and insert the whole thing in a piping bag, making sure to have an opening in the wrap connected to the piping tip. Pipe shells on the prepared baking sheets.

Slam each sheet hard four to six times on the counter. Then fist bump each end of the sheet’s underside twice. Let the unbaked macarons dry until they look dull but not overly dry. Drying time depends on humidity. Ina dry climate, the macarons can dry in 15 to 20 minutes; in a humid climate, it can take 35 to 40 minutes.

While the macarons are drying, heat the oven to 330 F (170 C/gas mark 3). Bake one sheet at a time on the middle rack. Check in 11 minutes. If the tops slide, then bake for 2 to 3 more minutes. The macarons should release without sticking. Check one or two. If they stick, put them back in the oven for 1 to 2 more minutes. Let the macaroons cool for 10 minutes before removing from the pan.

Assemble the macarons: find two macarons similar in size and add a good amount of ganache to the bottom of one of them. Place the other on top and squeeze gently to take the filling all the way to the edge.  Ideally, store in the fridge for 24 hours for best texture.

ENJOY!

to print the recipe, click here

Comments: I know it’s hard to believe but I used three different colors for the shells, the green is barely noticeable, only in a few of them. Many of the shells got zero color. Puzzling? Read on, and the mystery will be solved. There are essentially two types of strategies to get more than one color in the macaron shell. You can make the dough, divide it in two (or three) portions, color each one separately, add them to the piping bag and allow them to mix during piping. I decided not to do it, because I was a bit insecure as to when to divide the dough, and maybe deflate it too much when mixing with the colors. I normally add the color very early in the process.  That brings me to method number two, which gives a very interesting marbled effect, when done correctly. You start by opening a plastic wrap over your counter. Then, you paint two or three solid lines of gel color over the plastic. Pour your dough with the optimal lava consistency over the plastic, wrap it around, and insert the whole thing inside a piping bag. See the photo below.

I realize it’s hard to see the lines of gel color on the first picture, but trust me, they are there. To my disappointment, the first 20 or so shells I piped were totally white! The reason is, when painting the lines they must go all the way to the icing tip, otherwise obviously you’ll get no color until the dough moves through and gets in touch with the gel.  Alternatively, you can use a long brush and paint the inside of the piping bag itself, making sure to reach down all the way to the tip. I must re-visit this technique and get the effect I was hoping for. It was quite frustrating to keep piping shell after shell, with no color, and then a little bit here and there. But hopefully practice makes perfect, and I will succeed next time.

As I mentioned before, the parallels between making macarons and golf are truly amazing! Once you take that golf club back, it’s over. For macarons, a little misjudgment and you don’t get what you want. The Macaron Gods are not very forgiving. And I’ve probably been extra naughty lately. You’d think?

Almond flour: $9.99

12 eggs: $3.50

Powdered sugar: $2.50

Matching outfit to macarons: Priceless!

Add to FacebookAdd to DiggAdd to Del.icio.usAdd to StumbleuponAdd to RedditAdd to BlinklistAdd to TwitterAdd to TechnoratiAdd to Yahoo BuzzAdd to Newsvine

ONE YEAR AGO: Zucchini Noodles with Sun-dried Tomato Pesto

TWO YEARS AGO: In My Kitchen, July 2015

THREE YEARS AGO: Sous-vide Pork Chops with Roasted Poblano Butter

FOUR YEARS AGO: Roasted Strawberry-Buttermilk Sherbet

FIVE YEARS AGO: Amazing Ribs for the 4th of July!

SIX YEARS AGO: Baby Back Ribs on the 4th of July

SEVEN YEARS AGO: Blueberry Muffins

EIGHT YEARS AGO: A Pie for your 4th of July


SaveSave

SaveSave

SaveSave

SaveSave

SaveSave

SaveSave

SaveSave

SaveSave

SaveSave

SaveSave

SaveSaveSaveSave

SaveSave

SaveSave

SaveSave

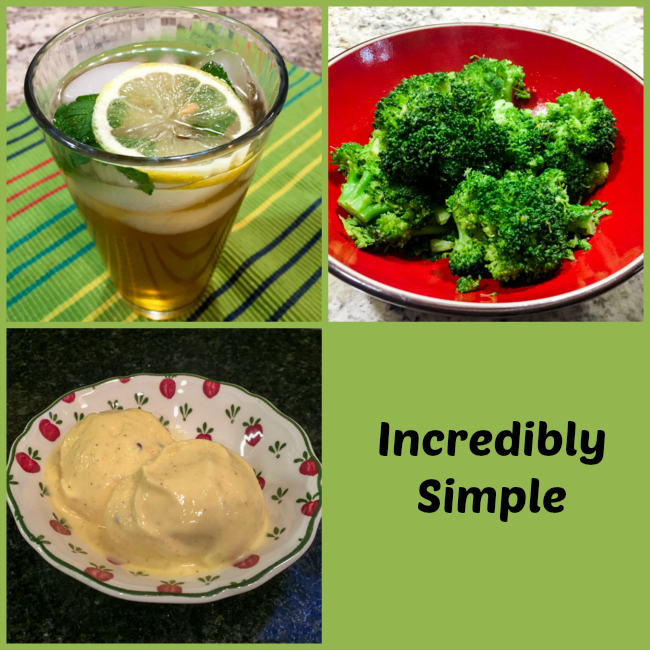
INCREDIBLY SIMPLE TIMES THREE

Back in February I made a post with four super-duper simple recipes, and here I am again to showcase three more. A drink, a side-dish, a dessert. Like last time, they all deliver a lot more than you would expect.

ONE

Starting with the drink. Fabulous. Refreshing. Delicious. I saw the recipe at Mike’s The Iron You, and made it the day after. Exactly as he posted, except that I cut the sugar down a bit. Since then, I’ve made it four times, and adapted it, simplifying it even further and leaving sugar out completely. You will need to find your favorite way, but trust me, this is a drink you must try if you love tea. The touch of genius is a pinch of baking soda after brewing. Do not twist your nose, it is magical. Have I ever lied to you?

MINT AND GINGER ICED GREEN TEA
(adapted from The Iron You)

4 cups of water
1-inch piece of ginger, peeled and sliced
2 bags green tea
1 bag of mint tea (or 1/4 cup fresh mint leaves)
1 lemon, divided
Pinch of baking soda
sugar is optional (coconut sugar is particularly  nice)

Combine water and ginger in a pot. Bring to a boil. Once the water boils, remove from the heat and add tea bags and fresh mint (if using them).  Cover with a lid and steep for 15 minutes. Remove the bags and strain tea separating the liquid from the mint leaves and ginger slices. Stir in sugar, juice of half lemon, and baking soda. Transfer to a pitcher and let cool before refrigerating.

Serve on a tall glass with lemon slices and fresh mint added, if you so desired.

ENJOY!

to print the recipe, click here

Comments: I reduced the amount made to four cups instead of six, because I’m the only one drinking it. When I make it before dinner, I have leftover drink to enjoy next day at lunchtime, so that works well for me. Check out Mike’s original version and see if that appeals more to you in terms of amount and level of sweetness.

TWO


Second, a side-dish that is ready in 6 minutes. That is 360 seconds. Ok, if you have to cut the broccoli florets yourself, it might take you 10 minutes. Best broccoli ever. Perfect texture, bright taste, and you can change it around by using different herbs, vinegars, spices. Love it.

PAN-STEAMED BROCCOLI WITH ORANGE AND CILANTRO
(adapted from Ellie Krueger)

1 large head of broccoli florets (1½ pounds)
zest and juice of half an orange
2 teaspoons lemon juice
1/4 cup cilantro leaves, minced
1 ½ tablespoons  olive oil
¼ teaspoon salt
¼ teaspoon freshly ground black pepper

Place the broccoli florets more or less in a single layer inside a saucepan. Add ½ cup water, cover and cook over a high heat for 3 minutes. Reduce the heat to medium and cook for an additional 3 minutes. Do not remove the lid during cooking. When the broccoli is done, it will be cooked to crisp-tender. If you prefer it a bit softer, remove it from the heat and allow it to sit, covered, for another minute or two.

While the broccoli is cooking, zest the orange into a large bowl. Juice half the orange into the bowl, add the lemon juice. Add the cilantro to the bowl along with the olive oil, salt and pepper. Whisk to combine.

Using a slotted spoon, transfer the broccoli to the bowl with the orange mixture and toss gently. Adjust seasoning with salt and pepper, if needed.

ENJOY!

to print the recipe, click here


Comments: During the time the broccoli is cooking (pay close attention to the timer, it’s important), make the flavoring mixture right on the serving bowl.  Check Ellie’s gremolata in the link, or try anything you like. I find the combination of orange with broccoli quite delicious, but to cut excessive sweetness I added some lemon juice to it. Apple cider vinegar could be wonderful too. Consider options such as za’tar, a very discreet touch of sesame oil, black olive tapenade, sesame seeds…  This recipe has the potential to become your favorite way to enjoy broccoli. Cannot beat the texture. Am I repeating myself? Apologies, I tend to get excited about stuff like broccoli with perfect texture. There, I said it again!

THREE

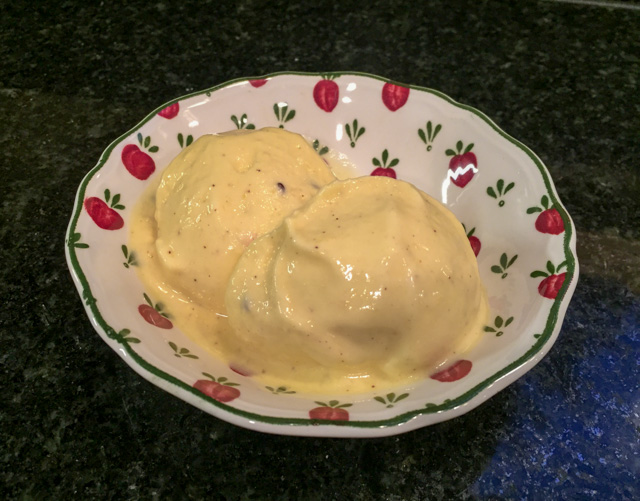
Soft-serve pineapple. I saw this one at The View from Great Island, a blog I’ve cooked from many times, Sue’s recipes never failed me. She talks, I listen. It is ready in minutes, once you freeze the pineapple pieces. It is perfectly smooth and soft-serve-like when you first process it. In the freezer it will turn a bit hard, but a little encounter with the microwave just to break the ice (literally), turns it into real sorbet consistency. I had no idea that a pineapple could become a luscious dessert just with the help of the food processor. Remember a few years ago when everyone was processing bananas? Well, pineapples are harder to peel, but totally worth the trouble. A friend from Facebook mentioned that 1 egg white can be added to this type of recipe, to give extra smoothness.  I have to try that soon.

SOFT-SERVE PINEAPPLE-CHILE SORBET
(slightly modified from The View from Great Island)

1 pineapple
juice of 1 lemon
1/2 teaspoon chipotle chile pepper (ground)

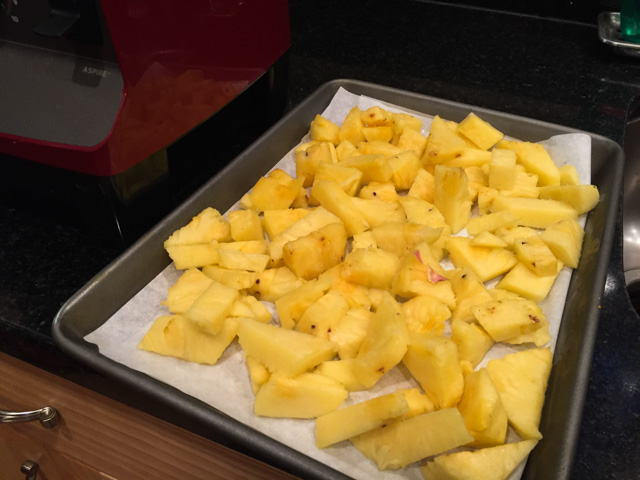
Line a baking sheet with parchment paper.  Slice the pineapple into 1 inch slices, core and all. Chop the slices into bite sized pieces. Arrange the pineapple on the baking sheet. Freeze for 2 hours, or until frozen solid.

Put the frozen pineapple chunks into a high power blender or food processor. Add the lime juice and chile powder. Process until completely smooth, scraping down the sides of the machine as necessary. Serve right away for a slushy, soft-serve consistency, otherwise, spoon the mixture into a loaf pan and put in the freezer to firm up, at least 4 hours.

ENJOY!

to print the recipe, click here

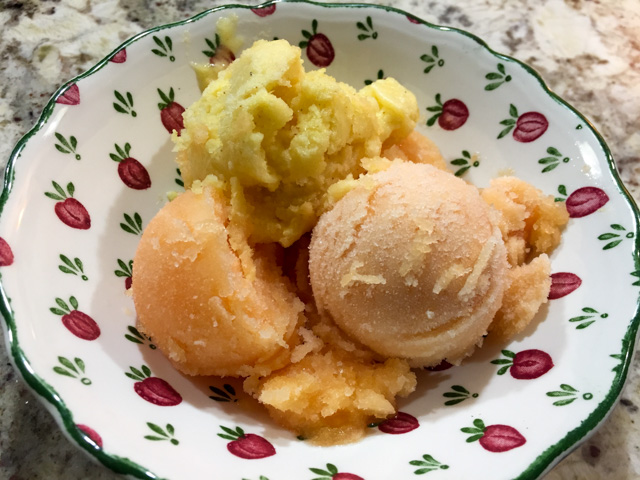
Comments: Adding pepper to sorbet can be quite interesting, but maybe it’s not for everybody. A purist would probably prefer it “virgin.” I reduced the amount of chipotle and omitted the cayenne that Sue used, so stop by her site to see her version too and decide what to do.  We also made two batches of cantaloupe sorbet (already in the blog), one with pepper, one without, and a few days later enjoyed a triple dessert, refreshing and hot at the same time.  We like to share a single bowl and take turns, a little bite with pepper, a little without… Simple Summer evening pleasures.

😉

And with that, I wrap up three super simple recipes that are sure to please you. I think that even if you are not into green tea, the addition of that pinch of baking soda might change your mind. It removes that bit of harshness, objectionable to some. Worth a try.

ONE YEAR AGO: Dan Lepard Simple White Loaf

TWO YEARS AGO: Maureen’s Fabulously Fudgy Brownies

THREE YEARS AGO: Wheat Berry Caraway Bread

FOUR YEARS AGO: Mexican Focaccia 

FIVE YEARS AGO: Sunny Kamut Salad with Roasted Lemon Vinaigrette

SIX YEARS AGO: Pane de Casa & Crostini

SEVEN YEARS AGO: Down-home Dig-in Chili

EIGHT YEARS AGO:  Cinnamon Rolls