CHOCOLATE CRANBERRY CURD TART


If you are tired of pumpkin pie for Thanksgiving, may I offer the perfect alternative? The color of the cranberry curd as you cut through the pie is enough to make your heart miss a beat. Plus, if you prefer a dessert that is not cloying sweet, look no further.  Tartness in the center, subtle chocolate sweetness on top and bottom. Oddly enough, I’ve had this recipe in my files to try soon ever since Helen published it in her blog. We are talking November 2014. I know, what’s wrong with me?  (Please, refrain from answering, it is a purely rhetorical question).

CHOCOLATE CRANBERRY CURD TART
(from Helen’s Pastries like a Pro)

Chocolate Press-in Shell
1 cup all-purpose flour
1/2 cup cake flour
1/4 cup cocoa
1/2 cup sugar
1/2 teaspoon baking powder
1 stick butter, cold and cut into small pieces
1 egg
1 egg yolk

Heat oven to 350 degrees. Spray the bottom of an 11”x1” quiche pan with removable sides in the center only. Set aside. Combine flours and cocoa in bowl of mixer. Mix briefly to combine. Add butter and cut in until very fine. Add sugar and baking powder. Mix to combine. Add egg and egg yolk; mix until it balls up and rides the blade. Remove from the processor and divide in half.

Divide one half into 2 pieces.  Roll one piece into a rope and press it in evenly along one side of the pan. Repeat with the second half of dough.  Overlap the seams and seal well so no seam shows. Press the remainder of the dough into the bottom of the pan. Seal the edges very well so no line shows. Prick the shell before baking.

Bake approximately 10 to 12 minutes or until completely baked. Cool completely.

Cranberry Curd
12 ounce bag fresh or frozen cranberries picked over
1 cup sugar (7 ounces or 200 grams)
2 tablespoons water
5 egg yolks (3 ounces or 85 grams)
1 tablespoon lemon juice
1 stick unsalted butter, cold and cut into pieces (4 ounces or 114 grams)

Place the cranberries in a rimmed baking sheet and pick over.  Shake the tray to move the berries around.

Place the  cranberries in a saucepan with sugar and water over low heat until the cranberries are very soft and some of them have popped.   Stir frequently as this will be very thick and can scorch. Immediately, puree them in a food processor (by batches if necessary). Puree for several minutes to get the skins as fine as possible. There will be tiny specs of red which is as it should be. If you prefer to remove the skins, strain the puree before proceeding. Add the yolks and lemon juice to the processor and process briefly.

Place the cranberry mixture in the top of a double boiler and add the butter. Bring the water underneath to a boil.   Stir the curd constantly until an instant read thermometer reads 170 degrees. Immediately pour into the cooled crust. Smooth the top. Cover directly with film and refrigerate for several hours or preferably overnight.

Chocolate Cream Glaze
2/3 cup heavy cream
2 1/2 ounces semisweet chocolate, cut into small pieces

Bring the cream to a simmer. Submerge the chocolate. Allow to sit for 4 to 5 minutes then whisk gently to smooth the chocolate completely. Remove the film from on top of the cranberry curd. Pour the glaze in the center and move it out to the edge of the curd with an offset spatula.

Refrigerate if using within a day or two. Freeze for up to a month for longer storage.

ENJOY!

to print the recipe, click here

Comments: First of all, I urge you to visit Helen’s site because as is always the case for her blog posts, you will find a step by step tutorial that will guide you through the process. Even if you’ve never baked a tart in your life, her explanations will take you to a happy – and tasty – ending. This was my first time making this type of press-in crust. I normally delegate all things crust (pies and tarts) to Phil, but not this time. My pan was a little smaller than the one she used, so the crust turned out a bit thick at the bottom. With my inexperience, I was a bit insecure to use less crust, not knowing exactly what to expect.  Next time I’ll make sure it’s thinner. Anyway, if you have the right size pan, just follow the recipe exactly.

The color of the cranberry curd is something! I shared a few photos on my Facebook page, and some of my friends were wondering how to get the finalized tart to show the curd, maybe reducing the glaze to a zig-zag drizzle, or putting the glaze underneath the curd instead.  Having tasted it, I think the tartness of the curd really benefits from a nice layer of ganache on top. So the striking beauty of it will have to be appreciated only after slicing. Gastronomic compromise.

This is a perfect recipe for those who don’t like overly sweet desserts. The colors scream end of the year festivities, so I hope you consider making it if not for Thanksgiving, before 2017 says goodbye.

Helen, thanks once again for a fantastic recipe and tutorial…
I am a bit ashamed it took me so long to get to this tart, but better late than never!

ONE YEAR AGO: Slow-Cooker Pork Ragu with Fennel

TWO YEARS AGO: Pimp your Veg, a Guest Post

THREE YEARS AGO: Cooking Light Pan-Charred Veggies 

FOUR YEARS AGO: Pomegranate Chicken Thighs and Carrot Mash

FIVE YEARS AGO: The Many Faces of Kale

SIX YEARS AGO:  Short and Sweet 

SEVEN YEARS AGO: Ciabatta, a Classic Italian Bread

EIGHT YEARS AGO: Magical Lamb Stew


SaveSave

SaveSave

SaveSave

SaveSave

SaveSave

SaveSave

SaveSave

RASPBERRY ALMOND BRUNCH CAKE FOR A SWEET MONDAY

Almost exactly three years ago I reviewed The Global Pastry Cookbook, a cookbook that is very dear to my heart, as I’d been following Gayle’s blog for a very long time. Today I share with you one more recipe from the book, which Gayle gave me permission to publish in full. It is a delicious cake, easy to prepare, with a soft crumb, intense raspberry flavor, and the perfect textural topping given by sliced almonds. Perfect. Just perfect. As it’s often the case, this cake was a Sunday baking project to be shared with our departmental colleagues next day. My goal? To turn the least appreciated day of the week into… something sweet…

RASPBERRY ALMOND BRUNCH CAKE
(from Gayle Gonzales’ Global Pastry Table)

6 oz fresh raspberries
2 tablespoons (26 grams) sugar
1 teaspoon lemon juice
1 cup (5 oz) flour
1/ 2 teaspoon baking powder
1/ 4 teaspoon baking soda
1/ 4 teaspoon salt
1 egg at room temperature
1/ 2 cup + 2 tablespoons (4 1/ 2 oz) sugar
1/ 2 cup (4 oz) buttermilk at room temperature
3 oz (6 tablespoons) butter, melted
1 teaspoon vanilla
1/ 4 cup (3/ 4 oz) sliced almonds

Heat oven to 350ºF. Lightly grease an 8” x 2 1/ 2” cake pan and line the bottom with parchment.

Combine raspberries, sugar and lemon juice and set aside to macerate. In a separate bowl, whisk together the flour, baking powder, baking soda and salt. In another bowl, whisk the egg, sugar, buttermilk, melted butter and vanilla. Use a fork to stir in the flour mixture and mix until moistened and there are no streaks of flour.

Spoon a little over half of the batter into the prepared pan, making sure to cover the entire bottom surface. Top with the raspberry mixture. Dollop the remaining batter over the raspberries and spread out in an even layer. There will be some raspberries exposed and that’s fine. Sprinkle with sliced almonds.

Bake until a tester comes out clean, about 30 minutes. Cool on a wire rack for 10 minutes. Run a thin knife around the edges and gently turn out the cake. Invert again and cool.

ENJOY!

to print the recipe, click here

It’s hard to find a more beautiful color than that of fresh raspberries…  I always catch myself smiling at the bowl, feeling it’s almost rude to cook them or hide them in a cake batter. But it’s for a great cause. They melt down into a single layer, topped by the moist cake and crowned with the almonds and their delicate crunch. Almonds and raspberries, at the risk of repeating myself, it is one of those perfect matches. This is a cake you can make with kids, very easy and it will be a hit with anyone who tries a slice. Or three…

Before I leave you, let me invite you to re-visit my old post and get a tour of Gayle’s book. Hard to believe it’s been three years. When I wrote her to ask permission to publish this recipe, I though the review was maybe a year old, 18 months tops. Almost fell off my chair when I realized it was written in November 2014.  This type of time-shock happens to me quite often these days. I wonder why… (sigh)

ONE YEAR AGO: Paalak Paneer, a Farewell Post

TWO YEARS AGO: In My Kitchen, November 2015

THREE YEARS AGO: Helen Fletcher’s Oatmeal Cookies

FOUR YEARS AGO: Thai-Style Pesto with Brown Rice Pasta

FIVE YEARS AGO: Shrimp with Spicy Orange Sauce

SIX YEARS AGO:  A Simple Appetizer (Baked Ricotta)

SEVEN YEARS AGO: Sour Cream Sandwich Bread

EIGHT YEARS AGO: Pasta with Zucchini Strands and Shrimp

SaveSave

SaveSave

SaveSave

SaveSave

SaveSave

SaveSave

SaveSave

SaveSave

SaveSave

SaveSave

SaveSave

PUMPKIN MACARONS

To Halloween or Not to Halloween, that is the question… 

 That’s up to you to decide. They can be very elegant served without any special decoration…

Or you can let your creative juices flow free…

PUMPKIN MACARONS
(adapted from several sources, including Craftsy.com)

for the shells:
198 g powdered sugar
113 g almond meal
113 g egg whites at room temperature
a pinch of cream of tartar
100 g granulated sugar
Orange Gel color from AmeriColor
¼ teaspoon pumpkin spice bakery emulsion (if unavailable, use  2 drops of vanilla extract)

for the filling:
3 tablespoons (40 g) unsalted butter, softened
1 cup (130 g) powdered sugar
1 tablespoon pure pumpkin puree
1 teaspoon milk
1/8 teaspoon ground cinnamon
pinch of salt

for decoration (optional):
luster dust in black and gold
1/8 teaspoon gin for each color

Line 2 or 3 heavy baking sheets with parchment paper or Silpat mats. Layer the powdered sugar and almond meal   in a food processor. Pulse until the mixture looks like fine meal, about 15 seconds. Pass through a sieve and transfer to a small bowl. Set aside.

Place the egg whites and pinch of cream of tartar in the bowl of a stand mixer fitted with the whisk attachment. Make sure that the bowl and the whisk are impeccably clean. Starting on medium speed, whip the whites with the cream of tartar until they look like light foam. The whites should not appear liquid. The foam will be light and should not have any structure.

Slowly rain in the granulated sugar, trying to aim the stream between the whisk and the side of the bowl. Turn the speed up to medium-high. Continue to whip the meringue until it is soft and shiny. It should look like marshmallow creme. Add the gel color and the pumpkin spice emulsion (or vanilla). Staying at medium-high speed, whip the egg whites until the mixture begins to dull and the lines of the whisk are visible on the surface of the meringue. Check the peak. It should be firm. Transfer the whites to a medium bowl.

Fold in the almond meal mixture in three increments. Paint the mixture halfway up the side of the bowl, using the flat side of a spatula. Scrape the mixture down to the center of the bowl. Repeat two or three times, then check to see if the mixture slides slowly down the side of the bowl. Put the mixture in a piping bag fitted with one of the tips listed above. Pipe on the prepared baking sheets.

Slam each sheet hard four to six times on the counter. Then fist bump each end of the sheet’s underside twice. Let the unbaked macarons dry until they look dull but not overly dry. Drying time depends on humidity. Ina dry climate, the macarons can dry in 15 to 20 minutes; in a humid climate, it can take 35 to 40 minutes.

While the macarons are drying, heat the oven to 330 F (170 C/gas mark 3). Bake one sheet at a time on the middle rack. Check in 11 minutes. If the tops slide, then bake for 2 to 3 more minutes. The macarons should release without sticking. Check one or two. If they stick, put them back in the oven for 1 to 2 more minutes. Let the macaroons cool for 10 minutes before removing from the pan.

Make the filling:  Cream the butter with the powdered sugar with a hand mixer, until incorporated and creamy. Add the other ingredients, continue beating until smooth. You should have the exact amount to fill this batch of macarons.

Assemble the macarons: find two macarons similar in size and add a good amount of filling to the bottom of one of them. Place the other on top and squeeze gently to take the filling all the way to the edge.  Paint decorations with luster dust dissolved in gin, if so desired. Let it dry and store the macarons in the fridge for 24 hours for perfect texture.

ENJOY!

to print the recipe, click here

Comments: These turned out so delicious! The pumpkin extract used in the shells gave them a subtle flavor that complemented the filling quite well. I found mine at Marshalls but included a link in the recipe for you to get it at amazon.com, if interested. These macarons scream Fall loud and clear. Once again I used my trustworthy recipe from Colette Christian over at Craftsy. I cannot praise her classes enough. During a recent sale event, I bought her Éclairs lesson, and it is simply outstanding. Plus, if you have any questions, she usually answers quite quickly. Very helpful, and very knowledgable. Yes, you read me correctly: éclairs are on my list of goodies to attempt in the very near future. Wish me luck…


I must thank Phil for saving the day with these Halloween-styled macarons. I had a different idea for decorating them, but let’s say it was a disaster. As I walked in circles around the kitchen, feeling miserable and hopeless, he suggested painting crazy faces on the shells, and we had a blast doing it together. Great project to do with kids, by the way. I used luster dust (available in amazon.com) in black and gold, mixed with a touch of gin. No worries, it evaporates, so these are kid-friendly. And approved by graduate students too…

ONE YEAR AGO: Slow-Cooked Whole Chicken

TWO YEARS AGO: Chocolate Zucchini Cake with Chocolate Frosting

THREE YEARS AGO: Pecan-Crusted Chicken with Honey-Mustard Dressing

FOUR YEARS AGO: Bewitching Kitchen on Fire!

FIVE YEARS AGO: Cashew Chicken Lettuce Wraps

SIX YEARS AGO: Chiarello’s Chicken Cacciatore

SEVEN YEARS AGO: Donna Hay’s Thai-Inspired Dinner

EIGHT YEARS AGO: Panettone


SaveSave

SaveSave

SaveSave

SaveSave

SaveSave

SaveSave

SaveSave

SaveSave

SaveSave

SaveSave

SaveSave

SaveSave

SaveSave

SaveSave

SaveSave

ELDERFLOWER MACARONS AND MUSINGS ON THE SUBJECT

My last macaron post was on August 15th, so the clock was ticking for another batch of these babies I am still obsessed with. Keep in mind I have two more batches ready to blog about. so if you are also a macaron-lover, stick around.  Once again, I used my default recipe from Craftsy although I’ve been playing with the formula from Philip (at Baking Fanatic) that has calls for less sugar. For this batch I used a lavender gel color, and something called Egyptian gold dust, which I talked about before. I also added a little bit of yellow color in the elderflower buttercream, to have a nice effect with the gold details. Very happy with this batch, which we enjoyed while my stepson Alex was visiting us from New York.

ELDERFLOWER MACARONS
(adapted from Craftsy.com)

for the shells:
198 g powdered sugar
113 g almond meal
113 g egg whites at room temperature
a pinch of cream of tartar
100 g granulated sugar
Purple Gel color from AmeriColor
2 drops vanilla extract

for the filling:
120 g softened butter
200 g confectioner’s sugar
1/2 teaspoon elderflower syrup
tiny amount of yellow gel food coloring

to decorate:
gold dust (optional)

Line 2 or 3 heavy baking sheets with parchment paper or Silpat mats. Layer the powdered sugar and almond meal   in a food processor. Pulse until the mixture looks like fine meal, about 15 seconds. Pass through a sieve and transfer to a small bowl. Set aside.

Place the egg whites and pinch of cream of tartar in the bowl of a stand mixer fitted with the whisk attachment. Make sure that the bowl and the whisk are impeccably clean. Starting on medium speed, whip the whites with the cream of tartar until they look like light foam. The whites should not appear liquid. The foam will be light and should not have any structure.

Slowly rain in the granulated sugar, trying to aim the stream between the whisk and the side of the bowl. Turn the speed up to medium-high. Continue to whip the meringue until it is soft and shiny. It should look like marshmallow creme. Add the gel color and the vanilla. Staying at medium-high speed, whip the egg whites until the mixture begins to dull and the lines of the whisk are visible on the surface of the meringue. Check the peak. It should be firm. Transfer the whites to a medium bowl.

Fold in the almond meal mixture in three increments. Paint the mixture halfway up the side of the bowl, using the flat side of a spatula. Scrape the mixture down to the center of the bowl. Repeat two or three times, then check to see if the mixture slides slowly down the side of the bowl. Put the mixture in a piping bag fitted with one of the tips listed above. Pipe on the prepared baking sheets.

Slam each sheet hard four to six times on the counter. Then fist bump each end of the sheet’s underside twice. Let the unbaked macarons dry until they look dull but not overly dry. Drying time depends on humidity. Ina dry climate, the macarons can dry in 15 to 20 minutes; in a humid climate, it can take 35 to 40 minutes. If using edible gold powder,  sprinkle a little with a brush and use a hand-held fan to spread it over like dust.

While the macarons are drying, heat the oven to 330 F (170 C/gas mark 3). Bake one sheet at a time on the middle rack. Check in 11 minutes. If the tops slide, then bake for 2 to 3 more minutes. The macarons should release without sticking. Check one or two. If they stick, put them back in the oven for 1 to 2 more minutes. Let the macaroons cool for 10 minutes before removing from the pan.

Make the filling:  Cream the butter with the powdered sugar in a KitchenAid type mixer until it reaches the correct consistency for piping. Add the elderflower syrup and beat for a few seconds longer to incorporate.

Assemble the macarons: find two macarons similar in size and add a good amount of filling to the bottom of one of them. Place the other on top and squeeze gently to take the filling all the way to the edge.  Store in the fridge for 24 hours for perfect texture.

ENJOY!

to print the recipe, click here

Comments: I had two goals with this recipe. First, to make a filling using elderflower flavor because the thought of it made me dream. Elderflower… even the name is musical! Second goal, to use a gold dust powder that I featured back in July in my In My Kitchen post. Small problem. I do not have an air-brush thingie, so decided to search for improvised ways to turn the powder into dust. A small, hand-held fan could potentially work, but we do not own one. Then I remembered the air-compressed can that we sometimes use to clean computer keyboards and small crevices in all sorts of gadgets and equipments. Here it is, in case you don’t know what I’m talking about.

I don’t know if you can read the name of my file by clicking on it, but it doesn’t matter. I will tell you right now. I called it not_the_right_tool. Yeap. Capisci?  It is way too strong, even if you try to  maneuver very delicately the little gun, it will spray air with too much enthusiasm. Which led to Sally having golden eyebrows two months before Halloween. Quite inappropriate. I don’t see an air-brush thingie in my future (pretty expensive little gadget), so I might search for a more well-behaved hand-held fan before I attempt using the powder dust again.  The effect is pretty nice, once you get it correctly. Live and learn. Even if my decorative effect did not have the exact look intended, the macarons were delicious.  The elderflower buttercream worked very well, and I imagine it would be perfect to ice cupcakes too. 


And now, I share a few thoughts on macarons, probably one of the most-feared concoctions by bakers everywhere. So many things can go wrong when you prepare the batter and then bake them. All recipes involve three basic ingredients, egg whites, almond flour, and sugar (usually in two different forms).  Basically egg whites are beaten to form a stable meringue that is next mixed with almond flour and, if desired, food coloring and flavoring agents. The method to form the meringue will range from French (egg whites are beaten with sugar at room temperature), Swiss (sugar is dissolved in egg whites gently warmed up and then whipped into meringue), to Italian (most stable meringue, formed by beating a simple syrup at the exact right temperature into egg whites).

The fact that macarons are so finicky would make one think that the proportions of ingredients are set in stone. Any variation, and you are doomed for failure. Well, that’s really not the case. In the table below, I offer you a few formulas, the first uses a Swiss meringue, all others are for the basic French method. You will immediately notice that the variation is not trivial. Particularly the amount of total sugar left me a bit surprised. Each of these recipes have many people who swear by them. They are often described as ‘my default recipe’ because “it never fails.”  I’ve tested two of them, Craftsy and Philip’s, and yes they both worked great. I like Philip’s formula because the shells are less sweet, and complement better some fillings like caramel and chocolate ganache.

All amounts given in grams.Original sources for above formulas, keep in mind my table normalized them all to 100 g egg whites:

Broma: Broma Bakery Craftsy: Craftsy online  tutorial Philip: Baking Fanatic Mimi: Indulge with Mimi Sue: You can do it… at home!  J.O.B. Joy of Baking Tiffany Macarons by Tiffany

The take-home lesson is: focus on technique. The ingredients are a lot more forgiving than we would think. As to aging the egg whites, trust me on this: you can bake a perfect batch of macarons with egg whites brought to room temperature without any need for aging.  I did the experiment myself, and others did too. I know many experts will swear it makes a difference. I would love to have them do a blind experiment baking a batch with aged whites another with room temperature eggs, no aging, and tell me which is which.  If you want to bake a batch of macarons on a whim, go for it. Technique trumps everything else for these finicky babies.  Watch videos showing proper macaronnage, and you will be on your way to success. And, of course use a scale so that you know how many grams of egg whites you are starting with, and adjust the proportions accordingly.

From my friend G.P.E. (Gary Patissier Extraordinaire) I got this nice lesson on macaron basics:

The important ratio in macarons is the sugar to egg ratio. At a 1:1 sugar/egg ratio, the meringue will bake up soft – think lemon meringue pie topping. At a 2:1 ratio, the meringue will bake up crisp – think meringue cookies. So for macarons, you are looking at a 2:1 ratio. Extra sugar ( > 2:1) will make the surface shinier and crisper and, of course, sweeter.  Note how there are two separate additions of sugar – one combined with the eggs and the other combined with the almond flour. That is intentional. Sugar stabilizes the meringue which is good. Stabilizing also means it inhibits formation of the foam. So to optimize stability versus volume, the maximum amount of sugar you want to add with the eggs is 1:1. Furthermore, you add the sugar late in the whipping process; I was taught to gently add the sugar when the egg whites are 75% done. Once you finish whipping the eggs, additional sugar (in this case, that mixed with the almond flour) can be added without affecting volume.


So there you have it, mine and Gary’s  little musings on a subject very dear to my heart: French Macarons… love making them, love thinking about making them, imagining colors and flavors together. Love bringing them to our department when maybe they make it easier to face that experiment that refuses to work, the upcoming exam, the preparation of that grant proposal…


or sharing with a very handsome (and very tall) stepson!

ONE YEAR AGO: A Duet of Sorbets

TWO YEARS AGO: Sobering Peach Sorbet

THREE YEARS AGO: Spiralizer Fun

FOUR YEARS AGO: Beer-Marinated Grilled Skirt Steak

FIVE YEARS AGO:  Secret Recipe Club: Corn Chowda

SIX YEARS AGO: Page-A-Day Calendar (Pits and Chief 5 minutes of fame…)

SEVEN YEARS AGO: Home Sweet Home (our beloved Pits in one of his last photos)

EIGHT YEARS AGO: Marbled Rye


SaveSave

SaveSave

SaveSave

SaveSave

SaveSave

SaveSave

SaveSave

SaveSave

SaveSave

SaveSave

SaveSave

SaveSave

SaveSave

SaveSave

SaveSave

SaveSave

SaveSave

SaveSave

SaveSave

SaveSave

SaveSaveSaveSave

SaveSave

PAUL HOLLYWOOD: THE WEEKEND BAKER

In the past year, I was hit hard by two addictions. The Game of Thrones, and The Great British Baking Show. Odd to see them mentioned together in the same phrase. I caved to GoT despite my adamant stance against violent movies. That show is awesome, brilliant, irresistible. I can hardly wait for the next season, already feeling deprived. But The Great British Baking Show is a lot easier to watch, and so much better than ANY cooking show made in the US, it’s not even funny. They really hit a magical formula to entertain and teach at the same time. The right amount of humor, the right amount of anxiety, great atmosphere among the contestants, and so much talent! I also love the fact that they do blind judging of the technical challenge, to me that immediately sets the show on a higher level.  Then, there is the chemistry between Paul Hollywood and Mary Berry. I realize she won’t be part of the new season, and from what I heard the new person does a stellar job too, the show should follow its natural path of glory. Paul is something else. Those penetrating blue eyes probably turn the blood of some contestants cold when he deeply stares at them and asks “have you really tried this before?“, or “is this slashing going to be alright?”    Analogy for my hard-core biochemist readers: if Paul asks “are you telling me that a low Kd means higher affinity for this enzyme? you sure about that?”  you would probably doubt all the biochemistry that until then was solid in your brain…

When you are so in love with GBBS. you do two things.

  1. You move to binge watching Master Class, in which Paul and Mary actually bake all that stuff they inflicted on the contestants, spilling some of the secrets for success.
  2. You buy their cookbooks. I now own several written by Paul and Mary, as well as a few from the show itself. Yes, I have a problem. No, I do not intend to go for therapy.

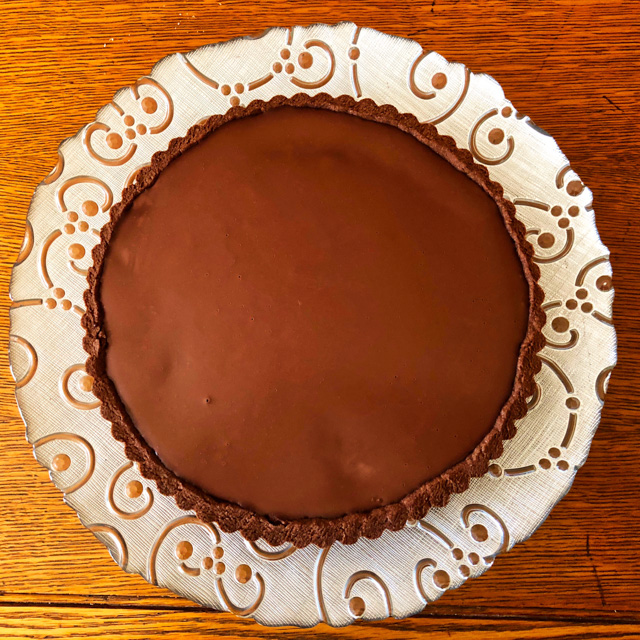
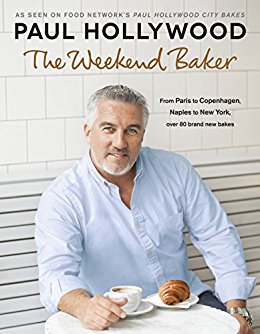
One of the cookbooks I own is The Weekend Baker by Mr. Hollywood. And I got his and Penguin Books permission to share with you one recipe from it (insert happy dance here). After a lot of mental struggles to pick just one, here it is. Chocolate to the limit, an Italian classic from Capri. Gluten-free, which might be a bonus to some, and decadently rich. A small slice will be enough, making it perfect to share with many friends, or in my case, co-workers. A certain Monday morning was made quite a bit sweeter in our department.
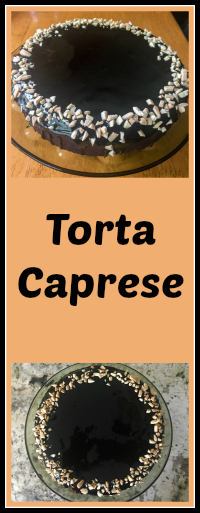
TORTA CAPRESE
(Reproduced from THE WEEKEND BAKER by Paul Hollywood, published by Penguin Books Ltd (2016). With permission from Penguin Books Ltd. Recipes © Paul Hollywood, 2016. Photography © Issy Croker)

 to buy the book, follow this link:  The Weekend Baker

for the cake:
100 grams (3.5 ounces) blanched whole almonds
50 grams (1.75 ounces) plus 160 grams (5.6 ounces) superfine sugar
1 whole egg, plus 5 eggs, separated
265 grams (9.3 ounces) dark chocolate, melted and cooled
50 grams (1.75 ounces) chopped almonds

for the topping:
70 grams (2.5 ounces) water, plus for softening the gelatin
90 grams (3.2 ounces) superfine sugar (superfine)
30 grams (1 ounce) cocoa powder
25 grams (.9 ounces) liquid glucose (I used light corn syrup)
2 gelatin sheets (about 2.4 grams/.1 ounces)

Candied lemon peel or chopped almonds, for decorating

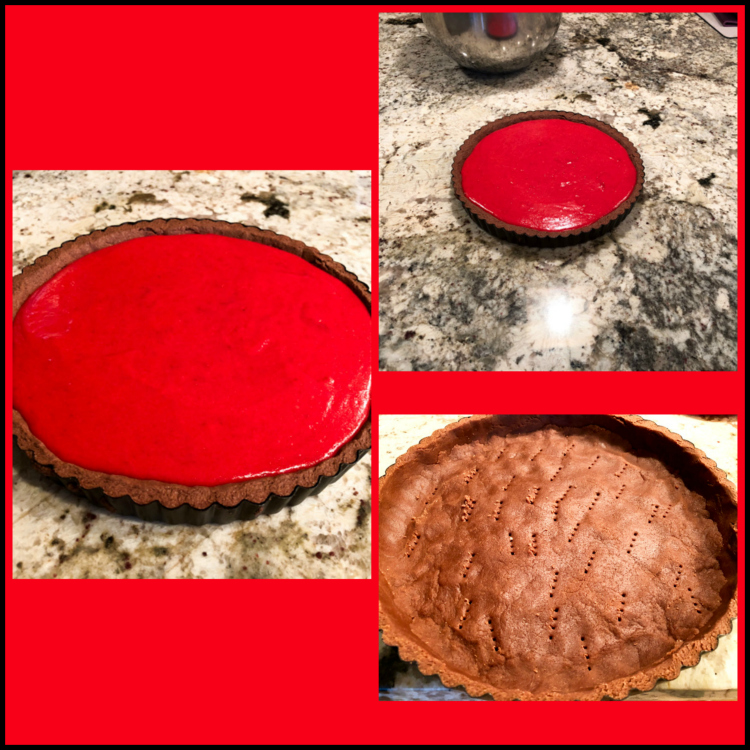
Heat the oven to 180 degrees C/Gas 4 (355 degrees F). Grease a deep 20-centimeter (8-inch) round cake tin. To make the cake, grind the whole almonds with 50 grams of fine sugar in a food processor. Reserve.

With an electric mixer, beat the whole egg and 5 yolks with the 160 grams fine sugar until the mix is pale and creamy and leaves a trail on the surface. In a separate bowl, whisk the egg whites to soft peaks. Do not over mix.

Add the cooled melted chocolate with the egg yolk mixture. Stir in the ground almond mixture and the chopped almonds. Beat in a spoonful of the egg whites to loosen the mixture. Now, a spoonful at a time, gently fold in the remaining egg whites.

Pour the batter into the prepared cake pan and bake for 40 to 45 minutes. Once the cake is cooked, leave it in the pan to cool before turning it out onto a serving plate.

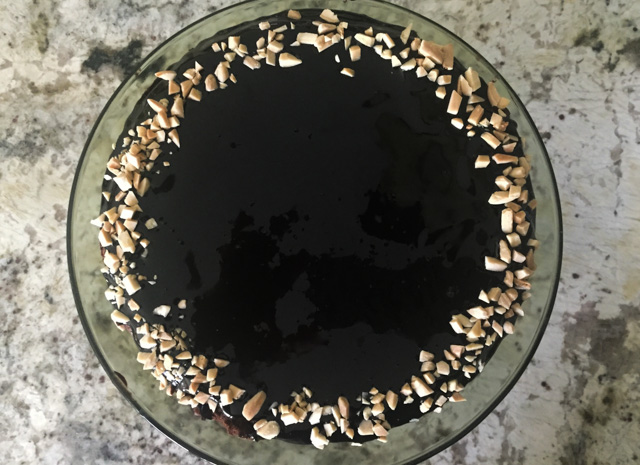
To prepare the topping, place the water, fine sugar, cocoa powder and glucose (or corn syrup) into a saucepan and bring to the boil. Simmer for 5 minutes and stir.

Soften the gelatin sheets in a little water. Remove the saucepan from the heat. Squeeze any liquid from the gelatin sheets and then add the sheets to the pan. Stir until the gelatin has dissolved. Leave to cool. Once cool, but still liquid, pour the chocolate topping just onto the surface of the cake and decorate with candied lemon peel or extra chopped almonds.

ENJOY!

to print the recipe, click here

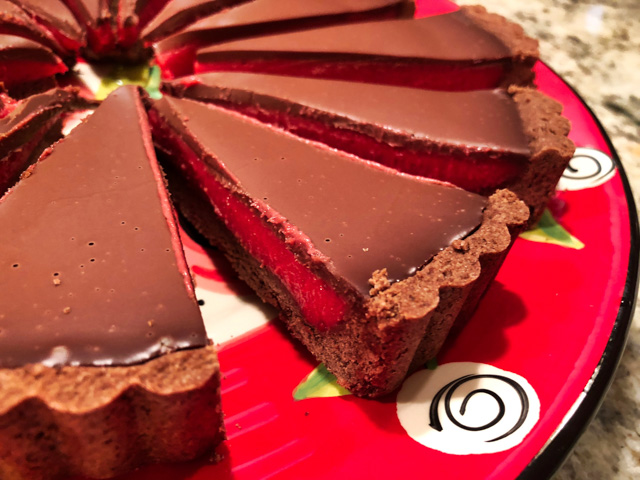
Comments: Please notice that instead of almond flour, Paul prefers to grind whole almonds with sugar. He states to get better taste and texture this way. So resist grabbing that bag of Bob Mill’s you’ve got on your pantry. The glaze. Oh, the glaze. Very intense chocolate flavor topping a cake that also has a punch of chocolate, but mellowed down by the almonds, both in taste and texture. In fact, when you look at the Torta Caprese you’ll expect your classic flourless creature, very fudge-like. It is not, the ground & diced almonds turn it into a different type of cake, one that in fact will feel a tad bit less rich. When I bite into a flourless chocolate cake, I always have the filling that it is so rich, a small slice seems tricky to finish.  This cake? Not the case. It is rich, but you’ll feel that keep working on that slice is the most natural move… Consider yourself warned. Plus, the glaze… Oh, the glaze…


And now, a quick virtual tour of Paul Hollywood’s book.


The book is organized in ten chapters, and contrary to most cookbooks, these are not your regular ‘Breads”, “Pies”, “Cakes” categories. Instead, Paul dedicates one chapter to each place he’s been to, showcasing the recipes that impressed him most during his visit.  Consider it a gastronomic tour. His introduction to the book will have you excited to jump on a plane (or as he puts it, start a very long swim from UK all the way to New York), and, book in hand, try every one of the delicacies he talks about.  So, without further ado, a few of my favorites from each chapter.

SUN BAKED, MADRID: I’ve never been to Spain, so baking from this chapter would be a nice way to tempt myself to finally go visit. My favorites include Churros and Spanish Hot Chocolate (for dipping them into), as churros were actually quite popular in Brazil when I was growing up.  But how about Iberico Ham and Manchego Empanadas? I am crazy for Manchego… Buñuelos de Viento sound great too, these are very light puff pastry entities, filled with chocolate or cream. But I am really intrigued by the last recipe in this chapter, quite simply called Torta. It is like a focaccia, but made with 70% olive oil in its formula. I bet it is amazing!

LA DOLCE VITA, NAPLES: My showcased recipe, Torta Caprese, comes from this chapter, where you will find many of the most authentic examples of Italian baking, like Pizza Margherita, Ciabatta, Focaccia. But the one that captured my imagination is Gatto di Santa Chiara, a cross between a quiche and a pie. The dough calls for some mashed potato in it, which I know results in incredible texture. Definitely something to make in the near future.

FRENCH FANCIES, PARIS: My home away from home! He opens the chapter with royalty, Croissants… And offers some other classics like Quiche Lorraine, Eclairs (be still, my heart), and Madeleines (made with brown butter). Baguettes are there too, just in case you are wondering…  I have my mind set on Chocolate and Hazelnut Meringues, though.

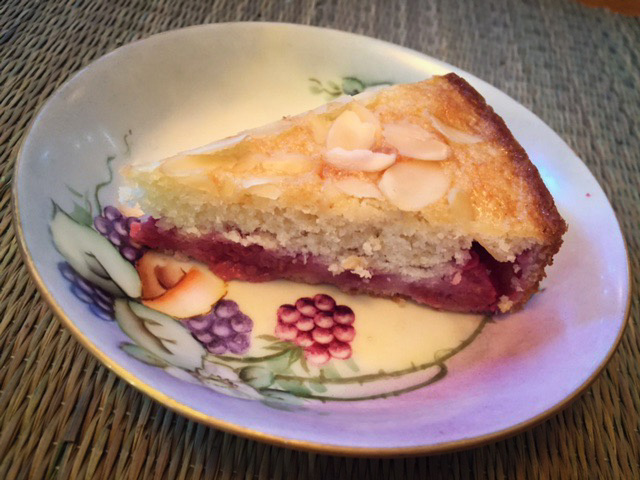
PUDDING LANE, LONDON: A city I visited three times, and find absolutely amazing, definitely want to go back. You will find a basic recipe for Scones that you can adapt for any flavor you like, the famous Victoria Sponge, Chelsea Buns, Lemon Drizzle Slices (similar to a cake I just blogged about, but with fancier icing), and Battenberg (a two-color cake that is calling my name).

DANISH TASTIES, COPENHAGEN: Another place I’ve never visited but hope to stop by some day, to get fully acquainted with the meaning of hygge, a very fashionable word. Danish is in there, a version with Apricot and Passion Fruit,  Seeded Rye Bread, and the recipe I almost picked to showcase, Danish Raspberry Slices. They look so cute, I know I’ll be making them for our graduate students in the very near future.

BAVARIAN BITES, MUNICH. I’ve been there, years ago, ate superbly well. Beautiful place! Paul offers a recipe for Pretzels that has some unexpected twists, I am a lover of soft pretzels, and have been meaning to try and bake them at home for…. forever.  Stollen, the famous bread is in this chapter, as well as Lebkuchen Biscuits, a sort of soft spice cookie that I’m sure I would fall in love with at first bite. Prinzeregententorte (say that three times fast) seems like the kind of cake that could be the weapon of my self-destruction. Seven layers of sponge cake that must be absolutely identical, as they represent the regions of Bavaria in 1886. Are you amazed yet?

AMERICAN PIE, NEW YORK: There we are at the Big Apple, the chapter opens with Bagels, rightfully so! Also a big nod to Bittman’s No Knead Bread, New York Cheesecake with details for baking that definitely take it to the smoothest consistency ever.  I really want to try my hands at it. So many recipes, so little time!

FUN IN THE SUN, MIAMI: Still in the US,  dear friends…  Paul loved the beat of Miami – who doesn’t? – it is packed full of Brazilians (sorry could not resist a little wave to my home country). Great items in this chapter, starting of course with Key Lime Pie, passing by  Best- Ever Chocolate Chip Cookies,  Waffles, and American Pancakes.

PRIDE OF POLAND, WARSAW: Would I be repeating myself too much if I say I’d love to visit Poland? Not only I have great Polish friends, but all my friends who visited were mesmerized by it. Seems like a fantastic place indeed.  Here are the recipes I loved the most: Babka, for obvious reasons. A bread, beautifully swirled with chocolate. And Polish Cheesecake. Yes, I need to get to know this, if not in Warsaw, in our kitchen.

THE RUSSIAN OVEN, SAINT PETERSBURG: Paul was really smitten by that city, and I also heard plenty of great things about it. Of course, I would never go in the winter, just looking at the photos of Paul in full winter gear when he landed there, made me cringe. No, a Brazilian cannot face that ever. But the recipes seem just amazing. Russian Pies (much more involved and complex than the name implies), the famous Blinis, Medovik (a gorgeous honey cake), Sweet Berry Pancakes, but what really won my heart is something call Vatrushka. Go ahead, google, and drool…

So there you have it, my little tour of Paul Hollywood’s The Weekend Baker is over. The book has a little introduction to each recipe, with interesting bits about them, gorgeous photos, not only of the finished product, but of the places he visited.  Well-balanced, actually. You will not be bombarded with personal photos like some cookbook authors do (not naming any names), but you’ll have enough to tease you, make you dream about that plane trip to see the world.

Paul, thank you and Penguin Books for allowing me to publish your recipe.

Before I leave my dear readers… yes, a lower Kd will always indicate higher affinity. For any enzyme in the known universe. I am sure you can all sleep better now…


ONE YEAR AGO: Texas Sheet Cake

TWO YEARS AGO: In My Kitchen, September 2015

THREE YEARS AGO: Sour Cherry Sorbet: A Labor of Love

FOUR YEARS AGO: In My Kitchen – September 2013

FIVE YEARS AGO: Raspberry Sorbet at Summer’s End

SIX YEARS AGO: When three is better than two  (four years with Buck!)

SEVEN YEARS AGO: Grating Tomatoes (and loving it!)

EIGHT YEARS AGO: A Peachy Salad for a Sunny Day

SaveSave

SaveSave

SaveSave

SaveSave

SaveSave

SaveSave

SaveSave

SaveSave

SaveSave

SaveSave

SaveSave

SaveSave

SaveSave

SaveSave

SaveSave