A small collection of goodies, all inspired by a Mexican fiesta… Cupcakes, Chocolate-Chipotle Cookies, Macarons (filled with Mexican chocolate ganache), and Chocolate-covered Oreos.

FIESTA CUPCAKES

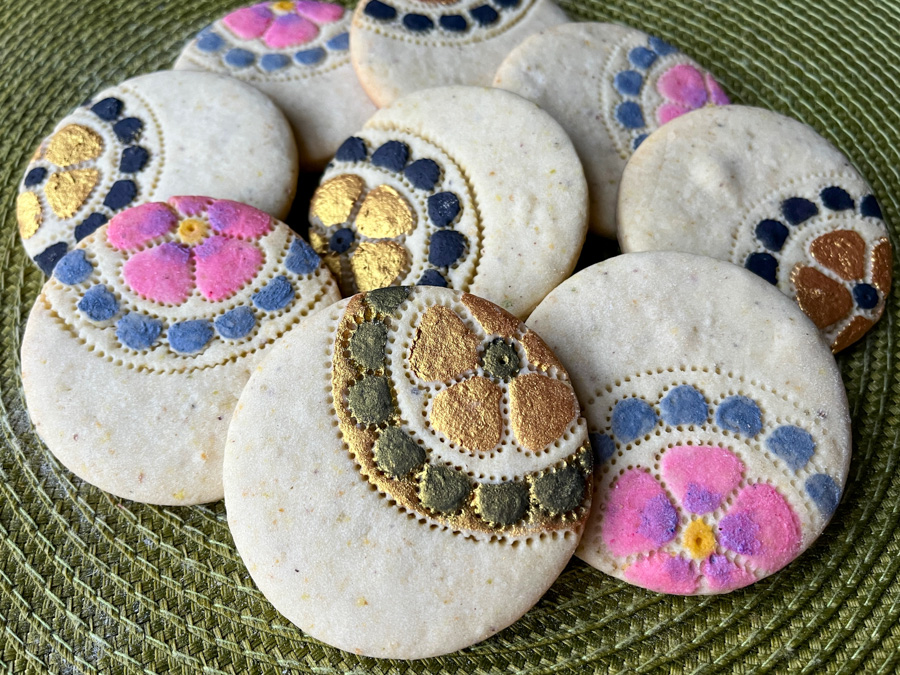
Any vanilla cupcake recipe (or chocolate) will work. Refer to this post for the buttercream, which was divided in two unequal portions: a larger portion dyed pink, and a smaller portion dyed orange. Then, a petal tip like 102 was used to add the icing in layers, as shown below. Any combination of colors will work, this one seemed appropriate for the Cinco de Mayo theme.

CHOCOLATE-CHIPOTLE COOKIES
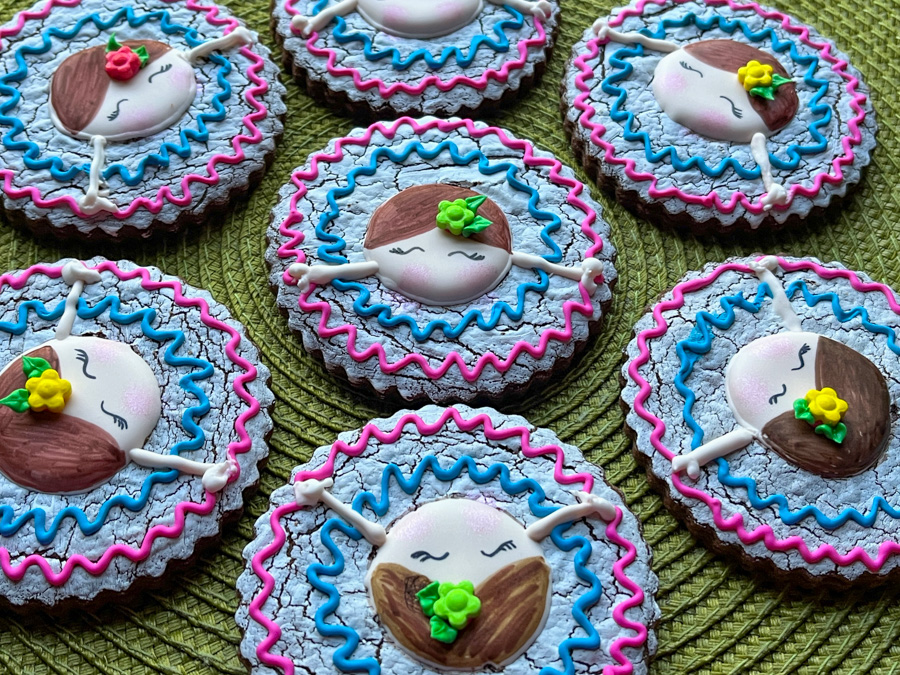
I am so smitten by these! Not at all complicated to put together, start with your favorite chocolate cookie recipe (mine is definitely this one), paint with Americolor white before baking to get the crackled effect. Then use Royal icing dyed with flesh tone or ivory to pipe a round for the face. Use any colors you want to make the wavy decorations. Once that sets, you can paint the face and hair, add the arms, and you are done. You can see the steps below.

They make for a real fun set, and will please those who prefer a modest amount of icing on their cookies.
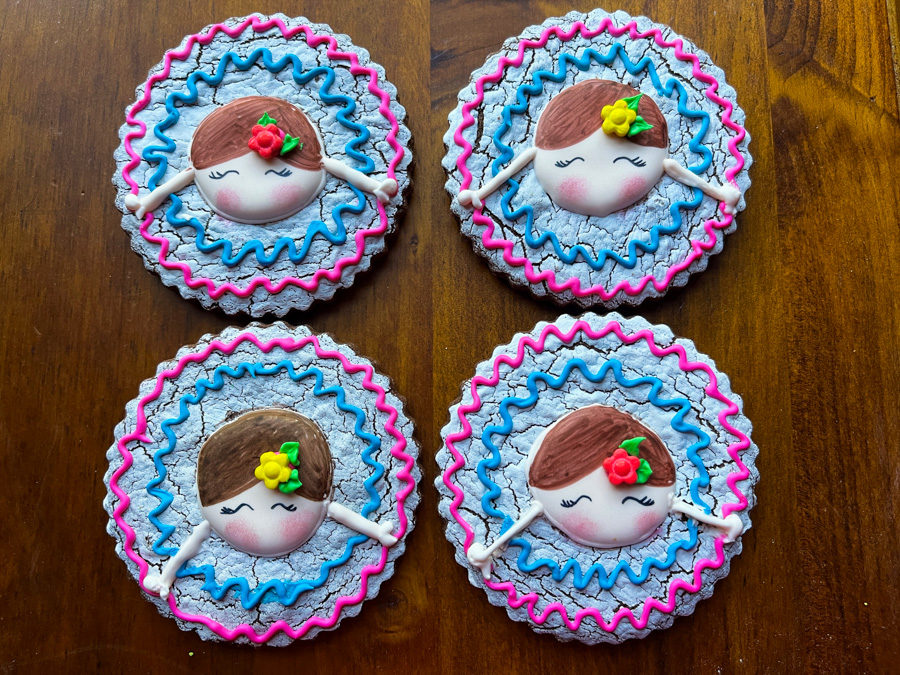
Many colors will work, and I also made a batch with sugar cookies instead of chocolate, with a pink and orange skirt.

MEXICAN CHOCOLATE MACARONS

For these macs, I used my default French meringue method (recipe here), divided the batter into three portions, a large pink, a medium size yellow, and a smaller orange. Piped a circle of pink, went with yellow in the center, then orange to form three concentric circles. Baked the shells and decorated with Royal icing. The ganache was made with
4 oz semisweet chocolate
1/4 cup heavy cream
1/2 tsp cinnamon
a pinch of cayenne pepper
Once the ganache cooled, I whipped it with a handheld mixer for a minute or so. You cannot go too long or the whole thing will turn grainy. You just want to incorporate some air into the ganache.
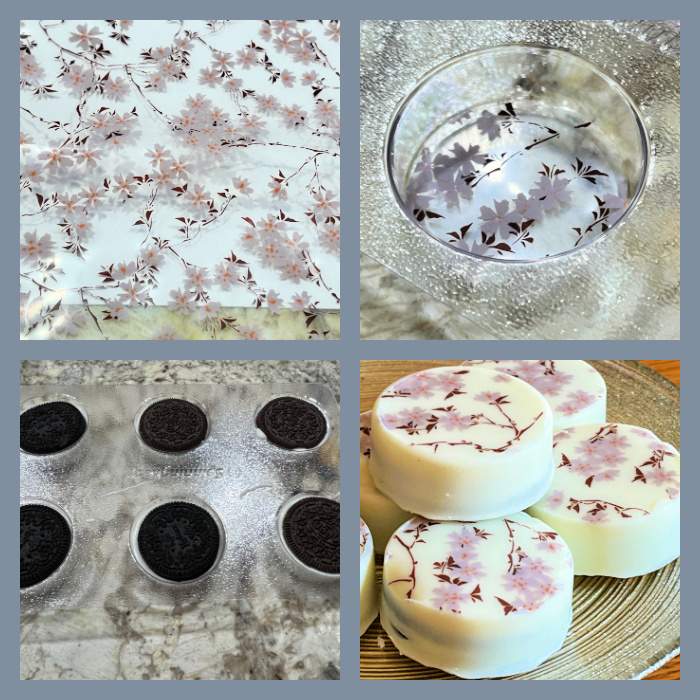
FIESTA CHOCOLATE COVERED OREOS

These are so much fun to make! I used chocolate transfer sheets cut to fit the inside of the mold, as described in this post. I love this colorful pattern, that would look good also on a white chocolate background.

HAPPY CINCO DE MAYO!

ONE YEAR AGO: Thai-Meatballs Over Wilted Bok-Choy
TWO YEARS AGO: Asparagus with Gunpowder Masala
THREE YEARS AGO: The Home Bakers Collective, April Project
FOUR YEARS AGO: Asian-Style Eggplant Meatballs
FIVE YEAR AGO: Uzbek Flatbread
SIX YEARS AGO: First Monday Favorite – Black Sesame FOUR
SEVEN YEARS AGO: Chocolate Orange Mini-Cakes
EIGHT YEARS AGO: In My Kitchen, May 2015
NINE YEARS AGO: P90X3, a Review of Tony Horton’s Latest Fitness Program
TEN YEARS AGO: Pasta and Mussels in Saffron Broth
ELEVEN YEARS AGO: Triple Chocolate Brownies
TWELVE YEARS AGO: Shanghai Soup Dumplings
THIRTEEN YEARS AGO: Bite-sized Chocolate Pleasure