MARINATED CHICKPEAS WITH SLOW-ROASTED RED PEPPERS

I follow a group of food bloggers I completely trust. Kelly from Inspired Edibles is part of this group. When she raves about a recipe, I usually jump on making it. This is the most recent example, and I know if you make it you will rave about it also. Two things: do not be tempted to use canned chickpeas. And go for the slow-roasting of bell peppers. These two small details make the dish shine.

MARINATED CHICKPEAS WITH SLOW-ROASTED RED PEPPERS
(adapted from Inspired Edibles)

for the veggie mixture:
1 + 1/4 cup dried chickpeas (from 1 1/4 cup dry)
2 large red bell peppers, cut into strips
110 g Feta cheese
60 g pitted Kalamata olives, sliced
10 cherry tomatoes, halved
parsley to serve

for the marinade:
⅓ cup olive oil
2 Tbsp fresh lemon juice
1 ½ Tbsp red wine vinegar
1 tsp Herbes de Provence
¾ tsp salt or to taste
black pepper to taste
½ Tbsp honey

Soak the chickpeas overnight in cold water. Next day, drain and rinse, then cook in slightly salted water until tender, but still al dente – about 40 minutes. the chickpeas in a large pot with lots of water until desired consistency is achieved (for this recipe, I prefer the chickpeas to have some texture – not too mushy – so I aim for al dente, it takes over 1 hour). This step can be made in advance.

Heat oven to 300F and prepare the marinade by whisking together all the ingredients. Make sure when you add the honey that it gets fully integrated with the other components.

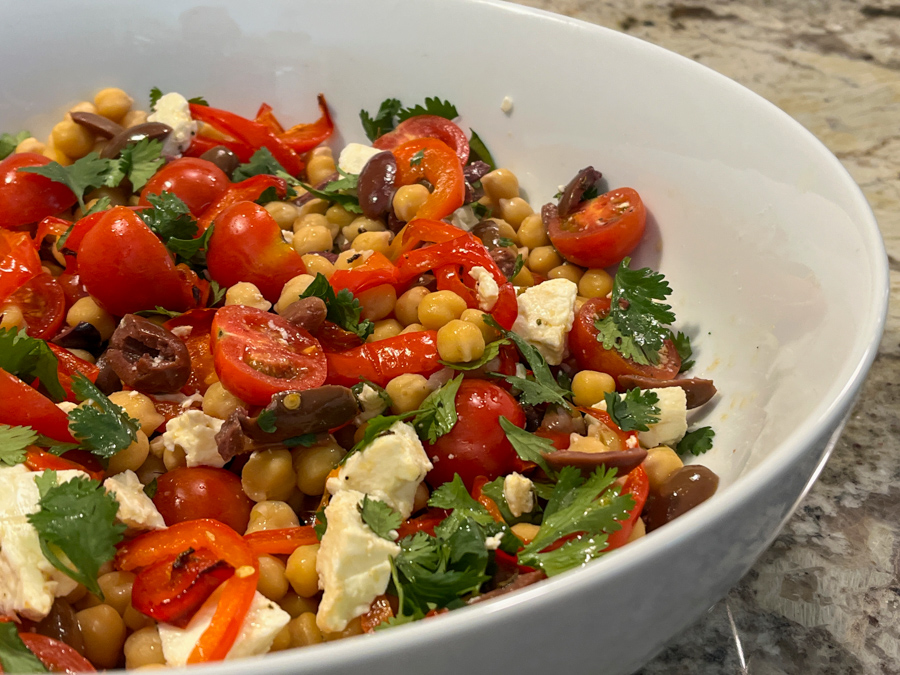
Place the cooked chickpeas (ideally still warm) in serving platter with tomatoes, olives, and feta cheese. intermingle with tomatoes, onion, olives and half of the feta. Pour the marinade over top, tossing gently to combine.

While the chickpea mixture marinades at room temperature, spread the sliced peppers out on a baking sheet, drizzle with 1.5-2 Tbsp olive oil and add a couple shakes of salt, and roast for about one hour. Add them to the chickpea mixture, and serve, sprinkled with parsley leaves.

ENJOY!

to print the recipe, click here

Comments: This recipe is a winner, all the way. Leftovers were fantastic next day and even better on the second day. I warmed everything in the microwave, just barely, and there was no compromise in the texture, the taste of the marinade just got more intense. Perfect.

Make sure to stop by Kelly’s blog and read her post, as she offers a different way to enjoy it, with cucumbers in tzatziki sauce. The key is to cook the chickpeas from scratch. Totally different from canned, which works fine for other preparations such as hummus. The slow-roasting of the bell peppers is another great twist, they develop a milder flavor and very soft texture.

ONE YEAR AGO: Passionfruit Millionaire’s Shortbread

TWO YEARS AGO: Chai-Mango Rosette Macarons

THREE YEARS AGO: Common Table, Something New in My Life

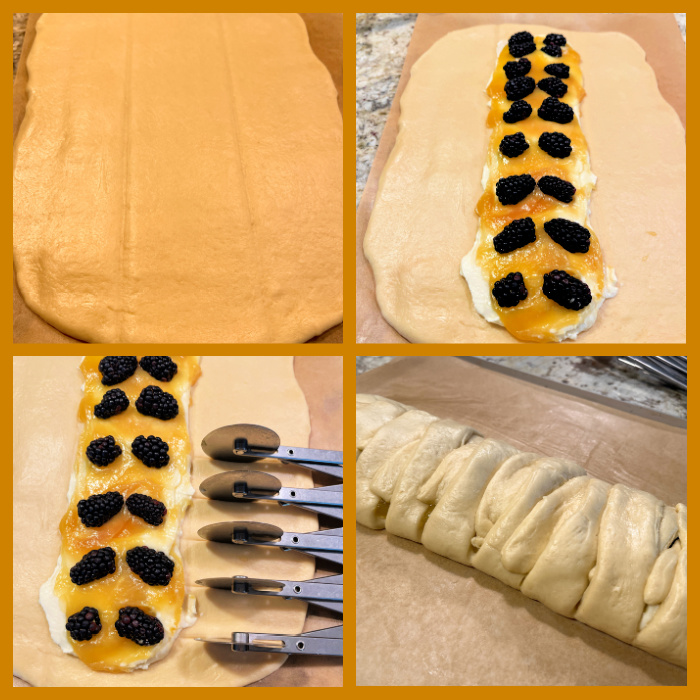
FOUR YEAR AGO: The Daisy, a Bread with Brioche Alter-Ego

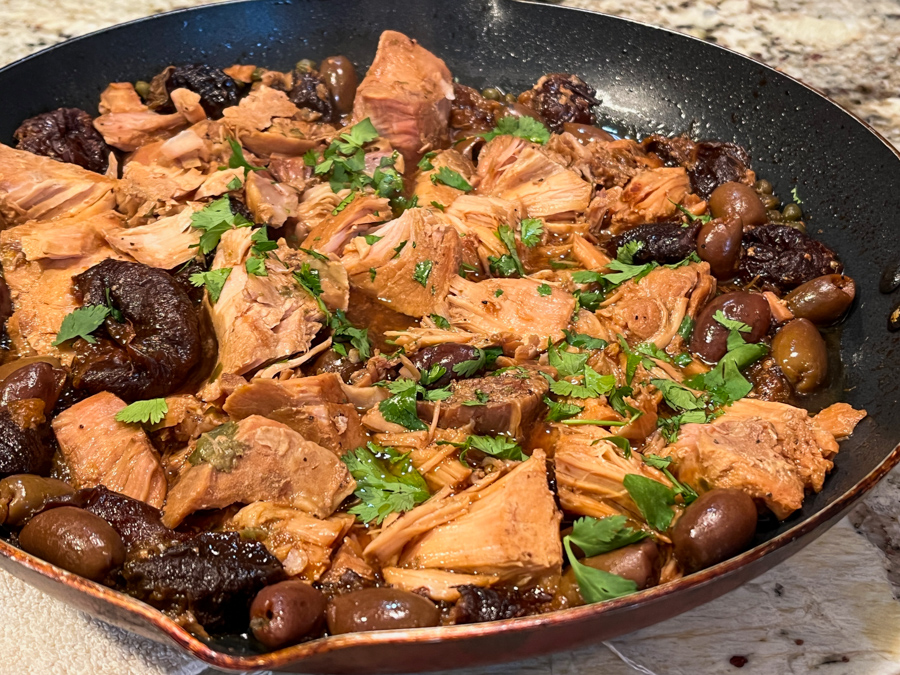
FIVE YEARS AGO: Pork Tenderloin, Braciole Style

SIX YEARS AGO: Raspberry Buckle

SEVEN YEARS AGO: Seafood Gratin for a Special Dinner

EIGHT YEARS AGO: Cooking Sous-Vide: Sweet and Spicy Asian Pork Loin

NINE YEARS AGO:  Farewell to a Bewitching Kitchen

TEN YEARS AGO: In My Kitchen. June 2012

ELEVEN YEARS AGO: Goodbye L.A.

TWELVE YEARS AGO: 7-6-5 Pork Tenderloin

PORK WITH PRUNES, RE-VISITING A CLASSIC

Years ago (2018, to be exact), I blogged on the classic version, and you can check it out here. Today, I offer you a variation using a leaner type of meat and the crockpot. Lately I’ve been exploring different uses for country style ribs, and this was a crowd-pleaser. Even if it was a crowd of two…

SLOW-COOKER PORK WITH PRUNES
(from the Bewitching Kitchen)

2 packages of country-style pork ribs, boneless
(or amount enough to fully cover the bottom of your slow-cooker, some overlapping ok)
1 cup dry white wine
1 cup pitted prunes (or amount to taste)
1/2 cup pitted black olives
2 Tbsp capers
2 tbsp Herbes de Provence
2½ tsp sea salt flakes
freshly ground black pepper
1 cup water
juice and zest of 1 lemon (or more to taste)
fresh parsley leaves to serve

Place all the ingredients except lemon juice, zest, and parsley in your slow cooker, distributing the pieces of meat with a little overlapping if necessary.

Cook on low for 7 hours. Remove the meat gently from the liquid that accumulates in the crockpot, transfer the liquid to a large skillet and reduce it by half or more, until slightly thick. Add the meat back to the skillet, and allow to simmer with the sauce for a few minutes.

Squirt the lemon juice, add the zest and parsley, and serve.

ENJOY!

to print the recipe, click here

Comments: I’ve been on a roll with the country-style pork ribs lately. The crockpot performs miracles with this particular cut of meat, which can dry out easily. Just make sure to stop the cooking at 7 hours, so that the texture is not compromised. Once you open the crockpot, you will have excess liquid, that will be much improved by a little extra step to concentrate it. That is why in the picture you see the meat on a large non-stick frying pan. You can do this final concentrating step later, so the whole meal can be prepared a couple of days in advance, it will only get better.

ONE YEAR AGO: Honeyed-Jalapenos on Spelt Pizza

TWO YEARS AGO: Bulgur and Chickpea Salad with Pomegranate Seeds

THREE YEARS AGO: Purple Star Macarons

FOUR YEARS AGO: Smoked Salmon, Fait Maison

FIVE YEARS AGO: Kouign-Amann, Fighting Fire with Fire

SIX YEARS AGO: In My Kitchen, Yin and Yang

SEVEN YEARS AGO: Chocolate Toffee Banana Bread

EIGHT YEARS AGO: In My Kitchen, June 2014

NINE YEARS AGO:  Strawberry Frozen Yogurt

TEN YEARS AGO: Baked Coconut and “The Brazilian Kitchen”

ELEVEN YEARS AGO: Honey-Glazed Chicken Legs

TWELVE YEARS AGO: French-Style Rolls


KAREN’S BRAIDED LEMON BREAD WITH BLACKBERRIES

She posted. I read the post while away on a trip. Could not wait to get home to bake it. As far as enriched bread goes, you cannot get much better than this. Think brioche loaded with a tangy lemon cream and luscious blackberries. As I said, cannot get much better. THANK YOU, KAREN!

BRAIDED LEMON BREAD WITH BLACKBERRIES
(from Karen’s Kitchen Stories)


For the Sponge:
3 ounces warm water (95 to 105 degrees F)
1 teaspoon sugar
1 1/2 teaspoons instant yeast
30 grams unbleached all purpose flour

For the Final Dough:
All of the sponge
85 grams vanilla yogurt, room temperature (I used plain and added 1/2 tsp vanilla)
56 grams softened unsalted butter
1 large egg, beaten
50 grams sugar
1 teaspoon salt
1 teaspoon vanilla
300 grams unbleached all purpose flour
one beaten egg for the egg wash
pearl sugar for topping (optional, but nice)

For the Filling:
85 grams cream cheese, at room temperature
25 gram sugar
29 grams sour cream (I used creme fraiche)
1 tsp lemon juice
15 grams all-purpose flour
100 grams lemon curd
Handful of blackberries


Combine the sponge ingredients in a small bowl, stir, and cover with plastic wrap. Let it sit for 15 minutes.
In your stand mixer bowl, combine the sponge, yogurt, butter, egg, sugar, salt, vanilla, and flour. Mix with the dough hook for about 8 minutes. Place the dough in an oiled dough rising bucket or bowl, cover, and allow to rise for one to two hours, until doubled (mine took 2 hours and 30 minutes).

Mix the cream cheese, sugar, sour cream, lemon juice, and flour until smooth. Cover and set aside.
Line a cookie sheet with parchment paper. Place the risen dough not the parchment, and press or roll it into a 10 inch by 15 inch rectangle. Mark the dough lengthwise into thirds by pressing a ruler into the dough. Spread the cream cheese mixture onto the middle third, leaving about an inch uncovered at the top and the bottom. Spread the lemon curd on top of the cream cheese mixture. Top with the blackberries.

Cut the outer sides into strips. Cut off the strips from the four “corners” of the dough, leaving a flap at the top and bottom. Fold up the bottom flap and fold the strips over the filling alternating in a braid pattern. Fold the flap over the top before finishing the braid. Cover loosely with oiled plastic wrap.
Preheat the oven to 360 degrees F.


Let the dough rise for about 45 minutes. When the dough is ready, brush it with the egg wash and sprinkle it with the sugar. Bake for 25 to 30 minutes until a deep golden brown. Cool on a cooling rack for at least 20 minutes. Slice and serve.

ENJOY!

to print the recipe, click here

Comments: Make sure to stop by Karen’s post because her pictures and explanations are very detailed and will help you with the shaping. The dough is a pleasure to work with, as enriched doughs always seem to be. You can make the filling while the dough rises, and use store-bought lemon curd to make your life easier. Next time I will add more blackberries, I was afraid they would contribute too much moisture and leak too much, but that was not the case.

This basic method can be used for savory breads, or use different sweet fillings. Karen has a lot of suggestions in her article, so pay her a visit.

ONE YEAR AGO: Bulgur-Pork Tomatillo Platter

TWO YEARS AGO: Baking through the blogosphere

THREE YEARS AGO: Chickpea Burgers, Vegan and Delicious

FOUR YEARS AGO: Macarons with Ganache Noisette

FIVE YEARS AGO: Quiche with Asparagus and Fennel

SIX YEARS AGO: Fakebouleh

SEVEN YEARS AGO: Yellow Squash Soup

EIGHT YEARS AGO: Grilled Chicken with Tamarind and Coconut Glaze

NINE YEARS AGO: Chicken-Apricot Skewers

TEN YEARS AGO:  Asparagus Quiche

ELEVEN YEARS AGO: Two-stage Pea and Prosciutto Risotto

TWELVE YEARS AGO: Mellow Bakers: Corn Bread

AIR-FRIED CAULIFLOWER WITH POMEGRANATE SEEDS AND TAHINI SAUCE

This is a winning combination that I urge you to try whenever you find fresh pomegranates to play with. In our neck of the woods, it’s not always available. I prefer to buy the pomegranate seeds in those little jars because I am not too fond of the work needed to extract them from the fruit. Yes, I am familiar with all the tricks, but in this particular case, I opt for the easy way out.

AIR-FRIED CAULIFLOWER WITH POMEGRANATE SEEDS AND TAHINI SAUCE
(from the Bewitching Kitchen)

for the cauliflower:
1 head of cauliflower, florets only
1 tablespoon grapeseed oil
1/2 tsp smoked paprika
salt to taste
pomegranate seeds

for the tahini sauce:
1/2 cup tahini
juice of 1 lemon
1/4 tsp salt
1/4 tsp pepper
1 cup water to adjust consistency (you may need less)

Coat the cauliflower florets with the oil, season with smoked paprika, salt and pepper. Place in the air-fryer at 390F or as high as your fryer goes. Cook the florets until they start to get brown at the edges, shaking the basket every once in a while. While the cauliflower fries, make the sauce.

Mix all ingredients for the sauce (except the water) in a food processor and process until smooth. It will be very thick. Slowly add the water, until you get to the consistency you like.

Transfer the cauliflower to a serving platter, drizzle the sauce all over and sprinkle pomegranate seeds, as many as your heart desires.

ENJOY!

to print the recipe, click here

Comments: I adore cauliflower and I am crazy for tahini. It was odd that it took me so long to put both together. If you don’t have pomegranate seeds, kalamata olives will work well for the contrast of color and that sharp flavor. A shower of black sesame or Nigella seeds could be great too. Anything to give some contrast to the cauliflower-sauce duet. Because our air-fryer is small, when I made this recipe there were no leftovers. Actually I did have extra sauce that was drizzled on all sorts of goodies for a couple of days. If you want to make this dish for company (or if you do not own an air-fryer), go for oven-roasting, 425F works like a charm. It just takes longer and the texture won’t be as crispy.

ONE YEAR AGO: Pistachio-Rose Donuts

TWO YEARS AGO: Smoked Chocolate Macarons

THREE YEARS AGO: Chocolate Celebration Cake

FOUR YEARS AGO: Incredibly Simple Times Four, May 2018

FIVE YEARS AGO: Tangential Quiche with Asparagus and Fennel

SIX YEARS AGO: Fakebouleh

SEVEN YEARS AGO: Yellow Squash Soup

EIGHT YEARS AGO: Grilled Chicken with Tamarind and Coconut Glaze

NINE YEARS AGO: Chicken-Apricot Skewers

TEN YEARS AGO:  Asparagus Quiche

ELEVEN YEARS AGO: Two-stage Pea and Prosciutto Risotto

TWELVE YEARS AGO: Mellow Bakers: Corn Bread

TURKEY TACO SALAD BOWL

I had no intention of blogging on this recipe because it sounded like a simple dinner that would be ok but nothing to write home about. That all changed with the first bite. It is undoubtedly the cilantro sauce that makes it special. Of course, if you are a cilantro-hater, this is not for you. The sauce is cilantro on steroids. We loved it. In fact, the husband exact words were “I hope you’ll make this sauce whenever we cook Mexican-anything.” There you go. Cannot get much better praise than that.

TURKEY TACO SALAD BOWL
(inspired by Averie Cooks)

4 large tortillas (I used Carb Balance flour tortillas)
a few tablespoons of vegetable oil
oven safe bowls to bake tortillas

for the Cilantro Lime Dressing:
1 bunch fresh cilantro, stems included (about 2 cups)
½ cup full-fat yogurt
¼ cup olive oil
½ teaspoon salt
½ teaspoon freshly ground black pepper
juice of 1 lime

for the salad:
1 pound lean ground turkey
1 tablespoon taco seasoning mix|
salt to taste
1 cup corn kernels (I used frozen, defrosted)
Romaine lettuce, shredded lettuce
1 cup diced tomatoes
1 cup canned black beans, drained and rinsed
1 avocado, sliced
Shredded Mexican cheese
salsa (I used tomatillo salsa)

Make the tortilla bows. Heat oven to 375F. Heat a little oil on a non-stick skillet, place the tortilla over the hot oil, when it starts to bubble, flip it over, heat for a few seconds, then place inside an oven-safe bowl. Bake for 15 minutes or until it gets crispy. You can do this in advance.

Make the dressing. Place the cilantro, yogurt, olive oil, salt, pepper and lime juice in a food processor and process until smooth. Reserve in the fridge until needed. You can also make the dressing hours or a day in advance.

Make the taco meat. Brown the ground turkey on hot oil, seasoned lightly with salt. Once the meat is getting some color, add the taco seasoning and 1/4 cup water. Simmer gently, cover the pan for 5 minutes, then uncover and let the water evaporate until it reaches the level you like for your salad.

To assemble the salad, add all different components inside the tortilla bowl, drizzle the cilantro dressing all over.

ENJOY!

to print the recipe, click here

Comments: I used a Mission carb-balance tortilla, and it works but it’s definitely not the best kind to make a bowl, so keep that in mind. I only have two oven-safe bowls that are the perfect size to shape them, so we enjoyed some of the salad in the bowl, and either moved on to a regular tortilla (the husband), or the salad by itself (yours truly).

If you only have one or two oven-safe bowls, you can bake one at a time, and save them, heat them all up in the oven for a few minutes before serving. I used frozen corn, and sautéed lightly in olive oil, with salt, pepper and cumin. Pretty much anything that sounds good to add to a taco salad will work here. Black olives, roasted red peppers. Just have fun with it, but whatever you do, do not skip the cilantro sauce!

ONE YEAR AGO: Turkey Jalapeño Meatballs

TWO YEARS AGO: Whole Chicken Sous-Vide

THREE YEARS AGO: Incredibly Simple Times Four, May 2019

FOUR YEAR AGO: French Style Baguettes

FIVE YEARS AGO: Sad Times

SIX YEARS AGO: Slow-Cooker Carnitas Lettuce Wraps and Paleo Planet Review

SEVEN YEARS AGO: The Making of a Nobel Reception

EIGHT YEARS AGO: Fennel Soup with Almonds and Mint 

NINE YEARS AGO: Green Curry Pork Tenderloin

TEN YEARS AGO: Farfalle with Zucchini and Ricotta

ELEVEN YEARS AGO: Slow-baked Salmon with Lemon and Thyme

TWELVE YEARS AGO: Hoisin Explosion Chicken