A YUMMY BRAZILIAN CAKE: BOLO DE FUBA’

I often say that I don’t care  much for sweets, and visitors to the Bewitching likely realize that for me, savory stuff tops the sweets by a long, long margin.  But,  for many years I heard comments about my youngest niece’s cake skills (a gene that must have skipped my generation!), and now, finally, I had a chance to savor one of her specialties: a traditional Brazilian cornmeal cake, called “bolo de fuba’.”  Her recipe has two interesting additions:  a farmer’s type cheese and shredded coconut.  Together, they produce a cake that´s moist, with just the right sweetness.  If I had to describe it in a single word, that word would be irresistible.

RAQUEL’s BRAZILIAN CORNMEAL CAKE
(adapted from Na Cozinha com Carolina)

a little butter and flour to prepare the pan
4 eggs
3 cups of milk
1 + ½ cups sugar
2 Tbs butter
2 Tbs flour
1 cup cornmeal
100 g (4 oz) sweetened, shredded coconut
1 cup farmers type fresh cheese, coarsely grated
1 Tbs baking powder

Heat the oven to 350F. Prepare a round, medium size, ring cake type pan by buttering the inside and adding a small amount of flour, tapping off the excess.

Add all ingredients to a blender and mix until they form a smooth batter. Pour the batter into the prepared pan, and bake for 45 to 50 minutes, until a cake tester or toothpick comes out clean.

Let the cake cool for 10 to 15 minutes before unmolding. Serve it warm or cold.  

ENJOY!

to print the recipe, click here

Comments:  Bolo de fuba´ originates in Africa, in fact the name fubá  means flour in kimbundu (spoken in Angola),  but in Brazil it is used exclusively for what in the US is known as cornmeal.  The Portuguese, main colonizers of Brazil, expanded the use of cormeal into all kinds of sweet and savory concoctions, including breads, as their famous “broa.” 

Bolo de fuba´ is the type of cake one would expect to be served with a nice cup of coffee or tea in the middle of the afternoon, or at breakfast to start the day on a good vibe.  As you can see from the photo below, this cake bakes in three distinct layers, a cornmeal cakey component on top, a creamy center, and the coconut flakes in the base.

Raquel´s version is the best I´ve ever had, making me lose all my composure and restraint, going back for another tiny sliver, and another, and another, until she could not take it anymore and said “why don´t you just cut a real slice and get it over with?”   Wisdom comes in many forms.  Lesson learned. 😉

ONE YEAR AGO:  Hidden Treasure

TWO YEARS AGO: Avocado Three Ways

Add to FacebookAdd to DiggAdd to Del.icio.usAdd to StumbleuponAdd to RedditAdd to BlinklistAdd to TwitterAdd to TechnoratiAdd to Yahoo BuzzAdd to Newsvine

HEADED TO BRAZIL!

A quick announcement, today we jump on a jet plane once more, and head to Brazil, to see family and friends.   The Bewitching should go on, depending on internet connections, but we’ll be back to our regular spot on this beautiful planet on the 15th.


GRILLING TOMATOES

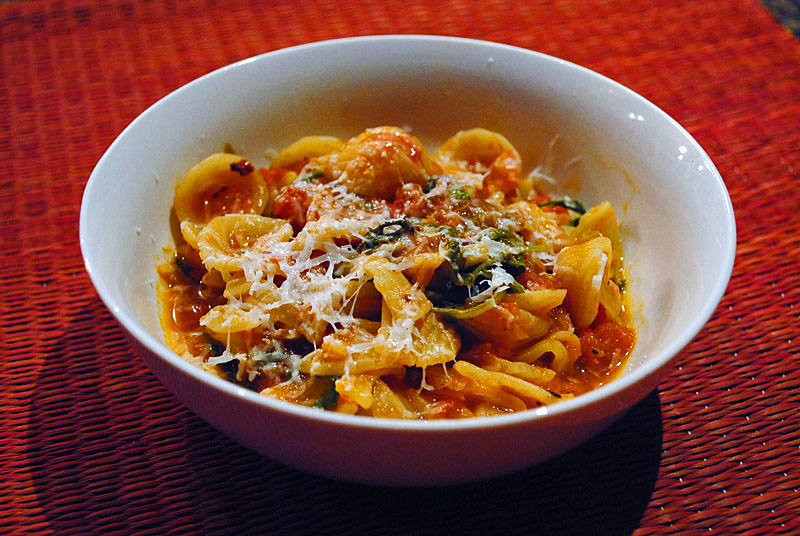
Our friends and neighbors who are also ultra-prolific gardeners went away on a trip and gave us a load of tomatoes before their departure. Some were big, heavy, and seemed very juicy, others were on a smallish side. I wanted to do something special with our gift, and went on a road never traveled before by making a grilled tomato sauce.  A final touch was wilting some arugula in it.  I will be traveling around this road on a regular basis from now on, this was a tasty sauce, and so simple to put together!


ORECHIETTE WITH GRILLED TOMATO SAUCE AND ARUGULA

(from the Bewitching Kitchen)

8 to 10 tomatoes, preferably from a friend’s garden
a little olive oil
salt and pepper
1 shallot, finely diced
2 cups of arugula
Orechiette pasta
Parmigiano Reggiano cheese, grated

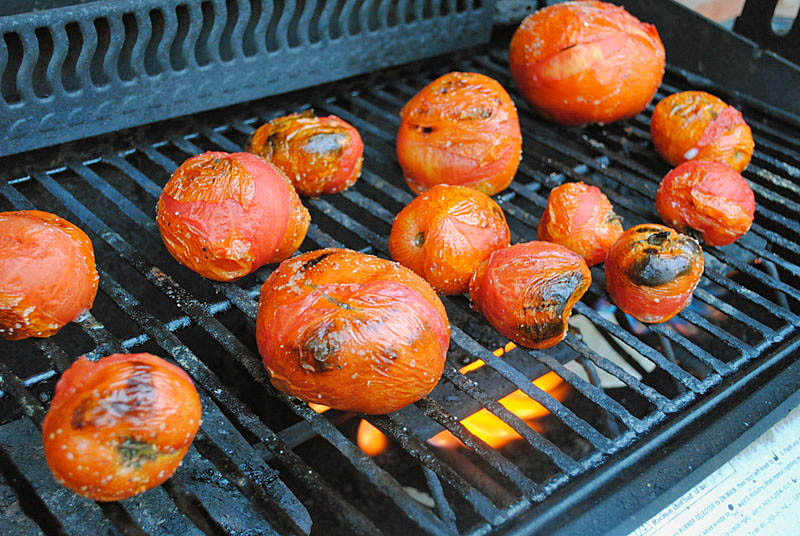
Rub the tomatoes with a little olive oil, sprinkle salt and pepper, and place on a hot grill until the skin gets nicely charred. Turn them every few minutes to get grill marks on all sides.   Different sizes of tomatoes will be ready at different times (obviously), so remove them from the grill accordingly.  Take the stem and central core out, place the flesh, skin, and seeds in a food processor and process until smooth, or retaining some chunks, if you prefer.

Saute the diced shallot in olive oil with a little salt and pepper until golden.  Add the processed tomatoes, and cook for 5 to 10 minutes, until it gets the consistency  you like.  Season with more salt and pepper if needed, and in the final couple of minutes add the arugula, cooking gently until it wilts.

Meanwhile, cook the orechiette pasta according to the package instructions, drain, and mix with the sauce, warming everything together for a few minutes.  Add to a serving bowl, and shave some Parmigiano on top.

ENJOY!

to print the recipe, click here

Comments: All modesty aside, this sauce was a perfect use for tomatoes that were not uniform in size and type, all I had to do was pay attention to the grill and remove each one as they got done. Grilled tomato sauce would work well on many venues: as a topping for pizza, bruschetta, over a mild, grilled fish, or as a basis for pasta sauces with different herbs and/or greens.   Not bad as a starting point for soup, I suppose, although the idea of soup with the heat wave we are having is not very appealing.  I never quite got the taste for cold soups, maybe next year I’ll explore that untraveled road.  😉

ONE YEAR AGO Twice-baked goat cheese souffles

TWO YEARS AGO:  Hearts of Palm Pie

Add to FacebookAdd to DiggAdd to Del.icio.usAdd to StumbleuponAdd to RedditAdd to BlinklistAdd to TwitterAdd to TechnoratiAdd to Yahoo BuzzAdd to Newsvine

SALMON TACOS

I’ve always twisted my nose at seafood tacos, considering them an abnormality of the gastronomic world.  But,  life has its own way of teaching important lessons and during our stay in Los Angeles, we sampled some fish tacos that made me reconsider my opinions. What can I say? I loved them, as well as the particularly incredible array of tasty salsas that place has to offer.

Since we came back, I wanted to make some type of fish tacos at home, and this recipe that I adapted from Food and Wine magazine was a perfect starting point.
CHIPOTLE-RUBBED SALMON TACOS
(adapted from Food and Wine)

2 tablespoons yogurt
1 teaspoon fresh lime juice
2 teaspoons chipotle chile powder
2 teaspoons finely grated orange zest
2 teaspoons sugar
1 pound skinless wild Alaskan salmon fillet, cut into 4 pieces
1 tablespoon plus 1 teaspoon extra-virgin olive oil
8 corn tortillas
Salt
1 Hass avocado, mashed with a squeeze of lime juice
salt and pepper
1 cup finelly shredded cabbage

for salsa:
1 Granny Smith apple, cut into 1/4-inch dice
1/2 English cucumber, cut into 1/4-inch dice
1 ripe tomato, cut into 1/4-inch dice
1/2 small red bell pepper, cut into 1/4-inch dice
1/2 small red onion, finely diced (optional)
1 + 1/2 tablespoons white wine vinegar
1 + ½  teaspoons sugar
salt to taste

Prepare the salsa by mixing in a bowl the apple, cucumber, tomato, bell pepper, and onion (if using).  Add the vinegar and sugar, season with salt, and reserve.  It can be prepared hours in advance to intensify the flavors.

In a small bowl, mix the yogurt with the lime juice, season with salt and pepper and reserve. In another small bowl, combine the chipotle powder with the orange zest and sugar. Rub each piece of salmon with 1 teaspoon of the olive oil and then with the chipotle–orange zest mixture. Let stand for 5 minutes.

Heat the tortillas either in a low oven, wrapped in foil, or on top of a flame (my method of choice), until they are softened and heated through.

Meanwhile, heat a grill pan. Season the salmon with salt and grill over high heat until nicely browned and just cooked through, about 3 minutes per side.
Gently break each piece of salmon in half. Spread the mashed avocado on the warm tortillas and top with the salmon, Apple-Cucumber Salsa and the cabbage. Drizzle each taco with the lime yogurt and serve right away.

ENJOY!

to print the recipe, click here

Comments:  This simple recipe is like a symphony of flavors – the salsa has it all: spicy, hot, sweet, the green apple is the key ingredient.  As to the cabbage, I’ve got a tip for you. If you love it in its raw state but the crunch factor seems a bit excessive,  put the shredded/julienned cabbage in a small bowl, add very hot or boiling water to cover, count to 5 seconds and quickly drain it, rinsing it with plenty of cold water.  This simple step softens it just enough, but won’t cook it. Perfect texture to top your tacos.

This type of meal is a favorite of ours: all the ingredients spread on the kitchen island, and we can enjoy them whichever way we like, very relaxed, very Summerish!
I sometimes go for a tortilla-less version, lighter but just as flavorful….

….but it’s nice to go for the full treatment with a bit of rice to round the meal

Whatever your preference, this meal is a winner!  If you are not sold on the idea of a fish taco, please, try this one, you will be very pleasantly surprised.

ONE YEAR AGO: Cinnamon-Turban Bread

TWO YEARS AGO: Summertime Gratin

Add to FacebookAdd to DiggAdd to Del.icio.usAdd to StumbleuponAdd to RedditAdd to BlinklistAdd to TwitterAdd to TechnoratiAdd to Yahoo BuzzAdd to Newsvine

A TALE OF TWO CRUMPETS

I’ve wanted to make crumpets from scratch for the longest time! I love the fact that they are full of tiny holes, smoother and creamier than regular bread, perfect to slather with butter or jam, or top with a poached egg and indulge…   Recently  I took a major step in the right direction, by getting crumpet rings (remember?).  And tried not one, but two recipes, one leavened by sourdough starter, and the second a more authentic version, with commercial yeast and baking soda.  Both methods produced completely different types of crumpets, and I favored the non-sourdough version.  I know, who could imagine that?   😉
                                                      (click to enlarge)

TRADITIONAL CRUMPETS
(From Andy’s blog at The Fresh Loaf forum)

250 g bread flour
5 g salt
15 g yeast
275 g water
0.75 g bicarbonate of soda
70 g water

Add the flour and the salt to the bowl of an electric mixer, and mix on first speed for a minute.  Dissolve the yeast in lukewarm water.  Combine the yeast with the flour/salt and beat on first speed for 2 minutes.  Scrape the bottom and the sides of the bowl, and beat on second speed for 6 minutes.   Cover the bowl and let it sit on a warm place for 1 hour.

Heat a griddle to 390F (200 C).  Dissolve the bicarbonate in the cold water and mix this solution to the batter.  Use right away, pouring a small amount of batter in well greased crumpet rings.   Cook for about 8 minutes on the first side, until bubbles form and the batter seems almost dry on top.   Remove the rings – carefully, they are hot! – and flip the crumpets, cooking for no more than 2 minutes on the second side.   Cool on a rack, and enjoy!

to print the recipe, click here

SOURDOUGH CRUMPETS
(from The Sourdough Companion)

Preferment
125 g all purpose flour
175 g water
12.5 g sourdough starter

Batter
125 g all purpose flour
175 g milk
300 g preferment (all the amount made)
5 g salt
5 g bicarbonate of soda

Make the preferment and let it sit at room temperature for 12 to 24 hours.

Next day, mix all the ingredients for the batter, and let if sit for 4 hours undisturbed at room temperature.  Heat a griddle to 390 F (200 C).  Pour small amounts of the batter in greased crumpet rings, and cook for 8 minutes on the first side, remove the rings carefully, and flip them to cook on the second side for a couple of minutes.  Cool on a rack, and enjoy…

to print the recipe, click here

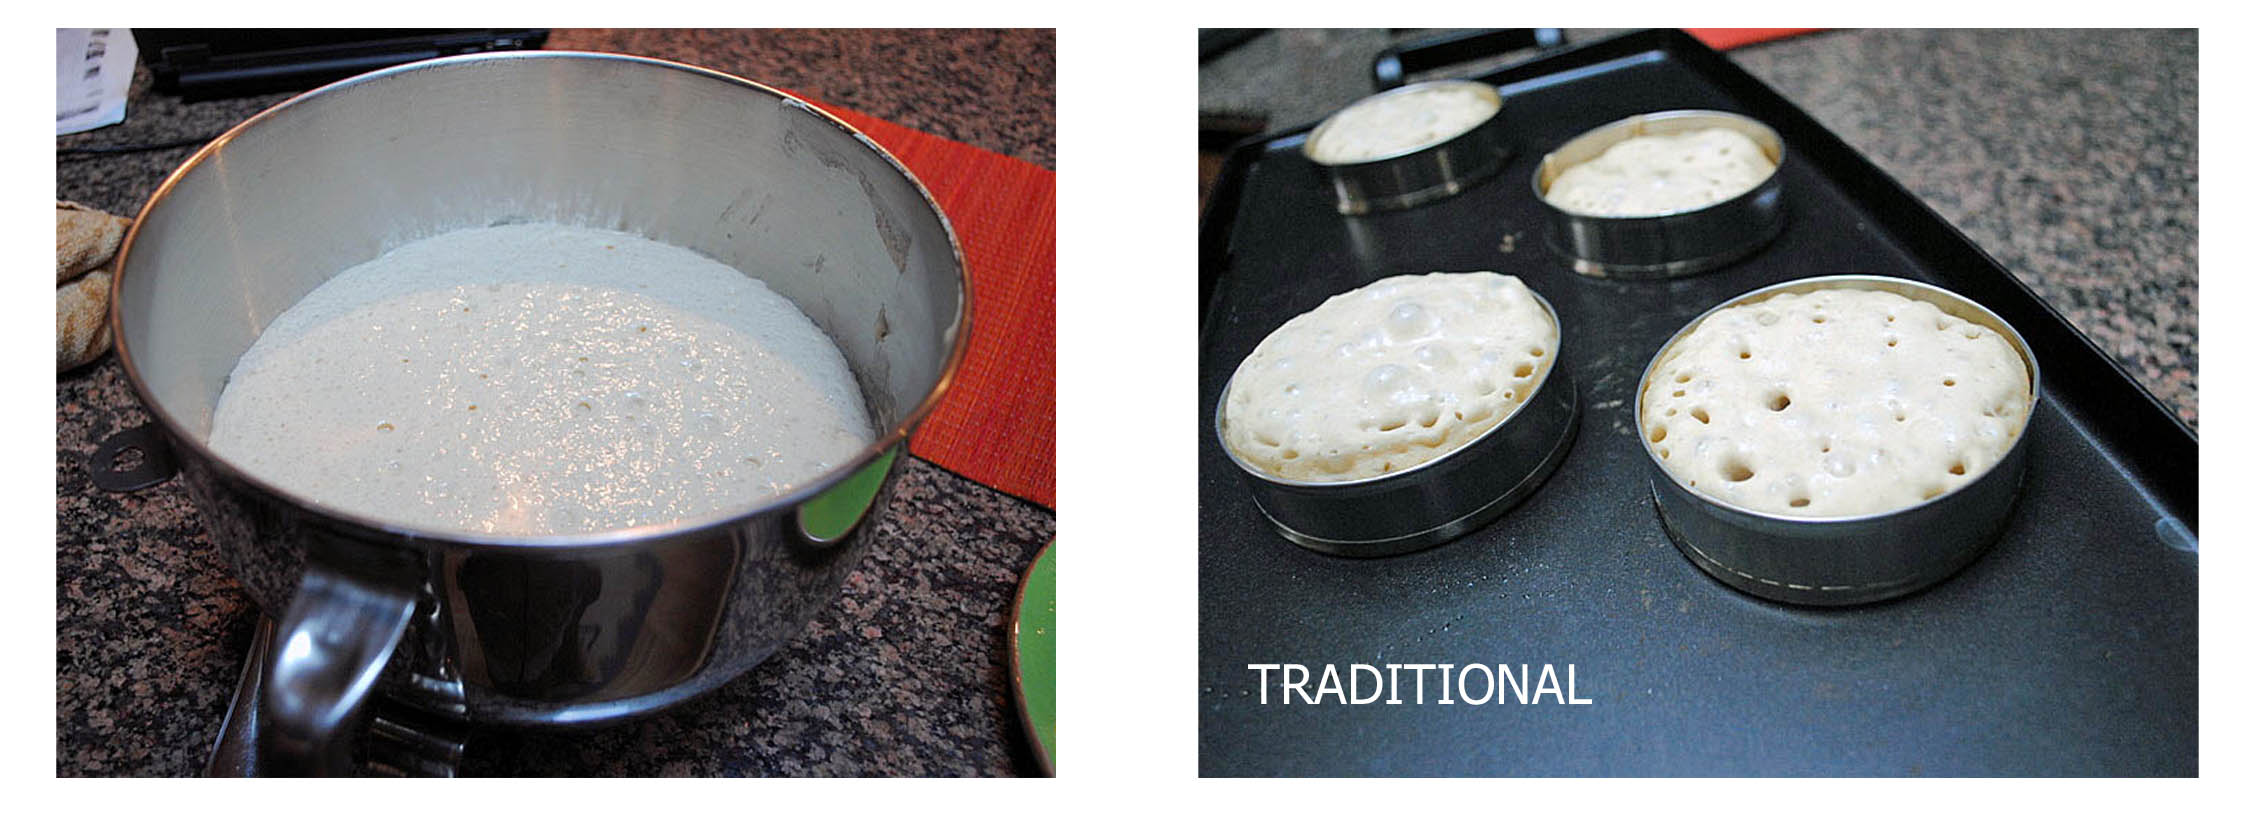
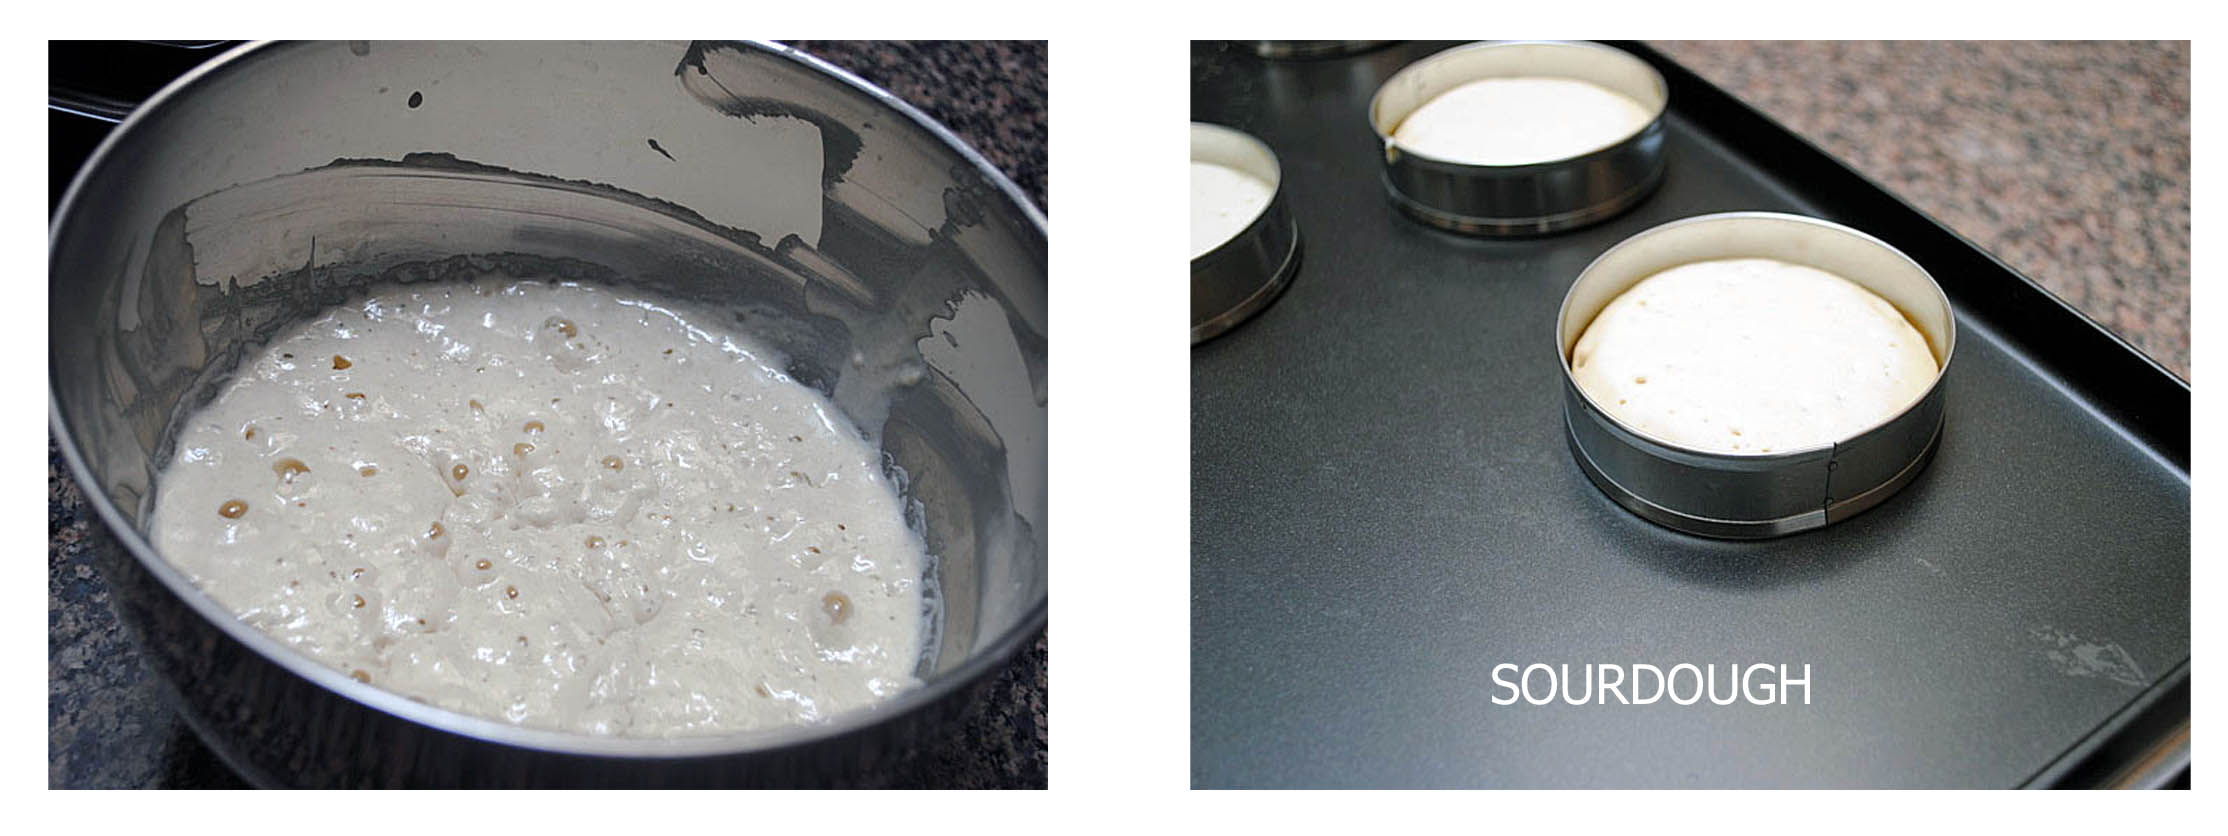
Comments:  Both recipes are pretty straightforward, with little hands-on time required. The traditional method allows you to have crumpets ready in about 1.5 hours, versus a little over 4 hours for the sourdough variation (not counting the pre-ferment prepared the day before).   The next sets of photos give you an idea of how different the batters looked right before cooking, and how the authentic version gave a more hole-y texture in the crumpets already during cooking.

A few pointers for success:

1. Do not fill the rings more than halfway, because if you do, the holes will close when you flip the crumpets.  It is tempting to add more batter, but resist the urge to do so.  Also, it will be harder to cook them through if they are too thick.

2. Do not cook them on a griddle that is too hot, or you will have a hard crust at the bottom and the crumpets won’t cook uniformly. Better to keep a lower temperature and cook longer.

3. Do not cook the second side longer than 2 minutes, or you might end up with an English muffin!   😉

4. Grease the rings again for each batch of crumpets, so that they are easily removed.  Crumpets are fragile, if they stick to the ring their shape can be compromised.

5. The rings are hot, and stay hot for a while once you remove them from the griddle.  It is easy to forget about it as the second batch gets going (sigh).

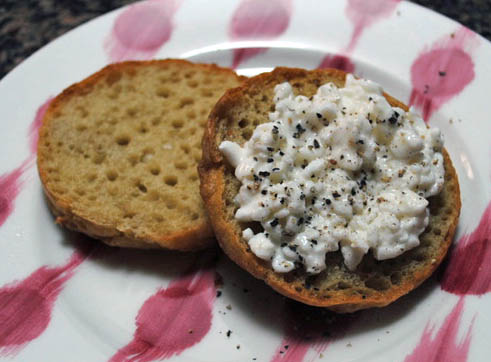
In my second attempt – the traditional recipe – things worked a lot better, and even the crumpets that were a bit too thick and “lost the holes” on the surface after flipping, revealed a wonderful crumb structure…

You don’t need rings to cook English muffins because they hold their shape well, but they are a must-have for crumpets.  You can of course improvise using empty, clean cans of appropriate diameter.  This would be a fun weekend project, kids would love to help you out…

I am submitting this post to Susan’s Yeastspotting

ONE YEAR AGO: Sweet Emergency

TWO YEARS AGO: The Bread We Love

Add to FacebookAdd to DiggAdd to Del.icio.usAdd to StumbleuponAdd to RedditAdd to BlinklistAdd to TwitterAdd to TechnoratiAdd to Yahoo BuzzAdd to Newsvine