A match made in heaven and materialized in the Bewitching Kitchen! We were lucky to get a huge bag of fresh dill from a departmental colleague and I had some feta cheese hanging in the fridge. One thing led to another and here we are!

FRESH DILL AND FETA SOURDOUGH
(from the Bewitching Kitchen)
475g white bread flour
25g whole-wheat flour
9g salt
350g water
65g sourdough starter at 100% hydration
2 tablespoons fresh dill, minced (or amount to taste)
50-100g feta cheese, crumbled
Make the levain mixture about 6 hours before you plan to mix the dough. It should be very bubbly and active.
When you are ready to make the final dough, place the water in the bowl of a KitchenAid type mixer and dissolve the starter in it, mixing with a spatula briefly, then add the two types of flour, and the salt. Turn the mixer on with the hook attachment and knead the dough for 3 minutes at low-speed all the time. Add the dill, knead for another minute to incorporate. If the dough is too sticky, add 1/4 cup flour, you want the dough to start clearing the sides of the bowl, but still be sticky at the bottom.
Remove from the machine, and transfer to a container lightly coated with oil, add the feta and gently mix it in. Don’t worry about incorporating it, it will all go into the dough as you fold it. Cover lightly with plastic wrap and allow it to ferment for 4 hours, folding every 45 minutes or so. After four hours bulk fermentation, shape the dough as a ball, and place, seam side up, in a lightly floured banetton. Leave at room temperature one hour, and then place in the fridge overnight, from 8 to 12 hours.
Next morning, heat the oven to 450F. Invert the dough over parchment paper, rub gently tapioca flour on the surface. Score with the pattern of your choice and bake at 450F for 45 minutes, preferably covered for the first 30 minutes to retain steam. Cool completely over a rack before slicing.
ENJOY!
to print the recipe, click here

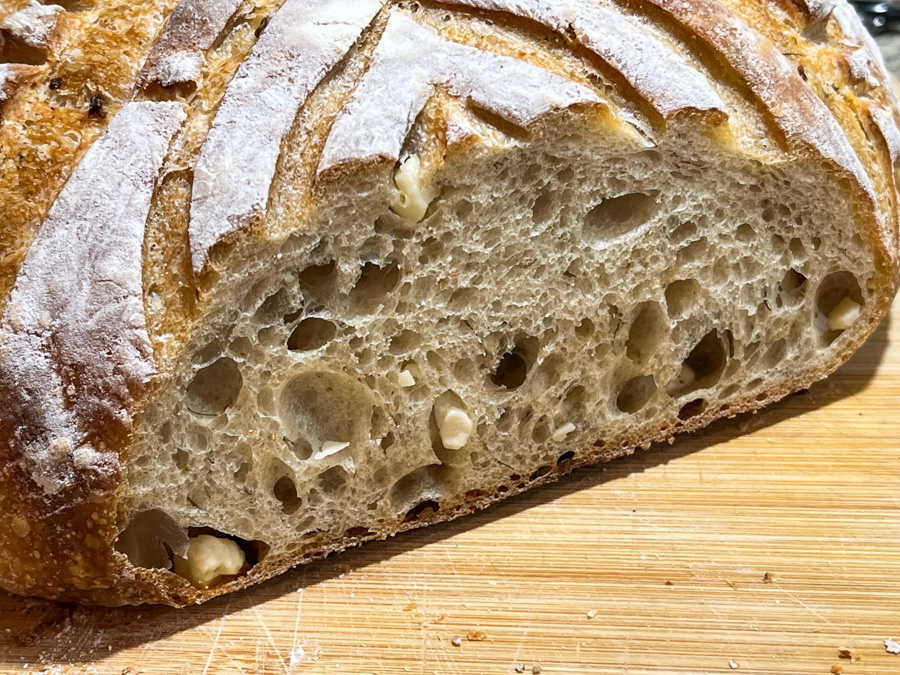
Comments: For the scoring of the surface I used a combination of razor blade and scissors. The bread had impressive oven spring, but I liked the way the design ended up. As to the flavor, I noticed that the dill came through stronger on the second day of the loaf sitting at room temperature. Usually in the evening of day #2 we slice what is left and freeze for later, so that’s what we did.

Really nice to bite into a little piece of feta cheese…..
ONE YEAR AGO: Marinated Chickpeas with Slow-Roasted Red Peppers
TWO YEARS AGO: Passionfruit Millionaire’s Shortbread
THREE YEARS AGO: Chai-Mango Rosette Macarons
FOUR YEARS AGO: Common Table, Something New in My Life
FIVE YEARS AGO: The Daisy, a Bread with Brioche Alter-Ego
SIX YEARS AGO: Pork Tenderloin, Braciole Style
SEVEN YEARS AGO: Raspberry Buckle
EIGHT YEARS AGO: Seafood Gratin for a Special Dinner
NINE YEARS AGO: Cooking Sous-Vide: Sweet and Spicy Asian Pork Loin
TEN YEARS AGO: Farewell to a Bewitching Kitchen
ELEVEN YEARS AGO: In My Kitchen. June 2012
TWELVE YEARS AGO: Goodbye L.A.
THIRTEEN YEARS AGO: 7-6-5 Pork Tenderloin