Once again I decided to push a little the limits of my comfort zone. Actually, let me rephrase that. With this project I threw caution to the wind and walked through pretty treacherous baking neighborhoods. When you buy a Silikomart Vague mold because you are mesmerized by its looks but have no idea what to use it for, you are in for a wild ride. It’s not as if you could order a cookbook called “Silikomart 101.” In fact, it’s hard to find even blog posts to help you out. Lots of amazing concoctions pop up in Pinterest, but instead of recipes they direct you to fancy patisserie pages in Paris, Rome, Prague. No help whatsoever to make them materialize in your own kitchen. Through some google-overwork, I finally saw a little light at the end of the tunnel through an Italian blog hosted by Vanessa (Tra Zucchero e Vaniglia = Between Sugar and Vanilla). Thanks to my limited ability to read the language and the help of google translate to fill in the blanks, I managed to put my beautiful mold to use. With this project, I also tried for the very first time an amazing technique: chocolate spraying with a paint gun. I know. I am gone. Beyond recovery. But… can we still be friends?
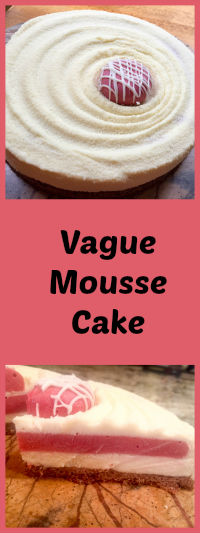
VAGUE MOUSSE CAKE
(inspired by Tra Zucchero e Vaniglia blog)
For the cookie base:
40 g all-purpose flour
3 tbsp (25 g) almond flour
¼ cup (25 g) hazelnut flour
1 tsp unsweetened cocoa powder, sifted
50 g unsalted butter, room temperature
50 g light brown sugar
In a large mixing bowl, whisk the all-purpose, almond, and hazelnut flours and the cocoa powder. In a separate bowl, combine the butter and brown sugar, then incorporate the flour mixture. Refrigerate for at least 1 hour.
Heat the oven to 300°F. Line a baking sheet with parchment paper. Evenly spread the dough about ⅛ in thick onto the prepared baking sheet (the batter should be slightly larger than the cake ring that will be used for assembly). Bake for 12 to 15 minutes. Cool completely. Reserve.
for the creamy raspberry insert:
75 g sugar
190 g raspberry pulp (passed through a sieve to remove seeds)
100 g whole eggs (about 2, lightly beaten)
2.5 g gelatine in sheets
65 g butter
Coat a baking sheet with a silicone mat or parchment paper and place on it a 7-inch diameter flan or cake ring, preferably with a sheet of acetate lining it. On another baking sheet, place a Silikomart globe mold (optional).
Soak gelatine in cold water. Put the beaten eggs, the granulated sugar and the fruit pulp in a glass bowl. Bring the mixture to 180 ° F in microwave at maximum power, measuring the temperature after 50 seconds. Continue to measure it every 30 seconds (it will take over 2 minutes to get there, depending on the power of your microwave).
Once the indicated temperature has been reached, add the gelatine and mix well to dissolve it completely. Cool to about 105 to 110 F and add the butter, emulsifying with an immersion blender. Pour the cream into the previously prepared steel circle until it also fills one of the globe mold cavities . Freeze for several hours or overnight.
for the white chocolate mousse
creme anglaise component (makes more than you’ll need):
175 g fresh cream
75 g fresh milk
55 g egg yolks
32 g sugar
1/4 tsp vanilla extract
Heat the milk and cream in a small saucepan until it starts to boil. Meanwhile, with a whisk mix the egg yolks, vanilla extract and sugar, taking care to incorporate as little air as possible. Add a small amount of the hot milk mixture slowly to the egg yolks to temper it, then slowly add the rest and blend well. Cook until it reaches 170 F. Pass the cream through a sieve and transfer it into a cold container to stop cooking. If necessary, use an immersion blender to make it fully smooth. But if you are careful heating it gently and constantly stirring it, it should not need any further blending.
You will use 150 g of the creme anglaise for the white chocolate mousse, as follows.
for the white chocolate mousse:
150 g creme anglaise (made as described above)
250 white chocolate
225 g freshly whipped cream to soft peaks
2.5 g gelatin in sheets
Soak gelatin in cold water.
Chop the chocolate coarsely and melt it in the microwave with the defrost function or maximum power 500 W.
Warm up the creme anglaise to about 100 F. When the gelatin is soft, squeeze it to remove the water and add it to the creme anglaise. Mix gently to fully dissolve it. Pour the hot cream over the chocolate, wait a moment and mix well. Fold the whipped cream to the still warm mixture. Reserve.
for the chocolate spray:
300 g white chocolate
200 g cocoa butter
Melt together and place in sprayer at 90 F.
to decorate the globe insert: melted white chocolate
Assemble the dessert. Place the Vague mold on a baking sheet that will fit inside your freezer. Fill with the white chocolate mousse, making a thick layer at the bottom.
Remove the raspberry creamy disc from the steel ring, removing the acetate and place it in the middle of the mousse making it sink a little.
Cover with the remaining mousse and beat the pan gently on the countertop so as to bring out any air bubbles. Level the mixture with a spatula and transfer into the freezer for several hours, preferably overnight.
Once frozen, turn out the cake and spray it with the mixture of white chocolate-cocoa butter at 90 F. Make a light coating, otherwise the mixture might just slide off the surface instead of forming a nice velvet texture.
Place the mousse over the cookie base, decorate the globe insert with a drizzle of white chocolate and set it at the center of the cake.
Store in the fridge until ready to serve.
ENJOY!
to print the recipe, click here
Comments: I completely changed the cookie base, as Vanessa’s recipe had some unusual way to deal with it. In her method, you make a dough, cool it, grate it, and press it to make the base. I felt too insecure to give it a try, and also thought it was a bit too convoluted. Plus, I wasn’t sure it would result in the texture I wanted for the bottom layer of my cake. I opted for a chocolate sable instead. It is a nice dough to work with, and I love the texture. For this torte, you’ll need two Silikomart molds, the Vague and a small globe mode to make the center decorative piece that goes on top. You can definitely omit it and serve the mousse cake plain. But it does add a striking look to the dessert.
A few things I learned through pain and struggles. You can see in my picture above that I used a silicone cake pan to make the raspberry insert. I had a pretty tough time un-molding it. The sides are too high, the material a bit too flimsy, I thought the whole thing was going to be ruined. Luckily, just a few boo-boos on the surface, no major harm done. Note to self: invest in a flan ring for this type of adventure. With a 7-inch metal ring, you simply freeze it and pull it up, leaving the perfect layer of mousse behind. Lesson learned. You need the right tools for the job.
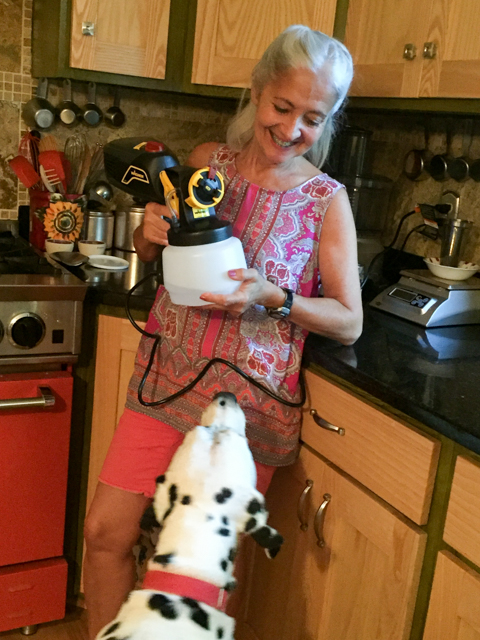
The overall scheme in this type of dessert goes like this: you make a cookie base, a creamy, frozen center insert with smaller dimension than the 8-inch full cake, and enough mousse to fill the mold, surrounding the insert. Once you have these three components, all that is left is to freeze it solid, un-mold and decorate the top. Chocolate spray is one cool method, as it gives a beautiful velvet texture. Contrary to fondant, it is a pleasure to eat. But no doubt, it is a very involved process. I used a Wagner sprayer that was a surprise gift from the saint I married. He actually tricked me. Asked me to go to Menard’s with him. Once we were there, he made a bee line to the paint section, next thing I knew, the box was in the shopping cart. He had even researched the model to get, as he knew I had been dreaming about spraying my world with chocolate. You knew already he is a keeper. This just confirms it… 
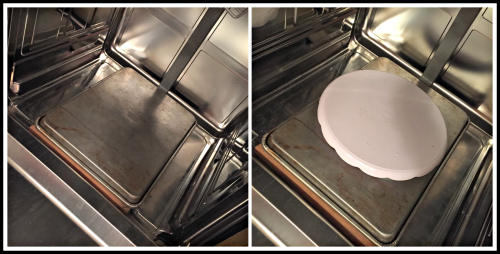
The velvet texture requires two things: the surface to be sprayed must be frozen, and the chocolate suspension must be at a maximum of 90 F, even a bit colder if possible. You need it to flow well, but to freeze immediately upon contact, forming the little velvety looking texture. Since the suspension needs to be passed through a fine sieve before going into the sprayer, things can cool down pretty fast. I decided to use my bread proofing box set at 98F to store the sprayer for 30 minutes or so. Then, I got the chocolate ready at the right temperature and worked as fast as I could to get the spray going. That brings another very important point: it is a very messy process. Very messy. People use all sorts of tricks to deal with it, usually doing it outside or in a garage with cardboard boxes forming a wall all around the piece to be decorated. But I found a tip that worked better than anything else: setting up the spraying unit inside the dishwasher! I just removed the racks, placed a baking sheet inverted on it, a plastic turntable to hold the cake, and that was absolutely perfect. All I had to do was run the dishwasher in the end.
I watched quite a few youtube videos on chocolate spraying to make sure I would have some chance of getting it right. One thing is certain: no matter how many videos you watch, how many detailed instructions you read, nothing prepares you for the real thing. It’s a wild experience. The sprayer works very efficiently but it is very hard to see what is happening because there is a haze of spray everywhere. It was also not very easy to turn the cake while spraying, the Wagner is not feather-light. Plus, my heart was beating at 120 bpm, maybe faster. To summarize, things got intense pretty quickly. Let me rephrase that also: Hell broke loose, big time. I hope the next adventure will be easier, though. At least I am confident that the set up I designed works well to keep the temperature in the correct range for a while, I won’t need to rush to get it done. Apart from a few problems here and there, I am reasonably happy with the way my first adventure with the Silikomart Vague turned out.
As far as taste is concerned, this was absolutely scrumptious! It is pretty hard to beat this trilogy: chocolate cookie, white chocolate mousse, and raspberry cream. They all go together like a dream…
Things to keep in mind for next time:
1. A little more gelatin in the mousse so that it will un-mold with a more defined surface.
2. Place the raspberry insert slightly more on the center of the dessert, so that it won’t be at all visible underneath the top mousse layer. In other words, add a bit more mousse inside the mold before setting the insert on top.
2. The cookie base could be rolled thinner, but opinions are divided on this issue. Phil thought it was perfect the way it was.
3. Be a bit more Zen with the spray paint gun. There’s really no need to scare three dogs and a husband into hiding. Even if your contact lenses fogged up with the spray, no amount of screaming will make them clear up. That is a fact you proved to yourself. Next time, keep calm, and spray on.
Make Sally and Bogey Quit That happy, grab a pin!
ONE YEAR AGO: Cottage Loaf, my very own technical challenge
TWO YEARS AGO: Pork Ribs: Sticky, Spicy and Awesome
THREE YEARS AGO: Sobering Peach Sorbet
FOUR YEARS AGO: Buttermilk-Blueberry Breakfast Cake
FIVE YEARS AGO: Silky Cauliflower Puree with Almond Milk
EIGHT YEARS AGO: Popeye-Pleasing Salad
.


