It’s shocking but we are arriving at the end of April. Hard not to use a beaten up expression like “time flies”. It simply does. But, birds are singing, owls are making a ton of noise in the middle of the night, sun is shinning, and I am a happy camper, having stored all my sweaters, coats, and boots far away from my sight. As usual, the last Monday of the month brings with it Reveal Day: a showcase of posts made by food bloggers who participate of The Secret Recipe Club, and are paired in secret. My assignment was the blog by Julie, Confessions of a Cooking Diva. Don’t you love that name? Made me wish I had named my blog The Drama Queen Cooks…. Tongue in cheek, of course. As regular readers know, I am a level-headed, composed, unflappable individual. Julie is originally from Idaho but lives in Utah with a cuddly cat and a basset hound, a type of dog I find very cool with its incredibly sharp sense of smell. Julie shares with me a deep fear of baking, but admits that nothing scares her more than spiders. I’d have to settle for cockroaches as my number one fear, but we are basically virtual sisters. I assembled quite a few recipes on my list of possibilities, like her One Pot Green Chile Mac & Cheese… her Caribbean Jerk Salmon Tacos… her Turkey Sausage….her Black Bean Burgers…. and her Apple-Pecan Cheesecake… But, my love for spices spoke loudly, so here I am to share with you an AMAZING recipe for cookies that marry a traditional gingersnap with chunks of white chocolate. Heaven. Pure heaven in cookie shape.
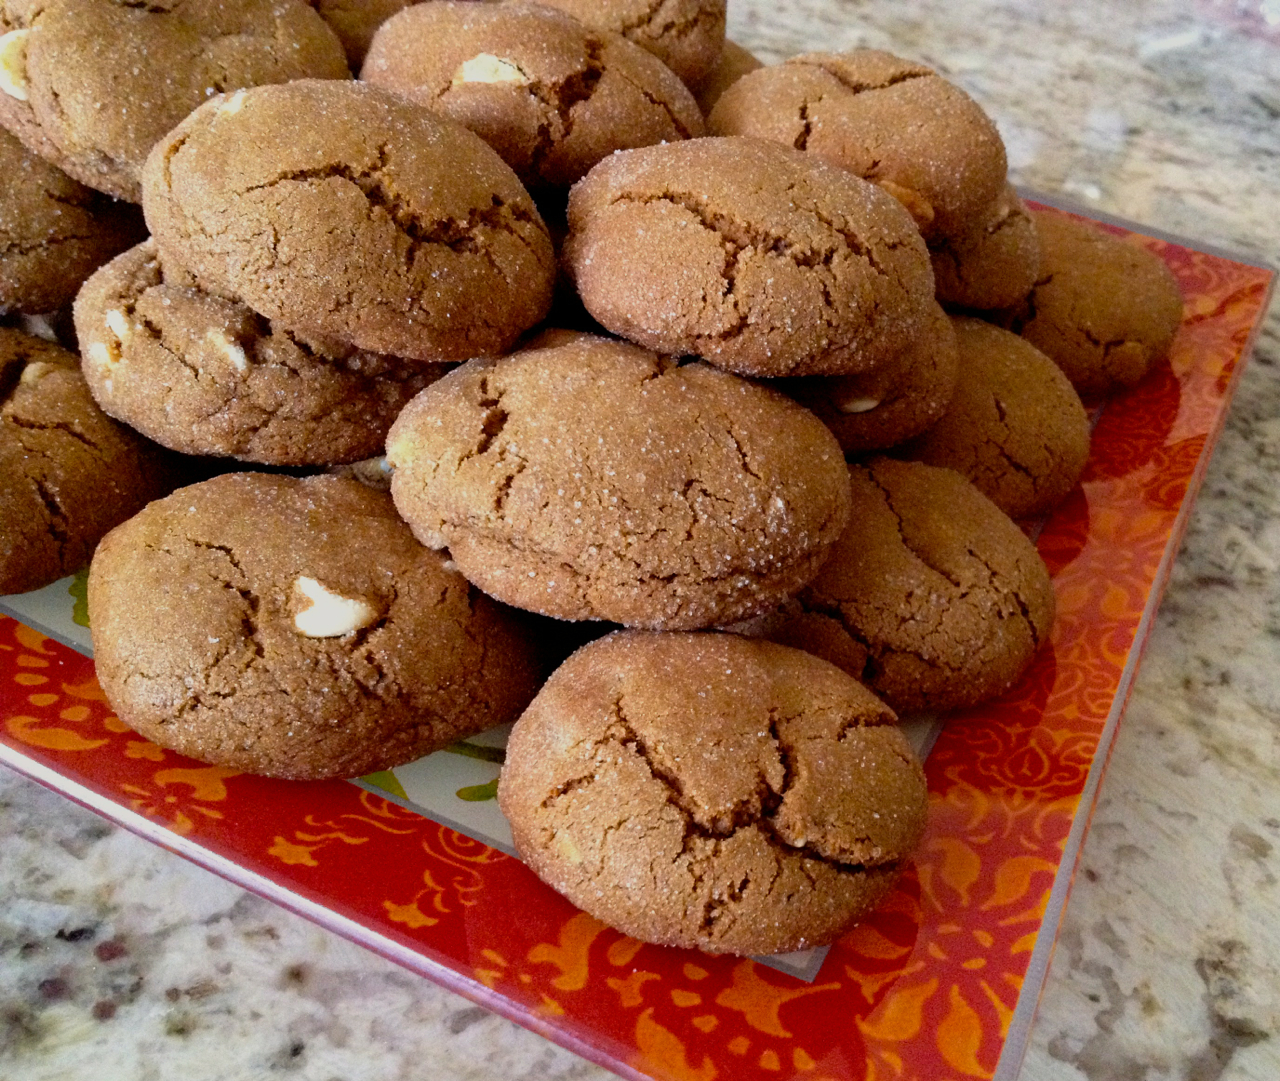
GINGERSNAPS WITH WHITE CHOCOLATE CHIPS
(from Confessions of a Cooking Diva)
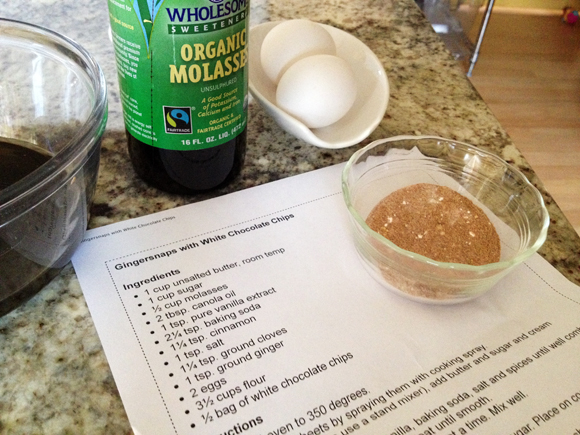
1 cup unsalted butter, room temp
1 cup sugar
1⁄2 cup molasses
2 tbsp. canola oil
1 tsp. pure vanilla extract
2 + 1⁄4 tsp. baking soda
1+1⁄4 tsp. cinnamon
1 tsp. salt
1+1⁄4 tsp. ground cloves
1 tsp. ground ginger
2 eggs
3+1⁄2 cups flour
1⁄2 bag of white chocolate chips (I used 3/4 bag)
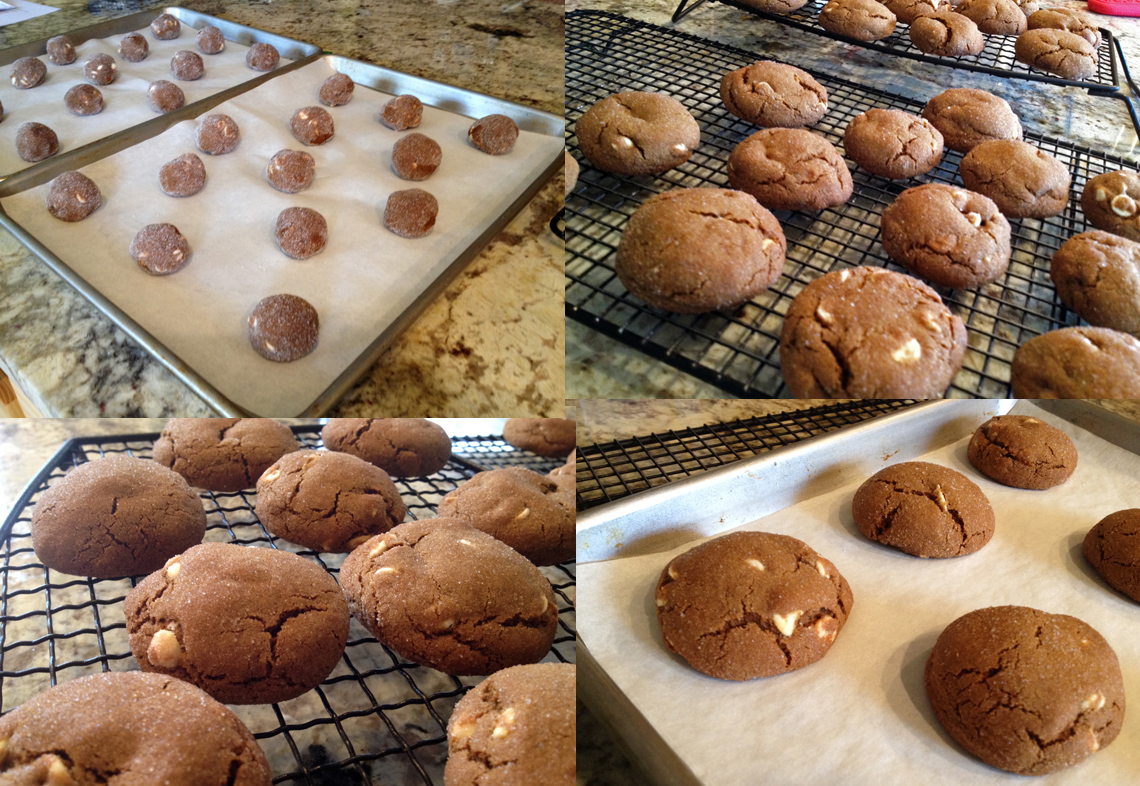
Heat oven to 350 degrees. Prepare baking sheets by spraying them with cooking spray or line them with parchment paper.
In a large bowl, cream butter and sugar together. Mix in the molasses, oil, vanilla, baking soda, salt and spices until well combined.
Add eggs, one at a time, and beat until smooth. Slowly add in the flour, half a cup at a time. Mix well. Stir in the white chocolate chips. Scoop the dough into balls and roll them in sugar. Place on cookie sheets about 2 inches apart.
Bake for 10 minutes. Then allow to cool on the cookie sheet for 5 minutes before removing and placing on a cooling rack.
ENJOY!
to print the recipe, click
Comments: Recently I read a book I’ve had for a long time but stayed sitting on a shelf, patiently waiting for me. It is called BOUCHON BAKERY, a masterpiece of a pastry book, written by Thomas Keller & Sébastien Rouxel. My only criticism is its coffee table format, not very user-friendly. But if you don’t mind that, it is well worth getting. The book goes well beyond recipes. In fact, it offers a deeper view of what it takes to start and maintain a bakery of the level of Bouchon. A lot of merit goes for the man in charge, Sébastien Rouxel, and his almost compulsive attention to detail. In Sébastien’s opinion, you cannot be a good pastry baker unless you are neat and organized, to the point that your bench is spotless clean at the end of the day, and as clean as humanly possible while you work. As he says, being neat and organized doesn’t start when you get to work, it starts when you wake up. That is quite a statement! So, let’s say that I was under the spell of the book when I worked on this assignment. My kitchen looked very professional, all ingredients lined up, detailed prep work. I am afraid it won’t last, but it felt great…
As to the cookies, they are FABULOUS. It is important not to over-bake them, so 10 to 11 minutes and you are done. I baked them mid-afternoon on a Sunday and took them to the department next morning. They were still soft, with a bit of moisture and chew, which is the way I like a cookie. If you prefer a more snappy creature, bake longer. The white chocolate goes very well with all those fragrant spices, that made our kitchen very inviting. Too inviting, maybe?

The ball can wait. I rather fetch a cookie!
Julie, it was nice to “meet” you through this month’s adventure, our students and colleagues in the department sure appreciate your recipe very much, and so did I! Have a great Reveal Day! And, if I may offer you a little gift, here it is. Print it and stick it on your fridge in case you need it.

As usual, my readers are all invited to dive into the collection of delicious recipes featured by my fellow virtual friends from Group D of The Secret Recipe Club by clicking on the cutest blue frog in the world, right at the end of the post.
ONE YEAR AGO: Turkey Chili with Almond Butter
TWO YEARS AGO: Secret Recipe Club: Leek and Cheese Tart
THREE YEARS AGO: Secret Recipe Club; Triple Chocolate Brownies
FOUR YEARS AGO: Shaved Asparagus Salad
FIVE YEARS AGO: Indonesian Ginger Chicken