MACARONS: MUCH BETTER WITH A FRIEND!

Making macarons has been on my list of culinary projects for a very long time! They are quite intimidating, because small details in the preparation can ruin them. Even experienced bakers often share stories involving feet-less macarons  (can you imagine the horror?), cracked macarons, and many other types of monstrosities. Even though I did not list cooking projects for 2014, I was set on not letting another year pass by without attempting them.  Then, the perfect opportunity shaped up: our friend Cindy came up for a visit with her husband, and we decided to tackle this challenge together.  We had so much fun, I highly recommend that you consider inviting a friend over and doing the same. I’d been collecting recipes, tips, advice, and after consulting with my expert patissier friend Gary, we focused our efforts in two sites: Gwen’s Kitchen Creations and Joanne’s Eats Well With Others. They both definitely know their ways around the tricky Parisian macarons.

FrenchMacarons

SNICKERDOODLE MACARONS
(adapted from Gwen & Joanne)

for the shells:
3 large egg whites, (95-100g), aged overnight
1/4 tsp cream of tartar
1/4 cup sugar (50g)
pinch of salt
2 cups powdered sugar (200g)
1 cup almond flour  (120g)
.
for the filling:

(makes a lot, you can reduce the amount, if you prefer)
1 cup unsalted butter, room temperature
4 cups confectioner’s sugar
¼ cup heavy cream
2 tsp vanilla extract
salt, to taste
1 tbsp cinnamon, plus more for dusting

 .
 Sift the salt, powdered sugar, and almond flour into a large container. Discard any clumps in the sieve. Using a whisk attachment, beat egg whites with cream of tartar until foamy. Add sugar in 3 batches. Continue beating until stiff peaks form. Add gel food coloring, if desired, whisk again.
.
Add 1/3 of the almond mixture into the egg whites. Fold until incorporated – about 15-20 turns. Then add another 1/3. Fold again. Repeat one last time. It will take about 65 folds for the right consistency.
.
Draw circles with a pencil on a sheet of parchment paper, then place the sheet with the drawing side down on a baking sheet, so that you can see the lines through. Pipe small circles using a pastry bag, making sure your hand is vertical, at 90 degrees over the center of the circle.
.
Let rest until a skin forms. It should no longer be sticky. 30-60 minutes.
.
Bake at 275F for 17 minutes. Let the shells cool completely before attempting to peel them off.

Make the filling: in the bowl of a stand mixer fitted with the paddle attachment, combine the butter and powdered sugar, mixing on medium-high speed until light and fluffy. Add in the cream and vanilla and beat on medium-high for 3 minutes. Mix in the cinnamon until completely combined, as well as salt to taste.

Pipe the buttercream onto the flat side of half of the macarons and then top them with a second, similarly sized macaron. Refrigerate in an airtight container overnight. Dust with cinnamon before serving.

ENJOY!

to print the recipe, click here

piping

Comments: Very few culinary projects will confuse you as much as macarons. If you read cookbooks or advice online, you will find conflicting info almost for every step. Do not over-beat the egg whites… It’s impossible to over-beat the egg whites, beat a couple of minutes longer after you think they are done… don’t over-dry the shells…. it’s impossible to over-dry the shells….  sift the flour at room temperature…. roast the flour to dry it completely…  don’t even think of making macarons with regular meringue…  Mind blowing, my friends, mind-blowing.  At some point you will have to settle on a recipe for your first time, take a deep breath, and see how it goes. I think for a first time we did pretty good, actually.  Aren’t they cute?

closeup
From what I gathered around the many sources, it is VERY important to age the egg whites, so make sure to do that. Crack the eggs the day before, separating the whites and let them sit over the countertop overnight.

Since this was such an involved process, I’d like to share a few photos of our adventure…

Sifting… it was by far the most painful and boring step of the whole recipe. We took turns, but sifting the almond flour took a loooong time. Cindy did a much better job than me, she is patient and thorough. Moi? Not so much… (sigh)
sifting

We made a nice template for the shells, using the top of shot glasses….
template

Egg whites were beaten until shiny, smooth-looking peaks formed…
eggwghites

Here are the results of our labor of love, shells piped and drying….
drying

Here are our baby-shells after baking, most with nice little feet…..
baked

All in all, we had a great time, and learned a lot that day… We assembled the best looking ones, and some of the ugly ducklings were consumed right away by our partners in the name of aesthetics.
ready

The advice to wait to savor them next day is also spot-on: there is a definite improvement in texture, so these are perfect to make in advance and show-off your baking abilities at a get together.

Next time I will try Dorie Greenspan’s recipe, that uses an Italian-type meringue, in which the sugar-egg white mixture is stabilized by heat. I thought it was too involved for our first time, but from what I’ve been reading, it might be a better approach.

Cindy, thanks for joining me in this challenge,
I definitely could not have done it without you!

ONE YEAR AGO: Our Mexican Holiday Dinner 

TWO YEARS AGO: The Ultimate Cranberry Sauce

THREE YEARS AGO: Edamame Dip

FOUR YEARS AGO: Gougeres

FIVE YEARS AGO: Beef Wellington on a Special Night

A VERY SPECIAL BIRTHDAY

It is not easy to be born on December 27th, even if it means sharing your birth date with Louis Pasteur… Most people are away celebrating the holidays with family, and getting ready for another big event coming up, the New Year’s Eve. Organizing a birthday party at this time of the year is tricky to say the least. We manage to pull a great one when Phil turned 50, but invitations were sent out months in advance. This year, it is just the two of us, and I must say I don’t mind it at all…

pekHappy Birthday to my favorite human being, best friend, awesome co-worker, partner in long runs, short runs, great golf, lousy golf, I cannot imagine my life without you!


KEN FORKISH’S PAIN AU BACON

PainAuBacon2It’s been a while since I baked a loaf of sourdough bread. A quick browse through my archives proves this sad turn of events: October 13th was my last adventure in the Land of the Wild Yeast. But, with so much going on, trips, busy schedule, I was forced to let my starter sleeping in the freezer a lot longer than I expected.  Finally, the second weekend of December shaped up as a perfect opportunity to resume bread baking. The weekend schedule seemed flexible enough – just a cocktail party Saturday night – and the perfect weather to crank the oven up all the way to 450 F.  Sometimes a tropical being is forced to find positive aspects in outside temperatures falling below 60 F.  I sat down next to our fireplace with quite a few of my bread cookbooks, and went through the very elaborate process of choosing which recipe to work on.  Keep in mind that if I have to dress up for a party, my outfit is decided in 5 minutes, accessories included. But choosing a sourdough bread takes me hours. And I mean  hours  in the strict sense of the term, in which 1 hour equals 360 seconds.  After intense mental struggle, I picked a winner from Ken Forkish’s book “Flour Water Salt Yeast“.   It was worth all the pacing back and forth, the many stick-it notes, and the snide remarks of the husband asking if I needed another couch to spread some more cookbooks. Very uncalled for. Obviously, I can only endure this type of treatment because I am an easy-going, serene, and forgiving human being. PainAuBacon1PAIN AU BACON
(recipe reprinted with permission from Ken Forkish)

Makes one loaf.

for the levain:
50 g mature active sourdough starter
200 g unbleached all-purpose flour
50 g whole wheat flour
200 g lukewarm water

for the final dough:
432 g unbleached all-purpose flour
8 g whole wheat flour
343 g water (warmed to about 90 degrees F)
10 g fine sea salt
250 g (about 1/2 pound) bacon, fried to crispy, and then crumbled
1 T reserved bacon fat
108 g of the levain
.
Mix the levain ingredients in a medium bowl, cover with plastic wrap, and let sit for about 10 hours, until bubbly. In a large bowl mix the flours and water by hand until just incorporated. Cover and let it rest for 20 to 30 minutes (that is the autolyse step).
.
Sprinkle the salt all over the flour mixture, then add the levain.  Using wet hands to prevent the dough from sticking, mix the dough by pinching it to distribute the salt. Cover and rest for 10 minutes.
.
Spread the bacon fat over the dough and add the crumbled bacon. Using the pincer method alternating with folding, mix all of the ingredients in the bucket. Cover the dough with plastic wrap, and let it sit for 30 minutes. In the next 2 hours, stretch and fold the dough 4 times, every 30 minutes. Cover and let rest at room temperature for 12 hours, until about tripled in volume.

Gently shape the dough into a loose boule. Flour a banneton,  shape the dough into a medium tight ball and place it seam side down into the proofing banneton. Cover with oiled plastic wrap. Let the loaves proof for about 4 hours, depending on the room temperature.

About 45 minutes before baking, heat the oven to 475 degrees F with an empty covered Dutch oven placed on the middle rack.

Remove the Dutch oven from the oven and remove the lid. Place a piece of parchment over the banneton with the proofed bread inside, and a flat baking sheet over it. Flip the dough over, remove the basket, and place the shaped boule in the Dutch oven using the parchment to help move it. The paper can stay in during baking.  Cover the Dutch oven and place it in the hot oven.  Wet the lid of the Dutch oven, and quickly use it to cover it. Alternatively, you can use your own favorite method to generate steam during baking.

Bake covered for 30 minutes, and then uncover it and bake it for 15 to 20 minutes more, until the interior of the bread reaches 205 to 210 degrees F and the bread is a deep brown.

Cool on a rack completely before devouring it…

ENJOY!

to print the recipe, click here

composite1

Comments:  After such a long time away from my starter, I get a little anxious when baking a loaf like this.  I was particularly worried about leaving the dough to ferment at room temperature for 12 hours, something I had never done before.  But, the dough behaved exactly as Ken mentioned in the book.  Take a look at these couple of shots:

Before…
Before

After…
After

A very nice, soft, bubbly dough, quite easy to work with and shape as a boule.
Proofing

One of the things I love about Ken’s book, is that he offers a sample timeframe for all recipes. Just for fun, I include my notes, prepared the night before. On top you see his suggestion of timing, and as I move along, I jot down my actual timing, adapted to fit my schedule. If you have the book, you may notice I actually halved the recipe to make a single loaf instead of two.

Notes(click to enlarge, if so desired)

The subtle smell of bacon while the bread baked was wonderful!  I made this bread especially to share with my youngest stepson and our great friends from Oklahoma who were coming to visit us the following weekend. So, the bread cooled completely over a rack, rested for a day, and the following morning I sliced it and froze the slices, in small packages.  It is a perfect way to have bread as good as freshly baked at a moment’s notice.

Here is the mandatory crumb shot…
CrumbShot

And the slices on their way to the freezer…

Bagged

This was a superb loaf of bread!  In fact, when we served it – alongside a hearty pasta with Bolognese sauce – it was hard to believe that bacon was the only ingredient added. It tasted very complex, almost as if a mixture of nuts were also incorporated into the dough. Salty, spicy, and smoky at the same time.

Ken, thank you for allowing me to publish the recipe for one of the most flavorful loaves of bread I ever made!I am submitting this post to Susan’s Yeastspotting event…

HAPPY HOLIDAYS, EVERYONE!

maracujaDad and son enjoying a nice passion fruit “caipirinha”…

ONE YEAR AGO: Carrot and Cumin Hamburger Buns

TWO YEARS AGO: Potato Galettes a l’Alsacienne & Book Review

THREE YEARS AGO: Caramelized Carrot Soup

FOUR YEARS AGO: Miso-Grilled Shrimp

FIVE YEARS AGO: Pain Poilane


MASCARPONE MOUSSE FROM BAKING CHEZ MOI

FACT: a truth known by actual experience or observation;
something known to be true.

For instance: I have too many cookbooks.  That is a fact. I don’t need another cookbook. Also a fact. Oddly enough, both were ignored when a third event recently took place:  I ordered Dorie Greenspan’s Baking Chez Moi. Instead of being ashamed of my lack of will power,  I jumped up and down with joy when the package arrived. Later that same evening I took it to my bedside table, where I intended to browse through a few pages, but instead found myself unable to put it down. Not enough sleep that night.  If you face the fact of owning too many cookbooks, and think you don’t need another one, I will be brutally honest: you are wrong. You must invite this one into your home. Released just last month, I know it will become a classic. And you don’t want to be out of that loop, do you?

mascarpone mousse
MASCARPONE MOUSSE
(reprinted with permission from Dorie Greenspan)

1/2 teaspoon unflavored gelatin
1 1/2 tablespoon cold water
8 ounces (227 g) mascarpone
1/3 cup (80 mL) heavy cream
2 tablespoons honey
3 large egg whites, at room temperature
pinch of fine sea salt
3 tablespoons sugar

Put the gelatin in a microwave-safe bowl, pour over the cold water and let the gelatin sit for about 3 minutes, or until it is completely moistened and has begun to expand. Then heat the gelatin in a microwave oven for 15 to 20 seconds to liquefy it.

Scrape the mascarpone into a large bowl, preferably one that has a pouring spout, and gently stir to loosen it.

Pour the cream and honey into a small saucepan, put over medium heat and bring just to a boil. Allow the liquid to cool for 5 minutes, then pour some into the gelatin and stir until smooth. Stir the contents of the gelatin bowl into the remaining cream and then pour everything into the bowl with the mascarpone. Use a whisk to blend gently.

Working in the bowl of a stand mixer fitted with the whisk attachment, beat the egg whites and salt together on medium-high speed until the whites just begin to turn opaque. Little by little, add the sugar and keep beating until the whites are marshmallowy – blowy and white, and when you lift the whisk, they’ll form tipsy peaks.

Turn the whites out onto the mascarpone mixture and, using a flexible spatula, lightly fold them in. Thoroughness is less important than gentleness here.

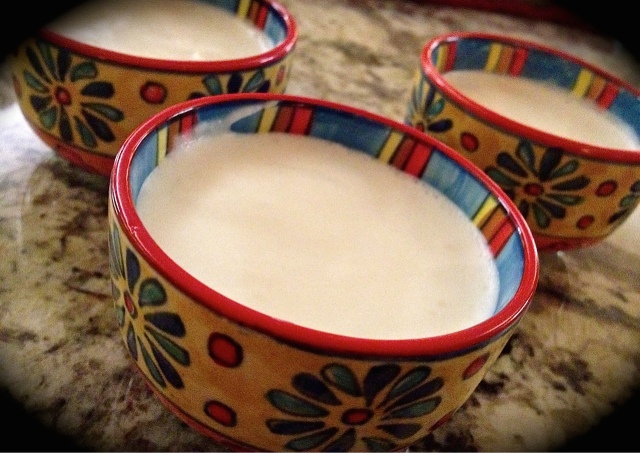
Pour or spoon the mousse into four 1-cup-capacity bowls. Cover the mousse with plastic film and refrigerate for at least 3 hours before serving, making sure to keep it away from foods with strong odors.

ENJOY!

to print the recipe, click here

FruitTopYou can gild the lily with some berries, either crushed with a little sugar in the bottom of the bowl, or as whole fruit on top. 

Comments: I always joke with Phil that Giada de Laurentiis in her cooking shows tends to use a few ingredients a bit too often.  Mascarpone is one of them. Hazelnut is another. You blink once, and there she is, grabbing the mascarpone from the fridge, and the bag of hazelnuts from the pantry.  So, I almost did  not pay attention to this dessert in Dorie’s book.  But, her description of the way the sweetness of honey plays with the tartness of the mascarpone and how the dessert kind of grows on you with each spoonful, convinced me to try it.  We recently had a couple of friends over for a Brazilian style dinner (steak, rice, black beans), and I wanted a dessert that would be tasty but not overly heavy.  This mascarpone mousse was perfect for the occasion, even if I say so myself…  Plus, I made smaller servings than called for. Dorie’s recipe is supposed to make 4 servings, I divided the mousse into six small bowls.  The description of Dorie is spot on: the mousse has a perfectly creamy texture, smooth, not too sweet, and the mascarpone and the honey together form a match hard to beat. I would not change anything in this mousse, and would recommend you try it if you need a dessert that is not on the heavy side.

And now, time for an overview of Dorie’s new book, the one that you must invite into your home right after you finish reading my post.

Baking Chez Moi Cover

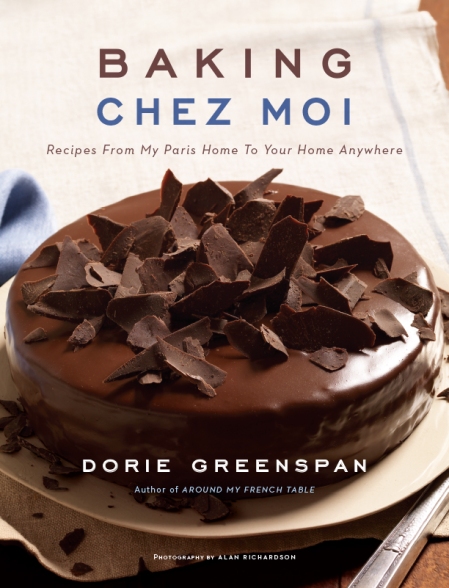
“These are the recipes the French bake at home for their families and their closest friends. They are generous, satisfying recipes tied to places, traditions, customs and culture.”
(Dorie Greenspan, Baking Chez Moi)

The way I see it, her book is the opposite of another she wrote together with Mr. Hermé,  Desserts by Pierre Hermé. In that book, nothing is simple, and every single one of the concoctions are the stuff that French people would buy at a pastry shop to take to a dinner party, or serve to lucky guests on a special occasion.  It is an amazing cookbook, but even though I’ve had it for more than 10 years, I made only two recipes from it, and each one left me feeling as if I had run a marathon. Barefoot. However, I must say that the French lemon tart is the best I’ve ever tasted, and worth buying the book to enjoy it.

Baking Chez Moi is a totally different entity. You will want to go to the kitchen right away to start baking, with no need to sit down and meditate in preparation, or light a bunch of candles to the Pastry Gods.  The book is divided in 6 chapters: Simple Cakes, Fancy Cakes, Tarts & Galettes, Baby Cakes & Petite Pastries, Cookies & Bars, and Fruit, Creams, Frozen Desserts & Candies.   A final closing chapter on Basics.  I will not list every recipe in the book, just give you a quick overview highlighting the ones that appealed to me the most.

Simple Cakes.  All the recipes in this chapter are indeed simple, often with just a few ingredients, perhaps the best example being Plain and Simple Almond Cake. To make it, you will need eggs, sugar, and almond flour. A hint of vanilla. That is it.  I can imagine the wonderful texture and delicate almond flavor.  Quite a few tasty apple cakes, including Custardy Apple Squares that seem perfect for that afternoon snack, or a special brunch.  Another great concoction in this chapter is a Cheesecake, Alsatian Style.  I had the opportunity of tasting one while living in France, it is lighter than the American version, so if you love cheesecake, don’t skip this one. With her Cornmeal and Berry Cake, she brings the fashionable olive oil cakes that everyone raves about these days. The same theme is present in her Hazelnut, Ginger and Olive Oil Cake (amazing flavors put together). Spiced Honey Cake made my heart skip a beat.  I just know it will be one of my favorites, as I am crazy for pain d’épices.

Fancy Cakes. In this chapter, she dials it up a notch, but the recipes are still quite user-friendly, and her notes so clear that even those who suffer from cake-phobia will be tempted to dive in.  The first cake in the chapter is a thing of beauty, the Moka Dupont.  A sort of icebox cake assembled with cookies, coffee and chocolate buttercream.  Shaved chocolate decorations on top.  Such a stylish little cake!  Sunday in Paris Chocolate Cake: with a name like this, who would not want to make it?  Love this particular instruction, “some of the chocolate may drip down the sides – let it.”  Tarte Tropézienne, is a cake made in fact with a buttery brioche dough, split in half horizontally and filled with a combination of creams.  It was a favorite of  the famous Brigitte Bardot in her early years of acting in Saint-Tropez. It is still very popular in that region, where each patisserie carries its own version.  A beautiful Gingerbread Bûche de Noël is also part of this chapter.  Not sure I have what it takes to face it, but it is such a classic!  Galette de Rois, a dessert that brings me nice memories of my days living in Paris, and a gorgeous Rose Fraisier, made with genoise and strawberries close this elegant chapter.

Tartes and Galettes. By far the number one for me is the Apple Tarte Flambée.  Why? She describes it as a sweet version of flammkuchen, a very thin pizza-like concoction from Alsatia that when I tried for the first time I thought I had died and gone straight to heaven. Will never forget the restaurant either, a very small place near Institut Pasteur at the 15eme.  I went back there quite often, usually all alone, heart-broken and feeling sorry for myself, but flammkuchen comforted me quite well.  Other goodies that called my attention in this chapter are Pear Tart with Crunchy Almond ToppingApricot-Raspberry Tart, Simplest Plum Tart, Caramelized Cinnamon-Milk Chocolate Tart (oh, my…),  and – are you ready for this one? – Crème Brûlée Tart.  Ok, that pretty much does it, although Tiramisu Tart sounds almost as decadent.

Baby Cakes and Petite Pastries. This chapter stole my heart and ran away with it… The first recipe already made me melt a little: Nutella Buttons. Enough said. Think tiny cupcakes with a Nutella filling and a glaze of chocolate ganache.  Happiness disguised in pastry. Pistachio and Raspberries Financiers, followed by Matcha Financiers are elegant, simple, and made in a two-bite serving. Lemon Madeleines of course had to be included, and a version of Black-and-White Marbled Madeleines is also there. Cannelés? Yes, of course! I must make them, as I even have the silicone pan for that, sitting in my cabinet. No excuses. What do you think of Chocolate Cream Puffs with Mascarpone Filling? Sounds fantastic to me. Beignets, Pailles, Merveilles, and Palmiers.  A French Nirvana in small pastries form.

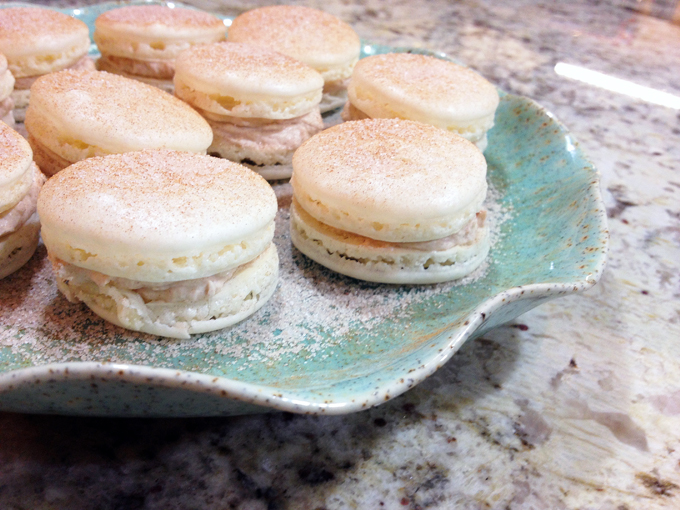
Cookies and Bars.  Dorie starts the chapter explaining that the traditional French cookie is the sablé, a shortbread type of delicacy that accounts for “half a hundred of the hundreds of cookies” in the French repertoire. Recently I made a chocolate chip cookie based on a shortbread dough and fell in love with its delicate, slightly crumbly texture. So, let’s say I am more than ready to embrace sablés. Some of the cookies that spoke dearly to me in this group are: Vanilla Bean, Toasted Buckwheat and Chopped Chocolate, Viennese, Green Tea Sablés. But, of course macarons are incredibly enticing, and she’s got several types like Basque Macarons, Parisian Macarons (the photo will blow your mind), Macaron Biscotti.  I also noticed her Cocoa Crunch Meringue Sandwiches, and Lavender Galettes (like a galette in cookie presentation). My favorite cookie of all times, Speculoos is part of her collection, and for that I am grateful. In the bar type of cookies, my favorites would be Lemon Bars, and Granola Bars.

Fruit, Creams, Frozen Desserts and Candies. A lot appealed to me in this chapter. How could I not go crazy for the Apple Speculoos Crumble?  But there is a Dark Chocolate Mousse, a Mascarpone Mousse (recipe included in this post),  a Honey-Yogurt Mousse, Lavender-White Chocolate Pots de Creme, Caramelized-Coffee Bean Pots de Creme, Speculoos Panna Cotta (excuse me while I close my eyes and dream a little), Chocolate Truffles, and Soft Salted-Butter Caramels.

Final Chapter,  Basics. Here you will learn many techniques and basic sauces and components of recipes such as how to make a Hot Fudge Sauce, a Raspberry Coulis,  a Spiced Hibiscus Syrup, Candied Petals, Flowers, Leaves and Herbs, among many other things.  Wonderful way to wrap up a great book!

A few final remarks: every recipe has a small introduction with a little story behind the recipe or the person who first introduced it to Dorie.  Just enough chit-chat to spice it up without being overwhelming.  Most recipes also include a short paragraph entitled “Bonne Idée“, with suggestions on how to slightly change it, with an added component, or a different type of presentation.  Baking Chez Moi is one of those cookbooks that you can read over and over like a novel.  I am glad I lack will power to resist certain temptations…

+++++++++++++++++++++++++++++++++++++++++++++++++++++++

So, there you have it, my little virtual tour of Dorie’s new cookbook, that must be part of your collection.  Dorie, thanks for giving me permission to publish your recipe! I look forward to baking more and more from it…

+++++++++++++++++++++++++++++++++++++++++++++++++++++++

ONE YEAR AGO: Pumpkin Brigadeiros

TWO YEARS AGO: Pumpkin Espresso Loaf

THREE YEARS AGO: Caramelized Carrot Soup

FOUR YEARS AGO: Miso-Grilled Shrimp

FIVE YEARS AGO: A Special Holiday Fruitcake