LEMONY SHREDDED BRUSSELS SPROUTS WITH ALMONDS

Definitely not the most popular veggie around, but even if you are a self-professed BS hater (cannot believe what I just did here), I suspect you will enjoy this recipe. Sometimes all it takes is cutting a veggie in a different way and a new horizon opens up. It is just what happens when you finely shred these babies. You can use a knife, but the food processor will be faster and give slices more homogeneous in thickness. Once you are done prepping the sprouts, the whole thing comes together in less than 10 minutes. Perfect side dish for a busy work day.

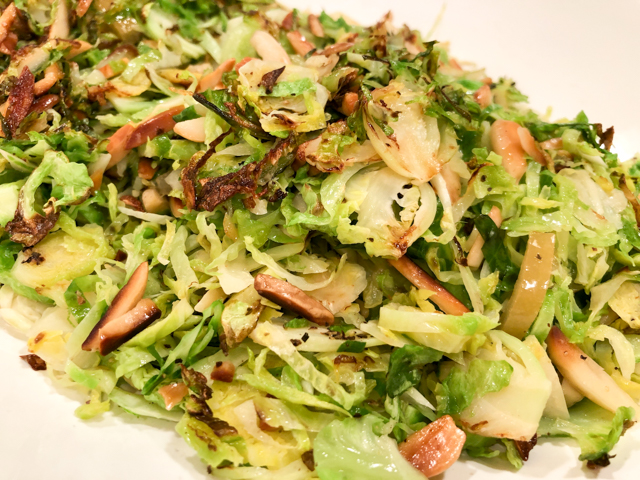
LEMONY SAUTEED BRUSSELS SPROUTS WITH ALMONDS
(from the Bewitching Kitchen)

(This is a heart-healthy recipe, with 1.5 g saturated fat per serving)

12 oz Brussels sprouts
2 celery ribs, finely diced
1/3 cup almonds
1 to 2 tablespoons olive oil
salt and pepper
4 slices of preserved lemons, diced (optional, see comments)
fresh lemon juice to taste

Shred the sprouts in a food processor to 1/8 inch thick. Reserve.

Heat the oil in a large non-stick skillet, add the celery, season with salt and pepper, saute until fragrant. Add the almonds and cook them until they just start to get some color.

Increase the heat to high, add the shredded Brussels sprouts, and saute them moving them around a  bit.  When they start to get a bit softer, add the preserved lemons, close the pan with a lid, and let it all cook undisturbed for 2 minutes.

Open the skillet, check if the sprouts are cooked to your liking. If they seem tough, add a bit of  lemon juice, close the pan again and cook a bit longer. If they are al dente, squirt a little lemon juice, adjust seasoning and serve.

ENJOY!

to print the recipe, click here

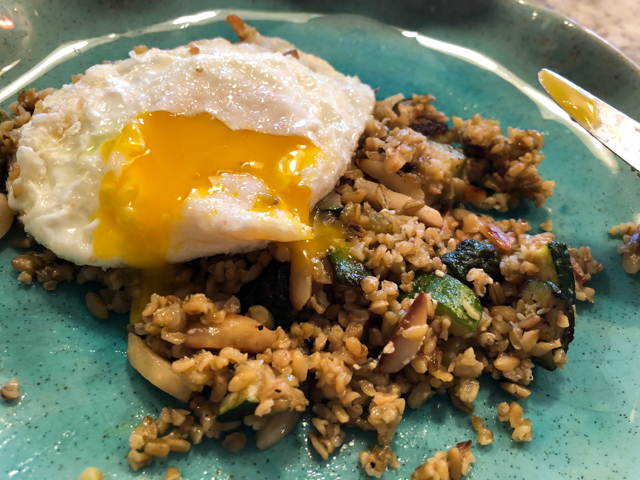
Comments: Amounts are all pretty flexible, I shredded enough sprouts to have what seemed enough for our dinner and leftovers for my lunch next day. It was close, let’s say that my lunch turned out a bit light.  A fried egg was needed to the rescue.  Preserved lemons will add a very intense citric flavor but don’t worry if you don’t have any around, just add  good dose of lemon (or even lime) zest, and it should be equally tasty.

That same evening I was roasting butternut squash as another side dish for grilled pork tenderloin, and decided to serve both veggies together.  Loved the color contrast and they got along great as far as taste is concerned. I admit I almost did not need the meat. But then I did.

ONE YEAR AGO: Savory Oatmeal with Bacon and Cheddar

TWO YEARS AGO: Air-Fried Carrots, Two Ways (most popular post on my blog!)

THREE YEARS AGO: Five Minutes in L.I.T (a tour of our laboratory!)

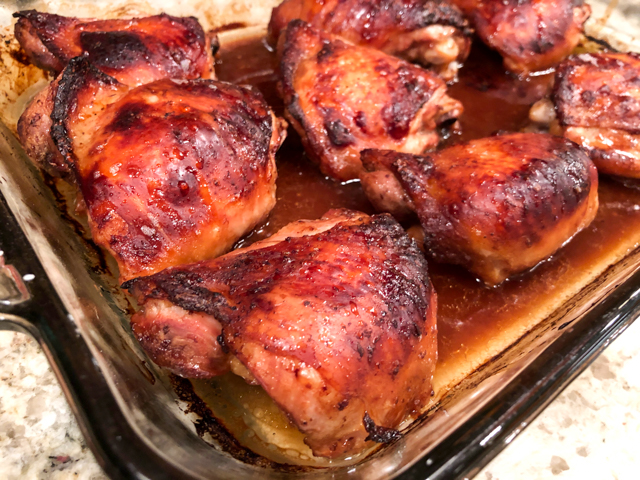
FOUR YEARS AGO: Chicken Thighs with Artichokes and Capers

FIVE YEARS AGO: Pea Pancakes with Herbed Yogurt

SIX YEARS AGO: Mushroom Stroganoff

SEVEN YEARS AGO: Tomato Sourdough

EIGHT YEARS AGO: Gamberetti con rucola e pomodori

NINE YEARS AGO: Flirting with Orzo

BLACK RICE WITH ROASTED CAULIFLOWER

Rice is hardly regarded as a special side dish, unless it gets fancied up as a risotto, joined to all sorts of goodies and a nice amount of butter. But, black rice, also known as Forbidden Rice, is another story. Dark, mysterious, with a heartier texture and more assertive flavor, it has the potential to make any meal special. I recently paired it with roasted cauliflower, and we were both very pleased with how it turned out.

BLACK RICE AND ROASTED CAULIFLOWER
(from the Bewitching Kitchen)

1 cup black rice
1 + 3/4 cup water
salt to taste
1 head cauliflower
4 tablespoons olive oil, divided (3 + 1)
juice of half lemon
1/4 tsp turmeric
1/4 tsp cumin
1/4 tsp ground ginger
1/8 tsp cayenne pepper

Soak the rice in plenty of cold water for 45 minutes. Drain, and rinse well. Add to a sauce pan with the water seasoned with salt. Bring to a boil, reduce heat, simmer with a tight-fitting lid for about 35 minutes, until the liquid is absorbed. Leave in the pan undisturbed for five minutes before serving.

To roast the cauliflower, cut the florets in a way that they get a flat side. Mix them with 3 tablespoons of olive oil, season with salt and pepper, and place as a single layer in a baking sheet, covering tightly with aluminum foil. Roast at 450 F for 10 minutes, remove the foil, roast for 15 more minutes, flipping the pieces mid way through (or at least moving them around a little, so that new spots touch the bottom of the pan. Depending on how dark you like your cauliflower, let them roast longer.  Meanwhile, mix the remaining tablespoon of olive oil with the lemon juice and spices. When the cauliflower is ready, drizzle the spice mixture, toss gently.

Serve the cauliflower over the hot, steamy rice.

ENJOY!

to print the recipe, click here

Comments: Black rice is very nutritious, high in iron and fiber, its purple color coming from anthocyanins. It is actually the food item with the highest content of this anti-oxidant. Not too shabby, right? If you’ve never tried it, the taste is similar to brown rice, and the texture might resemble a bit wild rice. All that to tell you, Forbidden Rice is not just a pretty face. However, it can be a bit tricky to cook it perfectly. After having a few lousy experiences with it, I have two pieces of advice: soak it for 45 minutes to 1 hour before cooking, rinse well.  And use 1 + 3/4 cup of water per cup of rice, not more. Recipes that tell you to use 2:1 will most certainly leave you with a soupy concoction, in which the nice bite of this grain will be compromised.

The cauliflower. I got inspiration from a Fine Cooking article on steam-roasted vegetables. I simplified considerably their take on steam-roasted cauliflower with Indian spices, and shared this stream-lined version with you.

As full-blown omnivores, we paired this side dish with very juicy and very delicious chicken thighs, my default recipe which is on our table every couple of weeks.Yes, it is a lot of chicken, but we got two full dinners out of it, and one lunch for yours truly.

For such a simple preparation with humble ingredients, we were quite amazed by how much we enjoyed it. Once the weather warms up (and I turn into a cheerful human being again instead of The Resident Curmudgeon)  I intend to make black rice salad, because it seems to me it might be a real winner also.

ONE YEAR AGO: La Couronne Bordelaise

TWO YEARS AGO: A Special Birthday Dinner

THREE YEARS AGO: Duck Confit for a Special Occasion

FOUR YEARS AGO: Tuscan Grilled Chicken and Sausage Skewers

FIVE YEARS AGO: Celebrate Wednesday with Pork Tenderloin & Apples

SIX YEARS AGO: Salmon Wellington

SEVEN YEARS AGO: The Green Chip Alternative

EIGHT YEARS AGO: Weekend Pita Project

NINE YEARS AGO: Let it snow, let it snow, eggs in snow


https://www.finecooking.com/recipe/steam-roasted-indian-spiced-cauliflower

FREEKEH WITH ZUCCHINI AND ALMONDS

I tend to fall in love with things and get into an obsessive-compulsive mode about them. Right now freekeh is a good example. I’ve been making it regularly, so finding news ways to prepare it is always on my mind. If you have never tried this grain, I’d say it is a mixture of farro and barley. Hearty, tasty, and goes well with many main dishes. You can find two types of freekeh, whole grain and cracked. The main difference is the time it takes to cook them. If you go for whole grain, be prepared for 40 to 45 minutes cooking time, whereas the cracked form will be ready in 20, 25 minutes maximum. In our neck of the woods, it is easier to find cracked, so that’s what I normally go for.

FREEKEH WITH ZUCCHINI AND ALMONDS
(from the Bewitching Kitchen)

2 Tablespoon olive oil, divided
2 medium zucchini, cut in 1/4 inch pieces
squeeze of fresh lemon juice
1 stalk celery, finely diced
salt and pepper
3/4 cup cracked freekeh
2 cups water
toasted slivered almonds to taste
fresh dill to taste
whole yogurt for serving (optional)

Sautee the zucchini. On a large skillet, heat 1 tablespoon of olive oil, add the zucchini pieces seasoned with salt and pepper and allow it to get golden brown before moving the pieces around. When it’s tender and fragrant, squeeze a little lemon juice and reserve.

Cook the freekeh. In a sauce pan, heat 1 tablespoon (or a bit less) olive oil, add the celery seasoned with salt and pepper, and saute until fragrant. Add the freekeh, cook a minute or two, then add the water. Cover the pan and simmer until tender, 20 to 25 minutes. Let it sit in the pan for five minutes with the heat off.

Add the freekeh to the skillet with the zucchini, warm everything together briefly, add toasted almonds, and fresh dill. Serve immediately with whole milk yogurt on the side, if so desired.

ENJOY!

to print the recipe, click here

Comments: I realize that I am asking you to use one large skillet and one sauce pan to make this recipe. In theory, you could saute the zucchini in the sauce pan, remove it, and proceed to cook the celery and freekeh in the same pan. However, I prefer a very large surface to get the zucchini perfectly cooked. And in case you don’t know, I love doing dishes, so one more pan to wash has never been a problem for me. I know… crazy, right?

This turned out very good, and almost a complete meal, actually. We enjoyed it with roast chicken, but next day my lunch was a nice serving of freekeh with a fried egg on top. Maybe not the most gorgeous picture in the blogosphere, but trust me, it was tasty…

If you never cooked freekeh, I urge you to give it a try. It is a nice alternative to rice, and you can also enjoy it cold in salads, or as addition to soups. Pretty versatile item.

ONE YEAR AGO: Salmon a la Wellington, re-visited

TWO YEARS AGO: The Unbearable Unfairness of Cake Baking

THREE YEARS AGO: Hermit Cookies

FOUR YEARS AGO: Cremini Mushroom Meatloaf

FIVE YEARS AGO: Ottolenghi & Tamimi’s Roast Chicken with Clementines

SIX YEARS AGO: Eight-Ball Zucchini: The Missing Files

SEVEN YEARS AGO: Grilling Ribbons

EIGHT YEARS AGO: Peppery Cashew Crunch

NINE YEARS AGO: Ossobuco Milanese: an Italian Classic

SOMEBODY STOP ME!

I simply cannot help it. I’m about to share yet another recipe for cauliflower-in-disguise. But, believe me, this one will change your life. Have I ever promised to change your life with a recipe? No. So trust me, because I never lie. Cross my heart, etc etc. The whole thing starts as 99% of the cauli-rice recipes do: process the florets into bits.  But then, the twist: instead of boiling or simmering it, you will roast the riced cauliflower. Yes, straight into the oven with a delicate coating of coconut oil. And here I am, salivating just by the thought of how great this recipe turns out. Every. Single. Time Perfection, my friends. Perfection. I am so in love with cauliflower that Phil could be a bit jealous of it.

Cauli-Rice with Asparagus and Almonds

BAKED CAULI-RICE WITH ASPARAGUS AND ALMONDS
(adapted  from  The Clothes Make the Girl)

1 head of cauliflower, any color you like
1 tablespoon coconut oil, melted
3/4 teaspoon of salt
ground black pepper to taste
sautéed asparagus
toasted slivered almonds

You will basically process the cauliflower into bits, then roast it with the coconut oil in a 425 F oven. For all the details of the recipe, click here

Meanwhile, prepare your asparagus using any favorite recipe and mixture of spices. Toast some almonds lightly seasoned with salt.  When the cauli-rice is baked, transfer it to a serving bowl, top with the asparagus and almonds, and serve right away.

ENJOY!

composite

Comments:  The difference this method makes in the final product is hard to imagine. The cauli-rice gets all loose and with the exact amount of moisture, not soupy and lifeless. The coconut oil will be barely noticeable. I suspect that even if you don’t care for its taste in this preparation you won’t object. Perfect marriage.

You can take this dish into so many different directions: make it Mexican with the right mixture of spices, add a nice home-made salsa on top. Make it Indian with a curry blend, make it Italian, Brazilian, Korean, it is truly a superb blank canvas to work on.

I’ve made it several times so far, and also used a yellow-orange cauliflower for a show-stopper of a side-dish. I love it. Love it. Period.  Here it is, next to a roasted chicken leg made with a marinade that included a certain ginger syrup of my past.

CauliRiceOrange
I say goodbye with the firm intention of not blogging on cauliflower for at least a week!. I’ve got will power, I’ll nail this. Although….

ArtichokeFlirt11

ONE YEAR AGO: Zucchini Pasta with Cilantro-Cashew Pesto

TWO YEARS AGO: Bran Muffins, Take Two

THREE YEARS AGO: Brown Butter Chocolate Chip Cookies

FOUR YEARS AGO: Mogo Mojo

FIVE YEARS AGO: Slow-Roasted Chicken Thighs: an Ice-Breaker


MILLET COUSCOUS WITH ROASTED CARROTS

Saw this recipe in Bon Appetit.  Made it that same evening for dinner. Lightning speed. Not that usual for me, but I had all the ingredients and was also anxious to cook millet for the first time. One of our grocery stores carries a very nice assortment of grains, seeds & flours in bulk. It is quite convenient when I feel like baking a special bread but do not want to carry home 1kg of oat flour or some other exotic being.  Millet was one of the goodies I brought home from a recent visit.   This recipe, a perfect way to welcome it in our kitchen.

MilletCouscous3


MILLET COUSCOUS WITH ROASTED CARROTS
(from Bon Appetit)

4 tablespoons olive oil, divided (I used a bit less)
1 cup millet
½ teaspoon cumin seeds
2 + ¼ cups chicken broth
6 medium carrots, peeled, cut into 1” pieces
Kosher salt, freshly ground pepper
¼ cup roasted almonds, chopped
¼ teaspoon cayenne pepper
¼ cup fresh cilantro leaves with tender stems (I omitted, did not have any around)

Heat oven to 400°. Toss carrots with 2 Tbsp. oil on a rimmed baking sheet; season with salt and pepper. Roast until tender and golden brown, 20 to 25 minutes.

Heat 1 Tbsp. oil in a medium saucepan over medium-high heat. Add millet and cumin seeds and cook, stirring, until beginning to brown, about 2 minutes. Add broth and bring to a boil. Reduce heat, cover, and simmer, stirring occasionally, until millet is tender, 25–35 minutes (it took me closer to 35 minutes).

Heat remaining 1 Tbsp. oil (I used about 1 teaspoon instead) in a small skillet over low heat; cook almonds and cayenne, stirring occasionally, until fragrant, about 2 minutes. Serve millet topped with carrots, cilantro, and almond mixture.

ENJOY!

to print the recipe, click here

comosite
When I told Phil we were not having “real couscous”, he was a bit surprised. It looks almost exactly the same as semolina couscous. It takes longer to cook, though, and has a firmer texture. The flavor is slightly more “nutty”, but still quite mild.  I imagine most people will love it, there’s really nothing not to like about it. Plus, like your regular couscous, it will absorb the flavors of everything else you cook with it. Use  a flavorful chicken or veggie stock if you have it around.  The roasted carrots and sautéed almonds turn it into almost a complete meal.  Of course, we enjoyed it with a nice roast chicken, just because… Full disclosure: the roast chicken was prepared at the grocery store.  And I am not even slightly ashamed to admit it.

On a slight tangent,  a couple of years ago I read a pretty good article written by one of the popular celebrity chefs, I don’t remember who it was,  it was not Thomas Keller, but some other star almost as bright.  Anyway, he went on and on about never buying a roast chicken from a rotisserie. That he could have a much better dinner by buying the chicken (organic, of course), sticking it in the oven with just a sprinkle of salt, pepper, a lemon or two quickly placed inside the bird.  I am all for cooking from scratch, but I must say a chicken ready for me on my way home from work is very handy. It makes life so much easier! I don’t have to deal with the raw chicken, I don’t have to wait for my oven to warm up to temperature (it does take a while with our potent Supernova), and I can concentrate on making a quick and easy side dish such as couscous, or from now on, millet…   So, yes, 8 times out of 10, I reach for a rotisserie chicken.  And 6 times out of 10, I resort to cheese pre-shredded, from a bag.

Confession: good for the food blogger 😉

ONE YEAR AGO: Mozarella-Stuffed Turkey Burger

TWO YEARS AGO: Happy Halloween!

THREE YEARS AGO: Clay Pot Roast Pork

FOUR YEARS AGO: Panmarino

FIVE YEARS AGO:  A Classic Roast Chicken