SECRET RECIPE CLUB: BARLEY RISOTTO WITH PEAS

Dear readers, when I got the Secret Recipe Club assignment for this month I went into full-happy-dance mode!   It turns out that I’ve been paying attention to Chocolate and Chillies for a looong time, and hoping I would be paired with it, to stalk it real good. And that is exactly what I did.  Asiya, the hostess of Chocolate and Chillies, has a ton of recipes that entice me.   She was born and raised in Toronto, where she now lives with her husband and two kids, but her family is originally from India. Her blog features recipes with a heavy Indian influence, and to make it even better,  many are her own family recipes.  I love it!  I bookmarked many options, but five were the strongest contenders.  Here they are: Butter Chicken (lower in fat than regular versions),  Mummy’s Tomato Spiced Rice,  Whole Wheat Banana Muffins, and…  Afghani Kebob with Tomato Gravy.  The fifth? It’s the one I ended up making:  Barley Risotto with Peas and Asparagus.  Oh, my….  what an amazing dish this was! I made a slight adaptation because the asparagus looked very sad at the grocery store that day, so I went with carrots.

Barley Risotto with Peas

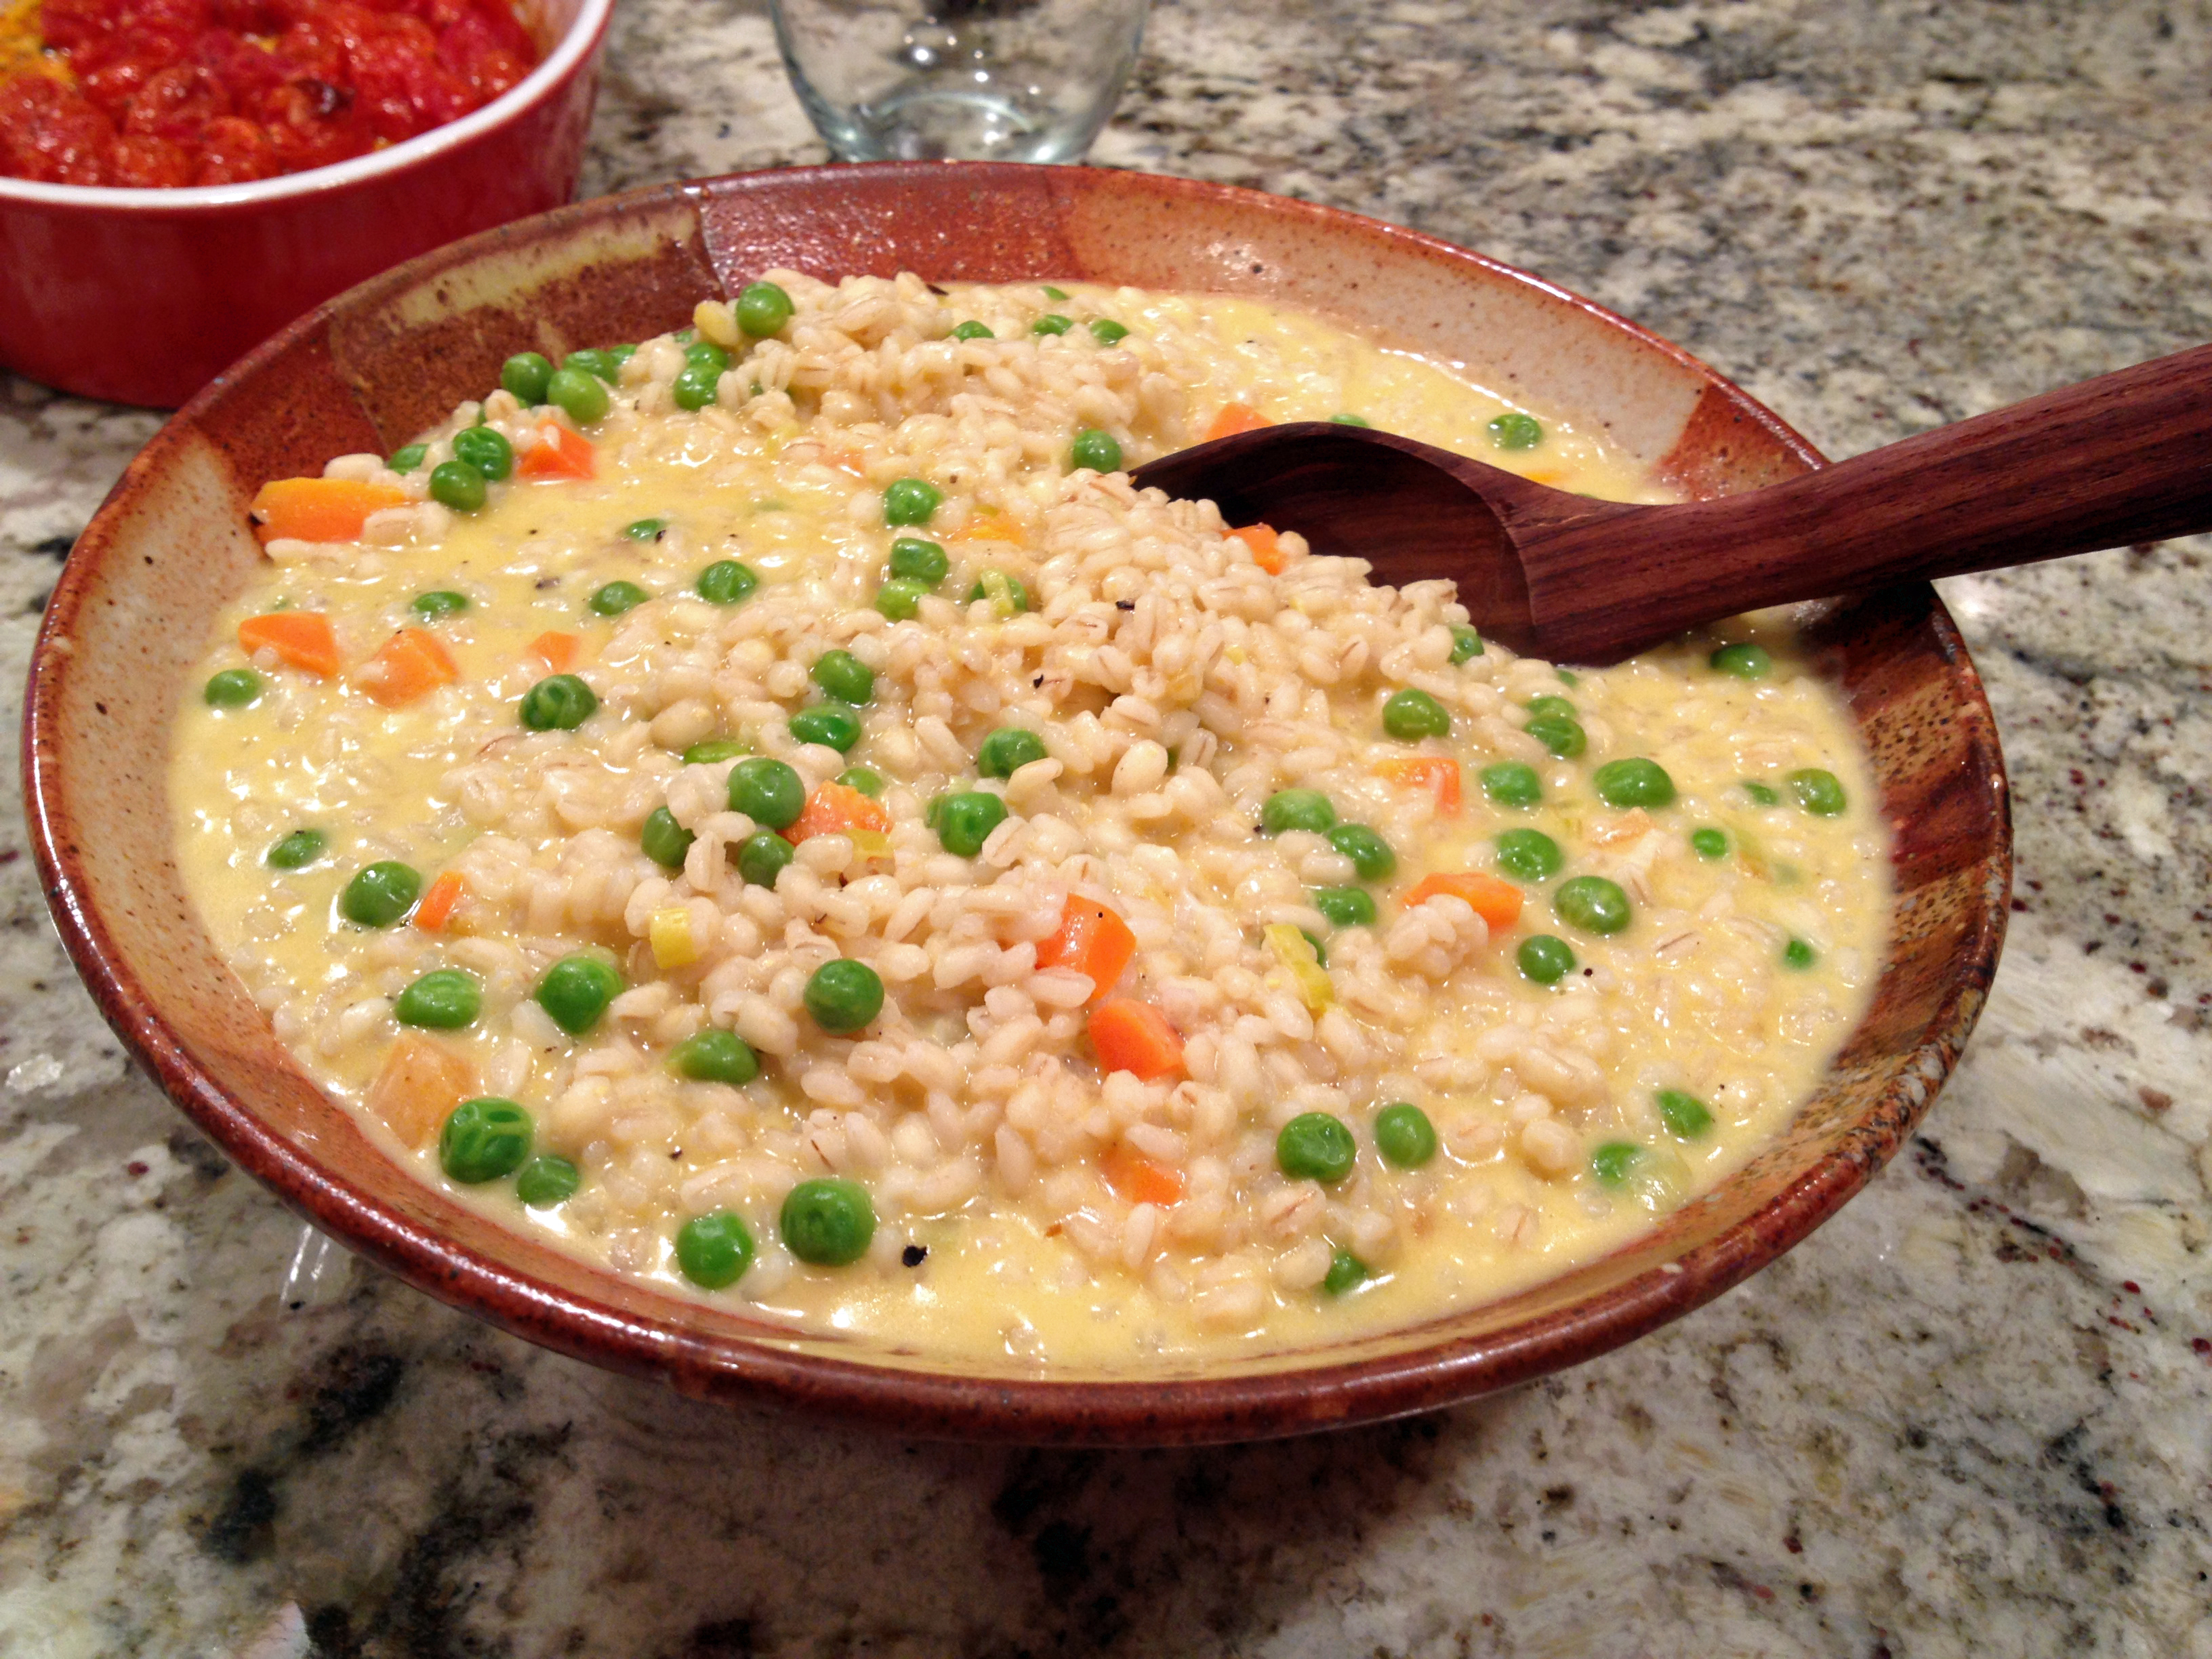
BARLEY RISOTTO WITH PEAS AND CARROTS
(slightly modified from Chocolate and Chillies)

4-6 cups of vegetable stock
2 tbsp olive oil
1 shallot, minced
1 leek, chopped
1 cup pearled barley
2 carrots, diced
1 cup frozen peas, thawed
1 tsp salt
1/2 tsp freshly ground black pepper
1 tbsp  freshly squeezed lemon juice
1/4 cup light cream cheese, at room temperature
1/4 cup Parmesan cheese
Boil the vegetable stock.  Reduce heat to medium-low to keep it warm.Heat olive oil in a large saute pan over medium heat.  Add the minced shallot and leek.  Saute 5-7 minutes until  tender.  Add barley and stir for a minute so that everything is well coated.  Add 1 cup broth and stir until most of it has been absorbed.  Continue to add 1/2 cup hot vegetable broth at a time, stirring until it has been absorbed before adding the next 1/2 cup.
.
While the barley is being cooked, microwave the pieces of carrots with a little water until almost tender, and reserve. Or you can cook them on top of the stove in a little salted water, and drain them well.
.
After 15 minutes of cooking the barley, add carrots and peas.  Stir in salt and pepper.  Continue to add water until barley is cooked through.
.
Remove from heat.  Add lemon juice, cream cheese and Parmesan cheese.  Stir until cheese is melted.
.
ENJOY!
.
 

                                                                  to print the recipe, click here
.

BarleyRisotto1

Comments:  This was such a creamy, comforting dish, I love the traditional risotto made with Arborio rice, but this version with barley won my heart!  I definitely want to make it with asparagus to celebrate the arrival of Spring and with it that infusion of life and joy and all things sunny and beautiful and gorgeous and warm into my personal equation.  Can you detect my excitement as February says goodbye?  I bet you can.

served11
The barley risotto was served with grilled pork tenderloin, but for the next couple of days the risotto all by itself was my lunch.  It tends to dry out a little bit in the fridge, but a little squirt of lemon juice brings it back nicely.  I am not sure this could work for a risotto fritter like a regular rice risotto would, it seems to me that the grains of barley would be hard to keep together, but if anyone tries it and succeeds, let me know.

Asiya, I had a blast stalking your blog and picking a recipe to cook from!

For those interested in following the cooking adventures of the other Secret Recipe members in my group, poke the cute blue frog at the end of the post, and have fun!

ONE YEAR AGO: Oatmeal Fudge Bars

TWO YEARS AGO: Cauliflower Steaks

THREE YEARS AGO: Soft Spot for Chevre

FOUR YEARS AGO: Quick sun-dried Tomato Crostini

FIVE GRAIN SOURDOUGH BREAD

Before I even start talking about last weekend’s bread, I urge you to visit Joanna’s blog to see her wonderful article about one of my favorite bread baking books, Bread.  Her post is a  must-read for anyone who might feel intimidated by  Hamelman’s masterpiece.  Great job, Joanna!

After the cracked wheat sandwich bread, our cravings for bread with grains incorporated in the dough only intensified.  As usual, on Thursday evenings I start considering the possibilities for baking in the weekend, so I grabbed Hamelman’s book, and opened it at random.  To my delight, the recipe on that particular page read: Five Grain Levain.  Seemed too fitting to ignore.  Plus, for a sourdough bread, the recipe could not be much simpler, the secret behind its simplicity lying in the use of commercial yeast to speed up fermentation.   All I had to do the day before was soak the grains, and give a final feeding to my starter.

FIVE GRAIN LEVAIN
(adapted from Hamelman’s Bread)

for the liquid levain
4 oz bread flour
5 oz water
2 Tbs mature sourdough starter

for the grains mixture
1.5 oz cracked rye
1.5 oz flaxseeds
1.2 oz sunflower seeds
1.2 oz oats
6.5 oz boiling water
1/2 tsp salt

for the final dough
8 oz bread flour
4 oz whole-wheat flour
4.2 oz water
1/2 Tbs salt
1/2 tsp instant yeast
all soaker prepared
all liquid starter prepared

Prepare the liquid levain 12 to 16 hours before you plan to start the dough.  Let it stand at room temperature, preferably around 70 F.  When you make the levain, prepare the grains too, by pouring boiling water over the grains and the salt in a small bowl.  Leave at room temperature.

Make the dough by adding all the ingredients into the bowl of a KitchenAid type mixer, knead on first speed for 3 minutes, then increase the speed to the second level and mix for 5 minutes.  Place the dough in a slightly oiled bowl, cover, and let it ferment for 1.5 hs, folding the dough on itself three times after 45 minutes to increase elasticity.

Shape the dough as a boule or batard, place in a banetton or appropriate container of your choice, and let it rise for 1 hour.

Bake at 460 F for 40 to 45 minutes, generating steam in the beginning, by either covering the dough with an inverted roasting pan, or adding ice cubes to an empty pan at the bottom of your oven.   Allow it to cool completely before slicing.

ENJOY!

to print the recipe, click here

Comments:   This loaf of bread lasted 5 days, and held up pretty well up to its end.  Usually, after the second day we opt for toasting, but this particular loaf was good enough with a very brief warming in our electric oven.  We kept it at room temperature over the cutting board with the cut side down, and sliced only what we were going to consume right away.  It goes well with pretty much anything, from ham to turkey, jam to peanut butter, or butter with paper thin slices of radishes and a little sea salt… delicious!

I am submitting this post to Susan’s Yeastspotting event…

ONE YEAR AGO: The Nano-Kitchen

TWO YEARS AGO:  Kaiser Rolls

Add to FacebookAdd to DiggAdd to Del.icio.usAdd to StumbleuponAdd to RedditAdd to BlinklistAdd to TwitterAdd to TechnoratiAdd to Yahoo BuzzAdd to Newsvine