MEXICAN FOCACCIA

Recently I took the liberty of calling an avocado dip as “hummus”, and now I will push the envelope once more and share with you my Mexican focaccia.   If you’ve been around my blog for a while, you know I am crazy about all things bread. Focaccia is a favorite in our home, because it is so simple to put together: no kneading, no complex shaping, just a simple flat bread that you can cut in squares and bring to parties, potlucks, or save it all for yourself…  The inspiration for this twist on focaccia came when I had leftover tomatillo sauce from Marcela’s enchiladas suizas.  As to the basic focaccia recipe, you can find it here.

pieces

What you will need…

…. your basic focaccia recipe

…. good quality olive oil

…. tomatillo sauce a la Marcela Valladolid

…. yellow tomatoes, sliced thin

…. Mexican oregano

…. crumbled Cotija cheese

…. Maldon salt flakes

Once you make the dough and open it on the baking sheet, pour some olive oil on the surface, make indentations with your fingers.  Spread a nice coating of tomatillo sauce,  layer yellow tomatoes on top.  Sprinkle oregano, Cotija cheese, a little salt.   Bake as instructed in the original recipe.

Let it cool on a rack, cut in squares and ENJOY!!!!!   😉

served

I am submitting this post to Susan’s Yeastspotting

ONE YEAR AGO: Sunny Kamut Salad with Roasted Lemon Vinaigrette

TWO YEARS AGO: Pane de Casa & Crostini

THREE YEARS AGO: Down-home Dig-in Chili

FOUR YEARS AGO:  Cinnamon Rolls

A FOCACCIA EXPERIMENT

A few months ago I followed an interesting discussion at The Fresh Loaf forum, in which a member (Kevin) made a mistake while scaling up a recipe (I can relate to that too well, by the way) and ended up with one of the best focaccias he’d ever made!  Being a very experienced baker, he made several batches of the same recipe, to convince himself that the small alteration in the method was indeed responsible for the outcome.  It all comes down to holding back some of the water (and the salt) in the recipe, and adding it a little later to the dough.  The rationale behind doing it was actually discussed a few years ago by Steve in his blog “Breadcetera” – check it out by clicking here.

I was anxious to try this variation in my favorite, default recipe, and this past weekend I finally had a chance to perform this important experiment.

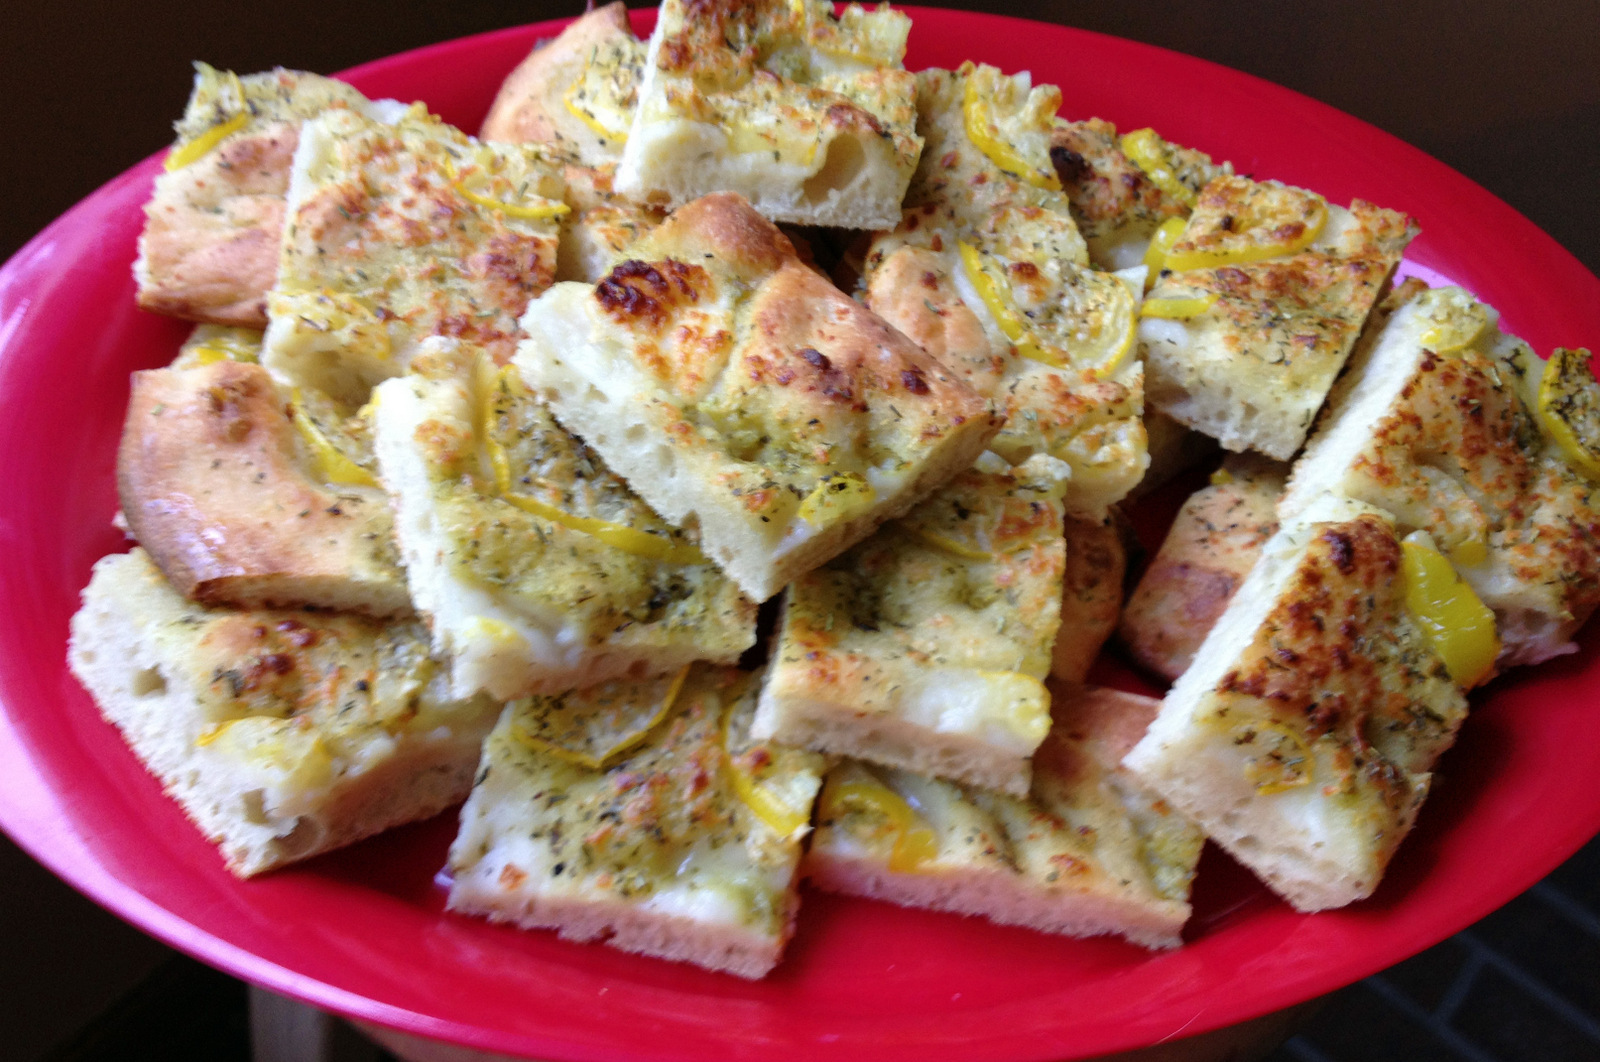
DOUBLE-HYDRATION FOCACCIA
(inspired by The Fresh Loaf Forum)

2 cups lukewarm water, divided
2 tsp active dry yeast
4 cups unbleached bread flour
3 tsp salt
2-3  tsp olive oil
2 T chopped fresh rosemary
1 tsp kosher salt

Measure 1 + 1/2 cup of  water in a large bowl, sprinkle yeast over water and stir until dissolved. Using a strong wooden spoon mix 2 cups of flour until smooth, about 2 minutes. Add the remaining 2 cups of flour, and knead with your hands (inside the bowl is fine), until the dough forms a very shaggy mass. Cover the bowl with plastic wrap and let it sit at room temperature for 20 minutes.

Dissolve the salt in the remaining 1/2 cup of (lukewarm) water.  Add it to the dough, and mix with your hands using a squishing/kneading motion.  Do not be alarmed by the look of the dough at this point.   Slowly the water and salt will find their way into the mixture.  Once it all seems incorporated, cover the bowl and let it rise undisturbed for 1 hour and 20 minutes.   The dough will be very bubbly at this point.

Heat the oven to 450F. Lightly oil a 9 x 13 inch baking sheet. Pour the dough onto the sheet,  brush the surface with 2 tsp olive oil. Dip your fingers in cold water or olive oil and make indentations all over the dough, working to stretch the dough as you go.  Brush the surface with another teaspoon of olive oil, sprinkle with rosemary and  salt.

Place in the oven and bake for about 20 minutes, until golden brown. Cool on a wire rack and….

ENJOY!

to print the recipe, click here

Comments:  Compared to the regular recipe, this focaccia rose a lot more, had a more airy crumb, and a softer crust.  If you like to use focaccia to made a sandwich, a panini-type production, this recipe is perfect for it.  However, to make a proper comparison,  I must wait until we get home.  With a large oven, I will be able to make two batches, bake them at the same time and draw a clear conclusion.   So, stay tuned.  June is not too far away.  (I say that with mixed feelings,  it won’t be easy to say goodbye to Los Angeles… )

I am submitting this post to Susan’s Yeastspotting, a must-visit site for all lovers of bread…

and, I am also joining a fun blog party, hosted by Alyssa from Cupcake Apothecary:  “A Themed Bakers Sunday.”   This week the theme is a favorite of mine: Bread!   Check out all the other entries and vote for your favorite!

ONE YEAR AGO: Pierre Nury’s Bougnat (awesome recipe!)

Add to FacebookAdd to DiggAdd to Del.icio.usAdd to StumbleuponAdd to RedditAdd to BlinklistAdd to TwitterAdd to TechnoratiAdd to Yahoo BuzzAdd to Newsvine

WEEKEND PITA PROJECT

I grew up enjoying one of my favorite breads,  pita, on a weekly basis.  In Brazil  it’s called “pao sirio” (Syrian bread).  As I’ve mentioned before,  Middle Eastern food is very popular in Sao Paulo, so my weekends often included visits to a particular spot that sold bags of freshly baked flat bread.  It was similar to what we call  “pita” here in the US,  and usually associate with Greek food.    The current bagged stuff at grocery stores pales in comparison to freshly baked pita, and it’s so easy to make that once you master this technique,  I doubt you’ll go back to the commercial versions.   Unless, of course, you’re lucky enough to have a Middle Eastern bakery right in your neighborhood…   😉

This recipe comes from Dan Lepard, and you can find it  by  clicking here. You can also read a discussion about it in his forum by following this link.

Dan’s method involves a simple dough (flour, yeast, sugar, olive oil, a little salt) prepared with his minimal kneading procedures, divided into 8 portions, and each one rolled into an oval or circle about 5mm (1/4 inch) thick.   The flat breads bake over a blazing-hot baking sheet for a few minutes, until they puff (or not, depending on how well you hit the correct thickness) and acquire a hint of color.

When you hit the jackpot – the slightly elusive, “just-right”  thickness,  you’ll be rewarded with a beautifully puffed up balloon in your oven!

Comments: Whenever I succeed in baking bread with my electric oven, I wear a smile and walk  on top of the world for a few days!  Baking 8 pita circles took some patience and fiddling with the oven.  Besides baking one at a time, I had to start with the rack in the center, and as the bread puffed up I quickly moved it to the lower position.  Against all odds, I didn’t burn myself!   It took me more than an hour to bake the full batch, which told me that the dough can sit at room temperature for a long time and still produced great pita!  😉

By the way, if your pita doesn’t inflate as a balloon, it will still be delicious.  In fact, I like to roll a few slightly thicker, because they produce a softer bread, with more crumb and a chewy texture.  It’s a nice change from the “pocket” version, that also re-heats a little better next day.

I am thrilled to submit this post to Susan’s Yeastspotting, my first this year!

ONE YEAR AGO: Tried and Tasted Round-up