Talk about a classic cookie, loved in more than 100 countries, born as Hydrox in 1908, sold in many flavors, some do not exist anymore (Lemon Meringue, anyone?). More than 40 billion Oreos are made every year, so why not make 20 or so in your own kitchen? Here is how.

OREO COOKIES
(slightly modified from Tasty.com)
FOR THE COOKIES
1 cup (225g) unsalted butter, softened
1 cup (200g)white sugar
2 teaspoons salt
2 large eggs
2 cups (250g) all-purpose flour
1 heaping cup (140g) dark cocoa powder
½ teaspoon baking soda
CREAM FILLING
½ cup (113g) butter, softened
2 cups (240g) powdered sugar
1 teaspoon vanilla
Using a Kitchen Aid type mixer with a paddle attachment, cream together butter and sugar until light and fluffy. Beat in eggs until fully incorporated. In a bow, whisk together the flour, cocoa powder, and baking soda. Add the dry ingredients to the wet ingredients, and mix together until combined.
Turn the dough out onto your surface and push together into a flat square. Wrap the dough in plastic wrap and refrigerate for 1 hour.
Heat oven to 325˚F. Remove the dough from the fridge, roll out and if desired, use a patterned rolling pin or other embossing gadgets to create a pattern. Cut the cookie rounds and freeze for 10 minutes before baking for about 15 minutes.
To make the filling, combine butter, powdered sugar, and vanilla in a medium mixing bowl. Beat together until light and fluffy. Assemble the cookies by spreading a generous scoop of the icing onto one of the cookies and sandwiching it with another.
ENJOY!
to print the recipe, click here

Comments: These are definitely for intense chocolate lovers, as the black cocoa pushes the chocolate flavor to higher levels. They are of course, totally fine made plain, but I cannot help dressing them up a bit with the pattern on top.
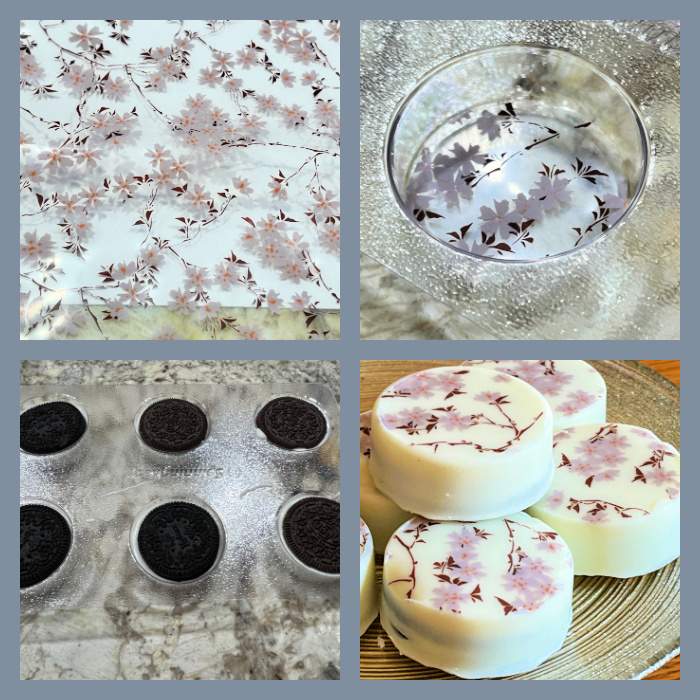
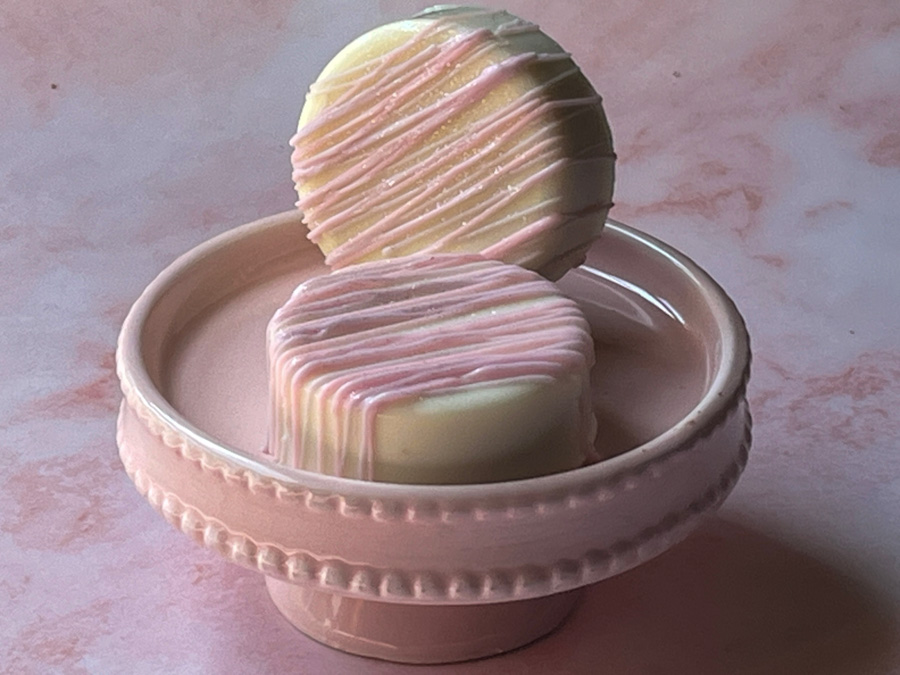
And now, let me take you through a little Chocolate-Covered Oreo Adventure! You need to get the appropriate molds, either plain or with designs and go to work. When using plain molds, I like to add chocolate transfer sheets to make them more visually appealing.
TRANSFER SHEETS
DARK AND GOLD

TRANSFER SHEETS
MISCELLANEOUS

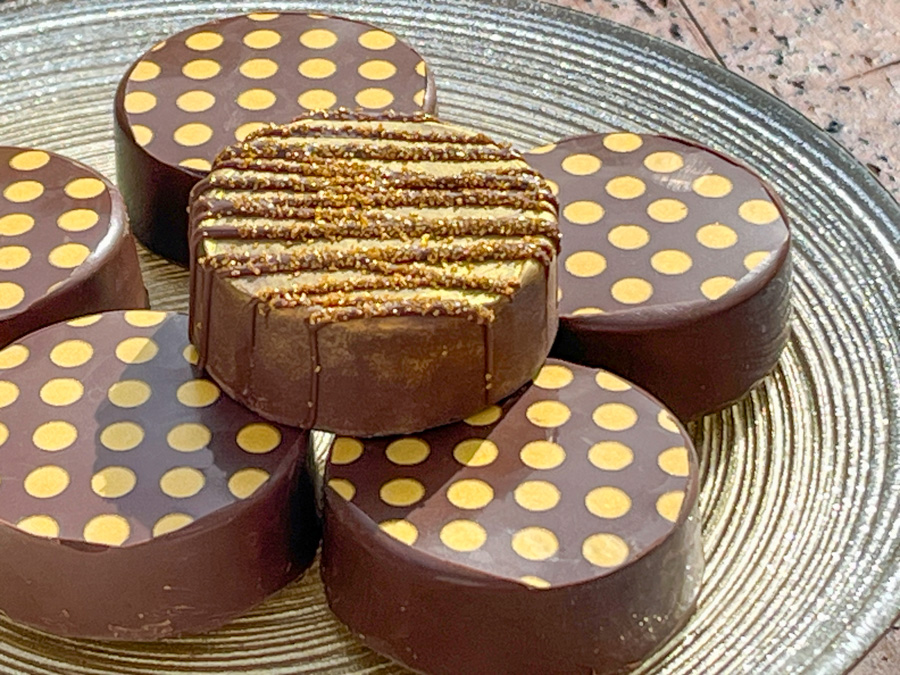
The thing with transfer sheets is that unfortunately you get what you pay for. It is possible to find quite affordable options on amazon, etsy, but if you pay a little more you will be much happier with the results. Less flaking, sharper images. One great brand (the one I used for the ones below) is called LUCKS but apparently they are not in business anymore, it broke my heart. I had those golden dot sheets for years, and wanted to get some more.
SPECIAL MOLDS
All my molds with patterns are from Spinningleaf.com
You can dress up Oreos using molds that generate a pattern. I sometimes dye a small portion of compound chocolate and paint areas of the mold before pouring the contrasting color. You need to let the painted area fully set before pouring the warm chocolate on top.
REACH FOR THE STARS

For the stars, I dyed some chocolate with yellow ad also brushed the inside of the mold with gold. Next time I will go for more contrast.
WORSHIP THE SUNFLOWER

One of my favorites, the sunflower mold, you just need to be careful painting the center so that the edges stay sharp.
BAKE WITH YOUR HEART

Making chocolate-covered Oreos is a weekly event for me, as it turns out they are THE most popular item with the homeless meals. That and a certain banana bread that I shared not too long ago. I hope you enjoyed this post, and consider playing with Oreos also.
ONE YEAR AGO: OMG Roasted Sweet Potatoes
TWO YEARS AGO: Air-Fried Eggplant Raita
THREE YEARS AGO: Turkey-Pumpkin Roulade with Cider Sauce
FOUR YEARS AGO: Strawberry-Vanilla Mini-Cakes
FIVE YEARS AGO: Bourbon-Glazed Pork Tenderloin with Pea Pesto
SIX YEARS AGO: Chocolate Chip Cookies from Naturally Sweet
SEVEN YEARS AGO: Little Bites of Paradise
EIGHT YEARS AGO: Maple-Glazed Pumpkin Bread
NINE YEARS AGO: In My Kitchen, October 2014
TEN YEARS AGO: Grilled Steelhead Trout
ELEVEN YEARS AGO: Brown Butter Tomato Salad
TWELVE YEARS AGO: Spelt and Cornmeal Rolls
THIRTEEN YEARS AGO: Roasted Potato and Olive Focaccia
FOURTEEN YEARS AGO: Multigrain Bread Extraordinaire